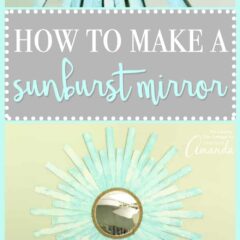
Beach Starburst Mirror
Supplies
- Wood shims in two lengths available at your local home improvement store
- Mirror
- Wood plate approximately the size of your mirror
- Coastal Paint
- Palette knives
- Rope
- Hot glue and glue gun
Instructions
- Start by painting your wood shims with the coastal paint. That texture is achieved through the thickness of this paint. Apply the teal first with a palette knife. Lift slightly with the back of the knife on the surface to create peaks and valleys. Set aside and allow to dry.
- Once almost dry, smear on white with a palette knife. Do not cover all of the teal with the white. Leave gaps in the paint
- Again you will want to lift with the back of the palette knife to create those peaks and valleys. Set aside and allow to dry completely.
- Repeat for as many shims as you need to go around your mirror. Dry fit everything together to ensure that you have painted enough.
- Once everything is completely dry, start with the shorter shims and turn everything over to the back side. Use hot glue to secure the shims around the outer edge of the plate.
- You will also want to add a short piece of rope as a hook to the back of your project.
- Add the longer shims to the mirror in each gap created by the shorter shims. Again use hot glue to secure.
- Use extra glue to secure everything into place. I went all the way around the inside edge.
- I also added hot glue between each of the longer shims.
- Once your hot glue has cooled, flip your project around to the front.
- Hot glue your mirror into place and start adding rope around the outer edge.
- Add as much rope as you like and then your beach starburst mirror is ready to hang in your home!