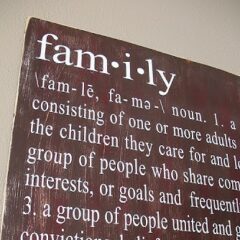
Distressed Family Definition Sign
Supplies
- Plywood
- “Family Definition” vinyl
- Ryobi Sander
- Antiquing Gel
- Rag
- Straight-Edged Item
- Clear Acrylic Sealer in Matte Finish
- Gorilla Glue
- Twine
- Scrap Cardboard
Paint
- White Acrylic
- Dark Brown
- Dark Burgundy Red
Instructions
- First I laid out the vinyl sheet onto the board to see if the plywood needed a trim.
- I used my Ryobi hand saw to trim off the excess plywood, then I sanded both sides and all of the edges until smooth.
- Using white acrylic paint I used a large brush and back and forth strokes to add a coat. Just slap it on, it doesn’t have to be pretty.
- I don’t paint the entire board completely because when I’m all finished I want some areas to show bare wood, some to show bare and white, and some just white. Let the white dry completely.
- When the white paint has dried (make sure it’s dry!), paint over it with dark brown.
- For the secondary top coat I used a dark burgundy red. You don’t want your paintbrush to be really wet. Dip the brush in the red then dab off some of the excess.
- Brush the red on lightly in random areas, keeping it in the same direction as the brown brushstrokes.
- This needs to dry completely, so go check your email or do a load of laundry.
- Using my handy dandy Ryobi sander and a medium grit sandpaper, using a light hand sand the surface, going with the grain of the brushstrokes. You’ll want to sand off the color in some areas down to the white, and in other areas just lightly. There’s no perfect science to it, just sand until you’re happy with it.
- Next use antiquing gel over the top, especially where the white shows through, to tone it down and give it an aged look. Apply the gel with a paintbrush and wipe it off with a dry rag.
- The harder you rub the more will come off, so you have the ability to change the aged look as you go. Work in small sections at a time.
- Let the antiquing gel settle and dry a little bit, about 15-20 minutes.
- Using the sander again, rough up anywhere you see fit, but especially on the edges. If you have any areas that the splintered like mine, be sure to smooth those out to avoid splinters in your hands or fingers. Dust the whole thing off to remove any loose particles left over from sanding.
- When using a large piece of vinyl like this one I highly recommend having someone help you. It can be difficult to hold one end of the vinyl still while peeling the other. Prepare your vinyl by rubbing a straight edged item (credit card, jumbo craft stick, etc) all over the transfer paper backing.
- Carefully peel back the transfer paper a little at a time, watching to see if any letters come up with the paper. If that happens simply rub that area with your straight edge and continue until the transfer paper has been removed.
- Position the vinyl on your sign board, again with the help of a friend if possible. You’ll want to hover it over the board until you are ready to set it down as it may stick once set in place. If any letters came off during the peeling process, just carefully set them aside and add them last. Use your straight edge to rub the vinyl letters onto your board, rolling the backing back off as you go until all the letters are stuck to the board.
- When you are all finished, give the entire project 2-3 coats with a clear acrylic sealer in matte finish. I attached a very simple hanger to the back using a piece of twine, some scrap cardboard and some Gorilla Glue super glue.
- Hang!