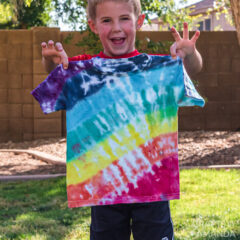
Rainbow Tie Dye
These rainbow tie dye shirts resemble... you guessed it, a rainbow beaconed in the sky during the aftermath of a rain shower!
Supplies
- Tie Dye in various colors. We used Tulip's One Step Tie Dye Kit
Craft tools
- Plastic tablecloth
- Disposable gloves
- - rubber bands
Instructions
- Prepare your squeeze bottles with dye according to package instructions.
- Cover the surface you’ll be working on. Spread the shirt flat onto the covered surface while it’s still damp. Scrunch/pleat the shirt together starting from the bottom right corner until the shirt is fully pleated.
- Squeeze the shirt tightly together and secure them into 4 sections using rubber bands.
- Dampen the shirt with a spray bottle or hose.
- Generously apply the colors to each individual section beginning with red on the bottom then yellow, green, blue, and violet, or follow any color pattern you'd like.
- Wrap the dyed shirt in plastic wrap or in a Ziplock bag and allow to sit for 6-8 hours.
- Remove rubber bands then rinse the shirts using warm water. Switch to cool water, then back to warm, ending with cool water. Follow with running through the washing machine.
Expert Tips & FAQs
- If you want to create your own colors, you don't need to mix the dyes in a bottle together, just squeeze the colors right onto the fabric. You can create the shirt pattern in whatever color sequence you want!
- You’ll want your shirts to be damp, but not soaking wet. You can either use a clean shirt and dampen it with a spray bottle or hose or prewash the shirt without drying it before beginning.