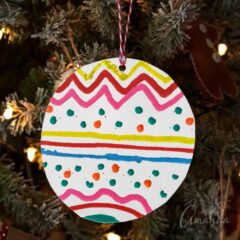
Paper Plate Melted Crayon Ornaments
Use a fun crayon melting tool to design unique paper plate Christmas ornaments with the kids!
Supplies
- Paper plates use mini paper plates for smaller ornaments
- Scrap paper
- Crayola crayons
- Crayola Crayon Melter
- Scissors
- Hole punch
- String
Instructions
- First, you'll need to peel the paper off the crayons, then break them into a few pieces.
- Next, push a crayon piece into the end of the melter. Be sure to read the instructions in the box as a little crayon goes a long way!
- Be sure to have some scratch paper nearby. Practice on the scrap paper and work on the paper until you get the flow you want.
- Hold the melter upright and draw your designs onto the paper plate, make sure you cross over the center circle line as we will be cutting these out!
- As I mentioned above, a little crayon goes a long way, so use up one color first before switching to the next.
- Keep adding designs using as many different colors as you like!
- The crayon dries very quickly so you should be ready to turn the paper plate over and cut out the center circle.
- Use a hole punch to create a hole at the top of your ornament.
- Tie some string through the hole as a hanger.