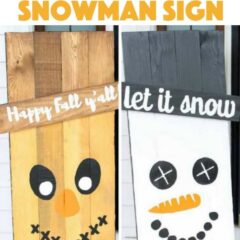
Reversible Fall and Winter Sign
Reversible scarecrow snowman sign: it's actually much easier than it looks! Grab your supplies and get professional results with our simple tips and tricks.
Supplies
- 1x4 boards I used two that were 10 foot long
- Saw
- Screws
- Nails
- Wood glue
- Drill or screwdriver
- Hammer
- Brown and gold wood stain
- Outdoor paint in white black, and orange
- Paint brushes
- Printable template
- Scissors
- Tape
- Transfer paper helps to have both black and white
- Spray sealer
Instructions
- Start by cutting your 1x4 boards to size. You want four pieces that are 3 foot long and two pieces that are 18 inches long.
- Lay out your 3 foot boards as shown below with one 18 inch board below it. NOTE: You want the 18 inch board to be at a slight angle. I placed mine approximately 6 inches from the top on one side and 9 inches on the other.
- Add wood glue between the angled board and your 3 foot boards.
- Add wood screws as shown below (I used two screws per board). The screws should be long enough to go through the first board and about half way through the second.
- Add the second 18 inch board directly over the first but on the opposite side.
- Again add wood glue in between this board and the three foot boards.
- This time use finishing nails to secure the board into place. Again these should be long enough to go through the first board and about half way into the second. I used two nails per board.
- Leave the sign laying flat until the glue has completely dried. NOTE: I used a few scrap pieces to prop it up and make sure it was completely flat.
- Once dry, you can start finishing your project. I started with the scarecrow side and a few coats of wood stain. Allow this to dry before adding your painted elements.
- To add the painted elements, cut around each one on the printed template.
- Lay into place on the sign.
- Add transfer paper (shiny side down) between the printed paper and the sign.
- Tape into place.
- Use a pen to go around all lines.
- Lift the template and transfer paper away and you are left with lines on your surface.
- Use those as guidelines to paint your sign.
- Repeat with all elements. NOTE: I used anywhere from 2 to 4 coats of paint on each of the elements depending on the paint color. Be sure to dry in between coats and add as many as it takes to cover your surface.
- Repeat all of the element on the fall side before continuing to the opposite side. Allow to dry completely before flipping.
- Repeat all of the same steps for the snowman side of your reversible sign.
- Paint the edges of your sign as well (I used black paint). This will be outside so you want to be sure that all surfaces are well covered with at least two coats of a high quality coating that is rated for outdoor use.
- Allow your finished project to dry completely then finish off with a few coats of spray sealer for additional protection.
- Allow to dry then add this reversible sign to your outdoor decor for fall and winter.