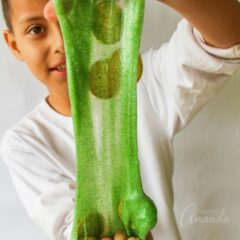
St. Patrick's Day Slime
Kids will love making this St. Patrick's Day Slime filled with glitter and coins! It's a golden opportunity to teach them the meaning of St. Patrick's Day.
Makes: 1 batch
Supplies
- 4 oz clear glue
- 1 tablespoon baking soda
- 1 tablespoon saline solution
- 1-2 drops green food coloring add more to get your desired shade of green
- green glitter
- plastic gold coins
Craft tools
- Measuring spoons
- Spoon
- Plastic bowl
Instructions
- Empty your bottle of clear glue into a bowl. One bottle of clear glue makes a generous helping of slime to play with.
- Now add one tablespoon of baking soda.
- Add one tablespoon of saline solution.
- Squeeze in 1-2 drops of green food coloring. Trust us, a little goes a long way!
- Stir in your food coloring and add more to get your favorite shade of green.
- Pour in your preferred amount of glitter.
- Now it’s time to mix! Use your mixing spoon and quickly stir your St. Patrick’s Day slime. At first, your green glitter slime will be VERY sticky and will get all over your hands if you touch it. It takes a few seconds for it to mix and form.
- During this process, if your slime is still sticky, you can squirt in small amounts of the saline solution until the slime becomes less sticky and starts to pull away from the sides of the bowl. Take the slime out of the bowl and start kneading it until it holds its shape. The more you knead it, the less sticky it will be!
- To add little St. Paddy’s day whimsy, knead in some gold coins for good luck!
Video
Expert Tips & FAQs
- For a group setting, buy value packs of glue (I've included a link above) to keep costs down.
- It’s best to use bowls and mixing supplies that you will throw away or save just for slime projects.
- Check the dollar store for gold coins!
- If you like, mix in little plastic shamrocks or rainbows!
- For both glitter and food coloring, you can always start off with a small amount and add more until you get the desired color and sparkle effect.