How to Make a Scrunchie
Follow our step by step instructions and video to learn how to make a scrunchie! Super fun beginner sewing project for kids and adults. Great for summer.
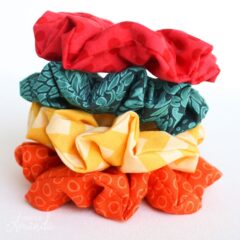
Makes: 4 scrunchies
Supplies
- 1 yard elastic
- 4 fat quarters fabric
- 1 safety pin
- 10 dress pins
- 1 white thread
Craft tools
- Sewing machine
- Iron & Ironing Board
- Self-healing Mat
- Sewing ruler
- Fabric Scissors or Rotary Cutter
Instructions
- On your cutting mat, use your rotary cutter or fabric scissors to cut a 22” tall by 3.5” wide fabric strip.
- Fold your fabric strip lengthwise in half. Iron to create a pleat.
- Pin strip of fabric together for sewing with dress pins.
- Sew a straight stitch 1/4” in from the edge along the length of the fabric strip.
- Turn your fabric right side out. You’ll need to stick your finger through the fabric tube and pull it back fabric back through itself.
- Iron fabric to dewrinkle and create a pleat.
- Add a safety pin to your 9” piece of elastic and guide it through your fabric tube.
- Once you pull the elastic through, hold it securely and tie it in a tight knot, then trim.
- Tuck the ends of the tube into itself and line up your seam.
- Sew a straight stitch across your closure and backstitch to secure.
Expert Tips & FAQs
- Scrunchies we made in this tutorial required 9 inch strips of the 1/4 inch wide elastic, so expect 4 strips per yard
- If you don’t have a sewing machine, you can hand sew your scrunchies with needle and thread, but you will want to make sure to use small stitches
- I preferred using a rotary cutter to cut my fabric, but you can use regular fabric scissors too
- I used white thread for my project, but you can also change out thread to coordinate with your fabric.
- It’s recommended you iron your fabric before and during your sewing for a nice, finished look!
- This version used cotton fabric, but you can try other fabrics as well like knit, velour, or satin.