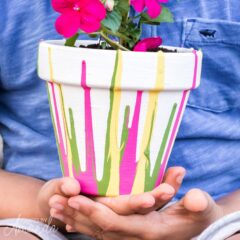
Drip Paint Pots
Using beautiful colors of your choice, you can create stunning drip painted clay pots that are fun for everyone.
Makes: 1 pot
Supplies
- Terra cotta pot
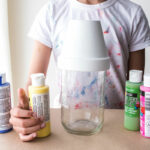
- Acrylic craft paint or Patio Paint in white and your choice of colors
- Clear outdoor sealer (if keeping pot outdoors)
Craft tools
- Painter's tape
- Paintbrush
- Jar or other cylinder
- Newspaper or plastic tablecloth
Instructions
Preparation
- Start by covering a large work surface with 2-3 layers of newspaper, or line with a disposable plastic tablecloth.
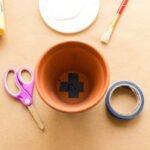
- Cover the hole in the bottom of the pot using painter's tape. This will keep the paint from dripping through.
Decorating Your Pot
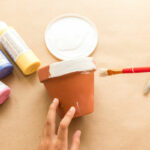
- Paint the outside of the terra cotta pot with white paint, including the rim. Do not paint the inside of the pot.
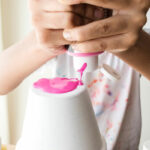
- When white paint is dry, place the pot upside down onto a jar or similar cylindrical object to keep the pot suspended.
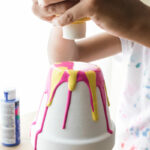
- Choose a color of paint to start with. Squeeze enough of that color onto the bottom of the pot, enough to cover the bottom so that it begins dripping over.
- Next, squeeze the second and any additional colors slow and sparingly in the areas you want those colors to drip down. The rest is up to you! Use as little or as much as you want, and as few or as many colors you want.
- Now you have to be patient and wait. It can take anywhere from 24-72 hours to dry, depending on how much paint you used.
When the Pot is Dry
- If you will be planting any live plants in your pot, be sure to use a skewer, fork or knife to poke a hole through the paint and the painters tape. This will allow for drainage as the original pot intended.
Optional
- You can paint a terra cotta trap to go with your pot!
Expert Tips & FAQs
- We recommend using a combination of acrylic paints and a sealer, or if you want to keep your pots outside, go with Patio Paint, which is specifically formulated for the outdoors.
- The trick here is to not squeeze too much paint out at once so you don't end up with a big blob of muddled shades. Use small amounts because you can always add more, but can't take any away.
- Be certain you use something to elevate the pot so that the rim is not touching the work surface. If you place the pot right on the work surface, the paint will gather around the rim and dry there, causing a messy look, jagged rim. We used a jar to place our pot onto, which allowed the paint to drip off onto the protected work surface.
- Important Note - if you allow water to sit in the tray after watering your plant, it can soften the paint around the bottom of the pot and cause it to peel.