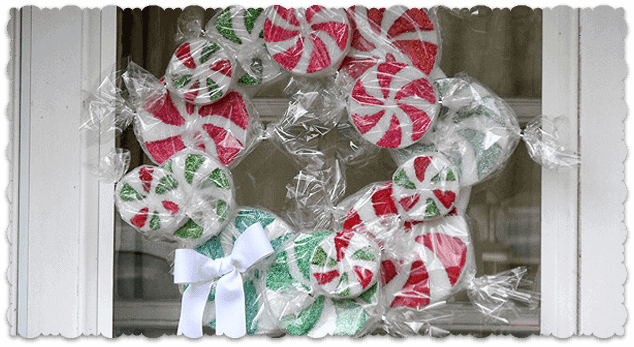

These peppermint candies made from Styrofoam discs are nothing new, they’ve been around for years. But instead of just making ornaments or table displays, why not make a bunch and turn them into a pretty wreath to display on your door this Christmas!

This was actually a really fun wreath to make. As messy as glitter is, it’s just so darned pretty, I can’t resist it! The rest of the day I walked around with little bits of sparkle on my face. :)

I used [amazon_link id=”B002BTWI62″ target=”_blank” container=”” container_class=”” ]Martha Stewart glitter[/amazon_link] for this project. I bought a 24-pack at Michaels ages ago and use it all the time, but Amazon actually carries it for less (check out the link above).

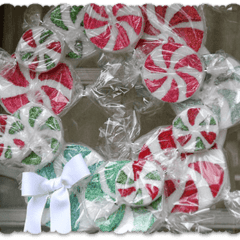
Before starting anything I laid out the discs on top of the wreath form, layering them in different ways until I found what I wanted. I’ve numbered them in the photo above, and those numbers correspond to the sizes listed below:
- 5 7/8″
- 4 7/8″
- 3 7/8″
- 2 7/8″
 I drew out a pattern, you can probably find one on the internet too if you don’t like mine. I did create one for you though, the link to download it is in the printable instructions below. See the darkened areas? You’ll cut the circle out then cut out the dark areas. Then lay that pattern onto the Styrofoam disc. Use a ball point bell or a toothpick to draw/carve the outline of the pattern into the disc.
 Use a liner paintbrush to paint Mod Podge onto the areas that would have been shaded in the pattern. Sprinkle wet Mod Podge with glitter. Tap off excess glitter onto the paper, then funnel the paper to return the glitter back to the glitter container.
Note: you can use the same pattern for all the different sized discs.
 When you’re finished making all of the peppermint candies, it’s time to wrap them. If using party bags, cut the end off of the bag and insert disc. Use a twist tie to secure both ends. For cellophane cut the cellophane into squares appropriately sized for each disc. Use a little hot glue to tack it together and secure the ends with twist ties.
 Place the wrapped candies onto the wreath form again and arrange them. Use toothpicks broken in half to secure pieces together. You can use hot glue to help hold them together as well. Line toothpicks around the wreath and take the assembled candy circle and press it down on top of the toothpicks. Tack with hot glue in a few places for added security. Tie a bow from wide white ribbon and hot glue to your wreath.

Peppermint Candy Wreath
Supplies
- 14 " white Styrofoam wreath
- Mod Podge
- Liner paintbrush
- Ball point pen
- Toothpicks
- Pattern
Styrofoam discs
- 4- 2 7/8 " discs
- 4- 3 7/8 " discs
- 4- 4 7/8 " discs
- 1- 5 7/8 " discs
Martha Stewart glitter
- Tourmaline
- Peridot
- Feldspar
- Aquamarine Crystal
- Garnet
- Verdelite
- Cinnabar
Instructions
- Place a clean piece of paper on the work surface and place a Styrofoam disc onto the paper. Lay pattern onto a Styrofoam disc. Use a ball point pen or a toothpick to draw/carve the outline of the pattern into the disc.
- Use a liner paintbrush to paint Mod Podge onto the areas that would have been shaded in the pattern. Sprinkle wet Mod Podge with glitter. Tap off excess glitter onto the paper, then funnel the paper to return the glitter back to the glitter container.
- Note: you can use the same pattern for all the different sized discs.
- When you're finished making all of the peppermint candies, it's time to wrap them. If using party bags, cut the end off of the bag and insert disc. Use a twist tie to secure both ends. For cellophane cut the cellophane into squares appropriately sized for each disc. Use a little hot glue to tack it together and secure the ends with twist ties.
- Place the wrapped candies onto the wreath form again and arrange them. Use toothpicks broken in half to secure pieces together. You can use hot glue to help hold them together as well. Line toothpicks around the wreath and take the assembled candy circle and press it down on top of the toothpicks. Tack with hot glue in a few places for added security. Tie a bow from wide white ribbon and hot glue to your wreath.
Expert Tips & FAQs
- Fingerprint Daddy & Me Coffee Mug - June 12, 2026
- Patriotic Bandana Wreath - June 9, 2026
- Ladybug Painted Rocks - June 5, 2026


Susan says
And now it’s that time of year again, and I’ve discovered this great idea, thanks to a friend!
Amanda Formaro says
Thanks Susan, glad you found it!
Frankie Lee says
This is really great wreath. I’d love one for my door. just hope it does. My projects no matter how simple I manage to not have it com out wrong.
Amanda Formaro says
Aww, well hopefully it’ll work to your satisfaction Frankie! Just take your time and follow the tutorial. Have fun!
amber whitehead says
I love glitter and this is just too awesomely cute. Can’t wait to get the stuff and try to make one. Thanks
Amanda Formaro says
So glad you like it Amber! I’ll be hanging it on the door as soon as Thanksgiving is over :)
doro K. says
funny.
I linked to your tutorial on my blog – thanks for sharing!
doro K.
karen says
this is so darn cute. I might try and down size it a little for a party decorations, where there isn’t a lot of space. Hope you don’t mind. Thanks again. I’d like to repin but having a hard time getting on the site. I’ll just blame it on the weather.
Amanda says
Sounds fun!
Angie @ Big Bears Wife says
Oh my gosh that is so cute, Amanda!
Jeanette says
This is adorable! I’m pinning this one!
Amanda says
Thank you for the pin Jeanette!
Sharon @CraftsnCoffee.com says
This is so adorable, Amanda. Who wouldn’t love this sweet whimsy on their front door? Or anywhere? Thanks for the inspiration. Sharon
Amanda says
Thanks Sharon!