
Creating a no-sew Roman shade is so much easier than you might think! You can certainly sew one using these instructions if you like, but this tutorial shows you how to make a Roman shade without sewing.
If you have sidelights, check out all my sidelight window treatment ideas.

No Sew Roman Shade Tutorial
Even though I have a sewing machine and can do basic things with it, I am much more motivated to create no-sew projects. I’m still a little intimidated by sewing because I just don’t have extra time to sit down and practice.

Craft supplies you will need:
- 1 yard of fabric
- 1 yard of lining fabric
- Aleene’s Fabric Fusion permanent fabric tape
- 4 tension rods
- Command Strip hooks for each side of the window to hold the tension rods

Helpful crafting tools:
- Scissors
- Tape Measure
- Iron
Project Tip
- Remove the rubber stopper on the rod to make threading it through the rod pocket easier.
How to Make a New Sew Roman Shade
- Measure the width of the window and cut the fabric as needed making sure to add 2 extra inches to fold over so you can make finished edges.
- Iron your fabric, then iron edges to create seams.

- Place fabric tape under the flap of the seam, press down and peel off backing. Place flap over tape and follow instructions on the package.
- Repeat this process with lining fabric if you need a liner. I used a plain white cotton fabric as a liner because the quatrefoil fabric I chose was pretty translucent.
- Use fabric tape to attach the liner to the shade fabric.

- To make top and bottom rod pockets for tension rods, fold over and press the top and bottom of the fabric about an inch and a half or more depending on the diameter of your rod. (You want to make the pocket large enough for the rod to go through).

- Run a line of fabric tape along the edge of the fabric and fold back over to adhere.
- Iron the shade and put a tension rod through the top rod pocket and another through the bottom rod pocket.

Hang, open and close your no sew roman shade
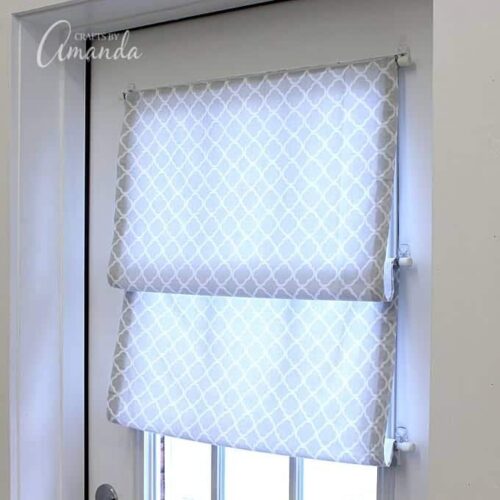
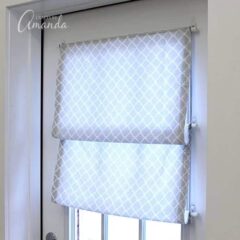
- With the fabric attached around the top tension rod, allow the rest of the fabric to hang and cover the window.
- Place the next two tension rods (I swear they are straight! The quatrefoil pattern is making them look wavy. Freaky!) on the hooks.
- Grasp the fabric behind the first tension rod and pull it upward, draping it over the rod.
- Repeat with the second rod.
- To close it, simply pull the fabric from the bottom until it’s straight down and behind the rods.
More No Sew Projects
If you’re looking for more no sew projects, check out Rosyscription for this cute no-sew table runner, and The V Spot where you can find out how to make a no-sew shower curtain. Sand and Sisal has some adorable no sew napkin pillow covers that I love as well!
More projects from my studio
I’ll be revealing the entire studio in a week, but meanwhile here are some projects that I’ve already revealed that were made specifically for the studio:
- My 4 Seasons Button Tree is one of the first things that people see when they come in. It hangs above the coffee pot and refrigerator.
- I just recently finished and hung my String Art Wall Letters above my fourth window.
- I had a dead spot in my flower planter boxes outside, so instead I started a Fairy Garden in that spot.
- The very first project I actually created here, before even moving in, was this No-Sew Stool Makeover, which I use regularly at my craft table.
This project was inspired by Diane’s awesome tutorial for her no-sew window shades. She shows you four different ways to use the same no-sew shade, I love it! Diane’s no sew Roman shade has three tiers while mine only has two. If I ever decide I want three, I can simply add one more tension rod to the mix.
No Sew Roman Shade
Supplies
- 1 yard fabric
- 1 yard lining fabric
- Aleene’s Fabric Fusion permanent fabric tape
- 4 tension rods
- Command Strip hooks for each side of the window to hold the tension rods
Craft tools
- Tape Measure
- Iron
Instructions
Shade
- Measure the width of the window and cut the fabric as needed making sure to add 2 extra inches to fold over so you can make finished edges.
- Iron your fabric, then iron edges to create seams.
- Place fabric tape under the flap of the seam, press down and peel off backing. Place flap over tape and follow instructions on the package.
- Repeat this process with lining fabric if you need a liner. I used a plain white cotton fabric as a liner because the quatrefoil fabric I chose was pretty translucent.
- Use fabric tape to attach the liner to the shade fabric.
- To make top and bottom rod pockets for tension rods, fold over and press the top and bottom of the fabric about an inch and a half or more depending on the diameter of your rod. (You want to make the pocket large enough for the rod to go through).
- Run a line of fabric tape along the edge of the fabric and fold back over to adhere.
- Iron the shade and put a tension rod through the top rod pocket and another through the bottom rod pocket.
Hang, open and close your no sew roman shade
- With the fabric attached around the top tension rod, allow the rest of the fabric to hang and cover the window.
- Place the next two tension rods (I swear they are straight! The quatrefoil pattern is making them look wavy. Freaky!) on the hooks.
- Grasp the fabric behind the first tension rod and pull it upward, draping it over the rod.
- Repeat with the second rod.
- To close it, simply pull the fabric from the bottom until it’s straight down and behind the rods.
Expert Tips & FAQs
This post originally appeared here on Sep 8, 2015.
- Patriotic Pinwheels - June 23, 2026
- Fingerprint Daddy & Me Coffee Mug - June 12, 2026
- Patriotic Bandana Wreath - June 9, 2026


Elizabeth says
Do you do easy sew blind with no drilling as want the blind to open and shut thank you
Nancy says
What a great idea, especially since there is no drilling in the door leaving permanent marks. Have you ever considered encasing the rods with a fabric tube(either ruffle or straight)? When you pull the material down the the covered rods would offer another look to the window. Can’t wait to try this idea… thanks again
Amanda Formaro says
Good idea Nancy!
Anne says
Oh my goodness…you’ve just saved me so much money! My husband and I want to replace the curtains on 4 windows with Roman shades, and we’ll be using this method instead of purchasing expensive, custom-fit shades. Thank you!
Amanda Formaro says
Nice! So glad this was helpful!
Linda says
really enjoy your crafts!