
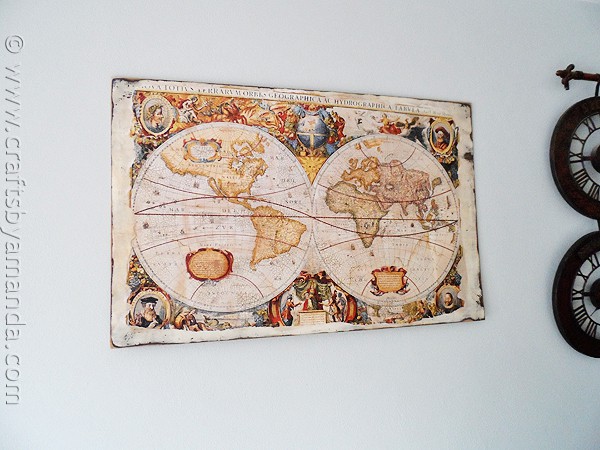
Using a map poster, a piece of plywood and some One Step Crackle, this beautiful piece of artwork was born. I’ll show you how to use decoupage and a little antiquing gel to get this great look.
You may have seen a couple other projects I made with this One Step Crackle. I made this Vintage Crackled Flower Pot and these Vintage Crackled Cherub Ornaments I really love this stuff, there are so many possibilities!
Funny thing is, this map was the first project I made with the One Step Crackle. So I actually learned a thing or two from this project.
1) The thicker the application, the larger the cracks
2) Cover all areas or you’ll get sections without any crackle which can look strange after the stain is applied
You may notice #2 above in some of these shots.
Just an FYI: Both Plaid and DecoArt carry similar products. Plaid makes Mod Podge and DecoArt makes a decoupage medium simply called Decoupage. Both companies make a one step crackle product, though I’ve been using DecoArt’s. I only used Plaid’s one step crackle once and it didn’t work for me. I haven’t tried it again, so it could have been the way I applied it. I will try it again some day, but for now, I know that DecoArt’s works, and works well, so I am more than happy to recommend it to you.
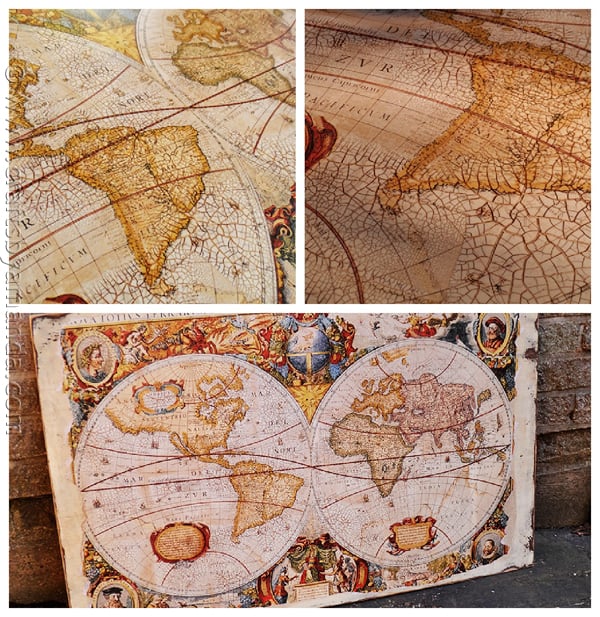
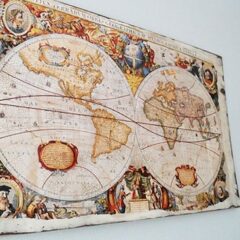
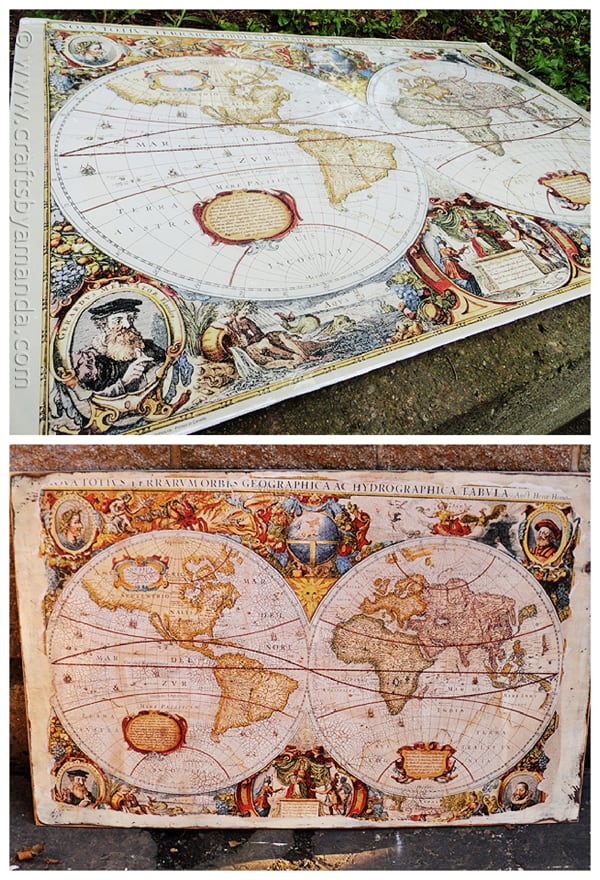 Overall though I love how the map turned out! Here’s a quick before and after. I found the map at a flea market for $5.00, but I’ve seen similar maps online for around $15.00.
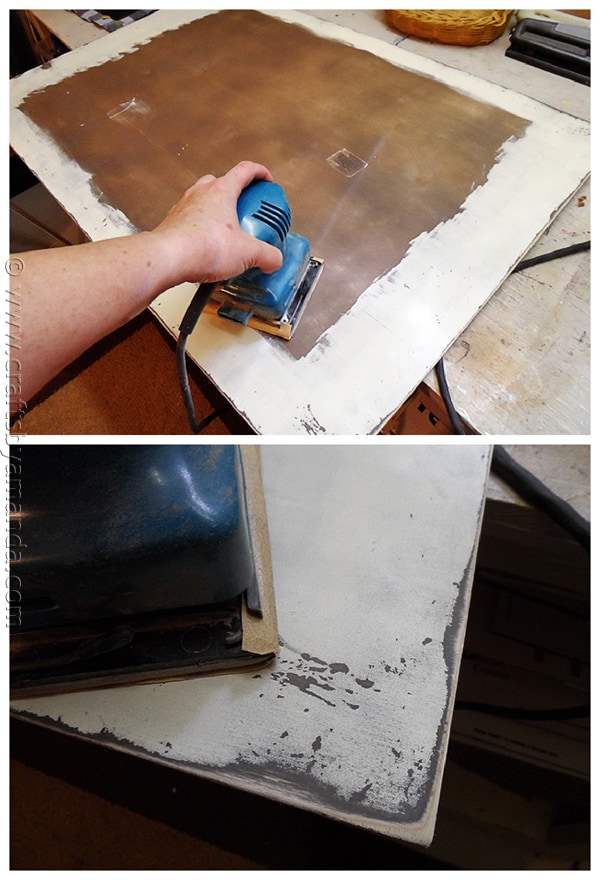
I started by painting a piece of plywood brown, then I painted the edges, about 4-inches inward from the edges, which an antique white. I only painted the edges because the map will be covering the center. I sanded the edges to reveal all the edges and corner and to reveal some of the brown beneath the antique white, to give it a distressed look.
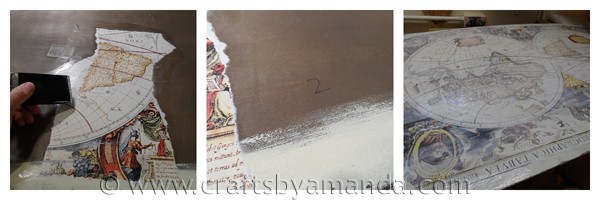
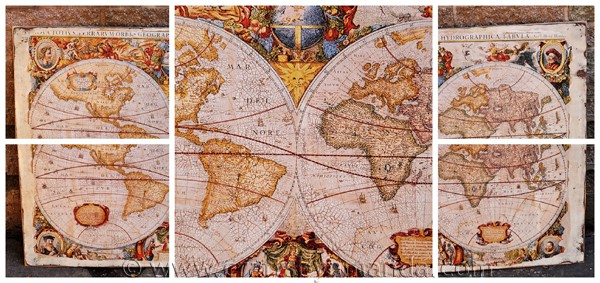
I wanted the map to look old. I decided to tear all of the edges, I didn’t want any straight sides at all. I was concerned about having issues decoupaging the entire piece without bubbles, so I decided to tear it into sections. I numbered the section on the back of the map pieces and corresponded them to sections on the board, just to keep it all straight. Once each piece was decoupaged onto the board, I added a coat over the top of everything.
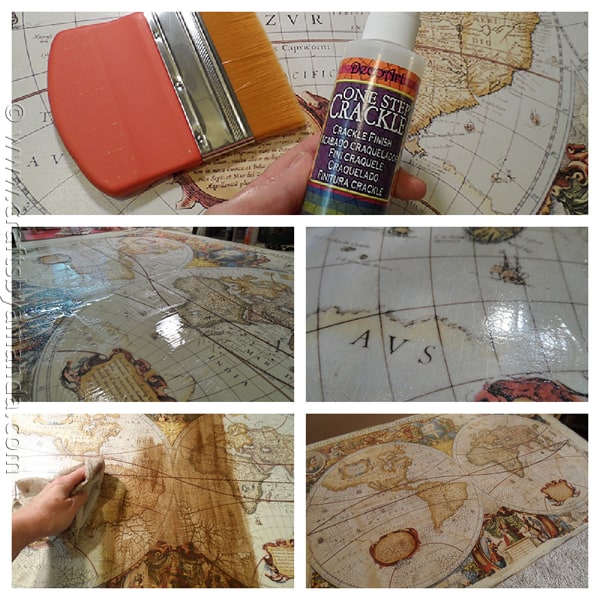
Once it was dry, I was ready to add the One Step Crackle. I used a large decoupaging brush to apply it. When you apply this product you don’t want to overwork it. Apply once, maybe smooth it quickly with another stroke and that’s it. No more. The more you work it, the less chance of the crackle working. let the crackle dry according to the bottle directions. Next you’ll apply a stain. I used a brown paint mixed with antiquing gel. Apply and wipe back. This will leave the stain in the cracks.
 See? :)
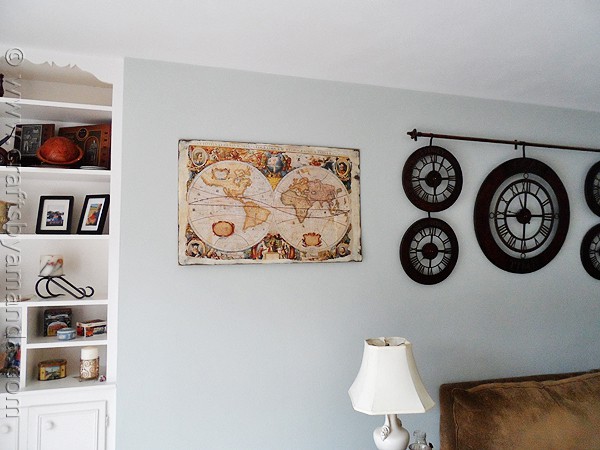
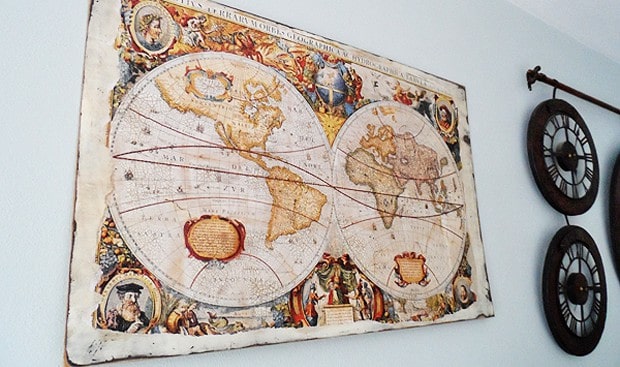
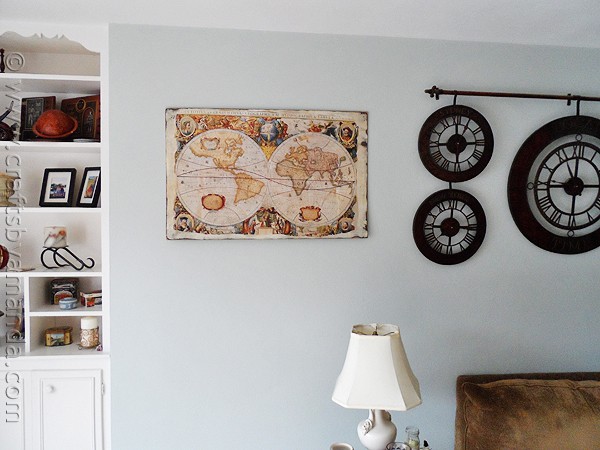
I had it hanging in my bedroom, but decided to move it to the living room so that it would be seen more. I love the way it looks next to my world clock and against our new wall paint color!
Hope you like it and it inspires you to try one Step Crackle, it’s a lot of fun!
Distressed Crackled Vintage Map
Supplies
- Map poster
- Plywood to fit poster
- Brown and Antique White acrylic paint
- Decoupage medium
- One Step Crackle
- Antiquing gel
Instructions
- Paint plywood brown and paint edges with Antique White. Sand edges to distress.
- Tear all edges of map poster and decoupage onto the plywood. Apply a coat of decoupage over entire map.
- When dry, apply One Step Crackle according to the bottle directions. Allow to dry.
- Mix brown paint with antiquing gel and apply over the top of the map, wiping back with a clean cloth.
- Swirling Twirling Ladybugs - July 21, 2026
- Drip Tie Dye Backpack - July 17, 2026
- Mini Coastal Clay Houses - July 14, 2026


Holly says
Hi Amanda,
I have a laminated map that I’m looking to “age”. Do you know if I can the lamination off? Or would this application on top of laminate?
Thanks for your insight!
Amanda Formaro says
Hmm I don’t know for sure. I feel like if you try to remove the laminate it will peel and ruin the map. You might be able to lightly sand areas of the laminate and age that. The stain would drop into the scratches.
Pamela says
Hi , can you tell me if the antique gel is water based or oil based . I can’t wait to try this technique. Thanks. Pamela
Amanda Formaro says
I do not know for sure, but I believe it’s water based. Here’s the product that I used https://decoart.com/Merchant2/merchant.mvc?Session_ID=3f0757342996ce4741ef3374d532a4a7&Screen=PROD&Store_Code=D&Product_Code=DS51-3&Category_Code=MED You can probably contact them through their site to find out.
Whitney says
I love the look of this! I’ve been looking around for the right way to age a print that I bought. Did you just use like a brown craft paint?
Thanks!
Amanda Formaro says
Hi Whitney! It’s a fun product for sure! Here’s what I said in the tutorial:
“…Next you’ll apply a stain. I used a brown paintmixed with antiquing gel. Apply and wipe back. This will leave the stain in the cracks.”
have fun!
Joe says
Sorry I just saw that it was decopauge medium that you put over the map. I’m wondering if I need to put a coat of anything, perhaps some sort of sealer or clear acrylic, over the canvas print.
Amanda Formaro says
Hi Joe. That’s a good question. I’ve only ever used it after decoupaging something. I found this on the company’s website: “Apply over a painted or sealed surface. Raw, unfinished surfaces or surfaces that are not completely sealed absorb part of the product resulting in little or no crackle.” Here’s the full information http://decoart.com/cgi-bin/Products.cgi?One_Step_Crackle
Joe says
Hi – thanks for sharing. I’m interested in doing a clear crackle finish over canvas prints that I purchased. I’ve tried a few other products on a cheap piece of canvas art, with no success. Not sure why, maybe the canvas screen prints are too porous? Anyway, I’m curious if this one step crackle will work.
You mentioned that you applied a coat of something over the map before you applied the one step crackle? Or did I read that wrong?
lucy garcia says
I love the distress and crackle look. It makes it look vintage. I was wanting to do this for a few posters my daughter wants of Marilyn Monroe. They are so expensive at the mall, and I am sure this is a lot cheaper. Is there any way I could reach you incase a craft emergency arises. I’m new at this arts and crafts stuff. Although I always wished I could try , and I think now is a great time to start. Again thank you your ideas are great!
Amanda Formaro says
Hi Lucy :) I’m afraid I can’t really be “on call” but I would suggest trying on a test poster first. Maybe get one of the cheap ones from Walmart :)
Lindsey says
Love this project! Just have a questions about when you tore the map? Did you tear the entire thing and piece it back together on the board? Or just along the edges?
Amanda Formaro says
Hi Lindsey! Yes, I tore it into large pieces first, and put it back together on the board. :) Thanks so much for the compliments!
Abby says
Very lovely art! The crackle adds such a unique element
Amanda Formaro says
Thank you Abby, so nice of you to say! :)
Kristi says
I love love love this! I featured it on my blog today http://digitalcakecrafting.blogspot.com/2013/01/shout-out-sunday-4.html
artsnark says
great tutorial & fun piece
Amanda says
Thanks!
Kristen says
This is so neat, Amanda! What a beautiful piece of art.
Amanda says
Thank you so much Kristen!
Brenda @ a farmgirl's dabbles says
I have been keeping my eye out for an interesting old map, to do something just like this. Thank you so much for taking the guess work out of how I should do it. I love how this turned out!
Amanda Wilson says
This is a great tutorial. I have been wanting to add a world map to my home, but I really like your distressed version better. Thank you for this tutorial. I can’t wait to try it out sometime. =)
Amanda says
Thanks Amanda!
Amanda says
So cool! Such great step by steps too!
Amanda says
Thank you Amanda, I appreciate that :)
Amanda says
Hi , I am curious if you can get the same results with using a heavy flat piece of cardboard as a backing instead of plywood . It would of course be lighter and perhaps a lot cheaper ? I was also thinking of adding a frame. You have great ideas and I love your how to posts. Keep up the good work !
Amanda says
Hi jess :) Yes, I’m sure you could use the cardboard and it would be cheaper, though plywood is VERY inexpensive. About $4 for a piece this size. The only problem I could foresee with the cardboard would be how smooth, or not smooth, it is. You may be able to see the corrugated layers beneath the surface, if that makes sense?
Kim @ Sand & Sisal says
This is seriously gorgeous Amanda! I love the crackle finish on it! It looks ancient!
Amanda says
Thank you so much Kim!