First off, please don’t panic. I didn’t paint a picture of bleeding birds. I used what is called “bleeding tissue paper” to create a piece of wall art with birds sitting on some branches. The color in the tissue paper bleeds when you get it wet, which as it turns out, looks like watercolor paint. So yes, this painting actually contains no paint at all. Only color from bleeding tissue paper.
I love actual painting too! See my dandelion painting here.

Create a painting with bleeding tissue paper
I’ll show you how to use bleeding tissue paper to create this watercolor effect so you can play around with it too. There’s also a video below that demonstrates all the different ways you can use it, I highly recommend watching it!

I first got the bleeding tissue paper from S&S Worldwide, the company I developed my kid’s craft kits for. When I was working on the craft kits I was trying all sorts of different materials but didn’t get a chance to play with the bleeding tissue paper until now.

I was inspired to “paint” this bird canvas with the bleeding tissue paper because of the painting that my daughter got me for my birthday. It hangs above my sewing table in the studio. I love all the textures in that painting, which is what made me decide to create this one.

As you can see from these close up shots, you can create some pretty fun and interesting textures using the bleeding tissue paper. I like that you can layer it or blend it, brush it or scrunch it. I just kept playing around until I was happy with my results.
So let’s get started. There are a few things you will need. Most items you will have in your craft room or closet, but a couple things you might need to buy.
You will need:
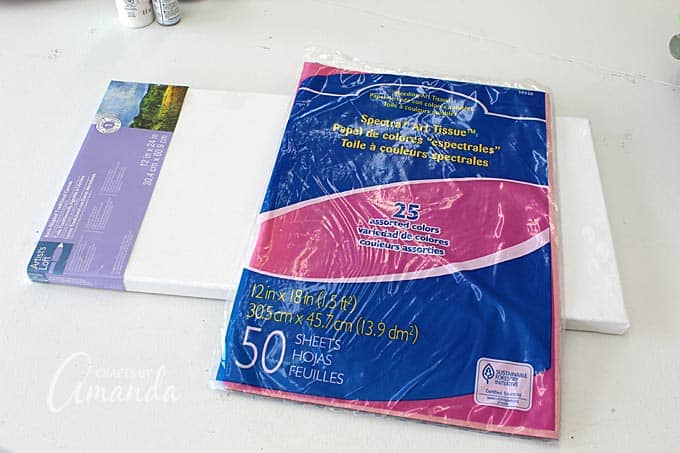
- Bleeding tissue paper
- 12×24 canvas
 (you can use your 40% off coupon at Michaels or Hobby Lobby)
 - Paintbrushes
- Water
- Acrylic sealer spray
- Micron craft pen
First off, if you don’t like your hands getting dirty, you might want to wear some workable latex gloves![]() . However, the stains do wash off with soap and water. So have fun, get dirty!
. However, the stains do wash off with soap and water. So have fun, get dirty!

I started off by drawing out my birds, which you can do too. Maybe it’s not birds you want to paint, so draw whatever you like. I actually added a third bird later. Rule of thirds after all…

My canvas was already primed. If yours isn’t, you might want to give it a layer of gesso![]() first. Totally up to you, but the results could be different if the surface is not primed. Before we move on, here’s the video I mentioned earlier. It shows several different ways to use bleeding tissue paper.
first. Totally up to you, but the results could be different if the surface is not primed. Before we move on, here’s the video I mentioned earlier. It shows several different ways to use bleeding tissue paper.
I chose light blue as my initial background color. I wanted some white to show through. First I dampened the surface of the canvas with water and a paintbrush. I crumpled the tissue paper slightly then straightened it out and placed it onto the canvas.
I used a paintbrush to add water to the top of the tissue paper. The bleeding takes place once the tissue paper is wet. Moving the paintbrush across the surface will encourage more of the color to release from the tissue paper. If you find that the amount of color released is simply not enough, put the tissue paper back in place and use your damp paintbrush to gently rub the tissue paper onto the surface of the canvas.

This is where art takes over. Simply lift and move the bleeding tissue paper to different areas of the canvas, crumple it up and pounce like a sponge, adding water as needed, lifting and checking the color, and repeating wherever necessary.

Once I was happy with the light blue background, I started adding some green. Same concept, crumple, water, lift, repeat. And as you can see if you don’t wear gloves (I know, I’m such a rebel) your fingers will get stained. But it will wash off with soap.

Once I had the background the way that I wanted it, I cut out my bird patterns and placed them onto the canvas to figure out exactly where they would go. I used those drawings and a pencil to trace the bird shapes onto the tissue paper. I chose yellow as the background for bird on the lower branch.

Adding the birds and the branches is a little more methodical than the background. I cut the bird shapes as well as the branch shapes from the tissue paper. Then using a liner brush, I placed the shapes onto the canvas then applied water to the bleeding tissue paper shapes.
I let them sit for a few minutes to make sure I got a good transfer. Then I removed the tissue paper from the canvas. I found it easiest to life the tissue paper with a craft knife.

Something I learned while I was creating is that you should allow the initial design color to dry before trying to add another color. As you can see above, the orange was blending in with the still wet yellow beneath it.

To make the leaves, cut small leaf shapes from green bleeding tissue paper, then carefully apply them to the canvas with a liner brush and water. Leave the tissue paper leaves in place and let them dry. They will begin to lift, and at that point you can remove them.

By now you’ve probably got the hang of it and you are adding textures to the birds as well as your background. Play around with it and have fun! I even added a third bird to my original design, and as you can see you just cut a shape from the tissue paper and use water and a paintbrush to add it to the canvas. I also added some yellow to the top as an afterthought. Afterthoughts are one of my favorite parts of the creative process.
I finished the “painting” off by lightly outlining the birds with a micron craft pen. Subtle enough to emphasize the birds, but not too much that they stood out. I like it!
When everything is completely dry, spray the finished art with an acrylic sealer. I did 2 coats.

And that’s it! We made a piece of wall art that looks like watercolor paint but doesn’t use any paint at all! Hope you enjoyed this project and it encourages you to try something new.
You might also like my Four Season Button Tree wall art.
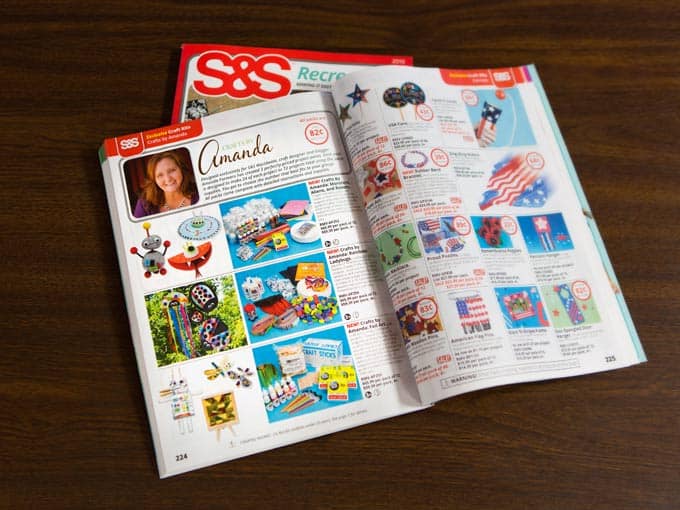
Be sure to check out my craft kits through S&S Worldwide, it’s the only place you can buy them! :) Look, I’m in a catalog! Yay!
This post originally appeared here on Jan 27, 2016.
- Tie Dye Beach Towels - July 24, 2026
- Swirling Twirling Ladybugs - July 21, 2026
- Drip Tie Dye Backpack - July 17, 2026


Marlene M Linke says
Really great project.!!! Wonderful tutorial and the art is just adorable!!!!! Well done!!!!
Amanda Formaro says
Thank you so much!
Tracee Huddleson says
This is so cute! Can’t wait to try this next school year!
Johelen miranda says
This is great a definite do for me. I have s much craft stuff because I do painting with chalk ,oil,acrlc. I am always looking for new ideas. I do the 5 diamond pictures everyone wants them. I do the clothes pin dolls, yo yo dolls, beads animals, pipe cleaner animals, I like doing felt things I have made my familly dogs for them from pictures for markings. I do the blankets and latch hook, plastic mesh things make animal figures from clay. Do the Japanese braiding. Guess you could say I am a crazyfor crafts. So when I saw this it was right up my alley. I like doing my own designs with mosaics. Those button people looked great to. I do he three kings different every year. I will be watching your pins and hopefully they will turn out like yours.
Amanda Formaro says
Wow you are quite the crafter! I hope you enjoy this method, i really loved it!
Doreen says
Dear Amanda
I came across you when browsing the net looking for a solution to the following problem. I recently purchased Spectra paper from the net but much to my disappointment I could not get the paper to bleed into the canvas. The canvas was already primed with gesso. I am 91 and always on the lookout for some craft I can do as I am almost housebound and with limited mobility. I was so looking forward to using this beautiful coloured paper! Your bird picture looks great and I would be more than grateful if you can tell me why I have this problem. I live in Australia. I have been a crafter all my adult life and this was something new I could turn my mind to, which is still OK, to without much effort. Kindest Regards Doreen
Amanda Formaro says
Hi Doreen. I’m sorry you had trouble! My first question is if the Spectra paper that you bought says “bleeding art paper” on it. If it’s just regular tissue paper it won’t bleed. If it does in fact say that’s it’s bleeding art paper, did you try it on another surface, perhaps plain white paper just to see if it works?
Clip Art says
Thanks for sharing carla!!!
Carla says
Does Michaels in Niles Illinois have bleeding tissue paper? I have worked with regular tissue paper and glaze. I created a large greeting card for our yard with lights. I blended several pieces of tissue like a stain glass window. I would think bleeding tissue would have been even better. I love your birds.
Amanda Formaro says
Thanks Carla! I’m not familiar with that store, but I’m sure you could give them a call and they could check for you :)
Munchkin Time says
Wow this is so beautiful, I love it, thank you for the tutorial, so helpful! Pinning!
Amanda Formaro says
Thank you so much!
Petrin Diaz says
I am a fan for mix-media art and am trying to work on a canvas for Spring using tissue paper in varied colors , but using the regular tissue paper (not bleeding one) and work the flowers, leaves, stems leaving the paper showing its texture. Do you have any project that could help me with my dream?…i love all your shown projects with the bleeding tissue, which i will try later! Thanks for your attention to my request!…
Amanda Formaro says
I wish I had something that would help, but your idea sounds so lovely! I hope you make it!
Dawn M says
Is the bleeding tissue paper special? Or can you use any tissue paper?
Amanda Formaro says
Yes it’s different from regular tissue paper. There are links within the post that will take you to the proper type of tissue paper.
Betty Tompsett says
Hi Amanda,I just love your tissue paper art with the birds.I am in Australia,I haven’t seen this style of art before.I want to give it a good try,I wonder if I could buy a small picture off you? I tried the Amazon site but am unsure whether the wetting tissue variegated sheets are what you used or did you get each sheet one colour only?
Amanda Formaro says
Hi Betty :) I’m not sure what you are referring to when you say wetting tissue variegated sheets, so I’m providing a link here to exactly what you would need to buy. I had a pack of 50 sheets in different colors, just like this set http://amzn.to/1TGt4cw
Sharon Urban says
I really want to try bleeding paper,I love water colors and I want to get some.Looks so easy.
Danielle M says
Absolutely gorgeous! Will try this, for sure…. Thank you!
Xtine says
This is beautiful! Try adding some vinegar to your water for vibrant colors as well, like dying Easter eggs.
Patti Estep says
This is really beautiful. I love watercolors and birds and you make it seems so doable.
Amanda Formaro says
Thank you Patti! I love watercolor as well so I was really happy with how this came out. I’m looking forward to doing another!
Katrina says
This is gorgeous! It seems the perfect way to do a background for a poster I want to do with the Reiki principles on it.
Do you think it would work on cardstock also? Or will it be best on a canvas such as you have used?
Amanda Formaro says
I watched a video of a woman who scrapbooks, she used paper but I’m not positive what kind it was. I was suggest trying a small piece out as a test. In fact, if you have some Gesso, paint have the sheet with it and leave the other half unprimed. Then try each side with the bleeding tissue paper and see how it works!
Quotes says
This is wonderful.!
Amanda Formaro says
Thank you!
Dawn M Jens says
This is pretty Amanda really lovely – thank you for posting – love birds – looking forward to this project – you are as talented as ever –
Amanda Formaro says
Thanks so much Dawn, I really appreciate that!
Sandra Sather says
I want to do this with Nursing home residents, will it work with water color paper?
Amanda Formaro says
Hi Sandra. I have not tried this yet on watercolor paper. I found a post where it appears to work, but if you wet the paper too much the paper will bleed too much and cause blobbed designs. I would recommend trying one sheet of watercolor paper yourself first, and experiment with it. Hope you have fun!
Angie | Big Bear's Wife says
Oh my! This is so cool! I’ve never seen anyone “paint” with tissue paper. I’m so going to try this.
Anne Dial says
How Beautiful..Thank you for the great tutorial.
Izabel says
This is wonderful, I haven’t see things like this for ages.
Amazing !!!
Amanda Formaro says
Thank you Izabel! I was really happy with how it came out :)
Barb says
I like this! Can’t wait to try this.
Amanda Formaro says
Thank you Barb! Hope you have fun :)