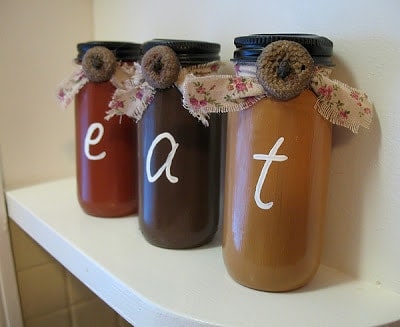
I have been busy creating new projects to display in my kitchen. In fact, yesterday I was thinking I better slow down or I could end up with it being too cluttered! Ha! You might remember my Distressed Eat Sign that I made back in November. Well I had these little spice jars sitting in my “to create a project” cabinet, and so these eat jars were born.
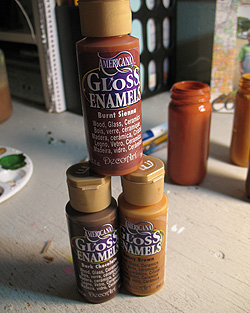
I used Gloss Enamels from DecoArt for this project, but you could use regular acrylics since you won’t be continuously washing them or placing them in the dishwasher.
Supply list:
3 empty glass jars with lids
rubbing alcohol
paintbrushes
DecoArt gloss enamels in Burnt Sienna, Dark Chocolate, Honey Brown and White
Krylon satin black spray paint
Black or white transfer paper
Rustic looking fabric scraps
Scissors
3 acorn tops (or buttons)
Hot glue gun
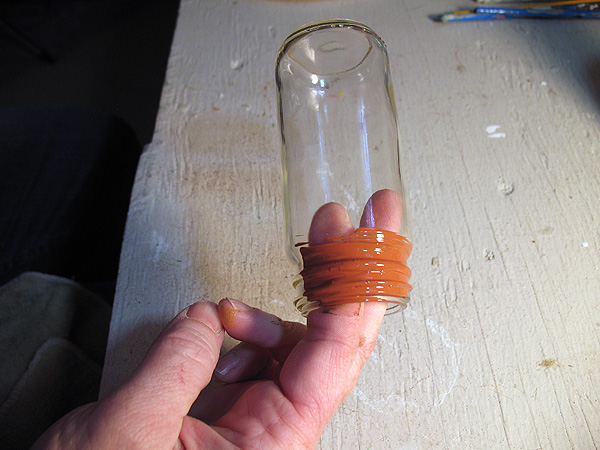
Wash the jars, then wipe them down with rubbing alcohol. Paint the top rim of the jar and around the bottom.
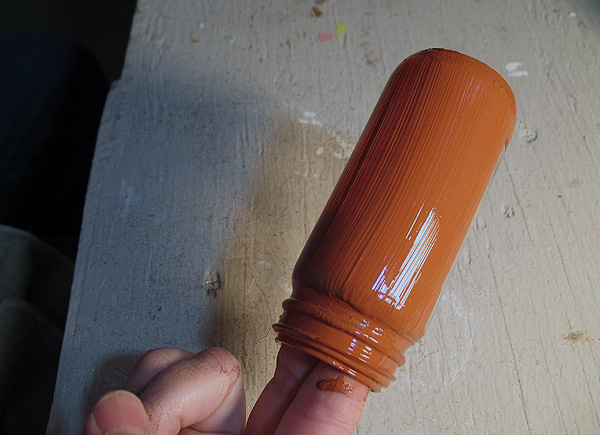
Then paint the rest of the jar.
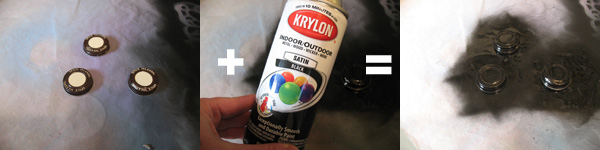
Set the jars aside to dry. Meanwhile, spray the jar lids with black spray paint.
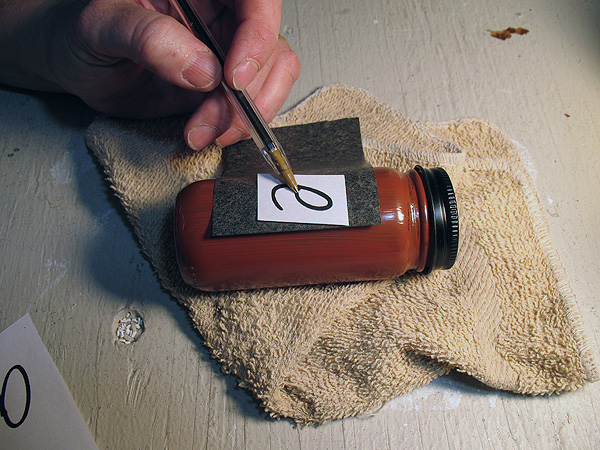
After the jars are dry to the touch, choose a favorite font (I used Saginaw Medium) and print off the letters e a t. Resize until they fit your jars then cut them out. Trace the letters onto the jars using graphite transfer paper.

Using a thin liner brush and white gloss enamel paint, trace over the transferred letter.
At this point, you can wait 48 hours then bake the jars in a low temp oven to set the paint. Mine were just going on a shelf and will not be disturbed, so the other option of air drying for 21 days is what I chose. Therefore, I could move forward with adding my bows.
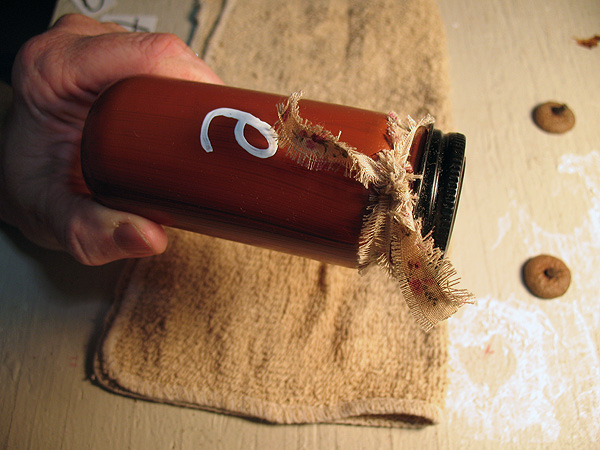
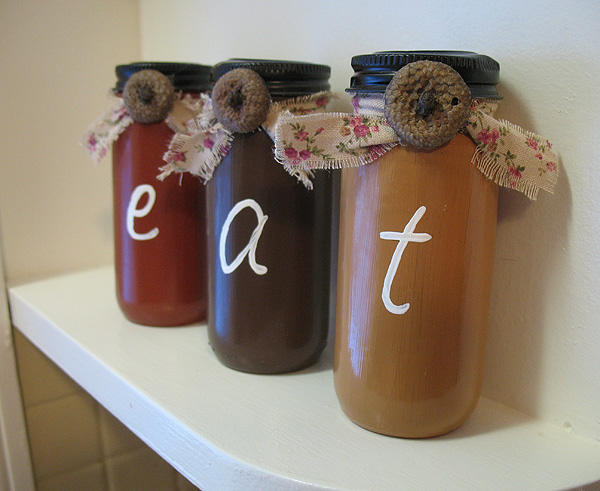
Cut material into 1/2″ wide strips, fraying the edges by pulling out some of the threads. Tie around the neck of the jar, be sure that the knot is centered above the letter. Trim the ends if needed and fray.
Put the lids on the jars after tying all the fabric. Hot glue an acorn top (or a button) to the center of the knot.
Display!
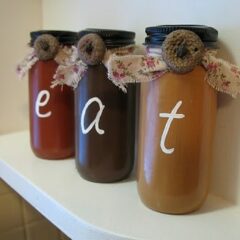
Eat Jars - a kitchen craft
Supplies
- 3 empty glass jars with lids
- rubbing alcohol
- paintbrushes
- DecoArt gloss enamels in Burnt Sienna Dark Chocolate, Honey Brown and White
- Krylon satin black spray paint
- Black or white transfer paper
- Rustic looking fabric scraps
- Scissors
- 3 acorn tops or buttons
- Hot glue gun
Instructions
- Wash the jars, then wipe them down with rubbing alcohol. Paint the top rim of the jar and around the bottom.
- Then paint the rest of the jar.
- Set the jars aside to dry. Meanwhile, spray the jar lids with black spray paint.
- After the jars are dry to the touch, choose a favorite font (I used Saginaw Medium) and print off the letters e a t. Resize until they fit your jars then cut them out. Trace the letters onto the jars using graphite transfer paper.
- Using a thin liner brush and white gloss enamel paint, trace over the transferred letter.
- At this point, you can wait 48 hours then bake the jars in a low temp oven to set the paint. Mine were just going on a shelf and will not be disturbed, so the other option of air drying for 21 days is what I chose. Therefore, I could move forward with adding my bows.
- Cut material into 1/2″ wide strips, fraying the edges by pulling out some of the threads. Tie around the neck of the jar, be sure that the knot is centered above the letter. Trim the ends if needed and fray.
- Put the lids on the jars after tying all the fabric. Hot glue an acorn top (or a button) to the center of the knot.
- Display!

- Swirling Twirling Ladybugs - July 21, 2026
- Drip Tie Dye Backpack - July 17, 2026
- Mini Coastal Clay Houses - July 14, 2026


Amanda says
Thanks for letting me know about the pictures. :) I found the problem and they are showing up now, thanks!
Mrs Ergül says
Hi Amanda, the photos in this post are not showing up. I will really love to see you what you have done with the jars. Hope you are able to relink the images. Thank you!!
Rachel {BubblyNatureCreations.com} says
These really add a nice touch!!! I like the paint colors you picked out… I will have to go over and check out your eat sign!
Come over and link this up here: http://www.bubblynaturecreations.com/2011/02/project-party-weekend-flavored-lip.html
We would love to have you join us!
Red Hill General Store says
These are adorable. It is truly amazing the type of things you can make from stuff that a lot of people consider junk or trash. Jars and bottles can make such neat decor. Love them!
Hayley says
What a fantastic idea! Love this!
L says
So Cute! Would love for you to add to my Thursday Treasure Party:
http://thetreasurista.blogspot.com/p/treasuristas-thursday-treasures-come.html
Jana says
Fun craft!
Would love for you to come link up:
http://gigglesglitzandglam.blogspot.com/2011/01/tuesday-glam-party-13.html
Cat says
Love it so much!!! They are so cute!!!
Kammy says
Sweet and. Adorable ! Kammy
The Shanty Girl says
These are very nice. I did read you post about your eat sign and I am drooling over that one! Very nice work! Nice to meet you!
Sherry
WobiSobi says
So Cute… I love the size of those jars.