
I love to make snowman crafts because you can turn pretty much anything into one! I’m no stranger to plastic spoon crafts either, so I decided to use them as my snowman base, and put them into wintery clay pots that are fun as a decoration or place holder.

If you wanted to use these as place holders, you could write the names right onto the front of the clay pot’s rim.
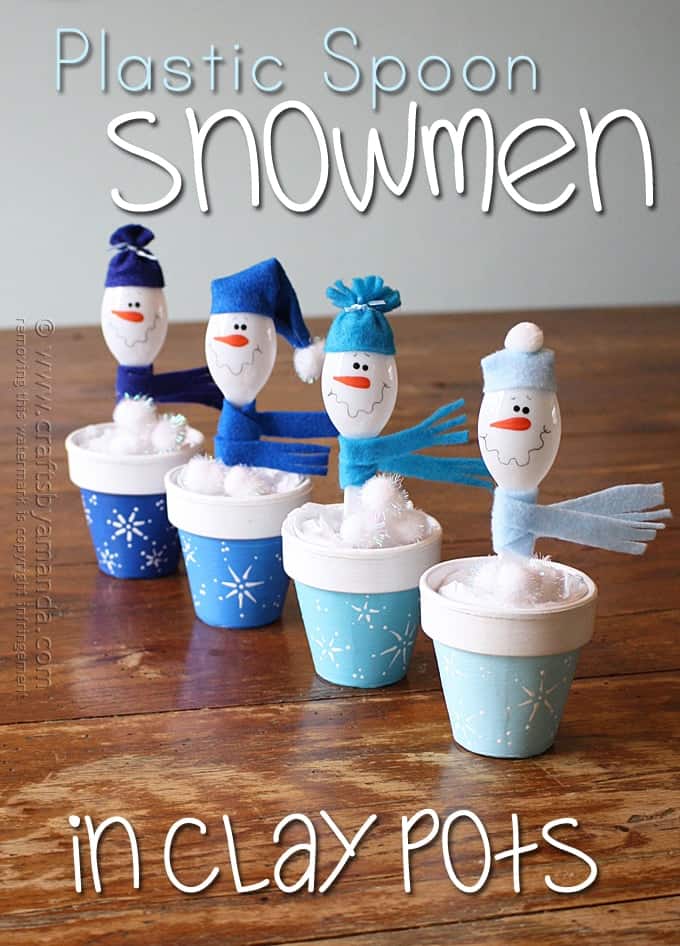
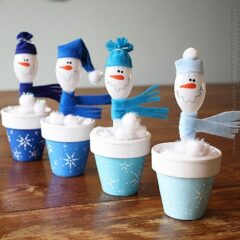
Plastic Spoon Craft: Snowmen in Clay Pots
These would make sweet hostess gifts too, something fun to display on the mantle or in the middle of the dinner table.
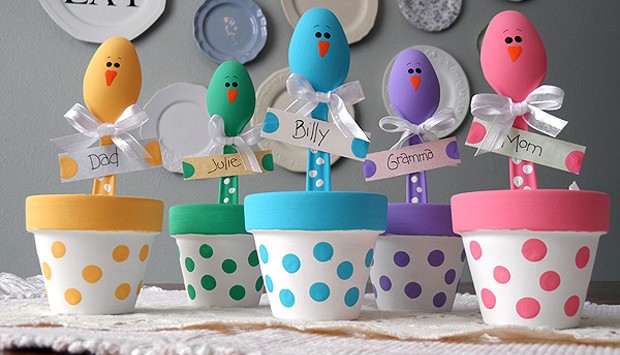
You might remember another plastic spoon craft I made a couple years ago, these Easter Chick Place Holders. I was showing them to a client during a meeting. That’s when it hit me to use this project as inspiration and make little snowmen too!
I’ve painted my clay pots with snowflakes, but if you prefer the polka dots like the Easter chicks, you can do that instead.
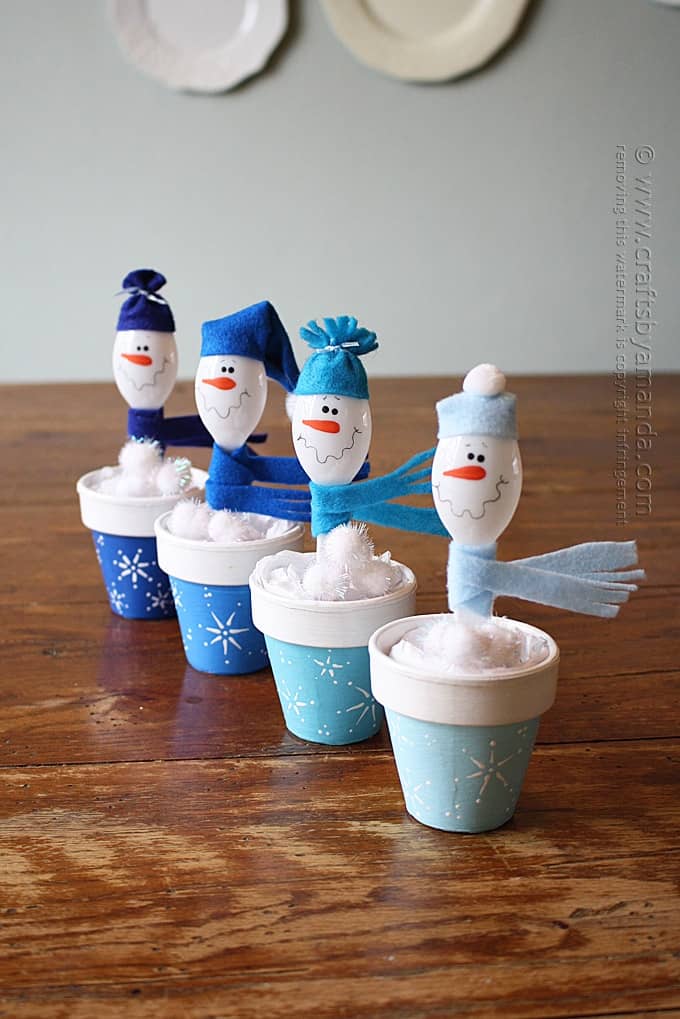
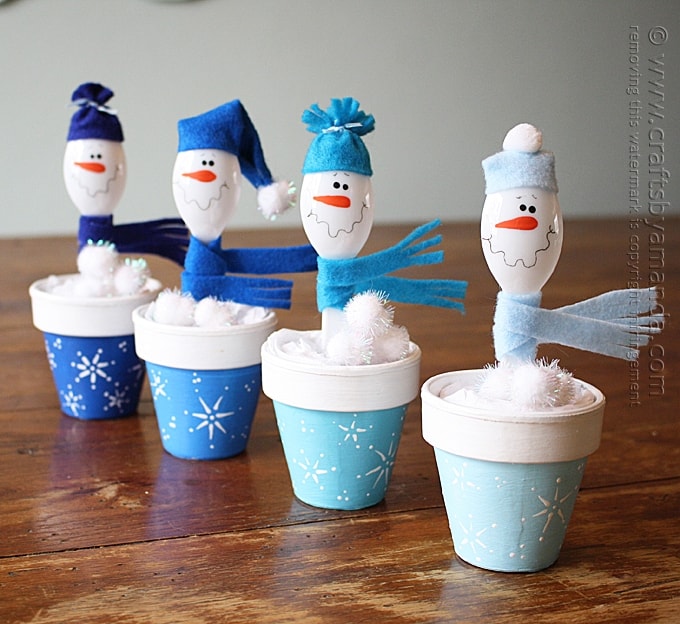
The scarves and hats are made from felt, I’ll show you how to make them below.
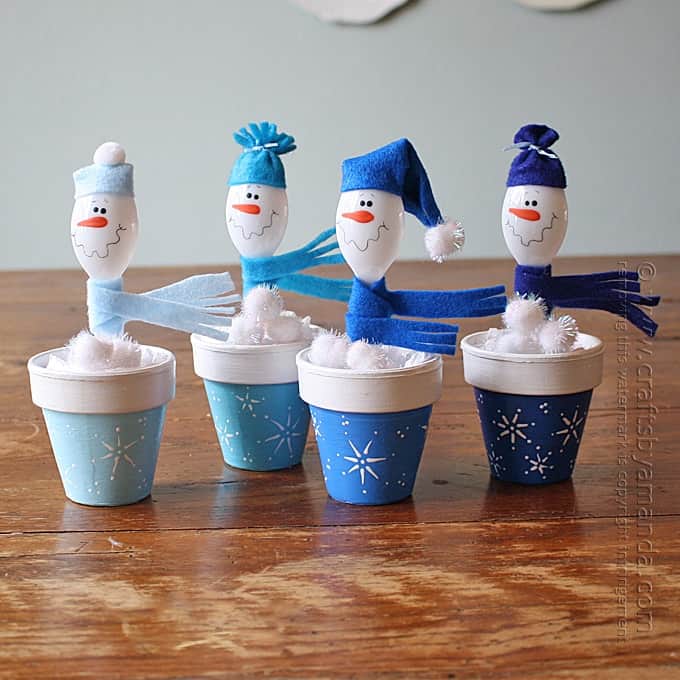
I chose different shades of blue so you could see how they each look. These could also be done in Christmas colors, red and green or even gold and silver. They would also be fun with pastels or primary colors!
Note: some links below are affiliate links. That means if you happen to buy something, a small percentage of that sale goes back into this site, which enables me to continue to bring you free tutorials such as this one. So, thanks!
As always, a full printable supply list and instructions are at the end of this post.
For this project you will need the following supplies:
To make ONE snowman:
- 4-inch clay pot

- Plastic spoon
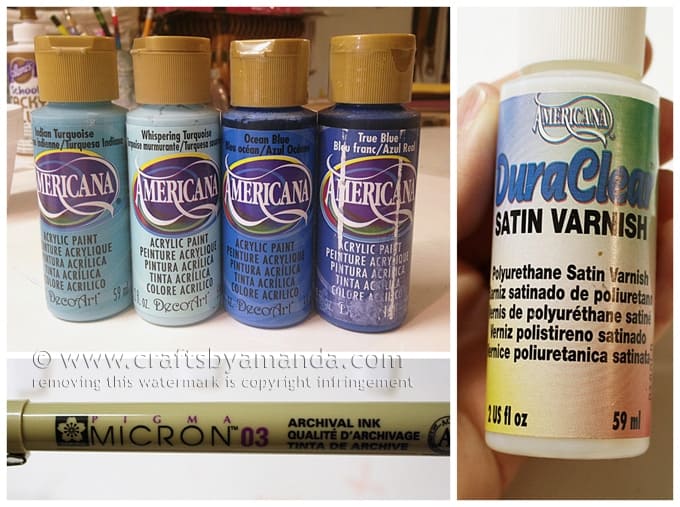
- Blue craft paint (I used Americana acrylics in Indian Turquoise, Whispering Turquoise, Ocean Blue and True Blue)
- Orange, white and black craft paint
- Blue felt
- Matte finish sealer (I used Americana DuraClear Satin Varnish)
- Floral foam
- White tissue paper
- White pom poms
- Ribbon
- scissors, toothpicks, hot glue gun, Micron pen (03)
IMPORTANT NOTE: Turns out that the Micron pen never quite dries on plastic. So if you think that people might touch the snowman’s face and smear the ink, you can use black paint dots (using a toothpick) to add the snowman’s mouth instead. If you prefer the pen, note that if it does smear you can easily wipe the smile off the spoon and reapply it.
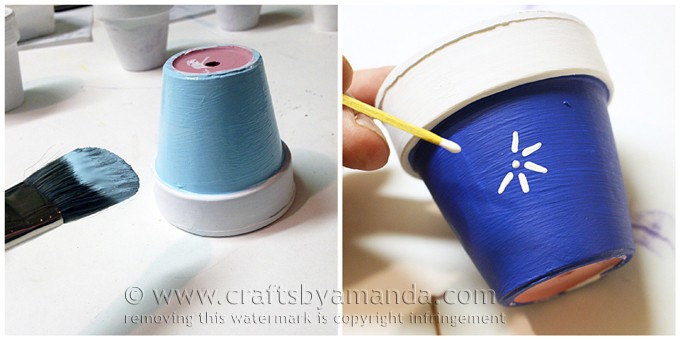
Paint the clay pot blue and paint the rim white. When dry, use a toothpick and white paint to decorate the pot with snowflakes. When completely dry, give the pots a coat of sealer.
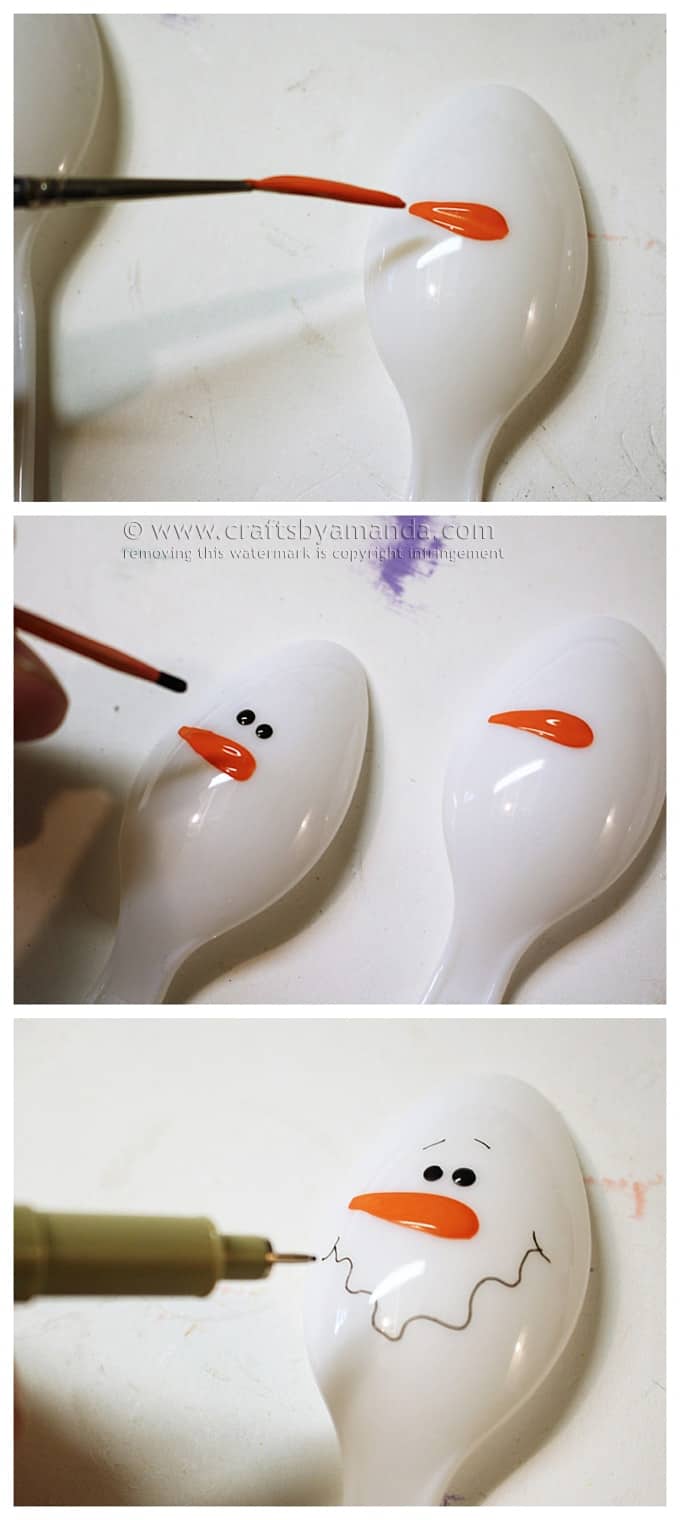
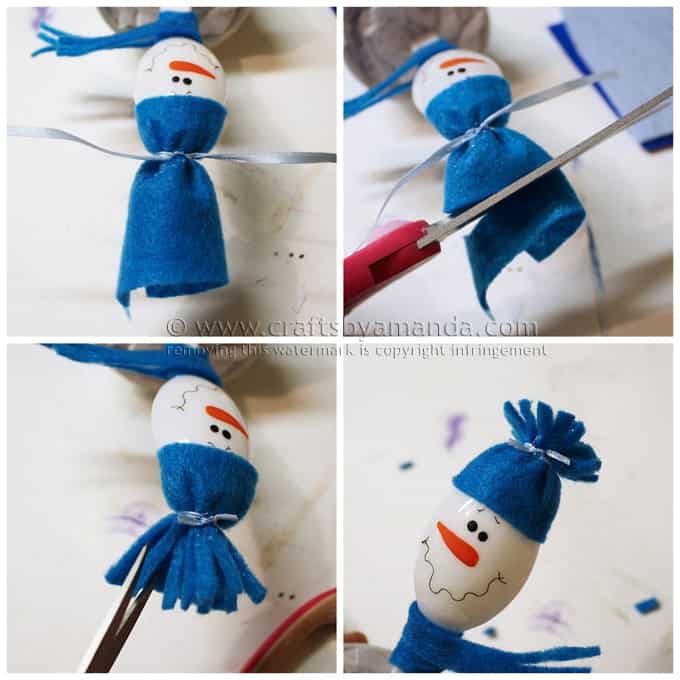
Use a long liner brush to paint an orange nose onto the spoon. Use a toothpick dipped in black paint to add the eyes. Use the black pen to add the smile and eyebrows. Please be sure and read the important note above about the pen.
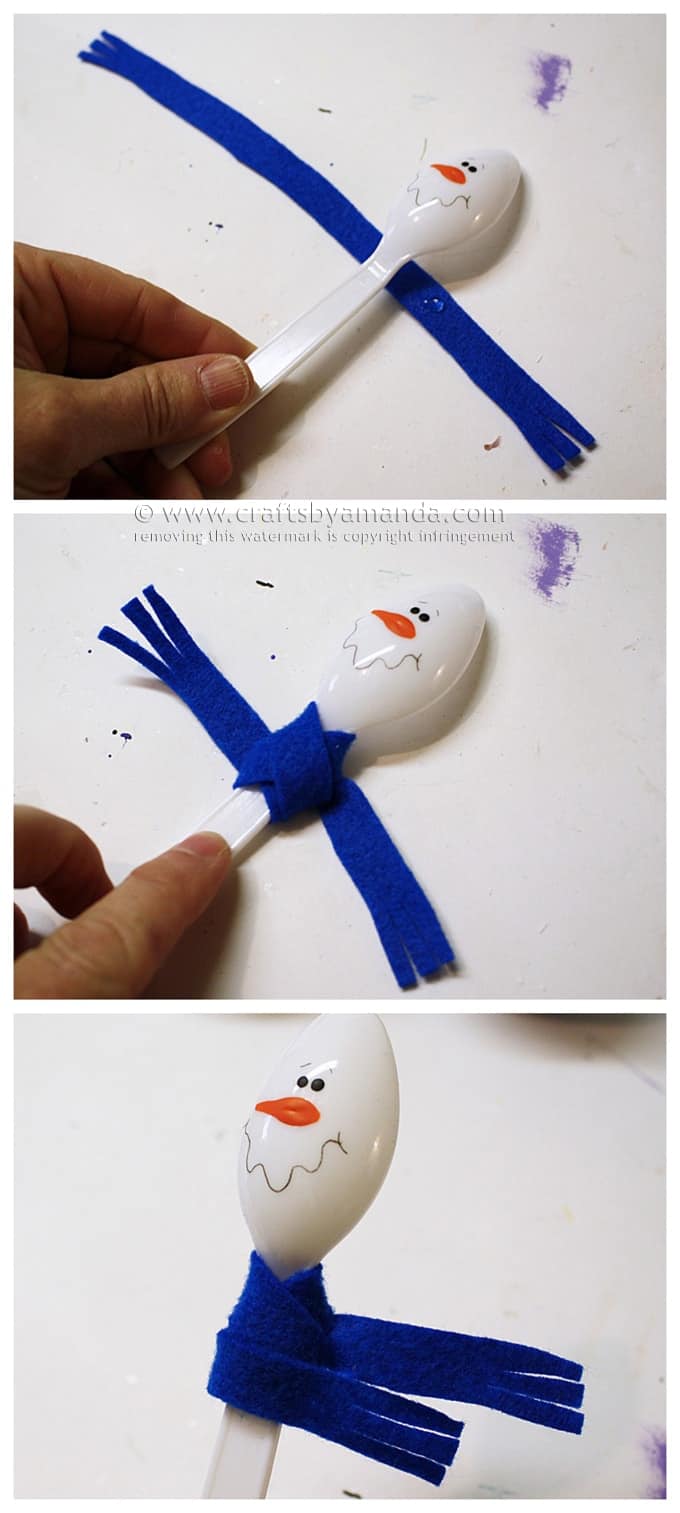
Cut a 1/2-inch wide strip of felt and fringe the ends. Add a dab of hot glue about 3-inches from the right end. Place the snowman onto the glue then wrap the scarf around several times, securing with more hot glue.
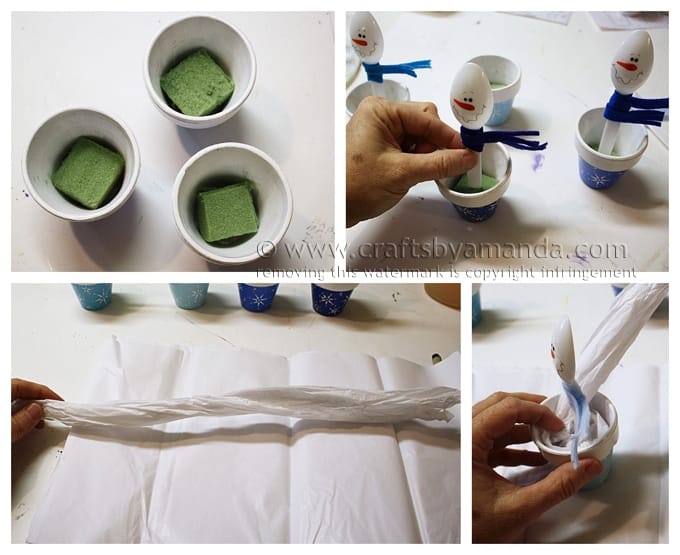
Cut a small square of floral foam so that it fits snugly inside the clay pot. Insert the snowman spoon into the floral foam. Tear or cut a sheet of tissue paper in half and roll it up. Use the tissue paper to fill the inside of the clay pot, covering up the floral foam.
Make the Hats
I’ve made 4 different hats and will show you how to make each one below.
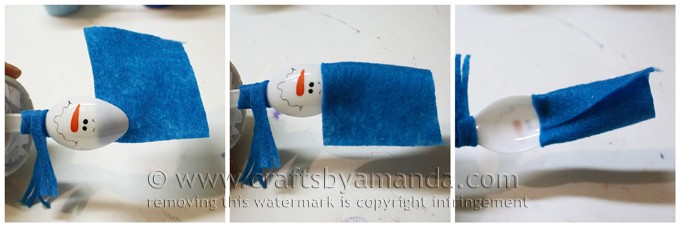
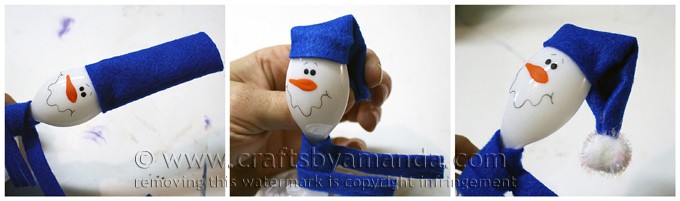
But first the basics. Cut a piece of felt, about 3” x 4”. Hot glue the corner of the felt to the back of the spoon. Wrap the felt around the front of the spoon and glue in place. Wrap the felt around to the back (trimming if needed) and glue it in place. This is how each of the hats below are started.
Fringed Pom Hat
Follow the basic hat instructions and tie a piece of ribbon tight around the felt near the top of the snowman’s head. Trim the top of the hat to about 1-inch above the ribbon. Use scissors to fringe the top of the hat and trim down until you like how it looks.

Beanie with Pom Pom
Follow the basic instructions for your hat then trim off the top, leaving about 2-inches of hat. Fold the top of the felt down to the back of the snowman’s head and glue in place. Glue a pom pom to the top.
Stocking Cap
Follow the basic hat instructions but don’t trim anything off the top. Fold the top of the felt down behind the snowman’s head. Use hot glue to hold it in place behind the head and fold the end of the felt together, securing with glue. Glue a pom pom to the end.
Basic Pom Hat
Follow the instructions for the Fringed Pom Hat but do not fringe the top.
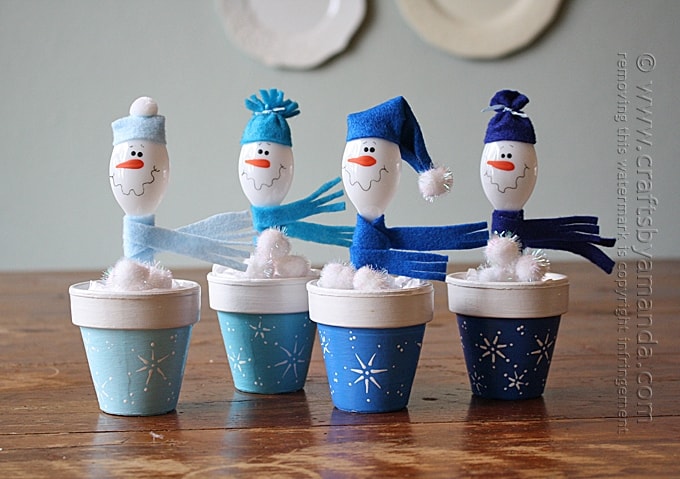
To finish everything off, add a few sparkly white pom poms to the pot to look like a pile of snowballs!
I hope you enjoyed this fun snowman craft! I think they came out really cute and I hope you do too. Have fun!
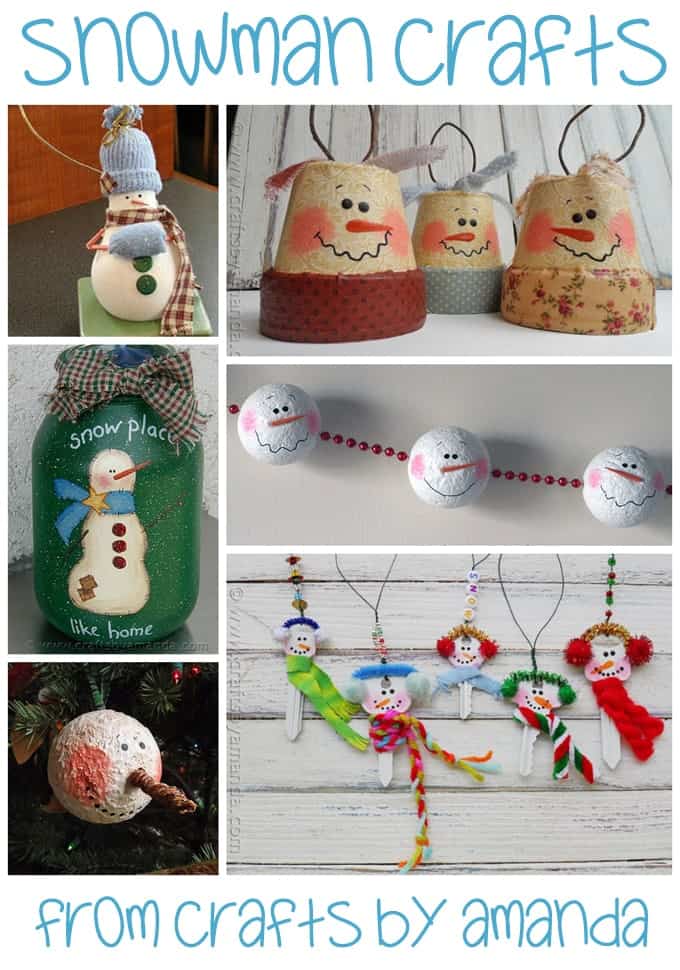
More snowman crafts
- Light Bulb Snowman Ornament
- Recycled Key Snowmen
- Snowman Garland
- Vintage Clay Pot Snowman Ornaments
- Jumbo Vintage Snowman Ornament
- Snow Place Like Home Painted Jar
- More Plastic Spoon Crafts
- More Clay Pot Crafts
And ONE more thing! You can’t possibly be done with this project unless you check out my friend Meaghan’s adorable edible version here!
Plastic Spoon Snowmen in Clay Pots
Supplies
- 4- inch clay pot
- Plastic spoon
- Blue orange, white and black craft paint
- Blue felt
- Matte finish sealer
- Floral foam
- Tissue paper
- White pom poms
- Ribbon
- Tools: scissors toothpicks, hot glue gun, Micron pen (03)
Instructions
- Paint the clay pot blue and paint the rim white. When dry, use a toothpick and white paint to decorate the pot with snowflakes. When the pots are completely dry, give them a coat of sealer.
- Use a long liner brush to paint an orange nose onto the spoon. Use a toothpick dipped in black paint to add the eyes. Use the black pen to add the smile and eyebrows. Please be sure and read the important note below about the pen.
- Cut a 1/2-inch wide strip of felt and fringe the ends. Add a dab of hot glue about 3-inches from the right end. Place the snowman onto the glue then wrap the scarf around several times, securing with more hot glue.
- Cut a small square of floral foam so that it fits snugly inside the clay pot. Insert the snowman spoon into the floral foam. Tear or cut a sheet of tissue paper in half and roll it up. Use the tissue paper to fill the inside of the clay pot, covering up the floral foam.
Make the Hats
- I’ve made 4 different hats and will tell you how to make each one below. But first the basics. Cut a piece of felt, about 3” x 4”. Hot glue the corner of the felt to the back of the spoon. Wrap the felt around the front of the spoon and glue in place. Wrap the felt around to the back (trimming if needed) and glue it in place. This is how each of the hats below are started.
Fringed Pom Hat (turquoise)
- Follow the basic hat instructions and tie a piece of ribbon tight around the felt near the top of the snowman’s head. Trim the top of the hat to about 1-inch above the ribbon. Use scissors to fringe the top of the hat and trim down until you like how it looks.
Beanie with Pom Pom (light blue)
- Follow the basic instructions for your hat then trim off the top, leaving about 2-inches of hat. Fold the top of the felt down to the back of the snowman’s head and glue in place. Glue a pom pom to the top.
Stocking Cap (royal blue)
- Follow the basic hat instructions but don’t trim anything off the top. Fold the top of the felt down behind the snowman’s head. Use hot glue to hold it in place behind the head and fold the end of the felt together, securing with glue. Glue a pom pom to the end.
Basic Pom Hat (dark blue)
- Follow the instructions for the Fringed Pom Hat but do not fringe the top.
- To finish everything off, add a few sparkly white pom poms to the pot to look like a pile of snowballs!
Expert Tips & FAQs
- Mason Jar Solar Lights - July 3, 2026
- Patriotic Pinwheels - June 23, 2026
- Fingerprint Daddy & Me Coffee Mug - June 12, 2026


Nina says
Love your snowmans, Amanda. Would love to share this craft idea in my blog.
E S Eby says
I wonder if you could hot glue two spoons back to back to make it more three dimensional which would be nice if you use them as place cards.
Amanda Formaro says
I’m sure you could, but I wouldn’t use hot glue. It won’t hold on plastic. Use white craft glue and give them some time to dry :)
Kani Poly says
So cute! Love it a lot
Janet D. says
Amanda! These are so adorable! I came across this project on FB and I instantly went out and purchased the supplies. I am going to use small mason jars as the base, because i just could not find the clay pots! I think it will work out fine. i just pained the jars with acrylics!! Thanks so much for posting this project!
Amanda Formaro says
Great idea using the jars Janet, so glad you liked the project! :)
E S Eby says
You can often find the small pots in a dollar store.
Peggy says
What size do you cut felt for scarf?
Amanda Formaro says
About 10-inches long will work, 1/2-inch wide.
SherriS. says
These are sooo cute! These will make great gifts.
Amanda Formaro says
Thank you Sherri!
Marti @ SewliciousHomeDecor says
These are adorable!! Pinning for later. :)
Amanda Formaro says
Thank you Marti!
diane says
really neat od crafts with two grandaughters when the come over
Amanda Formaro says
Hope you have fun!
Beth Litchfield says
I would love to have these crafts and more shared with me, sent to me at my email. I love doing crafts and every year I try to come up with something to do with the grandkids so they can make parent gifts, so I am always looking for different ideas. These are so cute and I also love snowmen for crafts, they are an all winter decoration and not just for Christmas.
Alisha says
These are easy and fun. Thank you for the idea. I had 4 10 yr old boys make them and their pots are each so different . Their creativity and imaginations made them each wonderful pieces.
Amanda Formaro says
Thanks Alisha!
handmade says
always so beautiful, thank you :)
Sara says
This would be great with Styrofoam cups for a class craft and cheap too!
Elena says
These are just so stinkin’ cute! Can’t wait to make them with my little one! Thanks for sharing; I pinned to my crafts board :-)
Amanda Formaro says
Thank you Elena!
adriana says
Lovely! Where can I buy the little clay pots from?
Amanda Formaro says
You can find clay pots at Walmart, crafts stores and home improvement stores :)
Carly says
Hi! Love these snowmen!
What is the sealer for ? I didn’t see it mentioned in the instructions. Thanks!!
Amanda Formaro says
Thanks for pointing that out Carly! I’ve corrected the post. The sealer is for the clay pots :)
[email protected] says
Making these with my little one! She will love it!