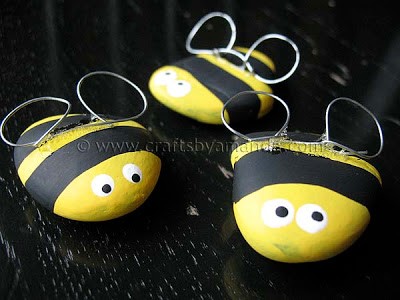
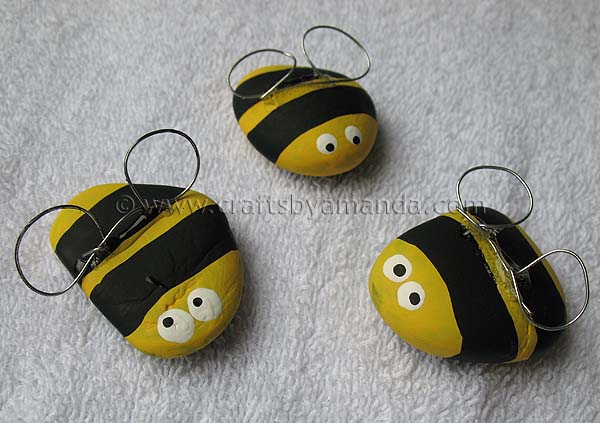
You can make these adorable rock bees for your garden or to use as a cute little paperweight for your desk. Throw a magnet on the back of them and now you have a cute magnet for your fridge! There are so many different ways to display these cute rock bees. Which way will you choose? Similar to my Ladybug Painted Rocks, these are a hit with children and adults alike!

Rock Bees
I have an older house, so this weekend we had to put our screens on. All it took was one bee to fly through the open window and into the living room and I was in the shed digging the screens out. Bees are really pretty and definitely a sign of warmer weather, but I’m allergic. I’d rather have these cute little bees made from rocks, than the real thing. Those guys will have to stay outside!
Related – check out a ton more ideas for painted rocks!
These rock bees are super easy and so fun! Collect some rocks from outside and let’s get to work.
What you need to make rock bees
Paints you’ll need:
How to make Rock Bees
Have the kids collect some smooth rocks from the yard. Wash them with soapy water, rinse and dry well.
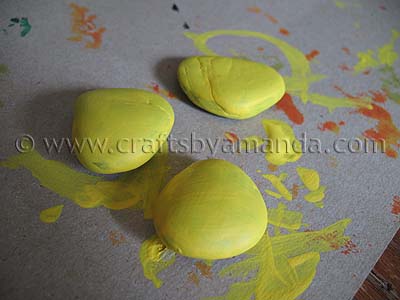
Paint them yellow and let dry. Two coats is probably better depending on the coverage of your yellow, but one will suffice.
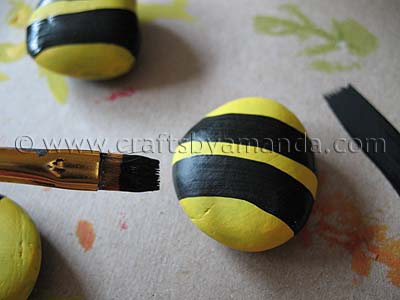
Now add black stripes.

Use the handle end of a paintbrush to dot on the whites of the eyes. Let the white dry completely.
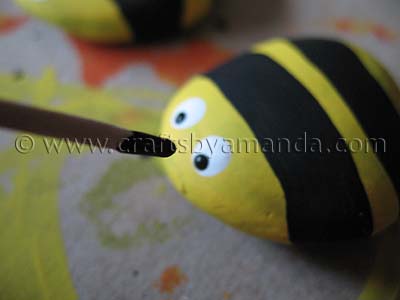
Use the handle end of a smaller paintbrush (or a toothpick) to dot on the black part of the eyes.
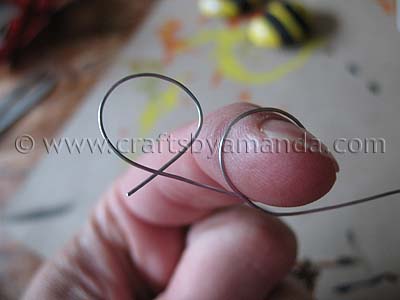
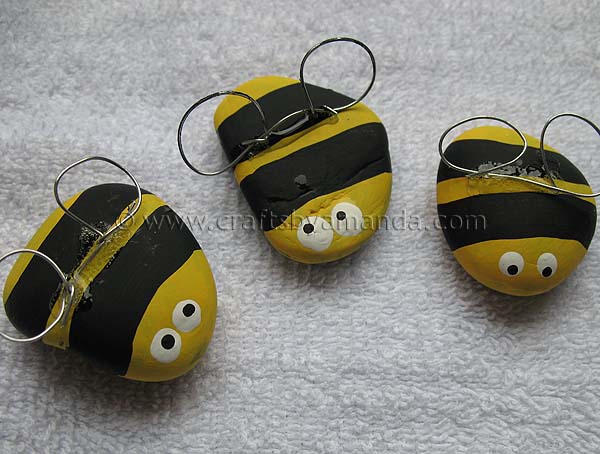
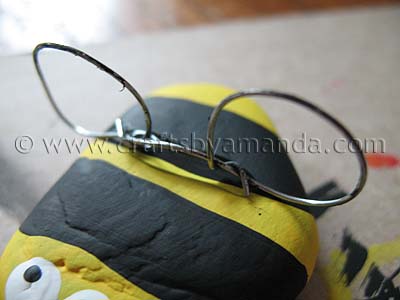
To make the wings I used some leftover wire I had. You could use chenille stems if you prefer. Just wrap it around the tip of your finger, then do another coil right next to that one. Trim off excess.
I put mine on with hot glue, but you could certainly use white craft glue.
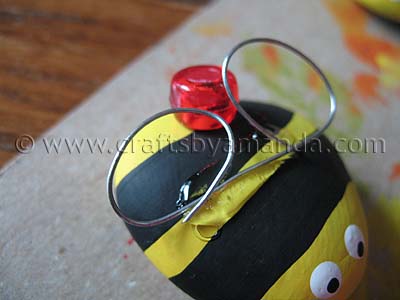
Set something small, like a pony bead, behind the wings to prop them up while the glue dries.
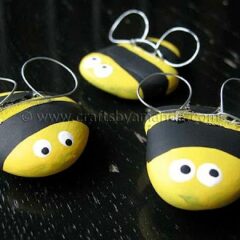
And there you have it, plenty of bees that won’t sting you!
Rock Bees
Supplies
- rock
- paintbrush
- toothpick
- wire
- chenille stems
- hot glue gun
- white craft glue
- pony bead
Paint
- yellow
- black
- white
Instructions
- Have the kids collect some smooth rocks from the yard. Wash them with soapy water, rinse and dry well.
- Paint them yellow and let dry. Two coats is probably better depending on the coverage of your yellow, but one will suffice.
- Now add black stripes.
- Use the handle end of a paintbrush to dot on the whites of the eyes. Let the white dry completely.
- Use the handle end of a smaller paintbrush (or a toothpick) to dot on the black part of the eyes.
- To make the wings I used some leftover wire I had. You could use chenille stems if you prefer. Just wrap it around the tip of your finger, then do another coil right next to that one. Trim off excess.
- I put mine on with hot glue, but you could certainly use white craft glue.
- Set something small, like a pony bead, behind the wings to prop them up while the glue dries.
- Swirling Twirling Ladybugs - July 21, 2026
- Drip Tie Dye Backpack - July 17, 2026
- Mini Coastal Clay Houses - July 14, 2026


Buttons and Paint says
These are so cute! We love them and have featured them in our painted rocks round up (with a link back to you) x
http://buttonsandpaint.blogspot.co.uk/2014/05/painted-stones.html
Amanda Formaro says
Thanks so much for including me!
Julie says
Love these-think I will spray the finished product with a clearcoat so they stay nice longer.
Amanda Formaro says
Hope you have fun with them Julie!
Carolyn says
I love your little busy rock bees… they looks fantastic…and super easy. Thanks for posting.
Isreview says
OH HOW CUTE!! I love "bee" crafts!
Elle says
Too cuuuute!
Amanda says
Hi Rachel and thanks for the feature! Yes you can certainly continue to link to me in this fashion :) Thanks!
Rachel says
These are the cutest things I think I've ever seen made out of rocks! I've linked to your project from my site here: http://www.allfreeholidaycrafts.com/Kids-Crafts-for-Summer/Rock-Bees
Hope that's okay! Please let me know if I can continue linking to your projects in this way in the future!
Thanks!
creativejewishmom/sara says
love these Amanda! thanks so much for sharing on Craft Schooling Sunday!
Rachel at Sun Scholars says
Those are so cute!!
I would love for you to stop by my blog and share this at my For the Kids link party! Stop by and join in on the fun!!!
http://sunscholars.blogspot.com/2011/05/for-kids-friday-9.html
Michelle L. says
Cute to the max! Great tip about propping up the wings, too – thanks for the tute!
Nama Halacy's Comfy Cottage says
My grandies and I will be making these cute little bees, you are so clever!
Rose @ Walnut Acre says
These are so cute! :-)
Handy Man, Crafty Woman says
Those are so, so cute!!
Ally Cooper says
So cute Amanda, this might be just what I need to do to keep my kids from freaking out every time they see a bee!
Tami says
So darn cute, Amanda!
Megan says
Very cute. I love bumblebees. At least from a distance. ;) It would make me smile to see these guys everyday. At first I thought the wings were old pairs of glasses with the glass removed. I see now it is wire but that would be a great recycle kind of craft for old glasses. Great one Amanda!
RedTedArt says
I LOVE! These are very very cute. Love the little wire wings!
Thank you for sharing on Kids Crafts Party!
Maggy
Nicole {tired, need sleep} says
These are absolutely adorable! I know my son will love making these – thank you!
CraftyMummy says
So cute!!
Cathy says
Those are adorable!
Sue says
These are so cute Amanda! I have a "thing" for bees (cute ones, anyway):) I've painted some on rocks also, but they are not as cute as yours. I LOVE the wings!
DebWestbury says
With Bees and Lady Bugs you must create more…maybe as rockpets for your garden…
Nichol says
What a cute idea. I run a daycare the kids would love this.
Jenny @ Embellishing Life says
These are adorable! I've seen ladybug ones, but these bees are so cute. Great idea using the wire for the wings. :)
The Scorpio Woman says
This is so cute and original. I'll probably try it with my son.
Lana @ Never Enough Thyme says
These are so cute! My granddaughter would love to help make these.