
If you’ve followed this blog with any regularity you probably know that I love tree crafts. I’ve painted several trees and even used recycled denim to make one, and this tree silhouette is no exception.
I have a board on Pinterest where I collect things that inspire me. If I’m thumbing through a catalog and see something I’ll look it up online and save it too. It’s actually a good idea, because there have been many times I’ve found something for sale on a website and go back months later to find that it’s not only sold out, but has also been removed from the website.
Because of Pinterest I’ve been able to save many such inspirational items, even long after their website had pulled it from their virtual shelves.
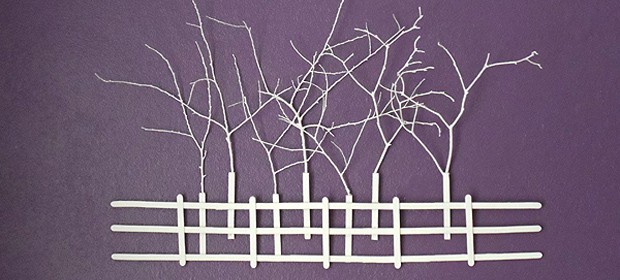
I pinned this “Birch Tree Wall Art” from an online store called The Paragon. Three months after pinning it I went back and the item was gone. Sold out or discontinued, but no longer living on their site. Luckily the photo was still living on Pinterest.
I decided to create something similar by using only three supplies… paint, twigs and a bunch of craft sticks![]() .
.
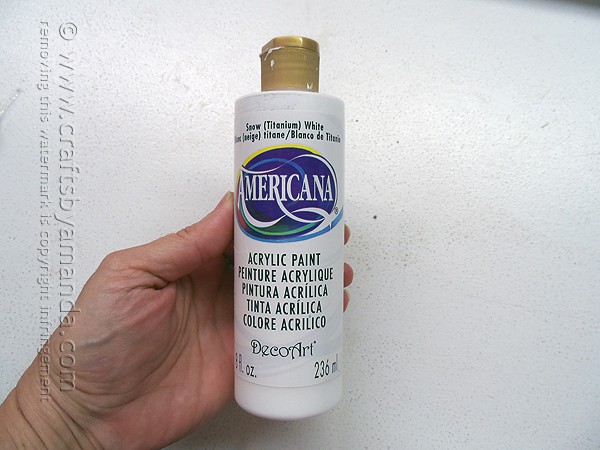
Americana has quite a few shades of white. I really wanted this to pop against the wall, so I chose the white of all whites, Americana Snow, Titanium White![]() .
.
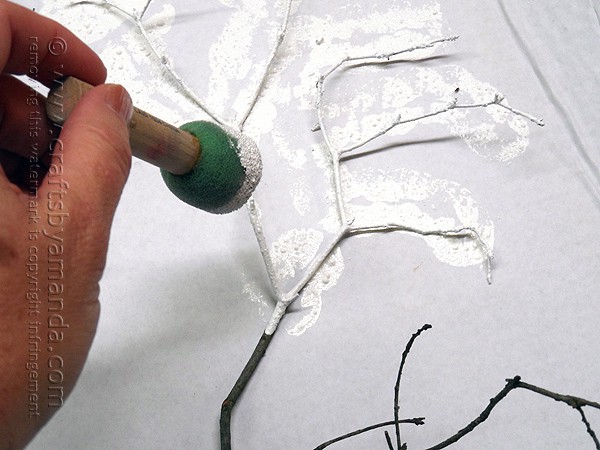
After choosing my twigs and breaking off any stray pieces, I used my sponge applicator to apply the paint. You could certainly use spray paint if you prefer.
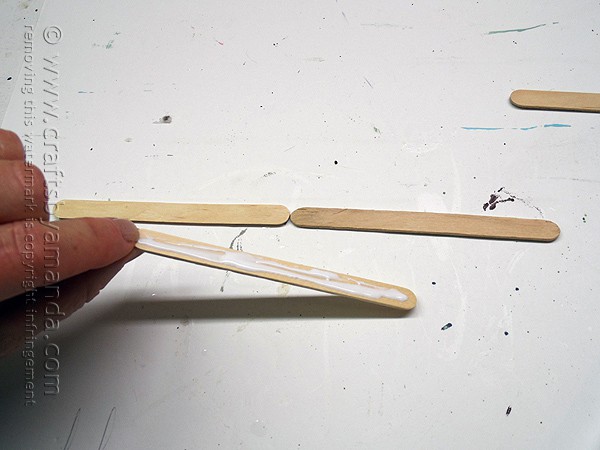
Creating the fence was easy. I lined up two craft sticks, end to end. Next I ran some white craft glue along the full length of a third craft stick, and pressed it onto the other two, lining it up in the center of the two. This joined them together.
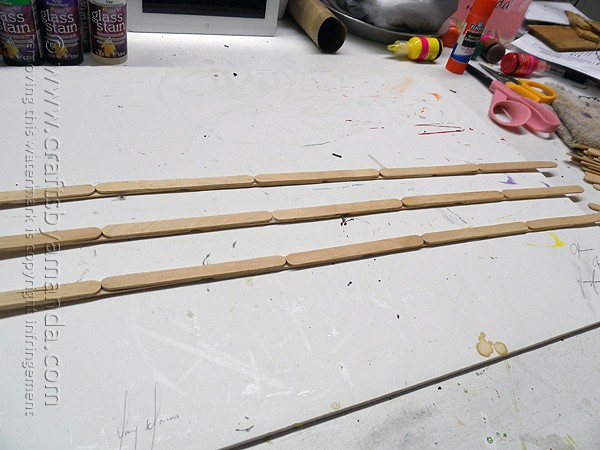
Basically, that third craft stick holds the first two together. All in all, each fence rail has 6 craft sticks in front, end to end, and 5 craft sticks in the back, holding them all together.
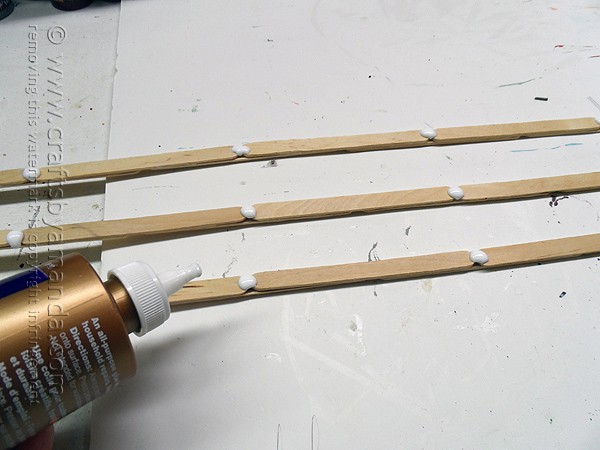
Now add some glue to where each of the craft sticks meet.
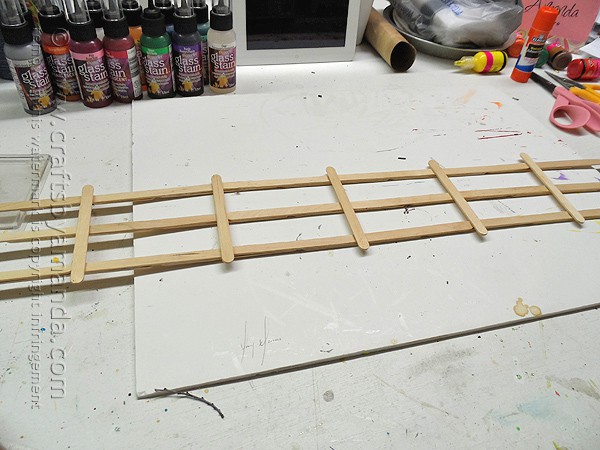
Press a craft stick in place for each section creating the fence posts. Set that aside to dry.
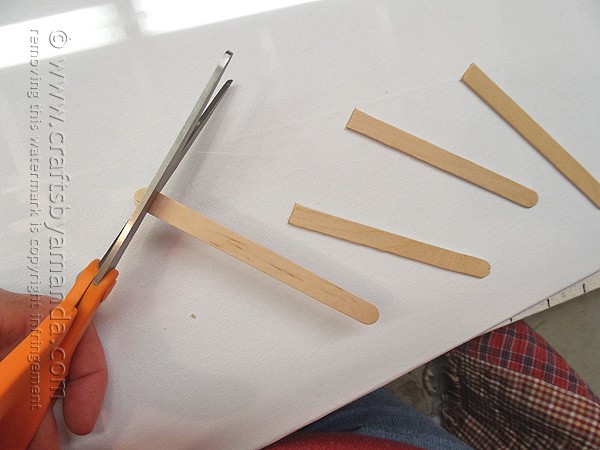
For the trees, cut off the rounded ends off of 7 crafts sticks (for 7 trees).
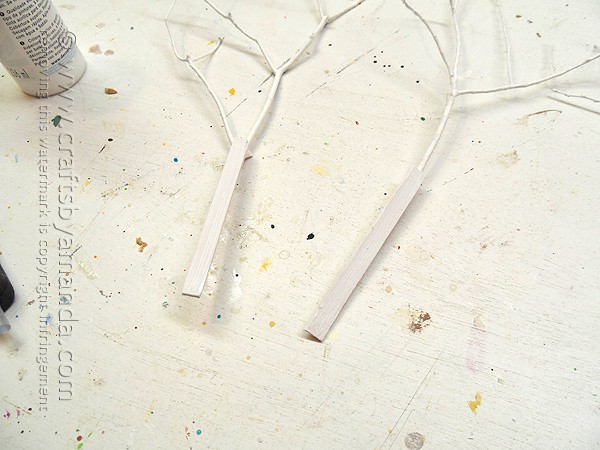
Hot glue the squared off craft sticks to the twigs, creating a trunk. Paint the trunks and the fence.

You decide where you want your trees, then hot glue them to the back of the fence.
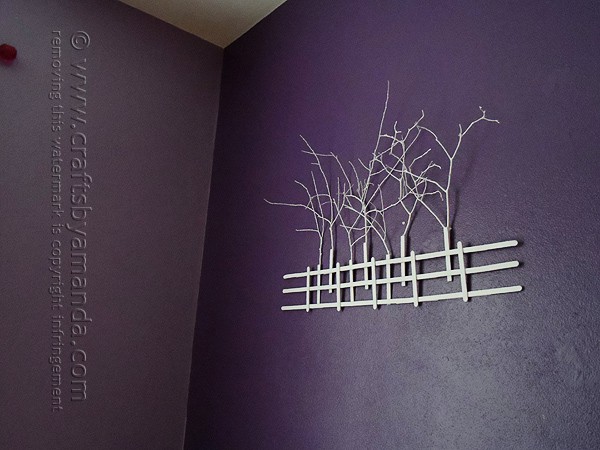
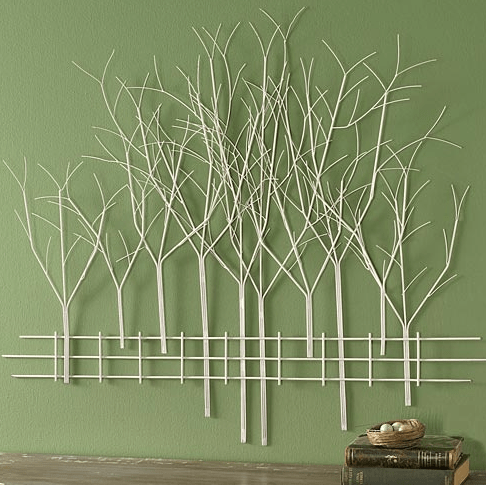
Hang it directly on a colored wall using wall putty or Command Picture Hanging Strips![]() .
.
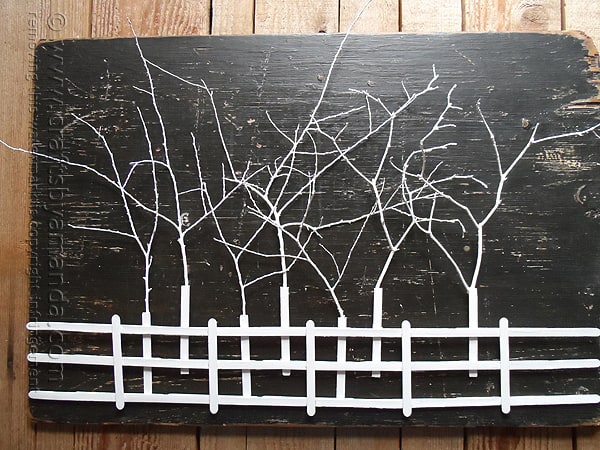
It would also look great attached to a dark background, like a piece of distressed painted plywood or a solid painted canvas.
Hope you enjoyed the project and it inspires you to try to recreate something with your own style!
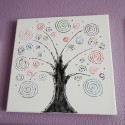
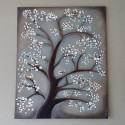
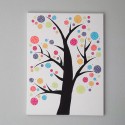
More Tree Crafts
If you like tree crafts, I have hand picked several of my favorites below. Or if you prefer, you can find all my tree crafts here.


Stick Tree Silhouette
Supplies
- Americana acrylic paint – Snow White or spray paint if you prefer
- Twigs from the backyard
- 43 craft sticks
- Tools: Sponge applicator white craft glue, hot glue gun
Instructions
- After choosing my twigs and breaking off any stray pieces, I used my sponge applicator to apply the paint. You could certainly use spray paint instead!
- To create the fence line up two craft sticks, end to end. Next run some white craft glue along the full length of a third craft stick, and pressed it onto the other two, lining it up in the center of the two.
- Basically, that third craft stick holds the first two together. All in all, each fence rail has 6 craft sticks in front, end to end, and 5 craft sticks in the back, holding them all together.
- Now add some glue to where each of the craft sticks meet. Press a craft stick in place for each section creating the fence posts. Set that aside to dry.
- For the trees, cut off the rounded ends off of 7 crafts sticks (for 7 trees).
- Hot glue the squared off craft sticks to the twigs, creating a trunk.
- Paint the trunks and the fence.
- You decide where you want your trees, then hot glue them to the back of the fence.
- Hang it directly on a colored wall using wall putty or 3M wall hanging strips.
- It would also look great attached to a dark background, like a piece of distressed painted plywood or a solid painted canvas.
There are Amazon affiliate links in this post. Therefore, if you click on one AND happen to purchase something while you are there, I will earn a small commission. :)
- DIY Mosquito Repellent Candles - July 10, 2026
- Mason Jar Solar Lights - July 3, 2026
- Patriotic Pinwheels - June 23, 2026


Unique says
REALLY love this! I will try to make it.
Amanda Formaro says
Thanks! Hope you enjoy it :)
Pat Kichinko says
Oh, I really, REALLY love this! I need to make one for my sewing/craft room. I love the distressed wood look, so I’m going to go for that. Thanks! When I hang it up, I’ll send you a photo! Keep the trees a-comin’! I need to see if you have a “Tree through the Seasons” craft: same tree through all four seasons. That would go up over my sewing table!!
Amanda Formaro says
Hi Pat! I have one of those on the brain, but not realized yet. Hope you enjoy making this!