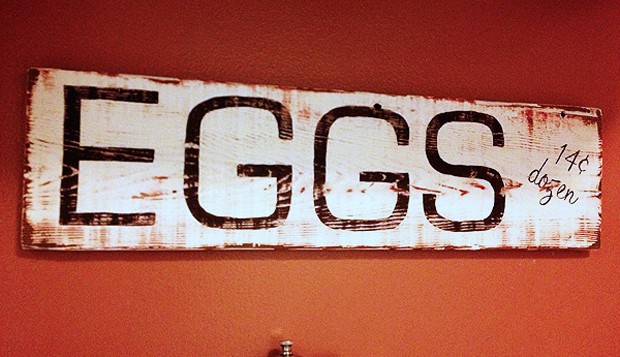
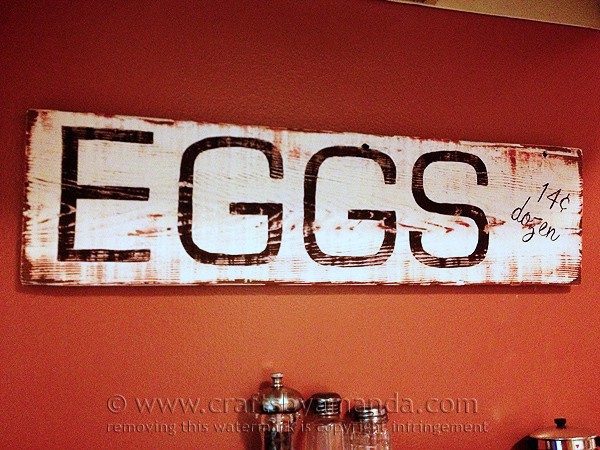
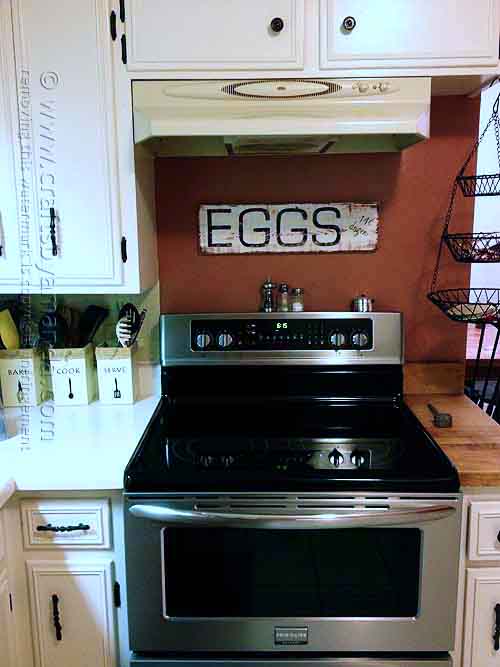
It’s no secret that I love distressed items. Making something look vintage or distressed really isn’t that hard, but starting with the right surface can make all the difference in the world. This distressed egg sign was made by using an old grainy piece of wood. The plank itself had a lot of raised grains, making it ideal for distressing.
Older pieces of wood are ideal to work with because they have flaws. The flaws are what give the piece character and make it look so vintage.

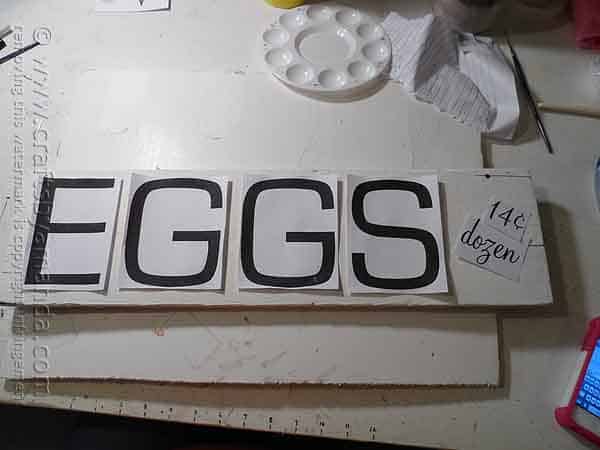
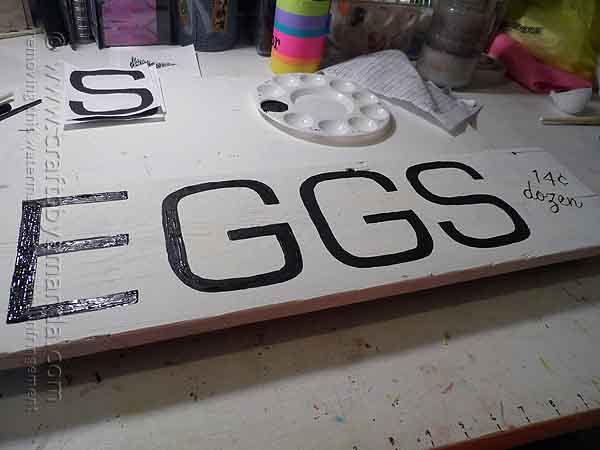
I used Americana acrylics for this project, colors: Warm White, Soft Black and Country Red. I started by going into Word and typing letters EGGS. I used the Eurostile font. For the “14 cents dozen” words I used the Monterey BT font. To make the cents symbol in Word click on Insert > Symbol and look for cents sign.
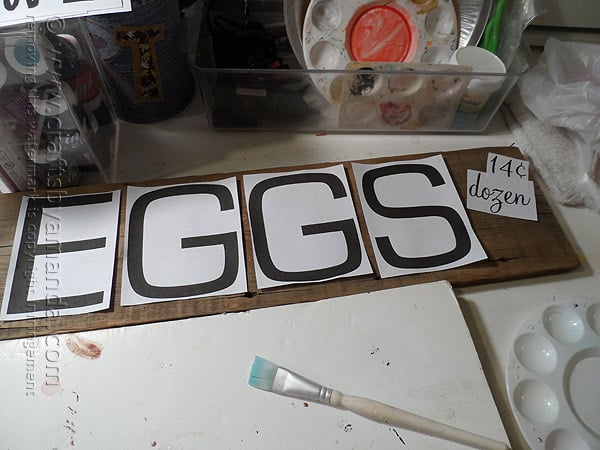
Because your wood plank may vary in size from mine, you may need to print a few copies until you get the size where you want it. The font size that I used for EGGS was 500 (yes, five hundred). The font size for the price statement was 150. This yielded 5 pieces of paper, one letter per sheet and another sheet for the price statement. Once printed, I laid the letters out on the plank just to make sure everything fit.
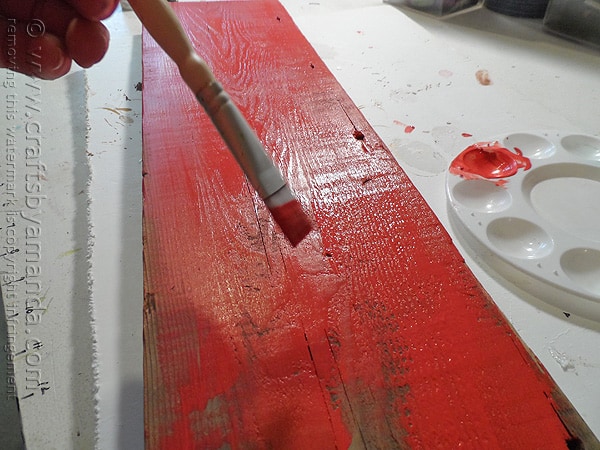
Setting the print-outs aside, I then painted the plank with Americana Country Red. I allowed this to dry for a couple of hours.
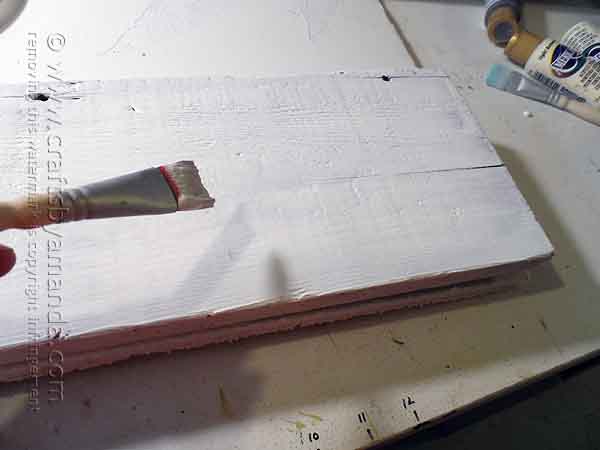
Once dry, I added a coat of Americana Warm White over the red. After letting that dry for about 30 minutes, I added another coat of Warm White and let it dry completely.
Next, position the letters over the white plank.
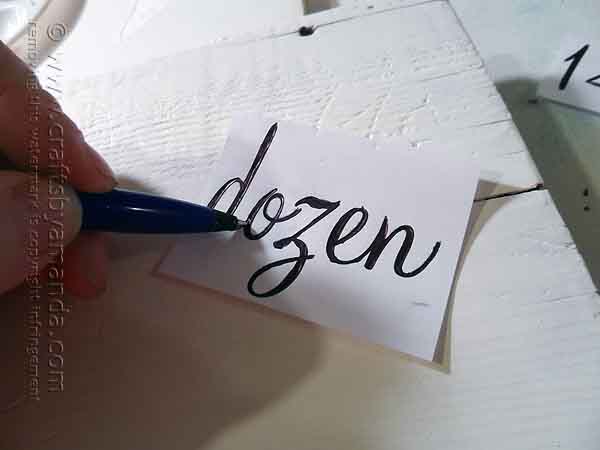
Use a ball point pen to trace the letters which will leave indents in the wood.
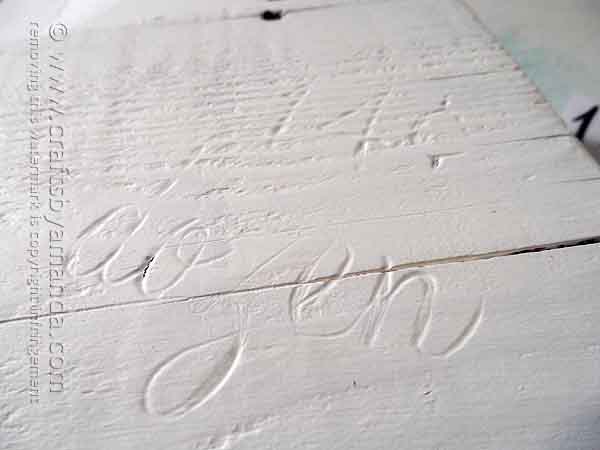
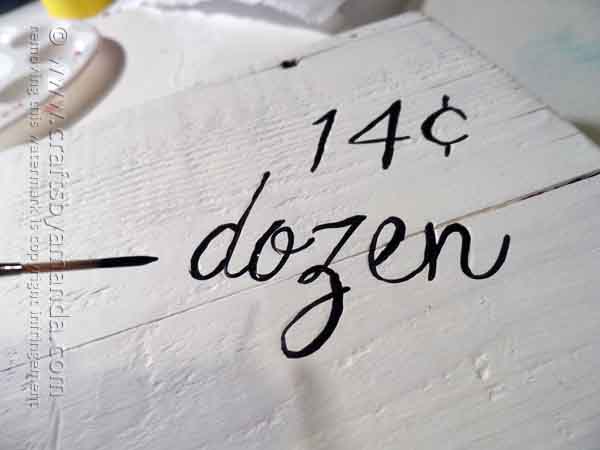
Use a fine liner brush to paint the letters with Americana Soft Black.
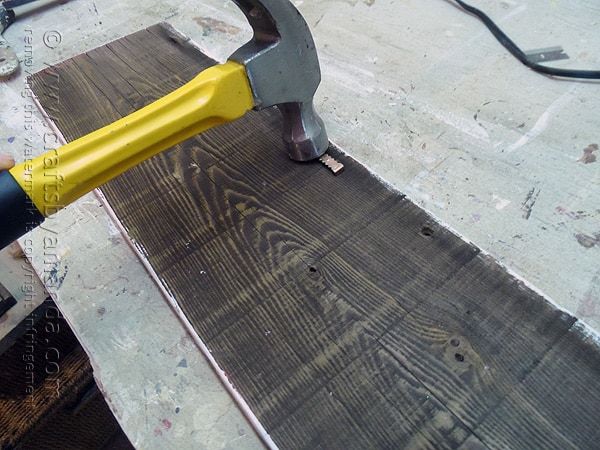
Before we move on to the distressing, add a sawtooth hanger to the back of the sign using a hammer.
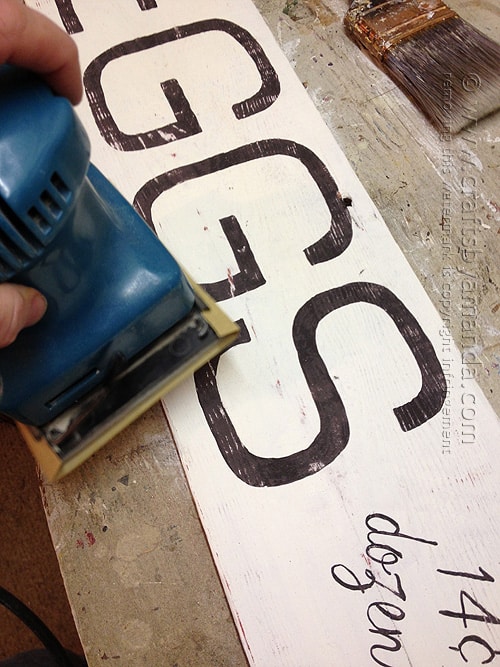
It’s important to make sure the paint has dried completely. If it’s still damp all you are going to do with the sander is smear the surface. So as long as your paint has had ample time to dry (3-4 hours), start running a hand sander over the edges to remove the white paint and expose the red beneath. In some areas you will want to expose the bare wood as well. This part is completely up to you.
Control the sander, use it lightly in some areas and press harder in others.
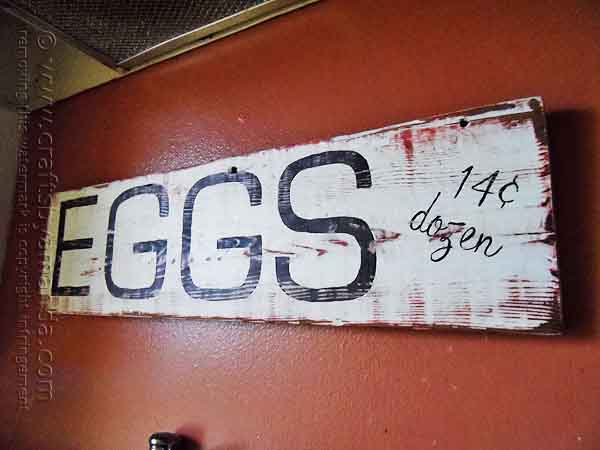
When you are happy with the way it looks, dust it off with a soft brush and add a couple coats of acrylic sealer, I prefer to use a spray. For vintage looking items like this, matte or satin finish is best. Have fun!

Vintage Egg Sign
Supplies
- Americana Country Red
- Americana Warm White
- Americana Soft Black
- Word document pattern
- Plank of grainy wood
- Sandpaper and hand sander
- Liner brush
- Ballpoint pen
- Clear acrylic sealer matte or satin finish
- EGG Word document
Instructions
- I started by going into Word and typing letters EGGS. I used the Eurostile font. For the "14 cents dozen" words I used the Monterey BT font. To make the cents symbol in Word click on Insert > Symbol and look for cents sign.
- Because your wood plank may vary in size from mine, you may need to print a few copies until you get the size where you want it. The font size that I used for EGGS was 500 (yes, five hundred). The font size for the price statement was 150. This yielded 5 pieces of paper, one letter per sheet and another sheet for the price statement. Once printed, I laid the letters out on the plank just to make sure everything fit.
- Setting the print-outs aside, I then painted the plank with Americana Country Red. I allowed this to dry for a couple of hours.
- Once dry, I added a coat of Americana Warm White over the red. After letting that dry for about 30 minutes, I added another coat of Warm White and let it dry completely.
- Next, position the letters over the white plank.
- Use a ball point pen to trace the letters which will leave indents in the wood.
- Use a fine liner brush to paint the letters with Americana Soft Black.
- Before we move on to the distressing, add a sawtooth hanger to the back of the sign using a hammer.
- It's important to make sure the paint has dried completely. If it's still damp all you are going to do with the sander is smear the surface. So as long as your paint has had ample time to dry (3-4 hours), start running a hand sander over the edges to remove the white paint and expose the red beneath. In some areas you will want to expose the bare wood as well. This part is completely up to you.
- Control the sander, use it lightly in some areas and press harder in others.
- When you are happy with the way it looks, dust it off with a soft brush and add a couple coats of acrylic sealer, I prefer to use a spray. For vintage looking items like this, matte or satin finish is best. Have fun!
I originally made this project for DecoArt.
- Swirling Twirling Ladybugs - July 21, 2026
- Drip Tie Dye Backpack - July 17, 2026
- Mini Coastal Clay Houses - July 14, 2026


Jennifer says
Where would you recommend the best places are to find your wooden planks??
Amanda Formaro says
Hi Jennifer. Flea markets are a great place, but you can use any kind of wood plank. You can distress it yourself by hitting it with a hammer, hammering and removing nails, hitting it with a chain, etc :)
Tam Francis says
What a GREAT sign. This is my first year having chickens and fresh eggs. I love it. I’ve been thinking of making some signs to go with them! I love this idea and very clever with the ballpoint pen creating an indentation to follow with you paint. I’ve done a lot of signs and find using one of the paint pens handy to straighten out lines :)
Thanks for the inspiration
~ Tam Francis ~
Amanda Formaro says
Thanks Tam! Yes paint pens are great for cleaning up lines, I agree!