If you’ve ever wanted to try silk screening at home, there’s a new kit on the market that allows you to create your own custom designs. You can certainly buy pre-cut screen stencils as well, but I think the fun part is being able to create your own. My daughter is a senior in high school and there have been several times this kit would have come in very handy. Powder puff games, spirit wear day, etc.

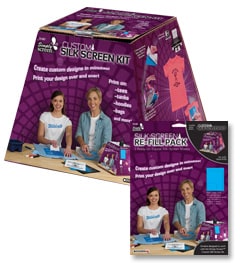
Plaid recently introduced the Simply Screen Custom Silk Screen Kit, available at Hobby Lobby stores. They provided me with a kit to try out and review. The kit comes in a large, oddly shaped box, and includes some starter screens, sponge, starter paints, squeegee, light bulb and housing, paintbrush and rinsing tray. The box doubles as a light box for exposing the screens (hence its odd shape), so make sure you don’t throw it away! You can purchase refill packs of the screens, but you only have to purchase the kit itself once.
Unlike traditional screen printing, you won’t need any transparencies, and there’s no need to reverse your images. You simply print out your design or draw it freehand with a Sharpie marker. this kit is only available through Hobby Lobby, so if there isn’t one near you, you can order everything via their online store. You can screen print onto clothing, fashion accessories, pillows, curtains, anything you can think of that has a fabric surface.
The Experience
I want to start off by saying that I definitely had some difficulty in the beginning using this product. I felt that the instructions were rather vague and left me trying to figure out what I was really supposed to be doing. If it hadn’t been for a group of other crafters I was able to chat with that were trying the same product, I think I probably would have given up. Luckily Plaid was very receptive to our feedback and will be adjusting their instructions and making things a bit more clear for the end user, the consumer. They also provided some insight and tips that improved my results.


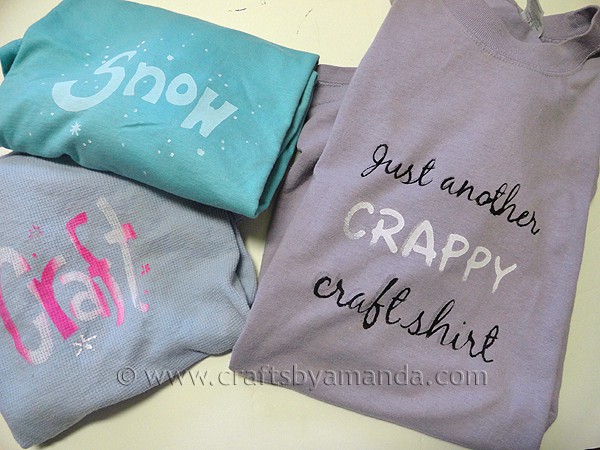
After Plaid gave us a few tips and explanations, things got easier, and I even got excited about trying some new designs. Unfortunately by the time I got it figured out, I had run out of screens. I was able to get a few good results and am not giving up. I’ll be purchasing another pack of screens and trying some more designs now that I have the hang of it. It’s actually quite cool and there’s so much potential. The screen stencils are reusable, just wash them out and let them dry. This allows you to make multiple items from one screen. Nice!
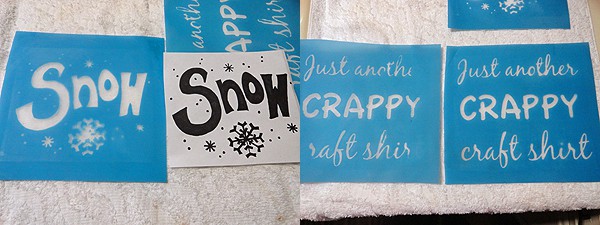
So here’s a basic run down of how this kit works. First, understand that the screens can be exposed with bright light or direct sunlight. So dim your lights and draw your curtains first. Once you’ve printed your design or drawn it with a marker, trim it with scissors. Then you use an appropriately sized screen, peel off the backing and place your design face down on the “sticky” side. It really isn’t sticky, but I’m referring to the side that you peeled the backing from. Your best bet is to actually place the screen in the box, then place your design face down onto it so you don’t have to lift and move them. This is where you would place a piece of glass on it if you have finer details. I used painter’s tape to hold it down and it did fine, but in the future I’ll use the glass tip for every design. Then you expose the screen for 25 minutes. Not 30, not 20, but 25. The timing is actually really important, so using a kitchen timer and don’t get distracted.


The Review
So overall, once the instructions have been refined, I’d give this product a 4 out of 5 stars. As it stands though, I would be an upset Hobby Lobby customer and would want my $40.00 back. Since I’ve never done traditional screen printing, I have really no idea of the cost comparison, I just know that $40.00 is a lot to shell out to be disappointed. However, from what I hear, $40.00 is a great deal for a home silk screening kit, provided it yields the results you expect. Once the instructions have been refined, I can see this product doing quite well.
While the initial kit comes with all you need to create several designs, once you have the hang of it and you want to do more, there are several other products available to you. The screen refill packs available for purchase go for $20.00, bottled paints in a variety of colors are $3.00 each, pre-made stencil designs run $10.00 each, and other accessories can be purchased, such as glitters and foils. The product also comes with an idea guidebook and Plaid has a website set up where you can watch demonstration videos, see sample designs, and read about the product.
I’m actually pretty pleased with this product and can finally see all the possibilities. I really want to try some new designs again and will be buying some screen refill kits in order to do so.
- St. Patrick’s Day Activity Sheets - March 4, 2025
- Watercolor Luminaries - February 11, 2025
- Free Valentine Printables: Cards, toppers, and tags - February 4, 2025


Becky says
Just reading this for the first time (2019). I did silk screen painting last summer by making my own stencil using the Cricut, and made the screen out of a embroidery hoop and nylon material. worked great I did one design on the nylon by holding the nylon on top of the paper and tracing it with a blackpermant marker and painted mod podge to on the areas where i didn’t want the the paint to show. I did about 2-3 layers once dry I silk screened about 50 shirts I washed the screen every 3-4 shirts. my shirts had a layer of a sun that was gold and words that were blue. First I did the suns and let dry for 24hours and then did the lettering and let dry for the weekend becuase I was gone. but once dry I ironed with awith a thin cloth over the paint with a plain iron. each shirt had newspaper inside so the paint didn’t bleed through or iron though.
Amanda Formaro says
That’s awesome Becky! Thanks so much for sharing your method!
J.D. Washington says
I have this kit and would like more emulsion sheets. Plaid said the kit and sheets are discontinued. Do you know of a brand of emulsion sheets that I can get to go with this kit?
Amanda Formaro says
I’m so sorry, I wish I did. :(
Ginny says
I got these for a dance team I coach and have been able to make shirts for the team. They work well but I found that large designs (several parts and words) takes too long to paint and the paint will actually dry in the screen, and you wont be able to use it again. This happened the first time. I actually cut every part of the design as a single piece and use it on 2-4 shirts at a time then wash it immediately so the paint doesn’t stay and dry in the design. Then you can reuse it on 2-4 more shirts and continue. I made 18. Also make sure to use enough paint in both directions so the design doesn’t come out light. I wish I could get the refill packs cheaper, but I guess Ill just use my 40% coupon. The instructions are better but they don’t really explain if you have to heat set. Did you heat set with iron and how did it do after washing??
Amanda Formaro says
Hi Ginny. To be totally honest, it’s been three years since I did that tutorial and used that kit. I’ve since given it away to a neighbor. I cannot remember for SURE but I’mm 99% positive there was no heat setting involved.
Mandy says
This blog is great! I saw this product in Hobby Lobby and was debating buying it but I wanted to read some reviews before I did. This helped so much!! But I had a question for you. I’m creating shirts for my sister’s Bachelorette weekend and I was wondering if you can reuse a screen? I need to make multiple shirts with the same design and I don’t want to have to remake the design for every shirt. Thank you for any help you may be able to offer.
Amanda Formaro says
Yes you can use the design multiple times! :)
Amanda says
Looks interesting! I’ve always wanted to try screen printing, so it could be a good buy. I’ll definitely have to wait until they clear up the directions, though; I’m a little slow. ;)
Angie @ Bigbearswife says
I use to do screen printing when I was in middle school, on the bog presses. It was a lot of work…….well I remember it being a lot of work haha. I Think this would be kinda neat. I don’t know if I’d buy one tho. I usually do my shirts by cutting out designs on freezer paper with my Cricut, and using it as a stencil to paint on clothes.
ColleenwithMurals&More says
Love your designs, Amanda! Perfect for teens (or adults ;) I love your review – honest and accurate. I hope Plaid sees this. I feel the same as you – I’ve ordered more screens now that I feel a little more confident. The kit has loads of potential.
Amanda Formaro says
Thanks Colleen! I’m actually pretty happy with the kit now after trial and error. I’d have been a HOT customer if I had bought it though. I think they need a troubleshooting sheet in the kit too.
niki says
Great Post!! Thanks for being real. sounds like a lot of potential in the Screen printing kit. I’ll look forward to seeing it in a store near me!! :)
Amanda Formaro says
Thanks Niki!
It’s actually quite a cool product once I got past all the trial and error!