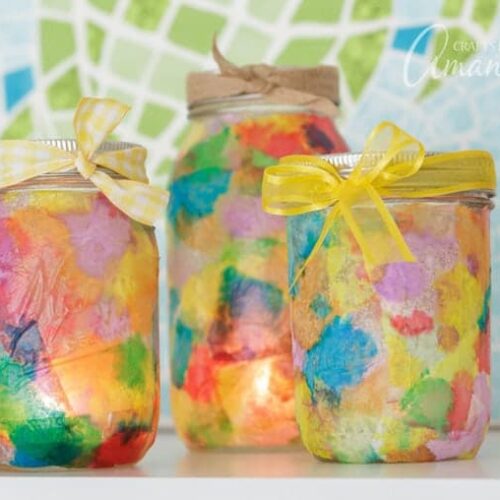
Using a simple watercolor paint palette and ordinary white coffee filters, we will create these beautiful watercolor luminaries!

How to Make Watercolor Luminaries
These watercolor luminaries are made in a similar fashion to tissue paper luminaries, but you are creating the colors and designs yourself. I created a random pattern for mine, but you could create specific designs like flowers or a sky scene on your watercolor luminaries. This project is perfect for adults, seniors, and even kids. They’d also make a sweet “mommy and me” project or great for a craft night activity with girlfriends!
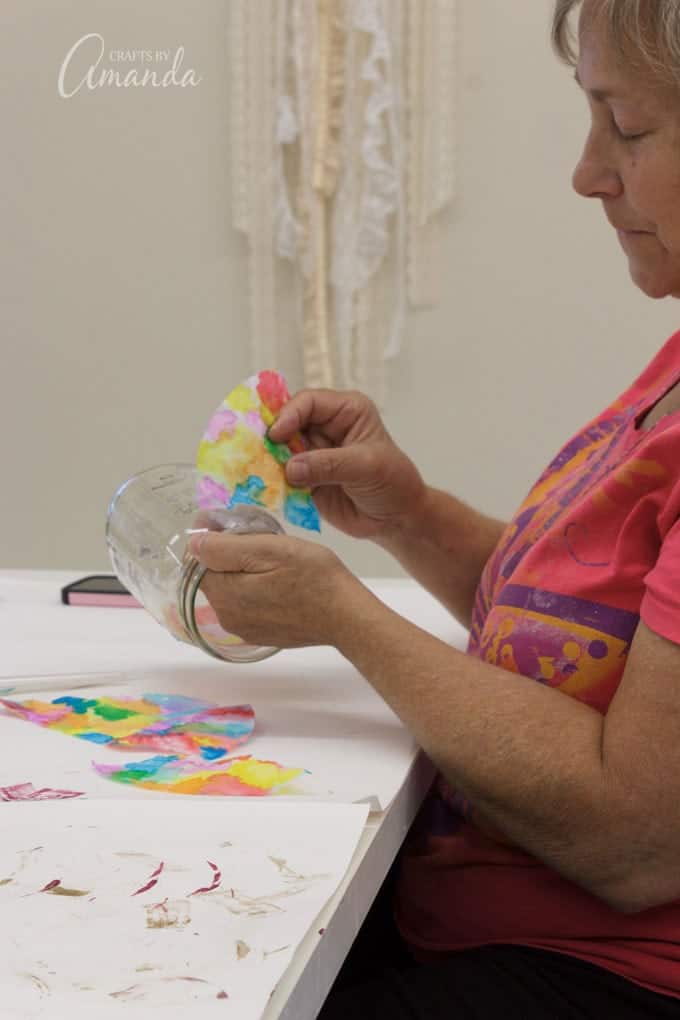
You’ll see I painted a lot of coffee filters. I really ended up needing only one filter for each small jar and about one and a half for each large jar. So I have saved the remaining colorful coffee filters for another project. Maybe I’ll make these coffee filter butterflies with my friend Debra’s grandkids!

While all of mine are multicolored, I think these would be gorgeous choosing specific hues. For example, using only blue and green and leaving some areas of the coffee filter white, you’ll create a soothing sea-inspired luminary. On the other hand, using red, yellow and orange watercolor paint will invoke a warm sensation in any room!

Supplies You Will Need for Watercolor Luminaries
For one luminary:
- 1 glass mason jar
- 2 white coffee filters
- Watercolor paint and paintbrush
- Mod Podge matte or another decoupage medium
- Large paintbrush or sponge applicator
- Ribbon or twine
- Paper towels
How to Make Watercolor Luminaries
- Lay paper towels out on the work surface.
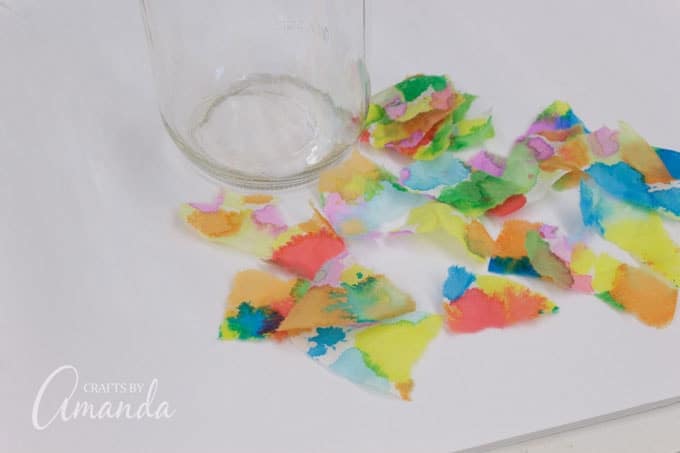
- Place coffee filters onto the paper towels and paint with watercolors.

- Allow coffee filters to dry.
- Tear painted coffee filter into pieces. The size is up to you, it just makes them easier to attach to the surface of the jar. Smaller pieces (about 2-inches) mean less wrinkles.
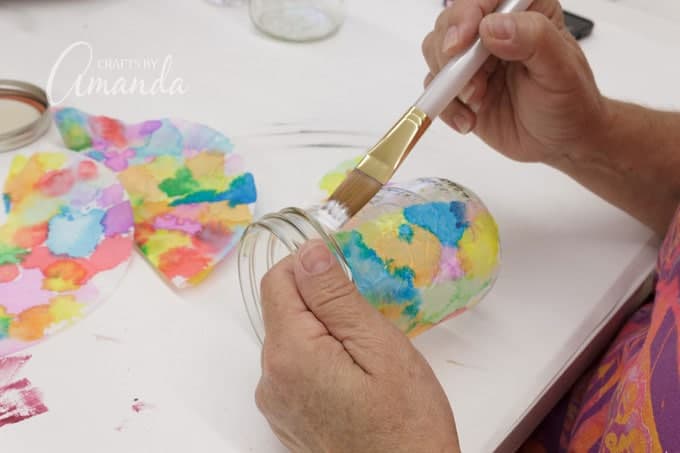
- Apply a thin coat of Mod Podge to a small section of the jar.
- Place a piece of the coffee filter onto the Mod Podge, then apply a thin coat over the top to secure it to the jar.
- Repeat the last two steps, overlapping the pieces slightly, until your jar is covered (leaving the rim untouched).
- Apply a final generous (but not dripping) coat of Mod Podge over everything.

- Allow it to dry completely.
- Add a ribbon or twine around the rim of your jar, securing with white glue, Mod Podge, or hot glue.

I love the way my luminaries came out. I really do wish I had made some of my coffee filters in just blue and green tones, those would have been very beachy! Luckily this is an extremely inexpensive craft, so I could definitely make more.

More Luminary Crafts
Check out my collection of 25+ luminary crafts that include holiday-themed luminaries and so much more! Or, here are a few of my favorites below.
- Doily Luminaries
- Epsom Salt Luminaries
- Striped Beach Luminaries
- Faux Stained Glass Mosaic Luminary
- Winter Luminaries: Snowy Pinecone Luminaries

Watercolor Luminaries
Supplies
- 1 glass mason jar
- 2 white coffee filters
- Watercolor paint and paintbrush
- Mod Podge matte or other decoupage medium
- Large paintbrush or sponge applicator
- Ribbon or twine
- Paper towels
Instructions
- Lay paper towels out on the work surface.
- Place coffee filters onto the paper towels and paint with watercolors.
- Allow coffee filters to dry.
- Tear painted coffee filter into pieces. The size is up to you, it just makes them easier to attach to the surface of the jar. Smaller pieces (about 2-inches) mean less wrinkles.
- Apply a thin coat of Mod Podge to a small section of the jar.
- Place a piece of coffee filter onto the Mod Podge, then apply a thin coat over the top to secure it to the jar.
- Repeat the last two steps, overlapping the pieces slightly, until your jar is covered (leaving the rim untouched).
- Apply a final generous (but not dripping) coat of Mod Podge over everything.
- Allow to dry completely.
- Add a ribbon or twine around the rim of your jar, securing with white glue, Mod podge, or hot glue.
This post was originally published on this blog on Aug 2, 2017.
- Tie Dye Beach Towels - July 24, 2026
- Swirling Twirling Ladybugs - July 21, 2026
- Drip Tie Dye Backpack - July 17, 2026


Mary Hartzheim says
So lovely … for ANY age!!
milli says
will these last outside?
Amanda Davis says
Only if you use Outdoor Formula Mod Podge
Lellalee says
Oh I love this idea – it is so cute and a lovely weekend project. I really enjoy making things that are unique to me and could come out 100 different ways if I made another! Lovely.xxx
PATRICIA says
Love this idea.
Sylvia Douglas says
ww have loads of acrylic paint will it work ?
Amanda Formaro says
Likely not with acrylic.
Pat Schutz says
I plan to try the coffee filter luminaries. I have everything I need already. I have made flowers with coffee filters. Turned out gorgeous! And for many many years have made luminaries out of lunch bags, kitty litter and a little tea light candle. We line them up from the street to the house for Halloween. Kids always love them! And my husband “took charge” of getting them ready and keeping them lit, and he’s not much of a crafter, but enjoyed watching the kids. No trick or treating this year! Thank you for the idea. Pat Schutz
Phillip Segretto says
I pray I get into a senior complex that has crafts as I hate reruns on TV would rather be craf
Eleanor Gray says
Mine will be blue . I live at the beach and I am on a save our oceans mission.
Amanda Formaro says
Love that!