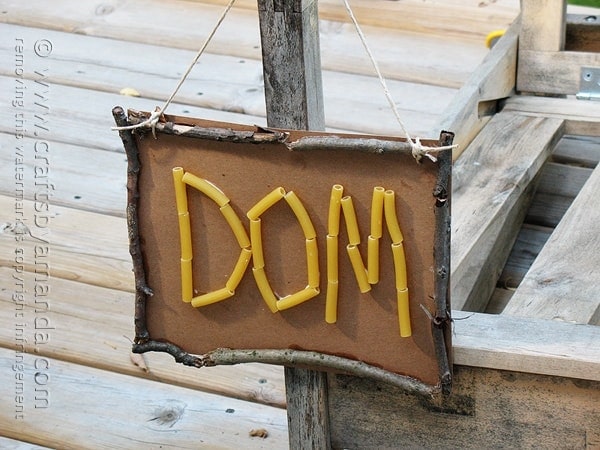
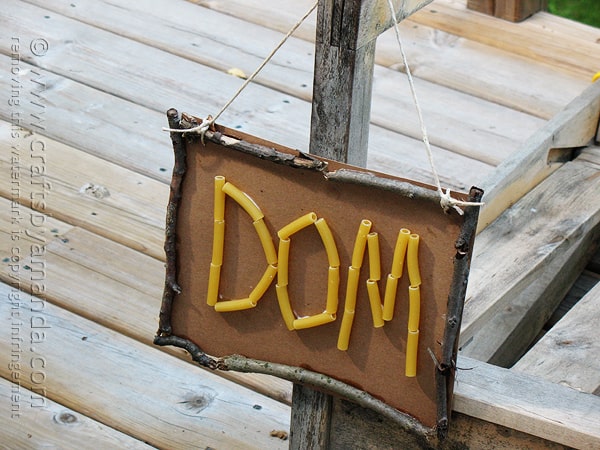
While this project is great for any time or any where, it’s a really great craft for camp! Imagine making this name plate and hanging it from the end of your bunk this summer. You’ll be the envy of your summer camp cabin. So get out in the yard and gather some twigs. Camp counselors, get this added to your activity list!
For this project I used dried pasta for the name, but you could easily substitute beads, pebbles, or even pennies! Have fun with it and make it your own.
Remember to respect nature! Never pull healthy twigs from a live tree. Always gather twigs that have already fallen to the ground. A great time to gather twigs is the day after a thunderstorm or storm with heavy winds. Look the twigs over for insect life. If you are unsure, you can bake the twigs in a 250 F oven for 30 minutes and let cool.
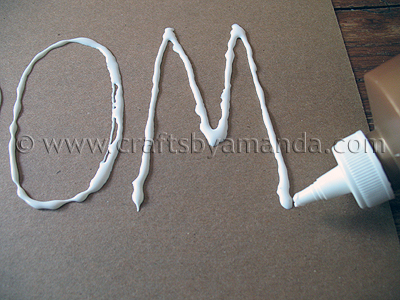
Starting an inch or so from the edge of the cardboard, use white craft glue to write your name.
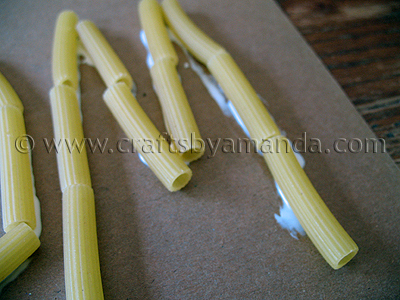
Place pasta noodles into the glue. Smaller noodles work great for smaller lettering or for letters with several curves (R, S, B, etc). Large noodles are good for basic letters. Use a combination of different noodles for a fun effect!
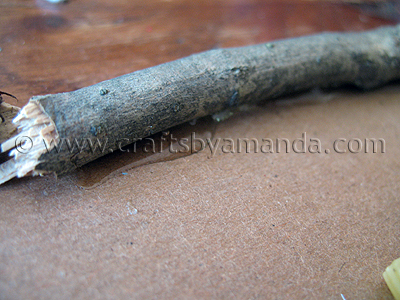
Place twigs around the border of the cardboard, breaking twigs into smaller pieces to make them fit, if needed. Pay attention to the curves in the twigs and be sure that there’s enough of the twig that will be flush with the cardboard. Once you have the placement you want, use instant grab glue to attach them to the cardboard. White craft glue can be used as an alternative but will require a longer drying time.
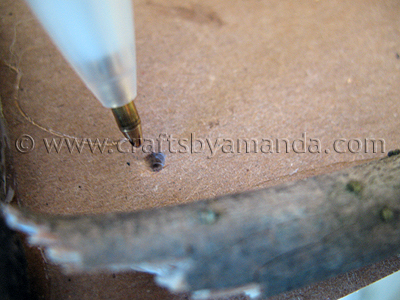
Use a pen to poke a hole in the cardboard at the top left and right corners, below the twig border. Use pen to poke the ends of a piece of twine through the holes and bring around the back and tie. Trim ends.
Optional: If you prefer the less rustic look, you can paint the pasta noodles and the twigs and cover the cardboard with construction paper or fabric.
Summer Camp Crafts
- 30+ Summer Camp Crafts for Kids
- Name Plate Can
- Acorn Mobile
- Colorful Walking Stick
- Winning Visors
- Camp Banner
Camp Crafts: Twig Name Plate
Supplies
- 8 ” x 10” piece of cardboard
- twigs
- dried pasta noodles
- white craft glue
- instant grab fast drying glue
- twine or hemp
- scissors
Instructions
- Starting an inch or so from the edge of the cardboard, use white craft glue to write your name.
- Place pasta noodles into the glue. Smaller noodles work great for smaller lettering or for letters with several curves (R, S, B, etc). Large noodles are good for basic letters. Use a combination of different noodles for a fun effect!
- Place twigs around the border of the cardboard, breaking twigs into smaller pieces to make them fit, if needed. Pay attention to the curves in the twigs and be sure that there’s enough of the twig that will be flush with the cardboard. Once you have the placement you want, use instant grab glue to attach them to the cardboard. White craft glue can be used as an alternative but will require a longer drying time.
- Use a pen to poke a hole in the cardboard at the top left and right corners, below the twig border. Use pen to poke the ends of a piece of twine through the holes and bring around the back and tie. Trim ends.
Expert Tips & FAQs
- Swirling Twirling Ladybugs - July 21, 2026
- Drip Tie Dye Backpack - July 17, 2026
- Mini Coastal Clay Houses - July 14, 2026


SJ @ Homemaker On A Dime says
Hi, friend! I'm admiring all your creativity here. Can you please share them with us at the Creative Bloggers' Party & Hop. Hope to see you there at the party :)
Mindie Hilton says
Would you come link your project up with me.
I would love for you to link it up to my party that is running now. Any linky goes.
http://bacontimewiththehungryhypo.blogspot.com/2011/06/any-link-goes-party-running-now-summer.html
Come strut your stuff.
Stockade says
Great craft project Amanda. After all the storms we've been seeing (and another on the way tonight) we have oodles of branches to choose from!
Cassy says
cute blog!
Im having a giveaway on my blog for a cute french damask pendant necklace…
cassylately.blogspot.com
creativejewishmom/sara says
love it Amanda, and thanks so much for sharing on Craft Schooling Sunday!
MoneySavingEnthusiast says
This is great. I am always looking for more "boy friendly" crafts.
RedTedArt says
Very cute! Love the camp theme! Perfect for summer!!!
Thank you for linking to Kids Get Crafty! Lovely to see you there!
Maggy
Leslie says
This is adorable! I am going to be camping pretty soon and will have to make this with my family!! Thanks for sharing!
I found you through the blog hop