
I made this light bulb ornament the same year I made the angel, snowman, and penguin , in December of 2000.
However, I never wrote a tutorial on this version. In fact, I made several of these, gave a couple as gifts and sold the rest in the craft store I used to own.
I’ll do my best to give you some general instructions in case you want to make one, but it’s been a while, so bear with me!
I’m not going to write the instructions out formally as I usually do, only because I might miss a step as it’s been 9 years since I made it.
So here goes.
Before I do though, here’s a video I made showing how to paint pine trees. For the light bulb ornament in this post, I used a tiny paint brush for the lights, giving them a soft glow.
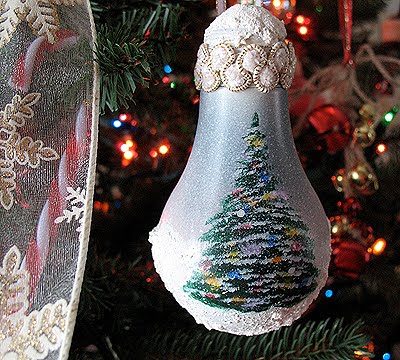
I usually prepare my light bulbs by making sure they are free of dust, rinsing in water, wiping off, then giving them a rinse in white vinegar. Usually I paint them with a brush, but this particular one I used spray cans. The reason I did that, and you can hopefully see in the photo below, was the create a sunset effect that would be more difficult with a brush (not impossible, just more difficult).
 I sprayed the bulb with a mauve first. Most of it won’t show in the finished product, but it’s still an important factor. After that was dry, I sprayed the top half with a dusty country blue, putting a thicker layer toward the top and just a dusting near the middle. The idea was to blend the blue into the mauve.
Note: You have to be careful with spray paint as it will run if you have a heavy trigger finger. Better to err on the side of caution and use several light sprays, letting them dry in between.
Next I painted the Christmas tree. That seems to be the “wow” factor of this ornament, and people comment on what talent I have, but really, the trees are very, very simple. Just check out the video demonstration above.
After adding the tree, and then the snow on the branches, I used a small paint brush and dabbed off all the excess paint, then gently dabbed on the “lights”. They blend into the snow and look like they are really glowing. :)
 To add the “falling snow” I splattered it with watered down white paint using a tooth brush.
I glued some rick rack around the neck of the bulb, gluing a loop of ribbon underneath the rick rack.
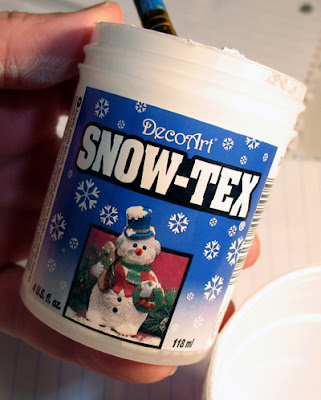
Lastly, I used Sno-Tex snow paint to cover the top of the bulb and to coat the bottom of the bulb as well.
And of course, the finishing touch was 2-3 coats of clear acrylic sealer (I used matte, not gloss).
How’s that for a tutorial? I feel like I could go make another one now! ;)
Christmas Tree Light Bulb Ornament
Supplies
- light bulb
- paint
- toothbrush
- paintbrush
Instructions
- I usually prepare my light bulbs by making sure they are free of dust, rinsing in water, wiping off, then giving them a rinse in white vinegar. Usually I paint them with a brush, but this particular one I used spray cans. The reason I did that was to the create a sunset effect that would be more difficult with a brush (not impossible, just more difficult).
- I sprayed the bulb with a mauve first. Most of it won’t show in the finished product, but it’s still an important factor. After that was dry, I sprayed the top half with a dusty country blue, putting a thicker layer toward the top and just a dusting near the middle. The idea was to blend the blue into the mauve.
- Next I painted the Christmas tree. That seems to be the “wow” factor of this ornament, and people comment on what talent I have, but really, the trees are very, very simple. Just check out the video demonstration above.
- After adding the tree, and then the snow on the branches, I used a small paint brush and dabbed off all the excess paint, then gently dabbed on the “lights”.
- To add the “falling snow” I splattered it with watered down white paint using a tooth brush.
- I glued some rick rack around the neck of the bulb, gluing a loop of ribbon underneath the rick rack.
- Lastly, I used Sno-Tex snow paint to cover the top of the bulb and to coat the bottom of the bulb as well.
- And of course, the finishing touch was 2-3 coats of clear acrylic sealer (I used matte, not gloss).
Video
- DIY Mosquito Repellent Candles - July 10, 2026
- Mason Jar Solar Lights - July 3, 2026
- Patriotic Pinwheels - June 23, 2026


Sue Polmateer says
A lovely Christmas ornament. Thanks for sharing
Donna says
Hi Amanda what web site did you use to help you with the ornaments?
Amanda Formaro says
Hi Donna! I’m not exactly sure what you mean? I didn’t use a website. There was a tutorial on a site MANY MANY years ago (probably 1999) where I learned to make the trees, but that’s long gone now. That’s why I made the video in this post, to help people see how the trees are made.
Debbie Ives says
I love the ornaments. I made probably 8 last yr and have saved every lightbulb that has blown since then.
So, you have to show some more designs for inspirational. I may give the same people duplicate. Lol
I had fun making them. I took a styrofoam board and made holes the size of the bulbs to set them in while the top dried Fun project
Amanda Formaro says
Great idea Debbie!
Julie says
Thank you for sharing all of your creative ideas. I want to try to make this ornament. Would you please tell me what kind of paint you used for the tree? Would a child’s watercolor kit work?
Amanda Formaro says
Hi Julie! For the actual tree it’s best to use acrylic craft paint, like Americana. I don’t think watercolors would adhere as well. Hope you have fun making it!
kristy says
love the idea what type of paper is this you use to paint the trees on ?
Amanda Formaro says
It was a pretty thick paper. Someone gave me the binder, some sort of artist sketchbook I think! It was just for demonstration purposes though and has nothing to do with the actual light bulb ornament :)
Simmone Roseau says
Amanda this was an awesome project. Like you I”ve been collecting light bulbs for some reason (of which you have now given me) to do something with. So now I can try these ornaments . I’m from a small island in the Caribbean so I may have to make some adjustments to them as we don’t have snow here and some of the materials you used are not accessible here. However , I really enjoyed this. Yout are very creative . Thanks again for sharing.
Simmone
Amanda Formaro says
Thanks so much Simmone! I would love to see your version when you make it :)
Fran says
I just love your light bulb ornament with the tree and by the way your tutorial is amazingly easy to understand. Thank you so much for sharing. I make a Santa claus with a light bulb and they turn out so nice also.
Amanda says
Thanks Fran, so glad the tutorial is easy to understand! :) I love the Santa light bulbs I’ve seen around, i’m sure yours are awesome!
Roxanna says
unable to open the pdf file it shows as an error, could you please send me a copy of the pdf for the tree.
Amanda says
I am uploading a video to You Tube right now on how to do this. Once it’s ready I will add it to the post! :)
Francie Workman says
This is so beautiful!! I tried getting the step by step PDF on doing the tree but it gave me an error. I sure would like to have it. Thanks.
Amanda says
I am uploading a video to You Tube right now on how to do this.
Francie Workman says
Thank you so much.
Debbie says
The link to the directions for painting the tree is no longer working! Actually, I think the website is no longer up. Can you give directions for painting the tree? Or a different website with the directions? Thank you so much. The ornament is absolutely beautiful!
Amanda says
Trying to get a video added for this now
karen s clark says
i saw your grinch gord. do you make and sell them? PLEASE
Amanda Formaro says
Hi Karen! No I’m sorry, i don’t sell them. I never made a grinch ornament though. So not sure’s whose you saw there :)
ruth says
amazing love it you did a beautiful job. thanks for the project
Amanda says
Thank you jean, how nice of you to say!
Anonymous says
YOUR CHRISTMAS TREE /LIGHT BULB ORNAMENT IS JUST FABULOUS! APPRECIATE YOUR SHARING THESE INSTRUCTIONS WITH ALL OF US! RESPECTFULLY,
JEAN
Holly says
This is beautiful. I am so making this next year (I am already way too behind for this year!)
Amanda says
Thanks ladies!
Jana says
Fun ideas!!
Come enter my linky party as well as the current giveaways!!
http://gigglesglitzandglam.blogspot.com/2010/12/glam-party-6-gifts-that-give-back.html
Sharon says
I love it! This is the first time I have seen your blog, just love everything!
Tru@TRU TALES FEATS says
That is so beautiful! I love the sunset look. You have a wonderful talent for painting.
Amanda says
Thank you Jerri and Sonia! I really appreciate your kind words :) I love that SnoTex paint!
Sonia says
I love this. You are a fabulous painter..the colors here look so awesome, and snow so realistic; I felt like you really preserved some real snow on it…lucky me that I stumbled across your blog!!
Jerri says
Wow! This looks fabulous. I'm not a painter myself, but my stepmom is. I'll have to tell her about this idea.
Thanks for linking up at the Holly Bloggy. I'm featuring several ideas from each of last week's events. I'll have to add this to the craft list tomorrow.
Amanda says
Judy that is so wonderful! I wish I could see them, thanks so much for telling me. The trees are really easy to do aren't they? And they produce spectacular results :)
Anonymous says
Amanda, I am far from a painter, actually I am NOT a painter, but man when I finished a few of your chirstmas tree bulbs I stepped back and said " AWESOME" and I will be giving sets as christmas gifts. Thanks for your wonderful art, Judy
Amanda says
Thank you Kathi! :)
kathi says
This one is sure to be an heirloom one day! Beautiful!
Amanda says
Thank you Shelby, it's one of my favorites! :)
Thank you for the compliments everyone :)
sharon brown says
I can’t get the video to come in plz help . THANK YOU
Amanda Formaro says
Hi Sharon. I’ve checked it several times and it’s working fine for me. Please try again, or click on the video title on the video display box and it should take you to the video on You Tube.
Kara@ Creations by Kara says
Thanks for stopping by my blogs today!! This is simply beautiful!!! I love the snowman and the penguin too. So cute!
tracy says
these bulbs are fab-i was sent here by janice (farmersgirl) LOL
foodie ffanatic says
What a fantastic use for these old lightbulbs now that we're all converting to the energy-efficient cfl bulbs. Very cool!
Julie says
Hi Amanda,
These are awesome – how do you stick the tree to the bulb? I’m wondering if you need special paper to draw the tree on? I can’t get sound on the video so apologies if you go through it on your vid :-)
Jules
Amanda Formaro says
Hi Julie! The video is actually just a demonstration of how to paint the tree since I didn’t have step by step photos of painting the actual light bulb. So the paper tree is unrelated to the actual bulb ornament. I just painted the tree directly onto the bulb.
artsy_momma says
I love how the tree looks!
HoneyB says
I'm impressed Amanda! The ornament is lovely! Its also blue which I love for Christmas. My tree is blue/white/silver/gold!