

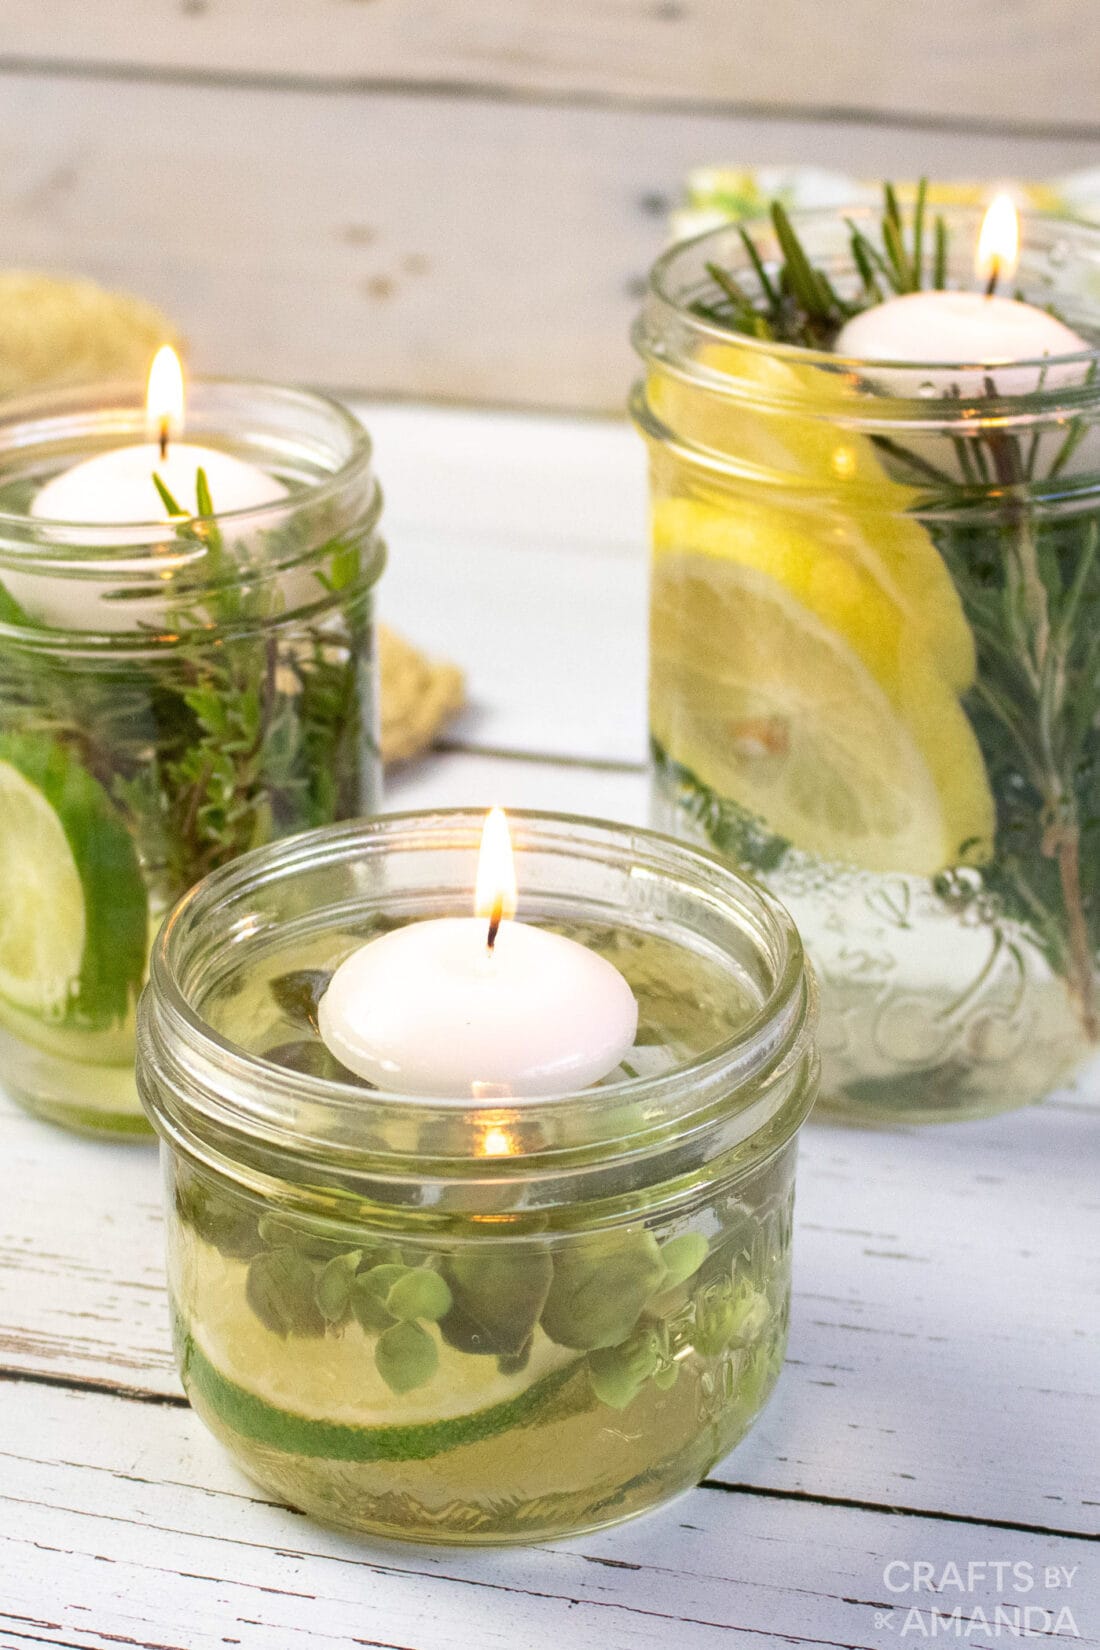
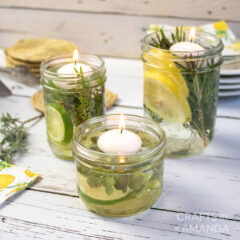
These DIY mosquito repellent candles are a natural way to rid of those pesky bugs buzzing around your ears.
Why we love this project
Did you know you could make your own homemade DIY mosquito repellent candles? With ingredients like lemon, lime, water, and essential oils, these candles are not just for pretty decoration but repel unwanted pests in your yard and they’re super easy to make!
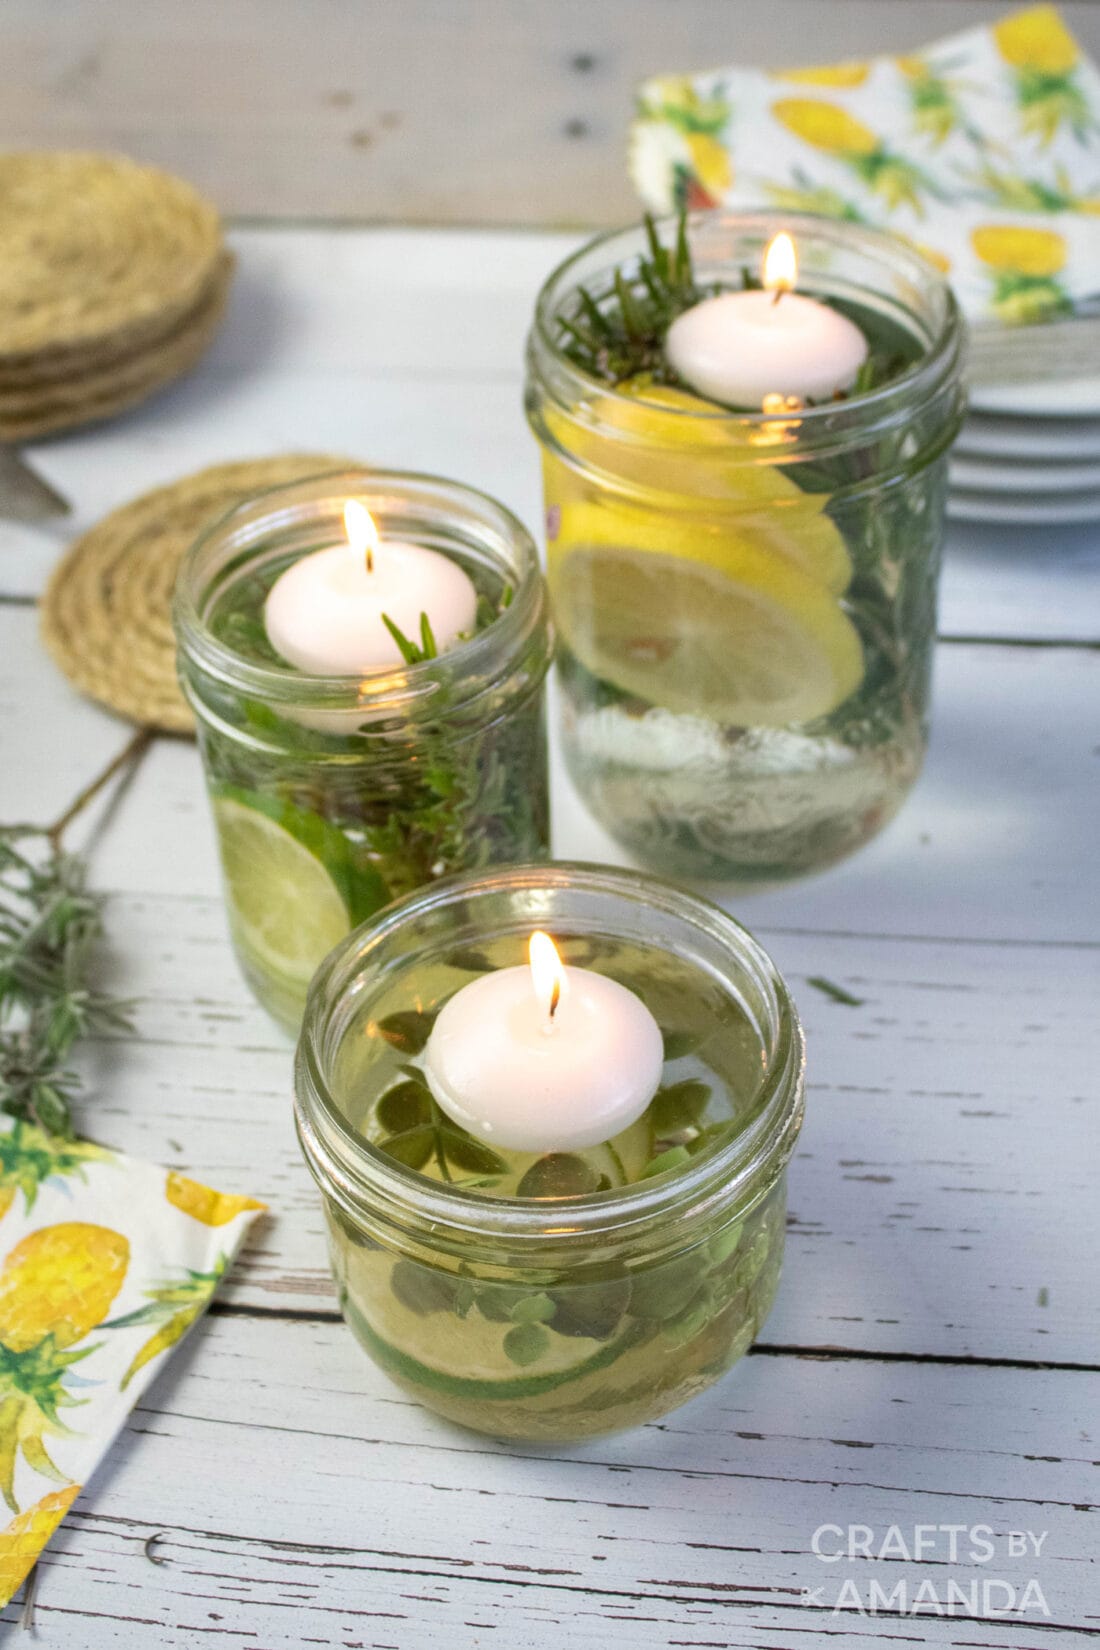
These repellent candles use clean natural ingredients to ward off mosquitoes. We can show you how to make them 3 different ways using either lavender and peppermint, eucalyptus and lime, or a mixture of lemon, eucalyptus, and peppermint. On top of that, these candles are pretty decoration making them awesome for outdoor parties or even weddings and showers.
RELATED – If you have extra citrus on hand, make some pretty lemon lime votive candles!
Helpful Project Information:
- Age Level: 12 and up
- Mess Factor: Small
- Level of Difficulty: Easy
- Time to Complete: Less than 10 minutes
- Cost Estimate: Less than $10.00
Craft supplies you will need

Get full list of supplies and directions in the printable version at the end of this post.
How to Make Mosquito Repellent Candles
These step by step photos and instructions are here to help you visualize how to make this project. Please scroll down to simply print out the instructions!
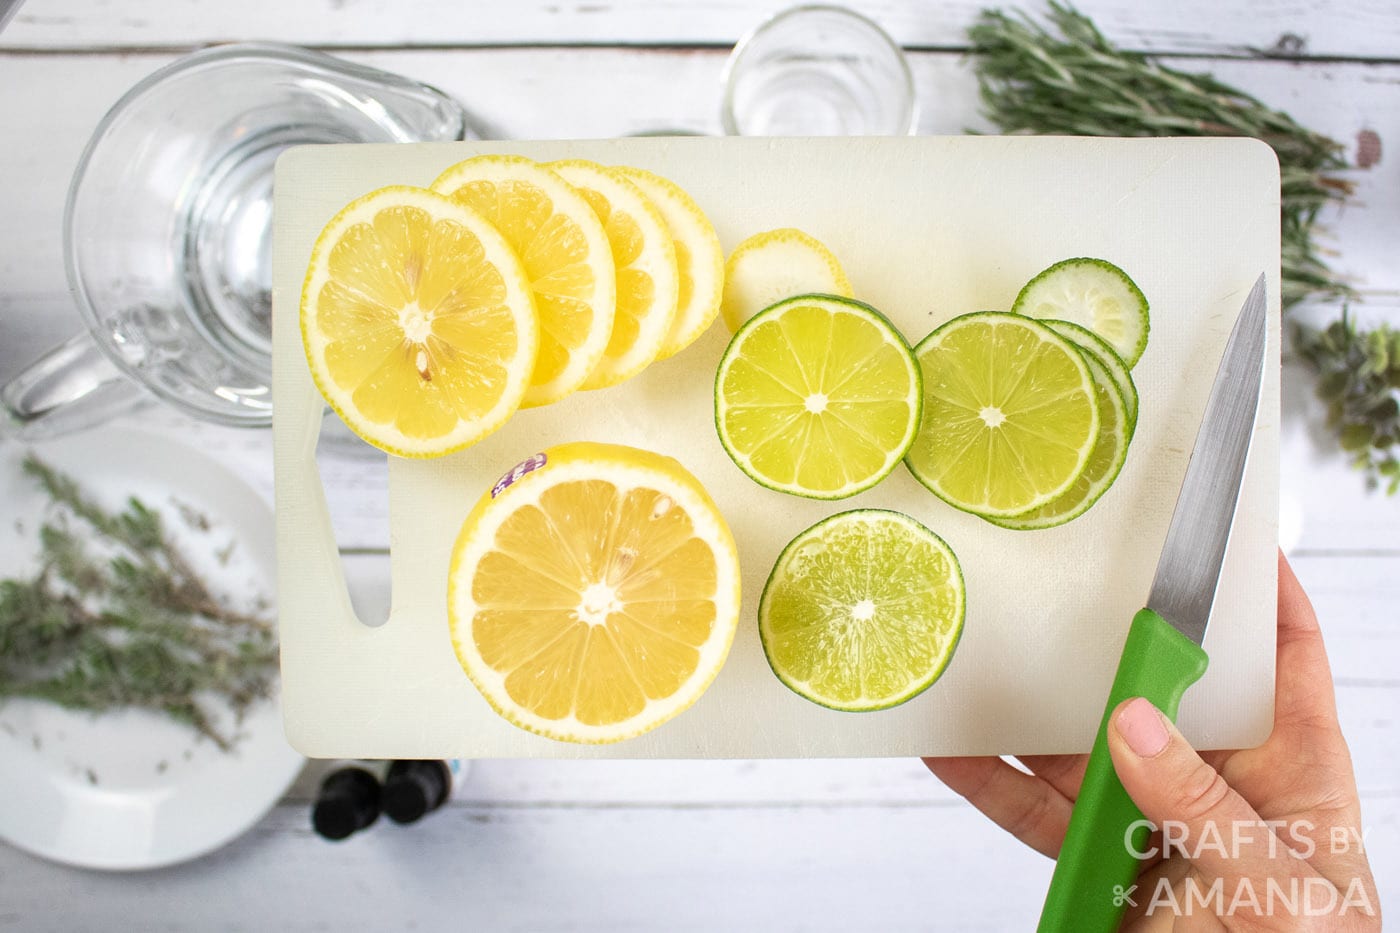
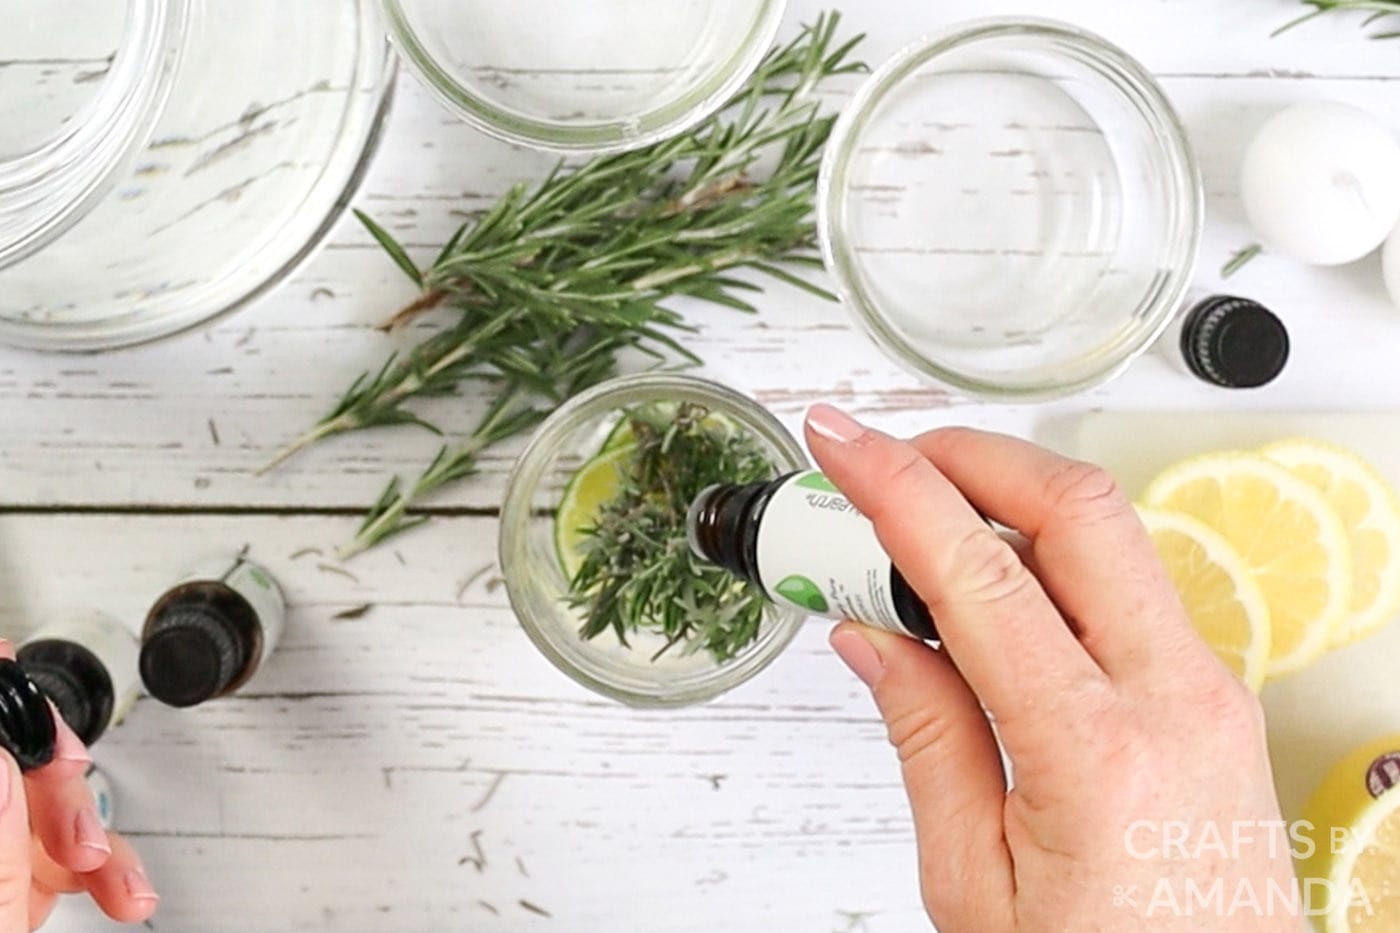
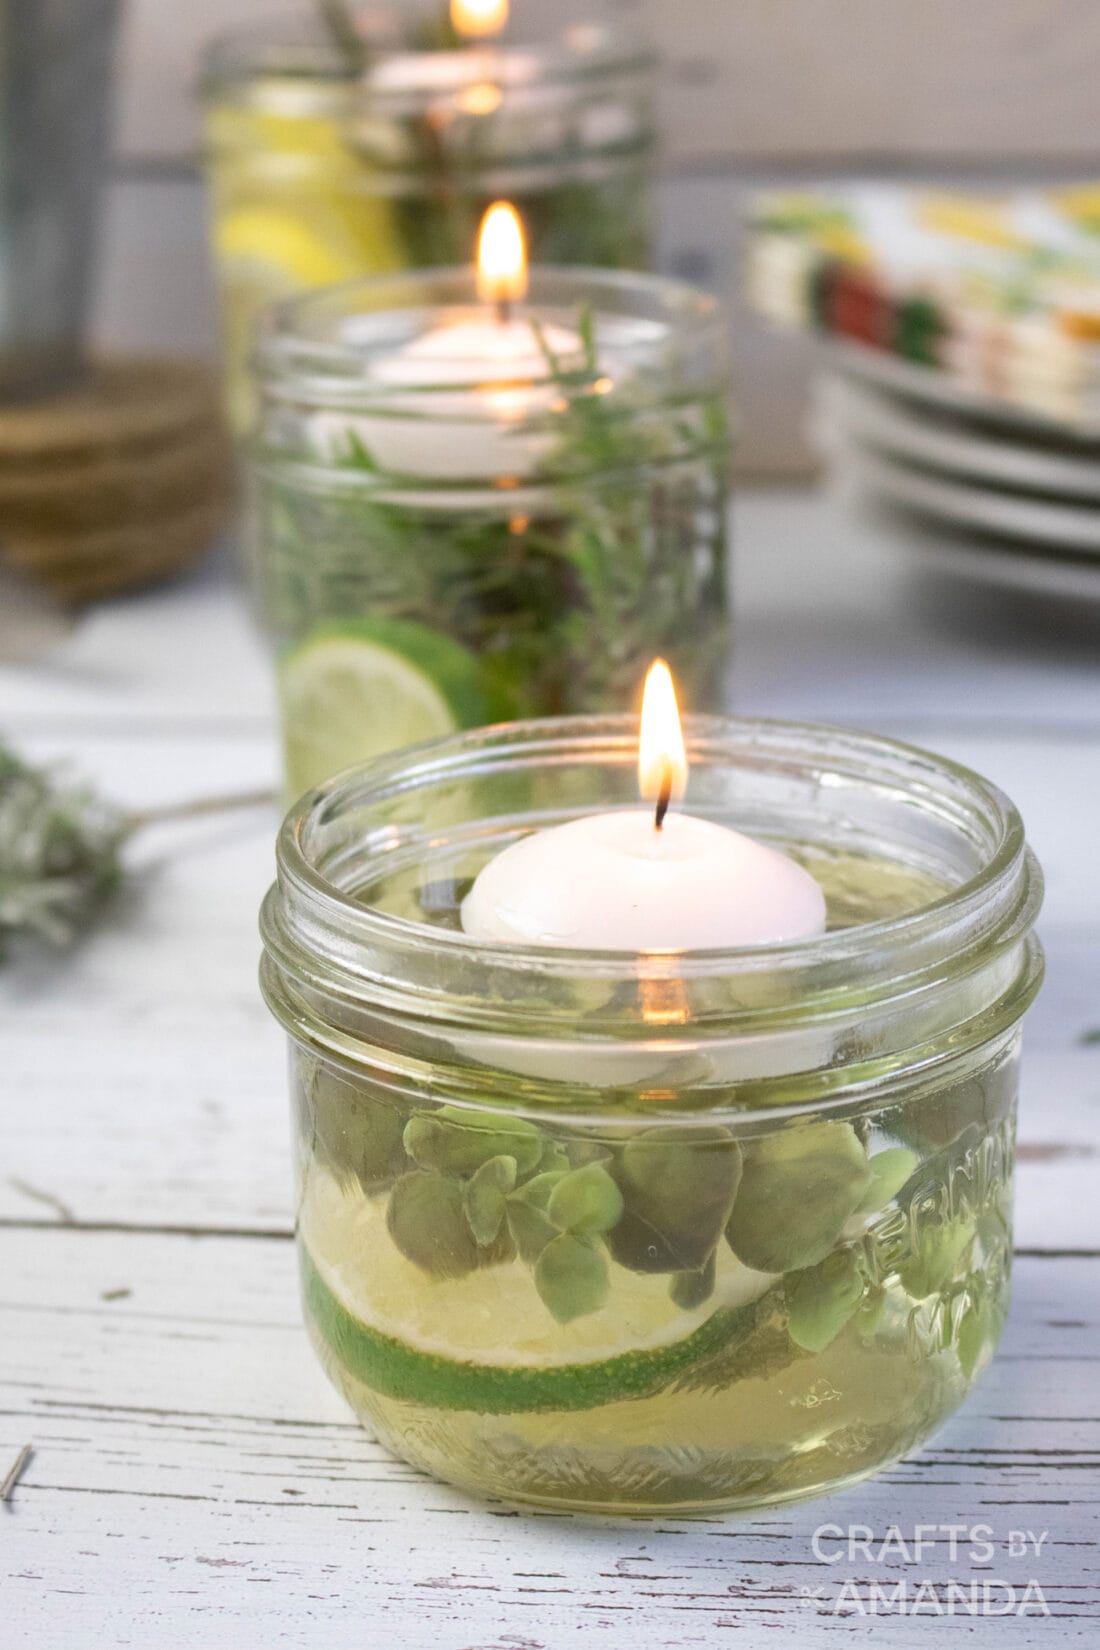
- Cut lemon (and/or lime) into 1⁄4” thick slices and place 2-3 slices inside each glass jar.

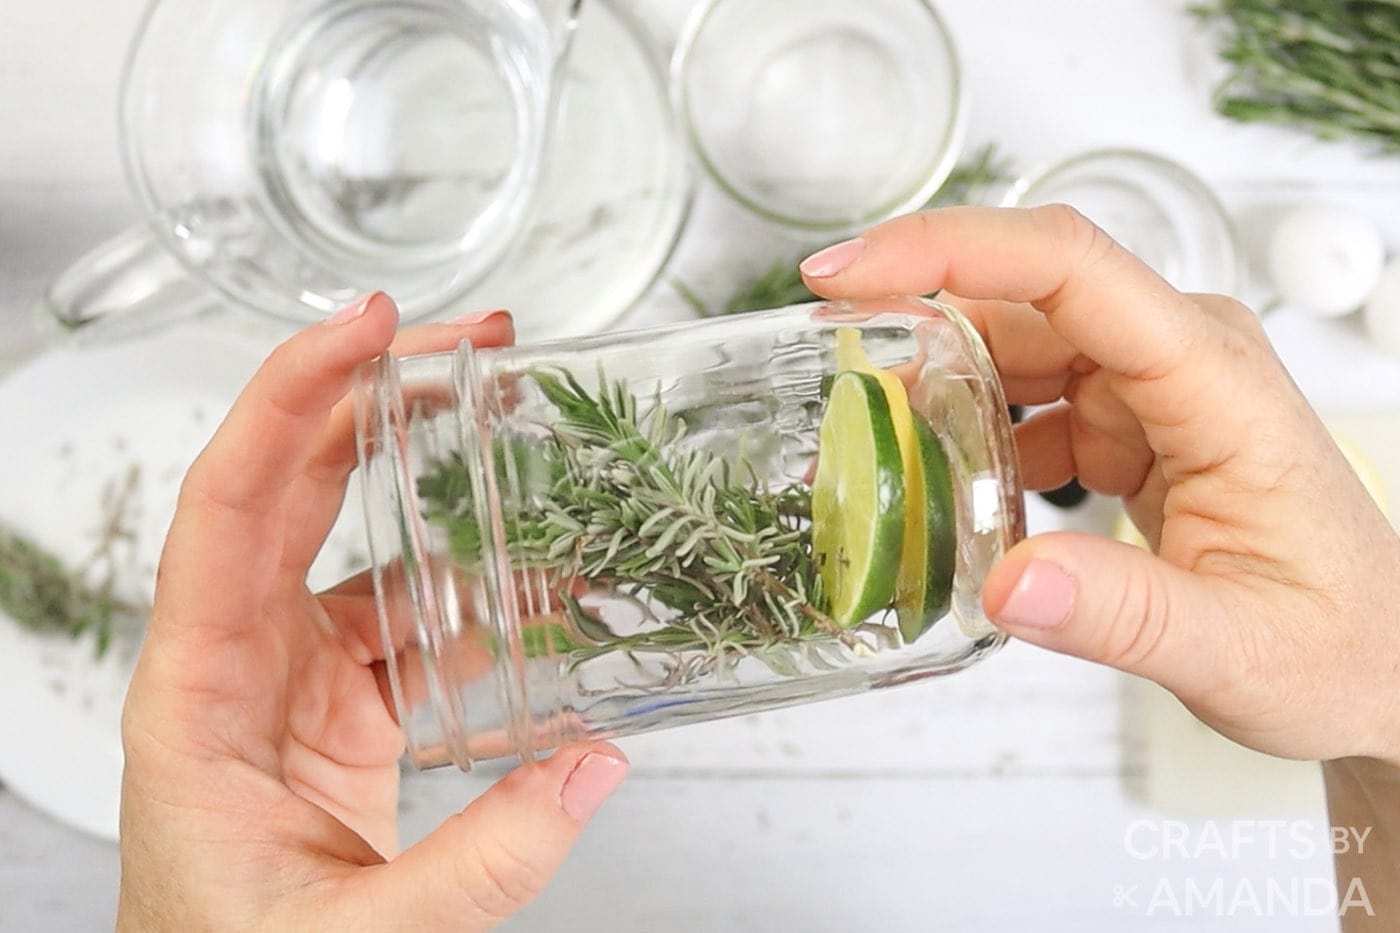
- Place 2-3 sprigs of greenery (lavender, rosemary, or eucalyptus) into each jar.
- Add essential oils (see recipes below in printable instruction card).
- Fill the jar with water to the neck of the jar submerging the citrus slices and sprigs of greenery.
- Place a floating candle inside the jar.


Expert Crafting Tips
- Having an outdoor party? Make a big batch of these pretty floating mosquito repellent candles to display throughout the yard.
- You can purchase unscented floating candles from a local craft store or online.
- Sprigs of fresh greenery like rosemary or lavender work in extra defense against mosquitoes, but you can certainly use faux greenery as well.
- Use wide mouth mason jars, in whichever size you’d like so you have room for your floating candles. If you decide to use larger than 16 oz jars, you can easily double the recipe called for in each candle as to not dilute the mixture too much.
Spring and summer are our favorite times of the year, but with those lovely seasons come the bugs, and the most dreaded of them all, mosquitos. I like being able to sit on my porch in peace without having to swat my hands, legs, arms, face… you name it. Insert, these DIY mosquito repellent candles! Which ones will you be trying?
More Summer Projects
- Drip Paint Pots
- Cheese Grater Owl
- Clay Pot Lighthouse
- Mason Jar Solar Lights
- DIY Garden Stepping Stones
- Bird Seed Ornaments
I love to create and share my projects with you! I know it’s hard to remember to come back and search, so I’ve made it easy for you with my weekly newsletter! You can subscribe for free and I’ll send you fun crafts and delicious recipes every week right to your email.
Mosquito Repellant Candles
Supplies
- 3 wide mouth mason jars in various sizes
- essential oils lavender, peppermint, lime, eucalyptus, lemon
- fresh or faux greenery lavender stems, rosemary sprigs, eucalyptus stems
- Fresh lemon and lime
- 3 floating candles
- tap water enough to fill each jar
Recipe 1
- 10 drops lavender essential oil
- 10 drops peppermint essential oil
Recipe 2
- 10 drops eucalyptus essential oil
- 10 drops lime essential oil
Recipe 3
- 10 drops eucalyptus essential oil
- 10 drops peppermint essential oil
- 10 drops lemon essential oil
Instructions
- Cut lemon (and/or lime) into 1⁄4” thick slices and place 2-3 slices inside each glass jar.
- Place 2-3 sprigs of greenery (lavender, rosemary or eucalyptus) into each jar.
- Add essential oils (see recipes above).
- Fill the jar with water to the neck of the jar submerging the citrus slices and sprigs of greenery.
- Place a floating candle inside the jar.
Video
Expert Tips & FAQs
- Sprigs of fresh greenery like rosemary or lavender work in extra defense against mosquitos, but you can certainly use faux greenery as well.
- Use wide mouth mason jars, in whichever size you’d like so you have room for your floating candles. If you decide to use larger than 16 oz jars, you can easily double the recipe called for in each candle as to not dilute the mixture too much.
This post originally appeared here on May 14, 2021.
- DIY Mosquito Repellent Candles - July 10, 2026
- Mason Jar Solar Lights - July 3, 2026
- Patriotic Pinwheels - June 23, 2026


Sue Pedana says
I would like to know how long the candles last
Shalee Evaristo says
Can I make this in advance? I would like to make 30 jars … how advance you think I can prepare the jars?
jacqueline says
merci ,merci c’est si joli !
Jeannette says
Amanda, there are so many projects that I don’t know which one to do first. I definitely will be doing many of these with and or without my Grandchildren.
Thank you for sharing. God Bless.
I am 79 years young and love doing different crafts.
Tawanna says
This looks very pretty and very useful for those nasty little bugs! I can’t wait to give this a try!
Melynda says
How long will the water part last? Does everything need thrown away after one day of use?
Julienne says
I can’t wait to try these! Your instructions are so clear with wonderful pictures to look at. I LOVE that you created a 1 page sheet of instructions (with a photo, yippee) that I can print and use. You do amazing and fun crafts and I am so thankful as a Preschool teacher and mom. THANK YOU!!
Tammy says
Thank you for this. Cant wait to try it.