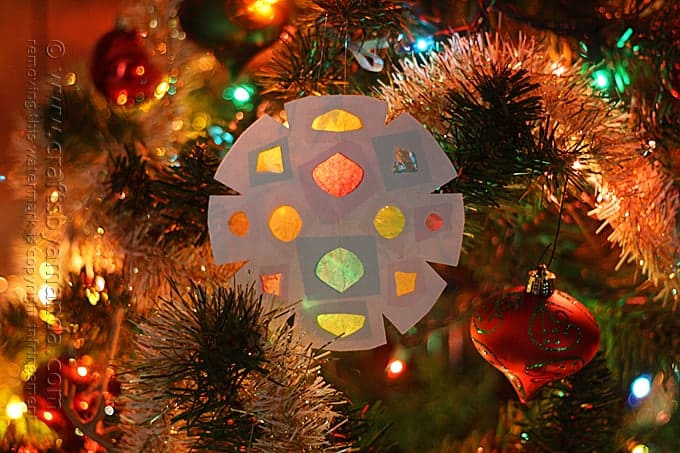
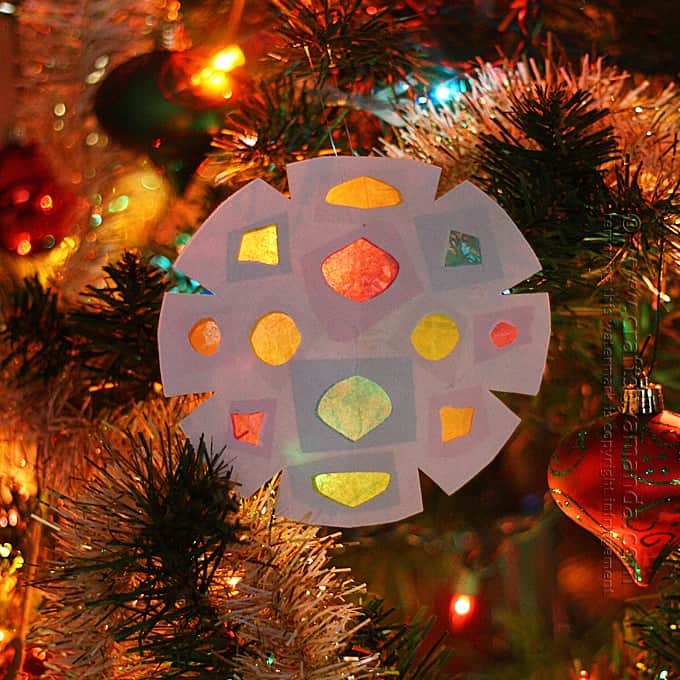
Kids make paper snowflakes every year around the holidays. Ask your grandmother and she’ll remember making them with her mom. This year, turn your ordinary paper snowflakes into these colorful versions that look like stained glass!

Making Paper Snowflakes
There are lots of ways to make paper snowflakes. In order to create the stained glass look, we’ll need to make the design a bit less intricate so that there’s room to attach the tissue paper.
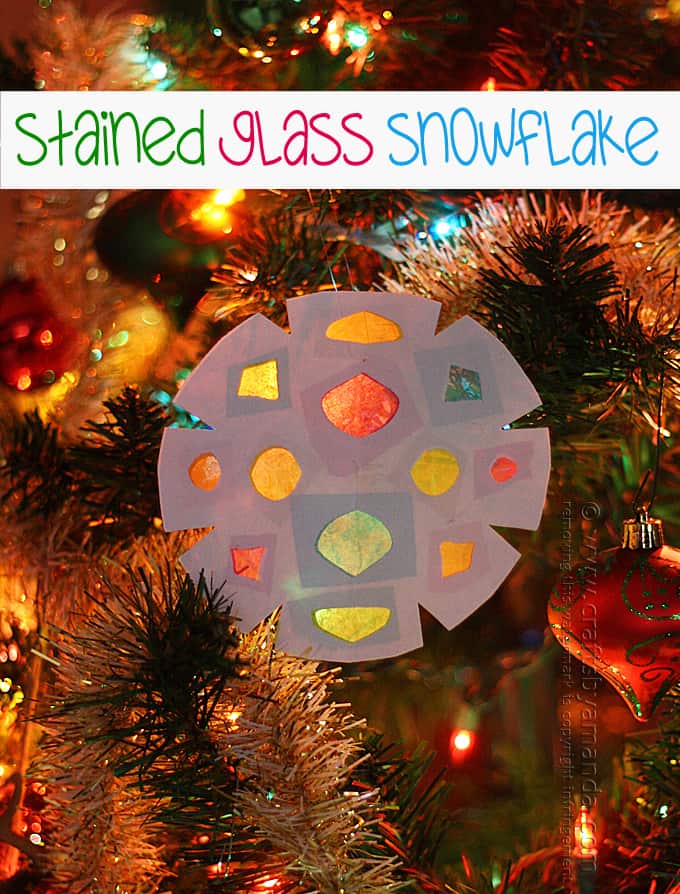
This paper snowflake can be used as an ornament or a sun catcher. Either way is beautiful. In the window the sun will shine through the tissue paper, and on your Christmas tree your Christmas lights will shine through.
Note: some links below are affiliate links. That means if you happen to buy something, a small percentage of that sale goes back into this site, which enables me to continue to bring you free tutorials such as this one. So, thanks!
As always, a full printable supply list and instructions are at the end of this post.
For this project you will need the following supplies:
- 1 sheet of white paper
- Tissue paper: pink, green, yellow, blue
- Scissors
- Glue stick
- Needle and thread
- Piece of ribbon
- Fold the sheet of paper in half and cut into two 5-inch squares.
- Stack those two pieces on top of one another and fold in half once.
- Cut a half circle.
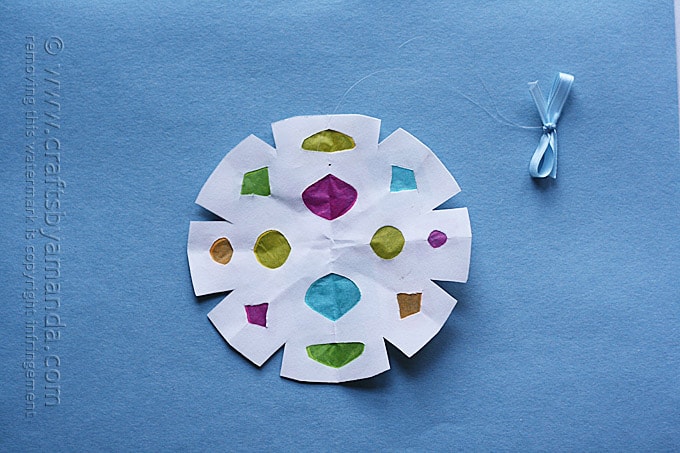
- When you open the papers you should have two identical circles.
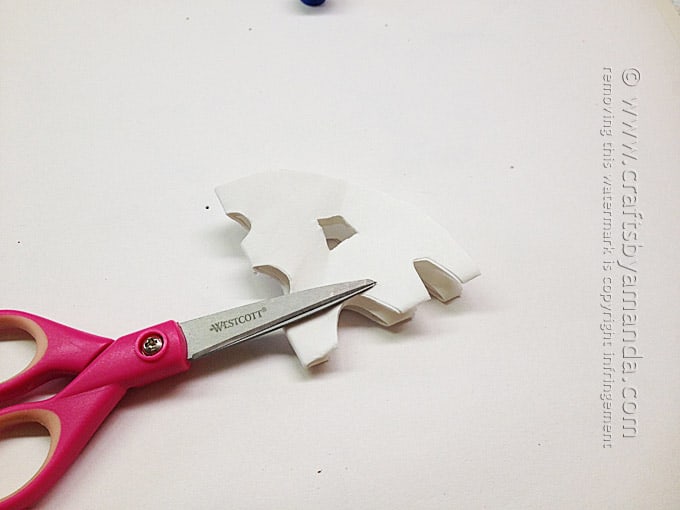
- Keeping them together, fold in half and then in half again.
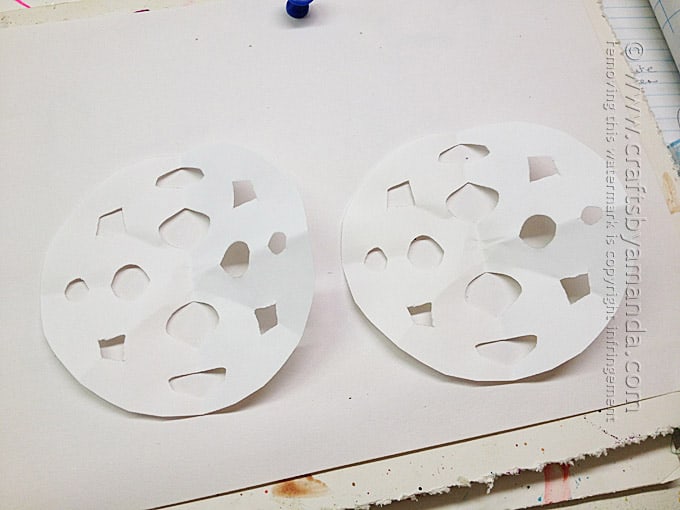
- Cut a few simple shapes from the edges of the paper to create a simple paper snowflake.
- When you open them up you should have two identical shapes.
- Separate them and set one aside, placing the second one on the work surface.
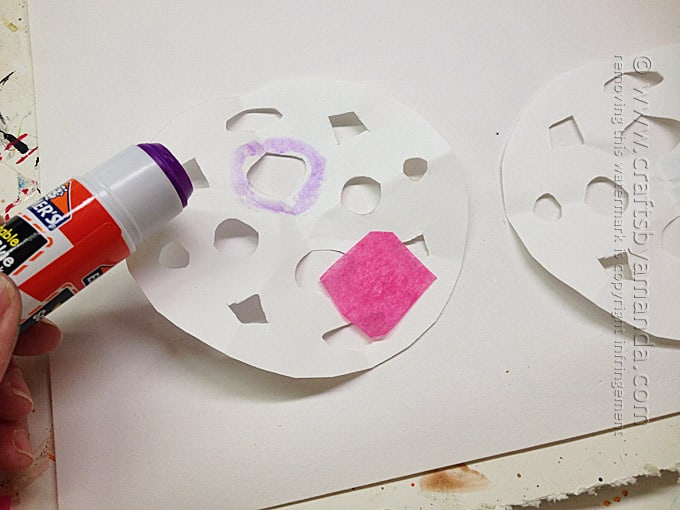
- Cut small pieces of tissue paper, big enough to cover a hole on the snowflake, but not too large that it overlaps other holes.
- Cover each hole with different colors, using a glue stick to adhere.
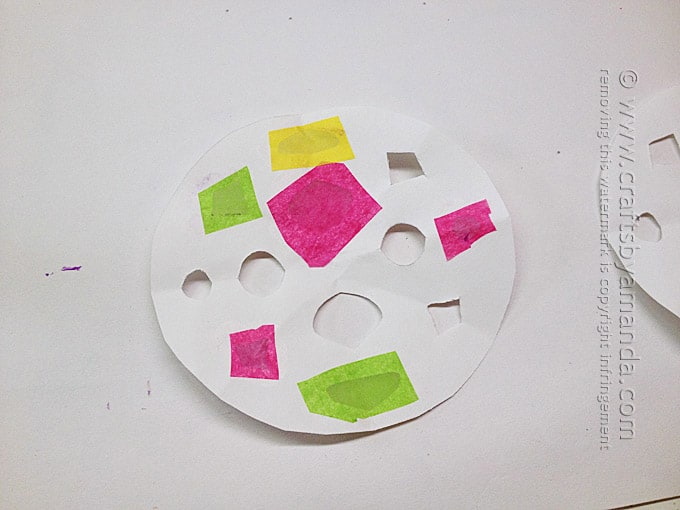
- Take the other snowflake shape and line up the holes so that when stacked on top of one another they are identical.
- Use a glue stick to attach it, sandwiching the tissue paper in between the two snowflakes.
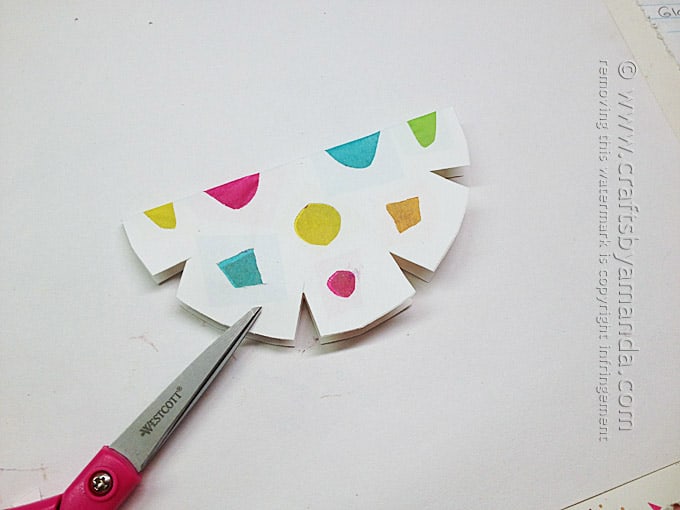
- Fold in half, creating a half circle.
- Cut notches in the curved edges of the circle to make the snowflake more decorative.
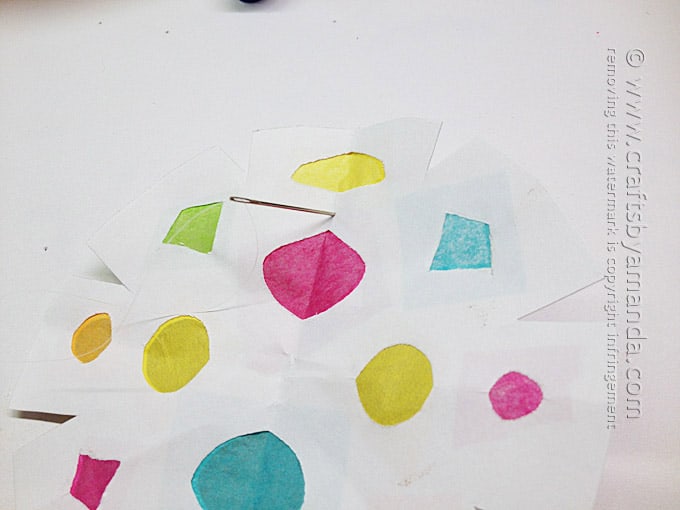
- Thread your needle and poke it through the top of the snowflake, about an inch from the edge.
- Tie the thread off and add a ribbon bow to the top of the hanger.
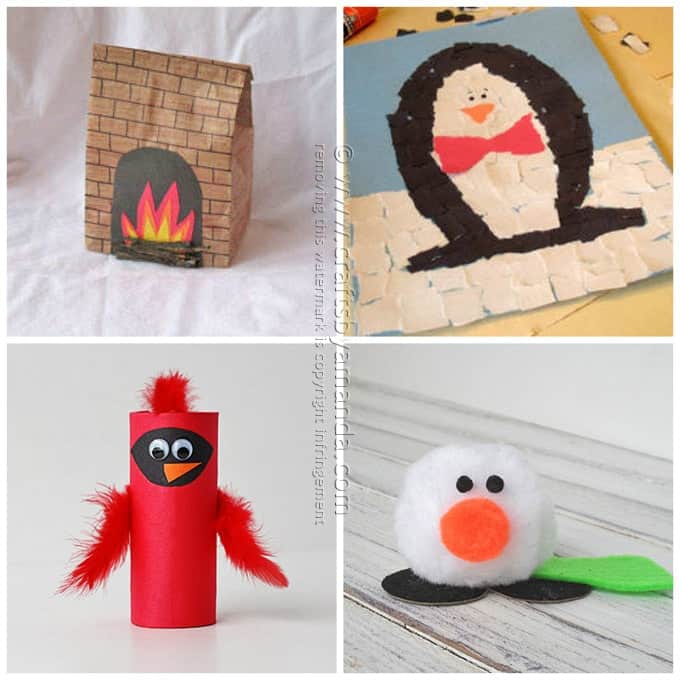
More winter crafts for kids
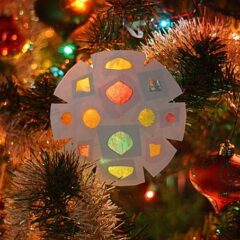
Faux Stained Glass Paper Snowflakes
Supplies
- 1 sheet of white paper
- Tissue paper: pink green, yellow, blue
- Scissors
- Glue stick
- Needle and thread
- Piece of ribbon
Instructions
- Fold the sheet of paper in half and cut into two 5-inch squares. Stack those two pieces on top of one another and fold in half once. Cut a half circle. When you open the papers you should have two identical circles. Keeping them together, fold in half and then in half again.
- Cut a few simple shapes from the edges of the paper to create a simple paper snowflake. When you open them up you should have two identical shapes. Separate them and set one aside, placing the second one on the work surface.
- Cut small pieces of tissue paper, big enough to cover a hole on the snowflake, but not too large that it overlaps other holes. Cover each hole with different colors, using a glue stick to adhere.
- Take the other snowflake shape and line up the holes so that when stacked on top of one another they are identical. Use a glue stick to attach it, sandwiching the tissue paper in between the two snowflakes.
- Fold in half, creating a half circle. Cut notches in the curved edges of the circle to make the snowflake more decorative.
- Thread your needle and poke it through the top of the snowflake, about an inch from the edge. Tie the thread off and add a ribbon bow to the top of the hanger.
- Swirling Twirling Ladybugs - July 21, 2026
- Drip Tie Dye Backpack - July 17, 2026
- Mini Coastal Clay Houses - July 14, 2026


Ann Martin says
Cute idea – the colored tissue adds so much!
Amanda Formaro says
Thanks Ann! :)