

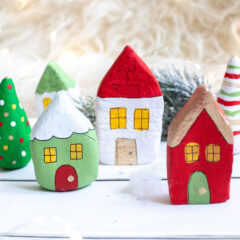
These adorable little clay houses are fun to make and are made from salt dough! Salt dough houses are great for all sorts of holidays, but we are going to show you how to make a Christmas Village Shadowbox with them as well.
Why we love this project
Have you ever made salt dough? I’d be really surprised if you haven’t. I guarantee that you have all the ingredients in your pantry right now. Super easy and so fun!
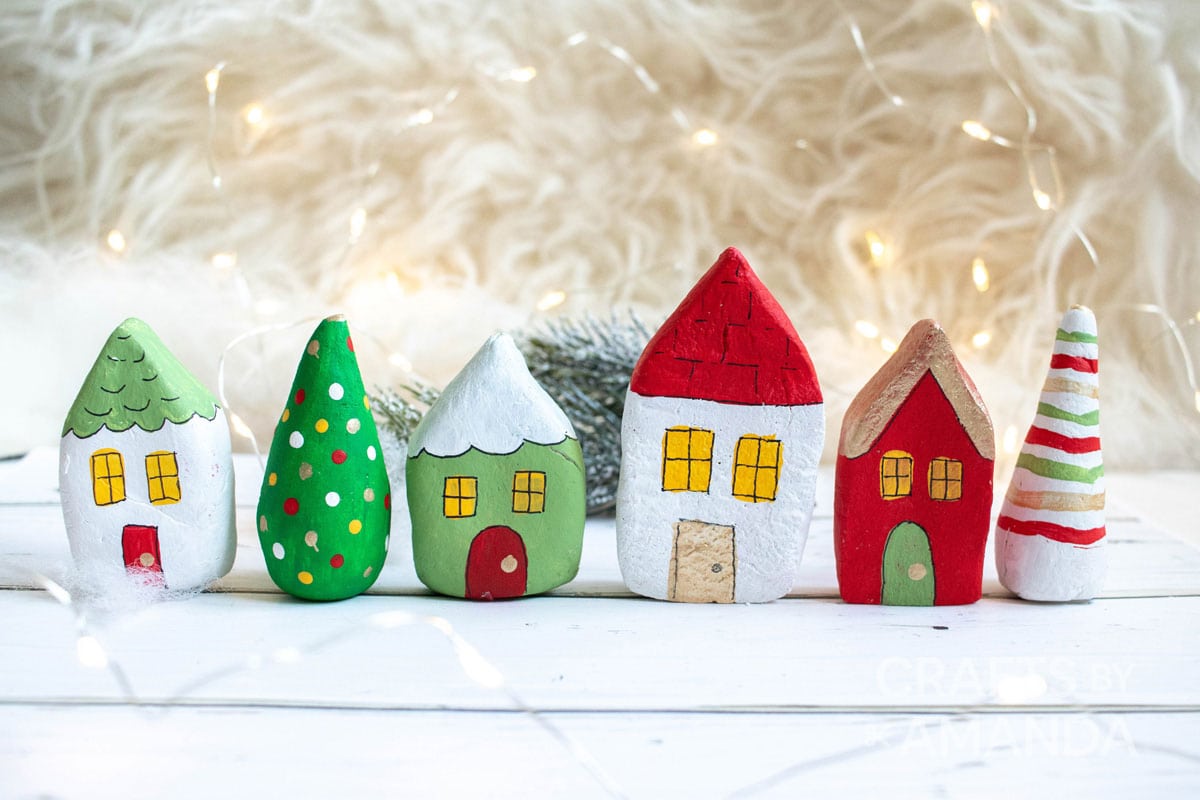
You can use these little houses in many different ways. Change the colors for different holidays, paint the roofs like toadstools for a little fairy village, or make a Christmas village like we are going to do today.
Helpful Project Information:
- Age Level: 7 and up
- Mess Factor: Medium (paint)
- Level of Difficulty: Easy-Medium (again, painting details)
- Time to Complete: 45 minutes, plus dry time
- Cost Estimate: Less than $2.00 (not including paint)
Craft supplies you will need
Get full list of supplies with measurements and directions in the printable version at the end of this post.
- Salt
- Flour
- Water
- Acrylic paint
How to Make Salt Dough Houses
These step by step photos and instructions are here to help you visualize how to make this project. Please scroll down to simply print out the instructions!
- Combine salt, flour, and water. Mix ingredients by hand until well combined and a dough is formed.
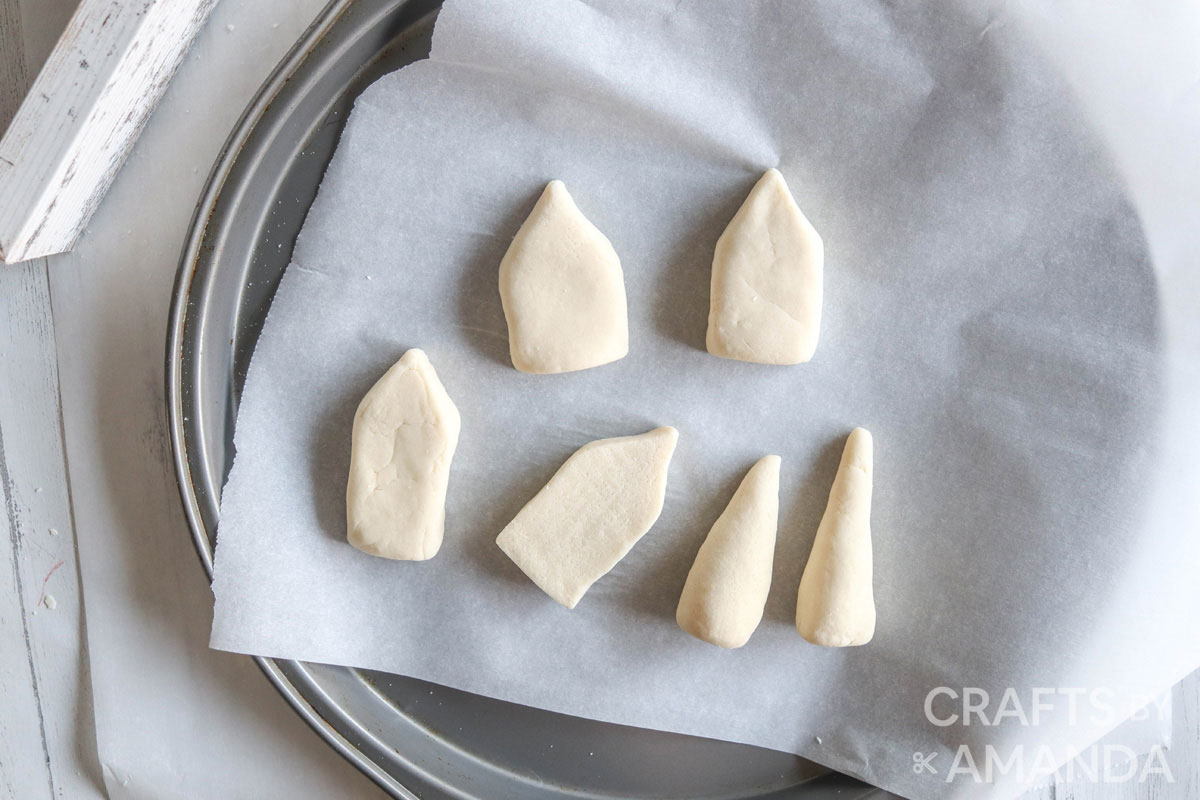
- Separate the dough into smaller portion sizes (about the size of your palm).
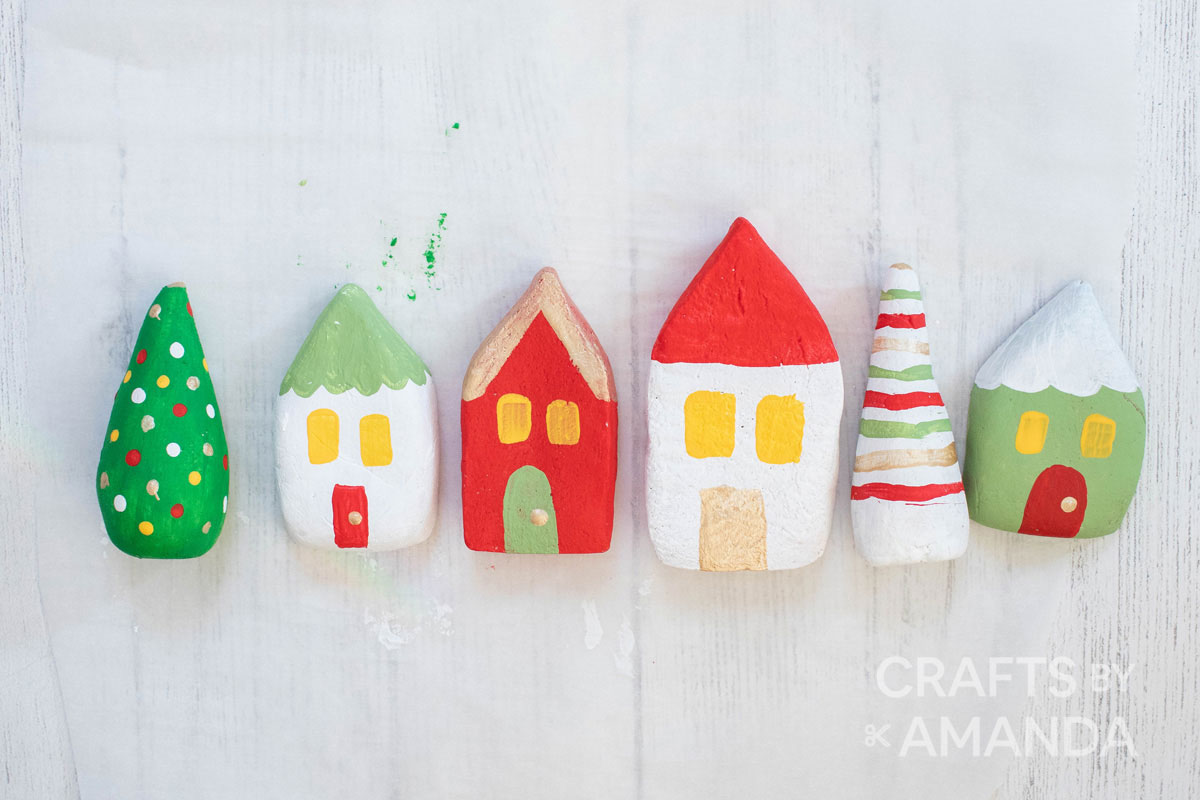
- Continue kneading to smooth dough and form the dough into a house shape with a triangular peak at the top.
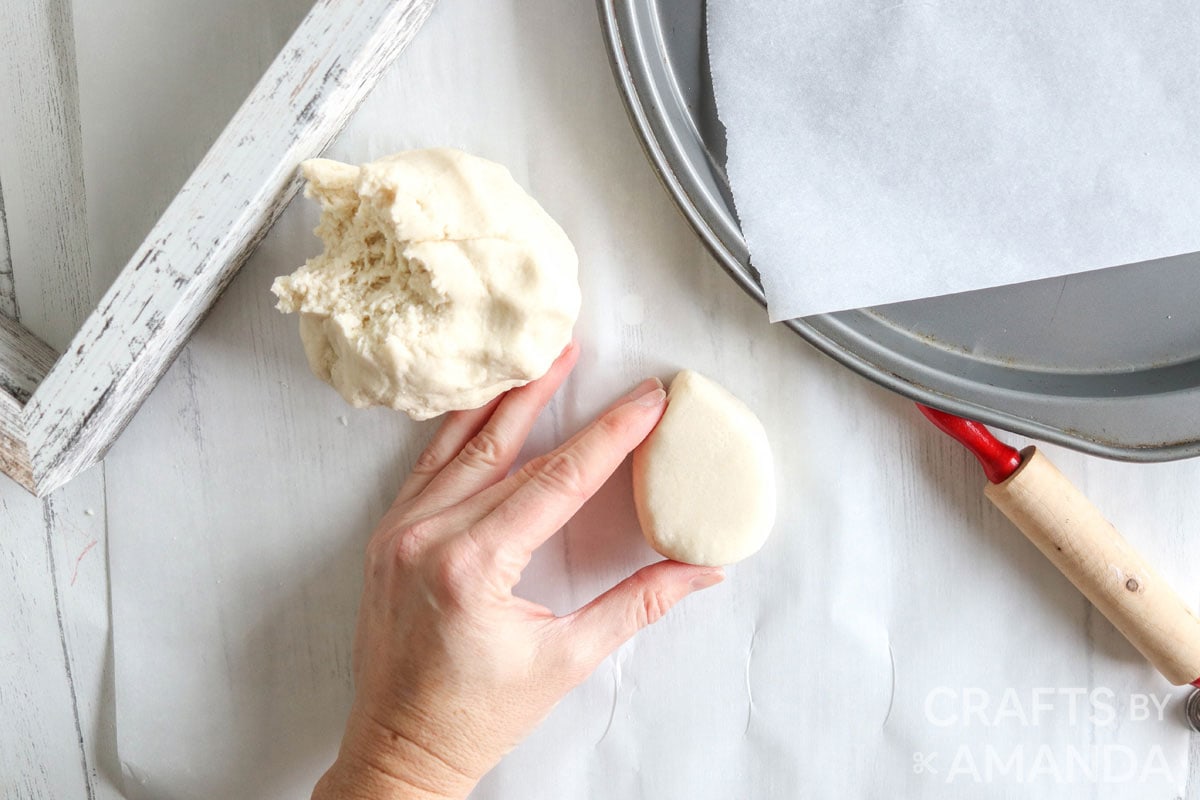
- Make additional houses in various sizes not exceeding 2 ½” high and 5/8” thick.
- Form remaining dough into cone-shaped Christmas trees.
- Place all shapes onto a parchment-lined baking sheet and bake in an oven at 220F for 2 hours. Flip the shapes over every 20 minutes.
- Remove from the oven and leave shapes to cool completely before proceeding.
Painting the Salt Dough Houses
First I’m going to give you a diagram of how we designed and painted our salt dough houses. If it’s helpful for you, great! If you prefer, you can design your houses however you like. This diagram is just in case you would like to use it.

Click on the diagram to download
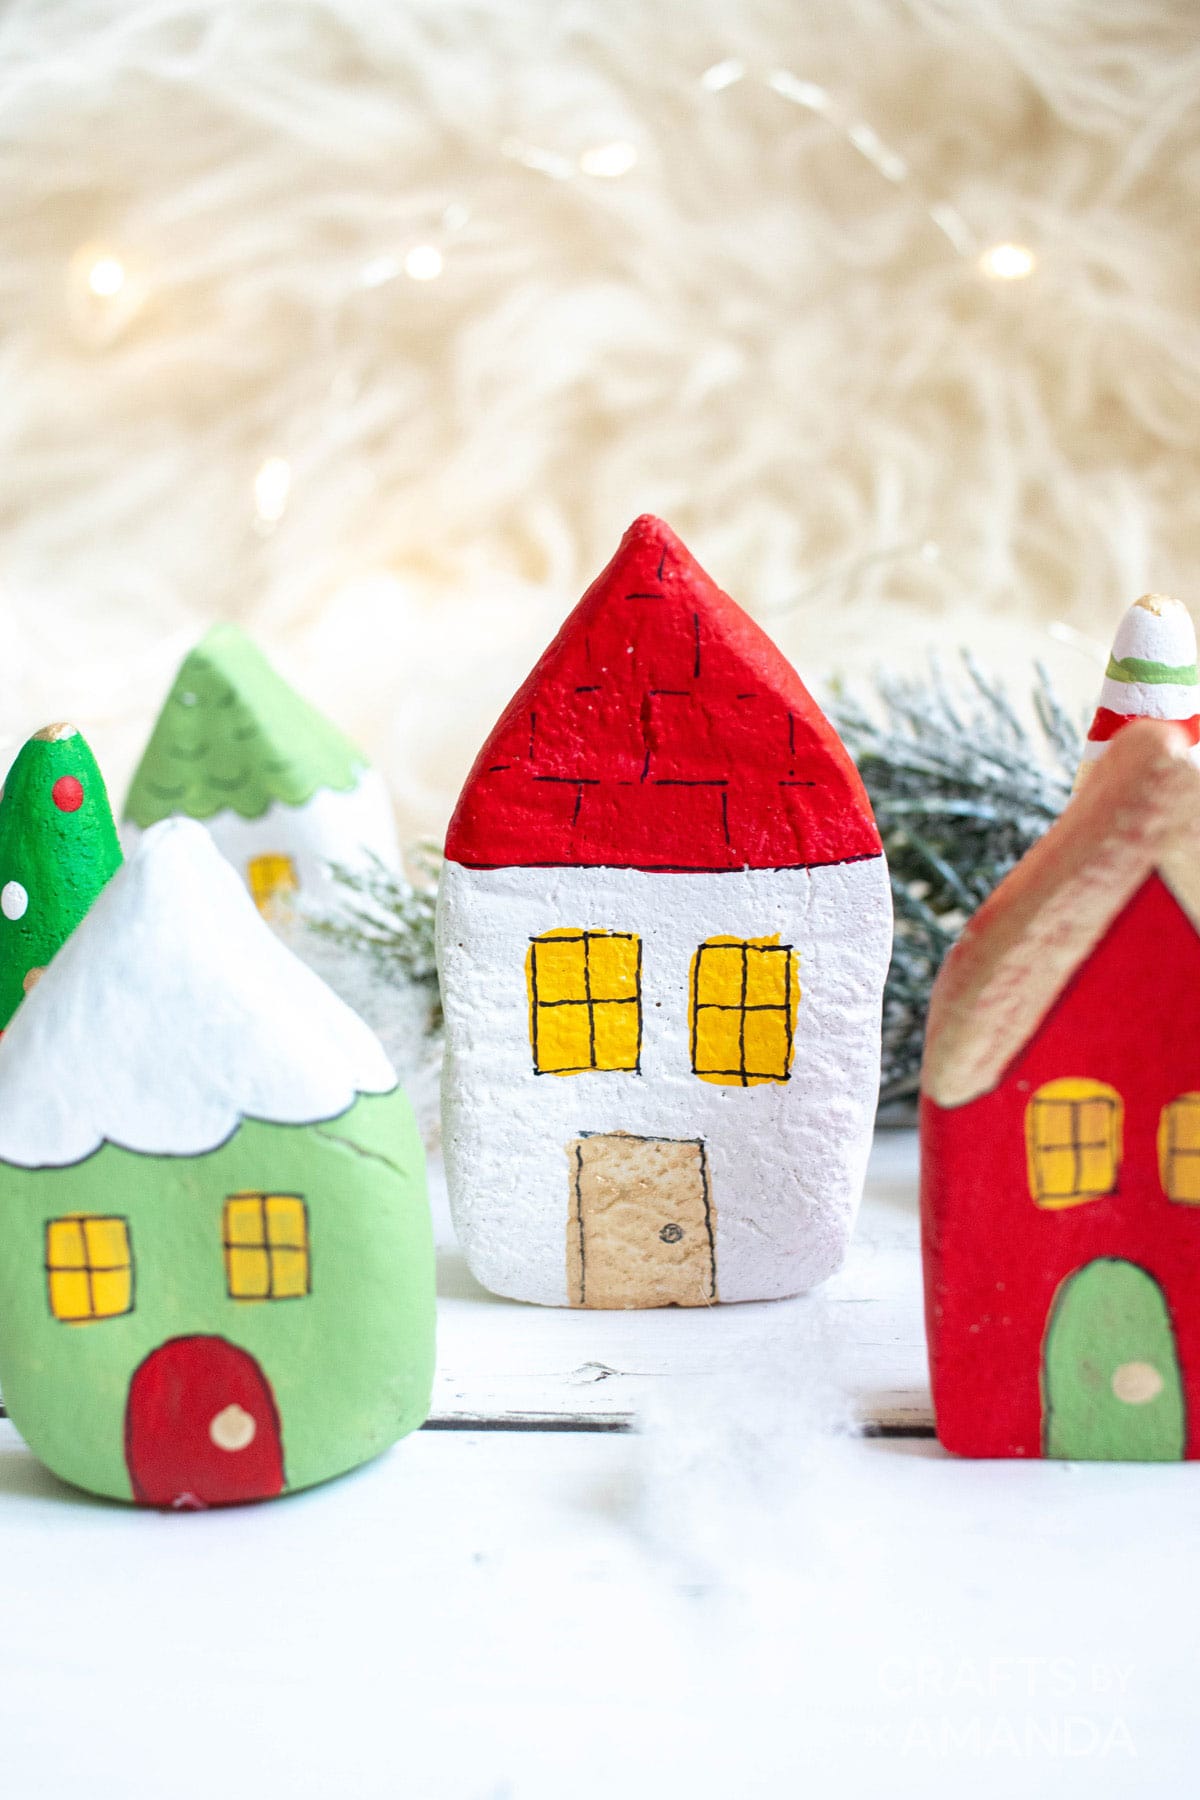
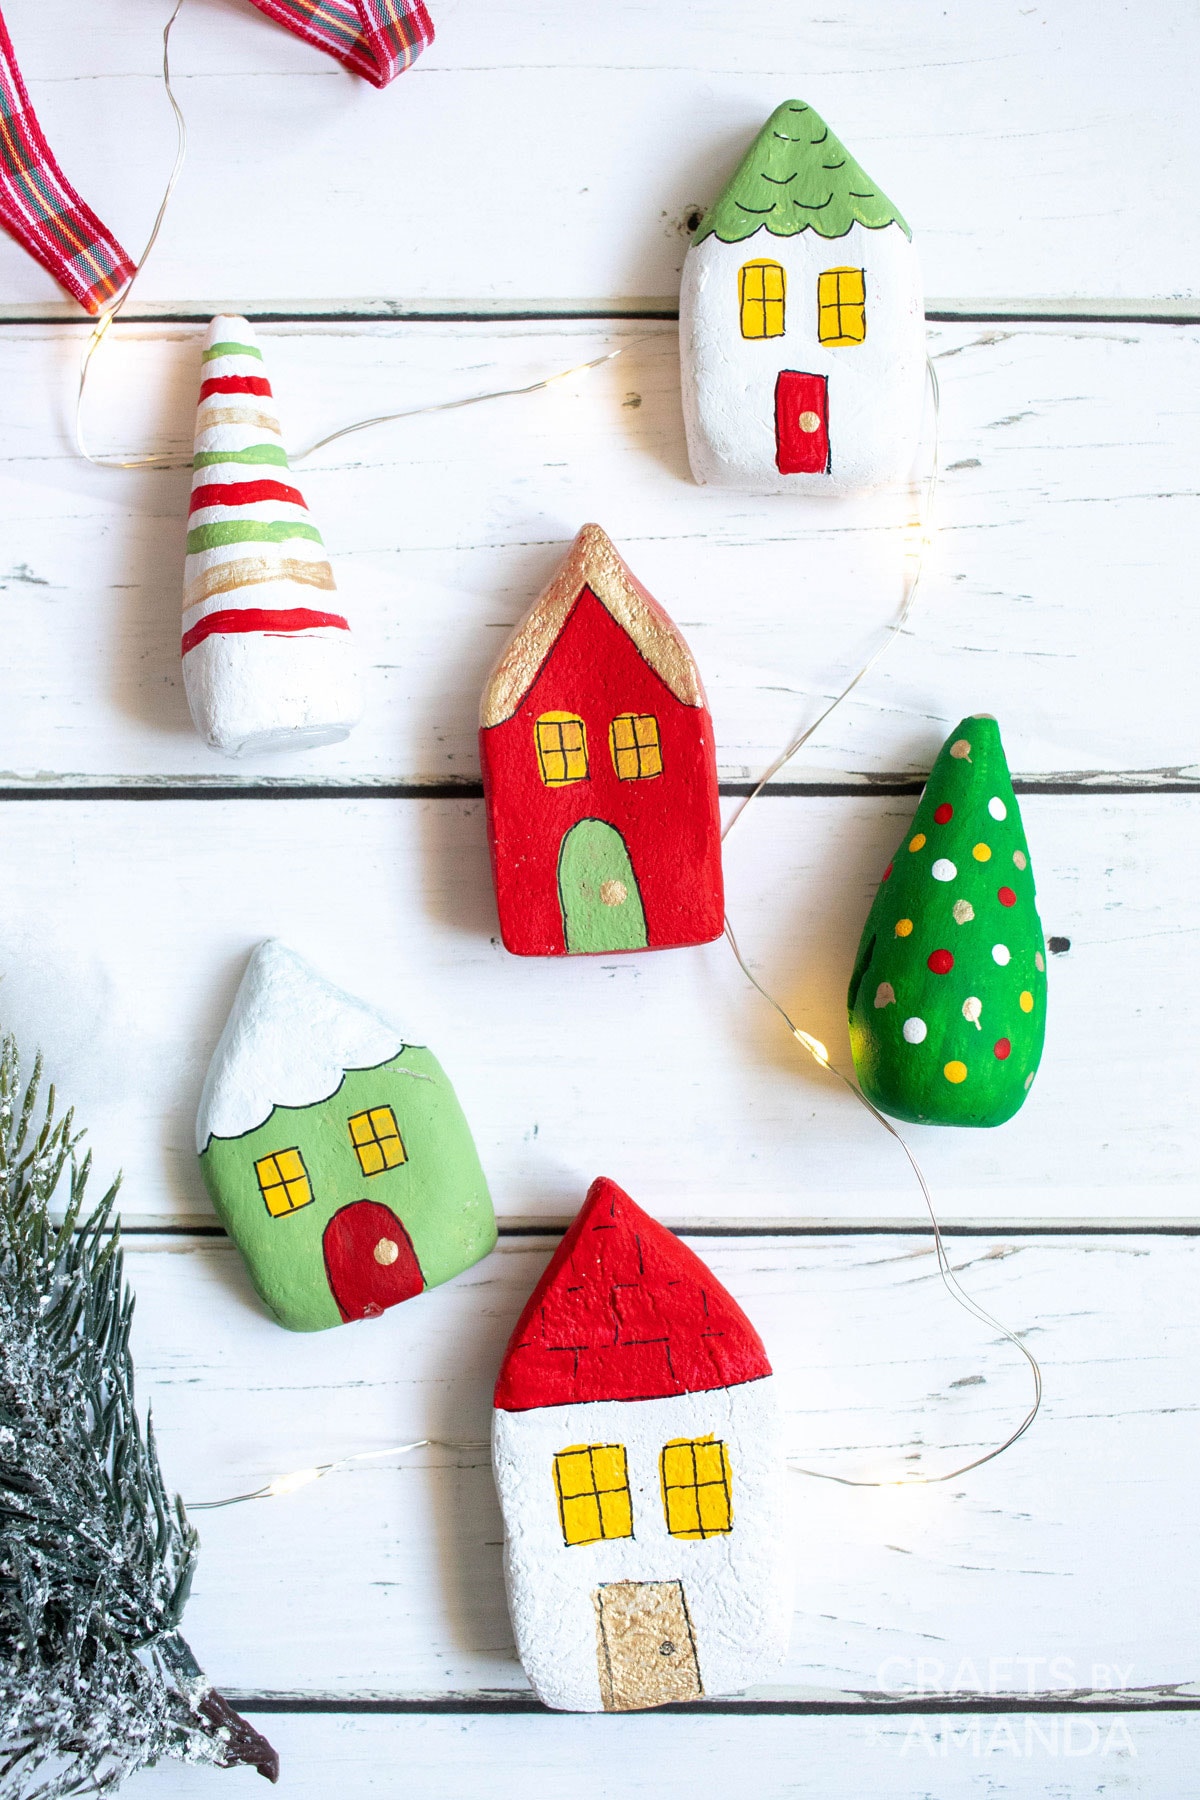
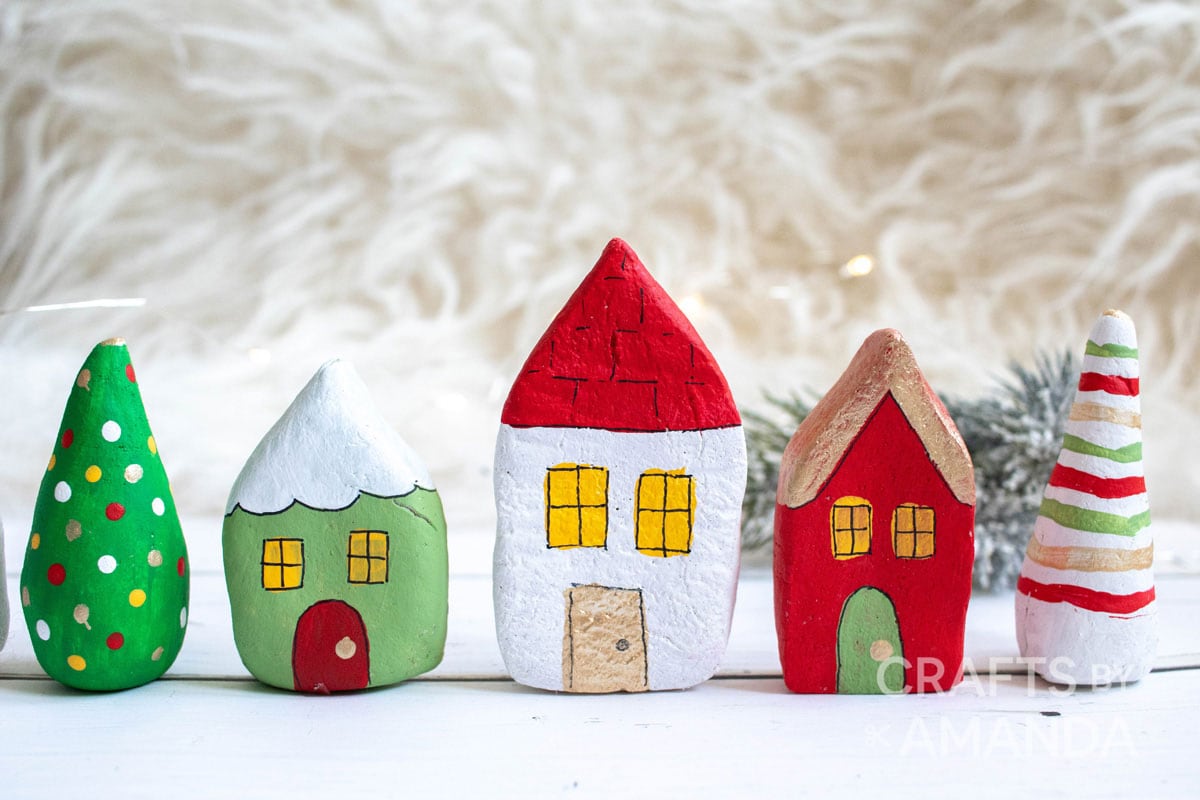
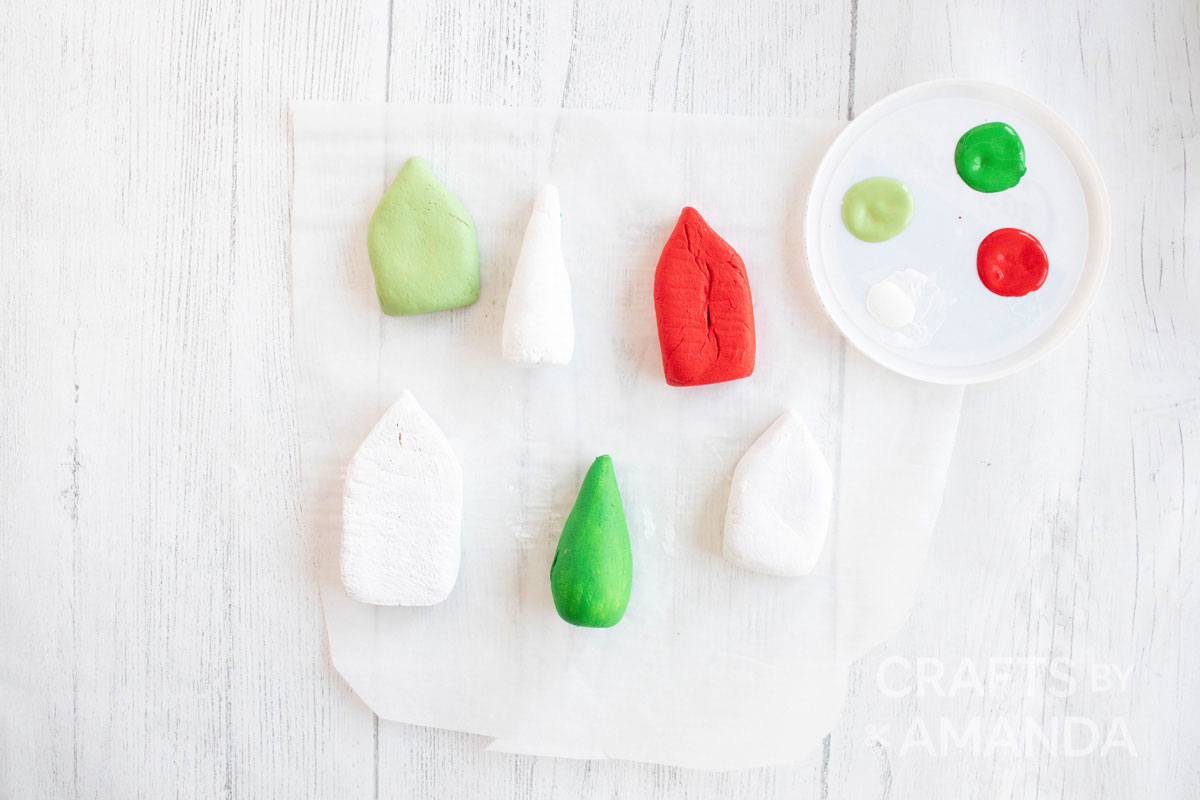
- Start by painting the surface of the shapes in a mix of white, greens, and red.
- Allow paint to dry fully before applying additional coats of paint or before changing colors.
- Using a fine-tip paintbrush, paint windows and door shapes onto the house as well as other accents such as scallops, stripes and dots in yellow, gold and, a mix of white, greens, and red.
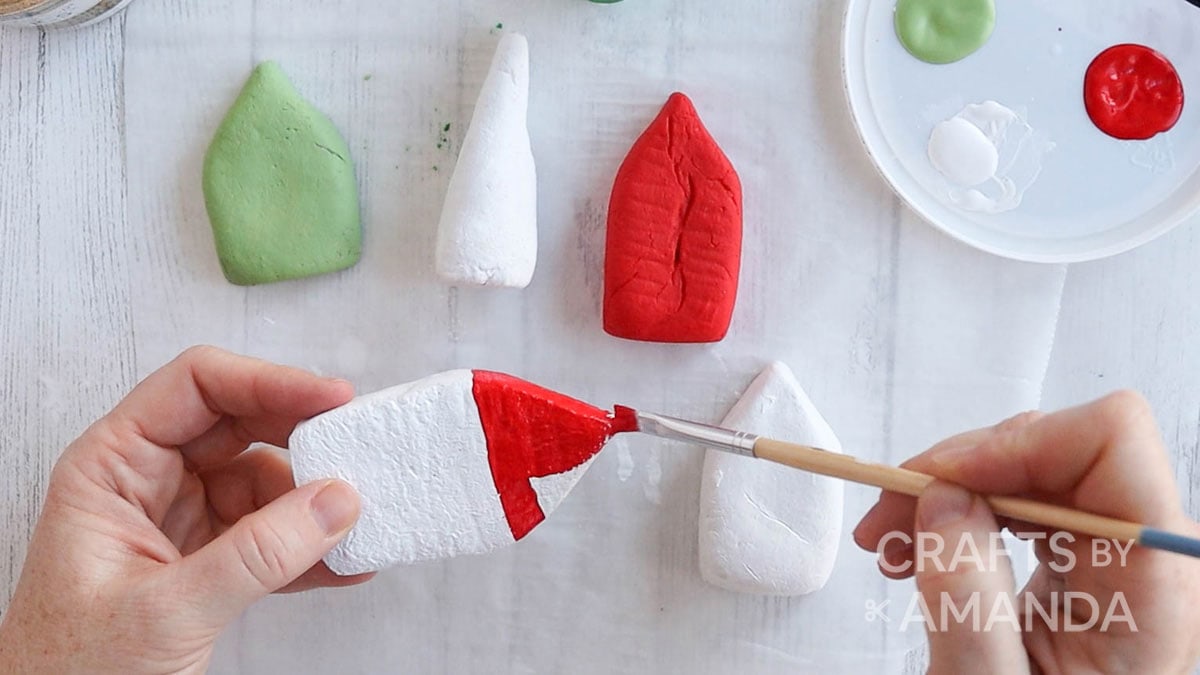
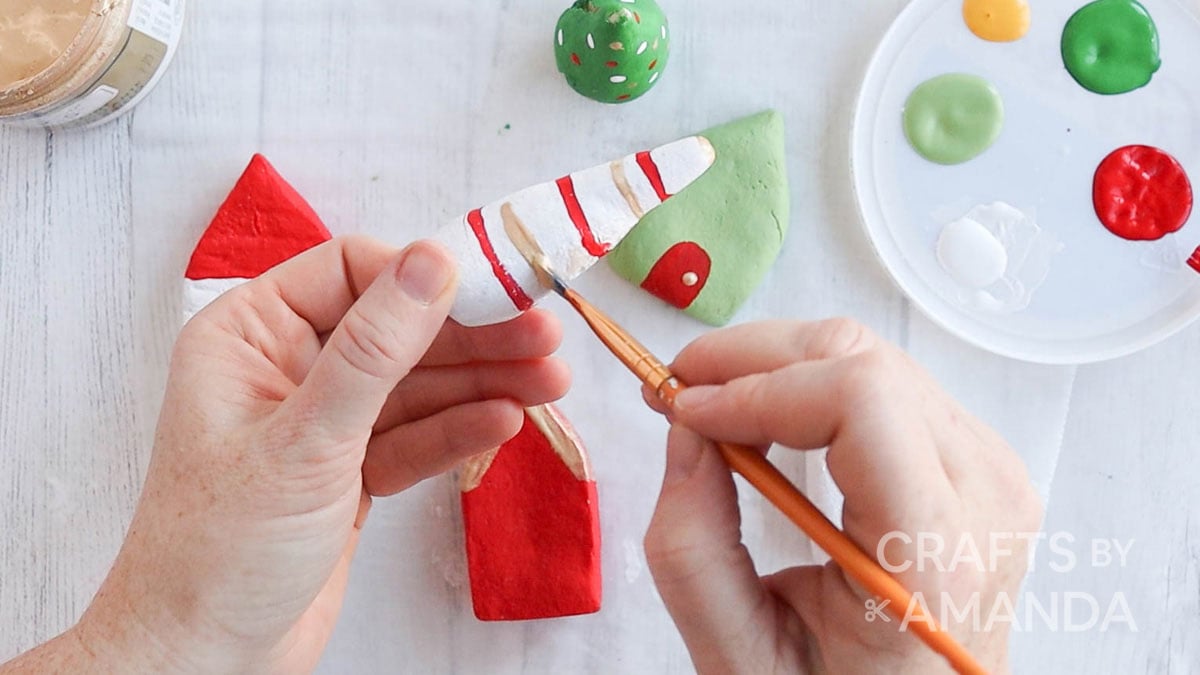

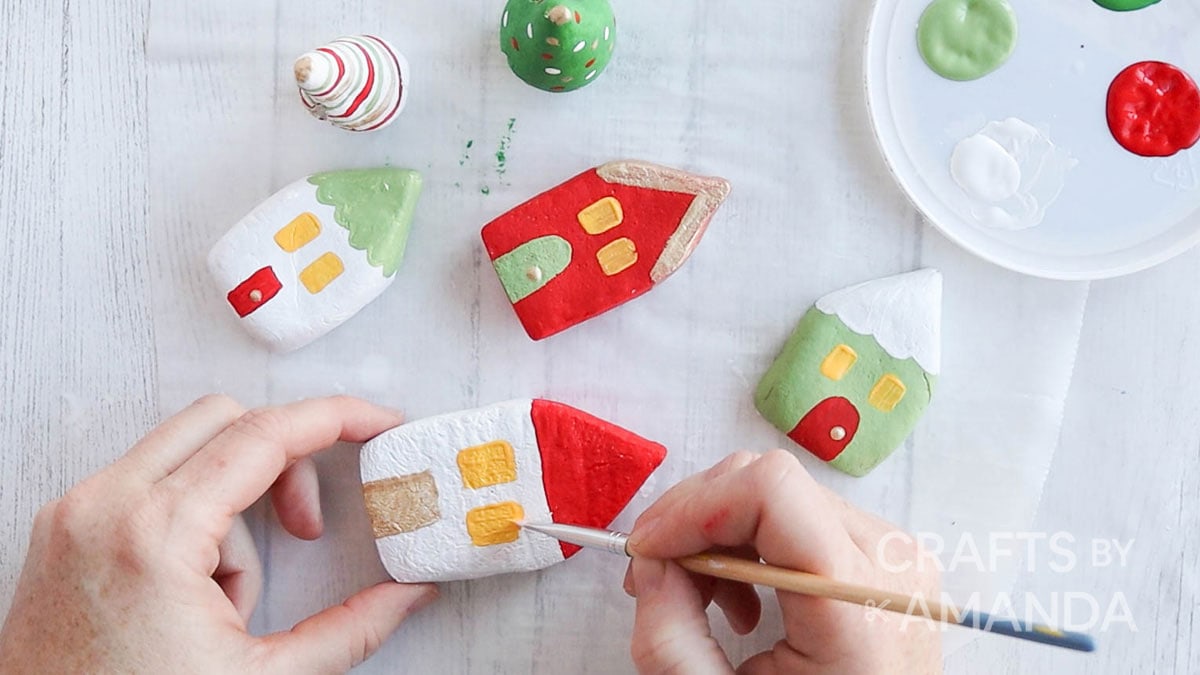
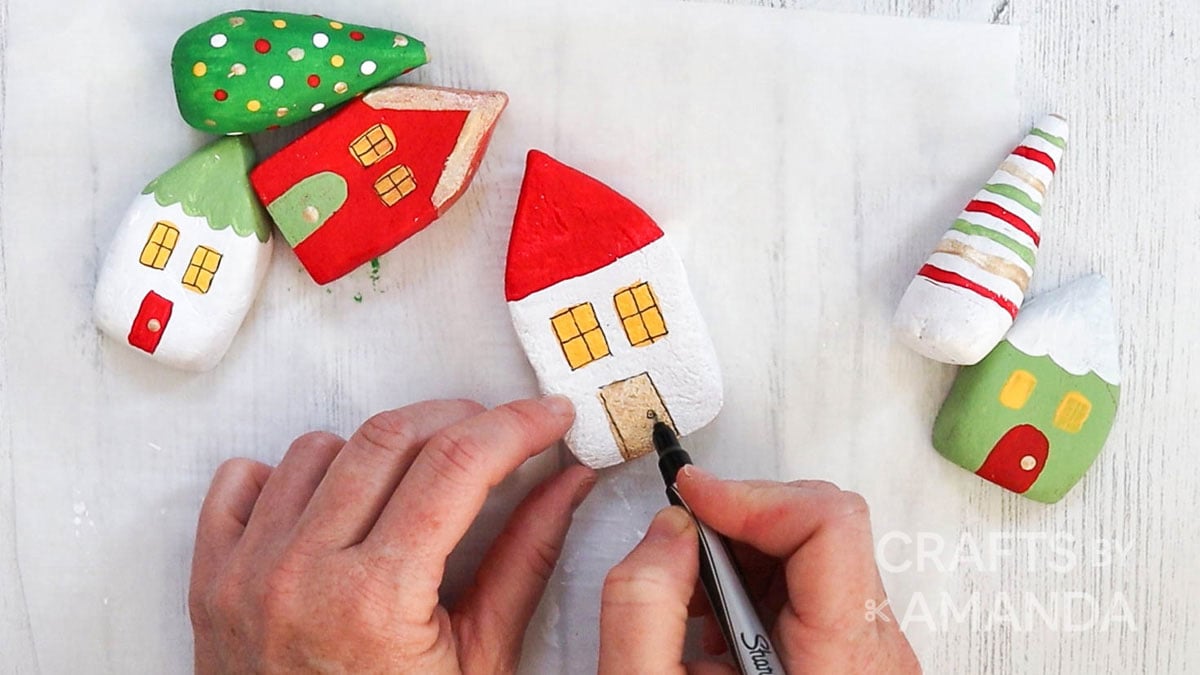
- Use a black fine tip paint marker to outline the windows, doors, and other accents. Refer to the printable Christmas village coloring guide.
Expert Crafting Tips
- Try to make your pieces all about the same thickness so that they will bake and dry evenly and together.
- We like acrylic craft paint for this project. We are using Americana Acrylic paint in Snow White, Cadmium Yellow, Foliage Green, Festive Green, True Red and Americana Decor Metallics in Soft Gold.
- Use your cute little houses nestled into the greenery of your holiday centerpiece, or prop them up on the fireplace mantel.
NEXT: We are making a Christmas Village Shadowbox using these darling little houses!
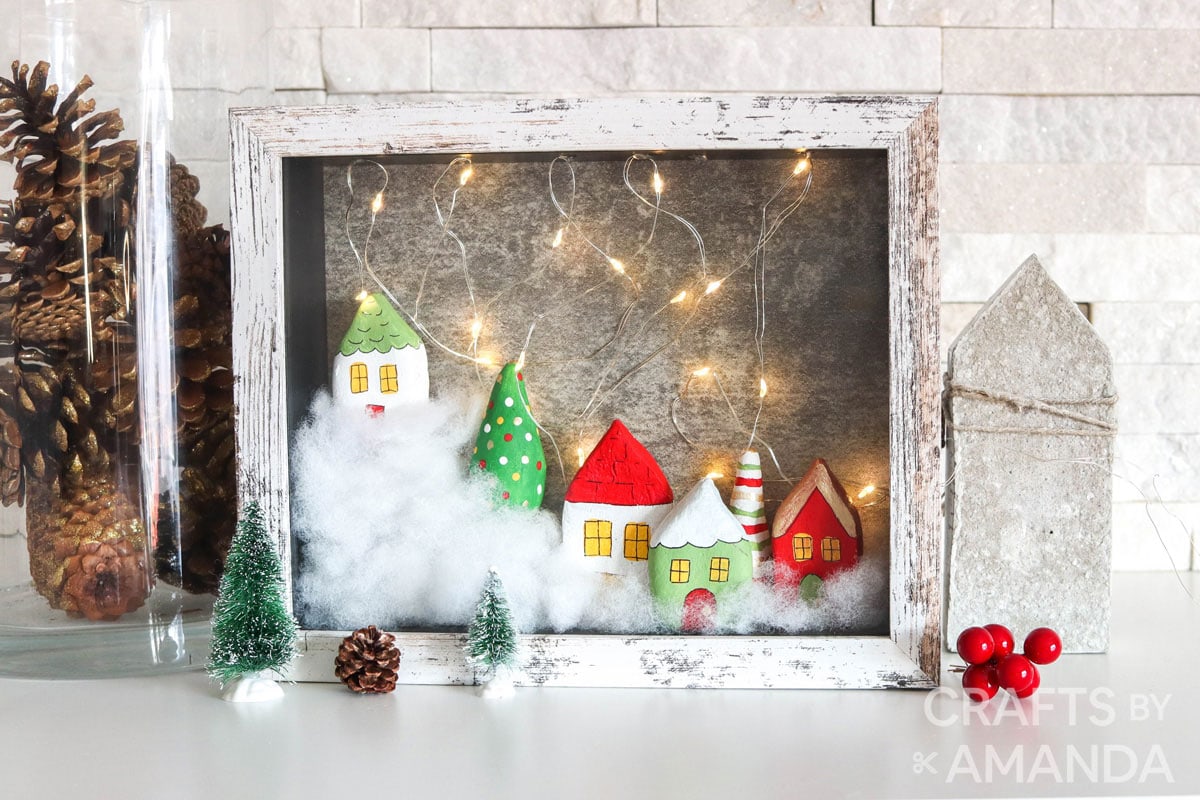
Click photo for Christmas Village Shadowbox tutorial
Hope you enjoyed this project. We love sharing ideas with you and hope you will let us know if you make your own!
More Christmas Projects
- Snowy Pinecone Luminaries
- Winter Hat Door Hanging
- Snowman Hat Centerpiece
- Christmas Votive Holders
- Sea Glass Christmas Trees
- Cinnamon Ornaments
I love to create and share my projects with you! I know it’s hard to remember to come back and search, so I’ve made it easy for you with my weekly newsletter! You can subscribe for free and I’ll send you fun crafts and delicious recipes every week right to your email.
Salt Dough Houses
Supplies
- 1/2 cup salt
- 1 cup flour
- 1/2 cup water
- Extra flour if needed
- Americana Acrylic paint in Snow White Cadmium Yellow, Foliage Green, Festive Green, True Red and Americana Decor Metallics in Soft Gold
- Paint Marker in black or black Sharpie pen
Craft tools
- Baking Sheet
- Paintbrushes with assorted tips
Instructions
Making the Salt Dough Houses
- Following the recipe instructions from this Salt Dough Jabba the Hutt craft, combine salt, flour and water. Mix ingredients by hand until well combined and a dough is formed.
- Separate the dough into smaller portion sizes (about the size of your palm).
- Continue kneading to smooth dough and form the dough into a house shape with a triangular peak at the top. Make additional houses in various sizes not exceeding 2 ½” high and 5/8” thick.
- Form remaining dough into cone shaped Christmas trees.
- Place all shapes onto a parchment lined baking sheet and bake in an oven at 220F for 2 hours. Flip the shapes over every 20 minutes.
- Remove from the oven and leave shapes to cool completely before proceeding.
Painting the Salt Dough Houses
- Start by painting the surface of the shapes in a mix of white, greens and red. Allow paint to dry fully before applying additional coats of paint or before changing colors.
- Using a fine tip paintbrush, paint windows and door shapes on to the house as well as other accents such as scallops, stripes and dots in yellow, gold and a mix of white, greens and red.
- Use a black fine tip paint marker to outline the windows, doors and other accents. Refer to the printable Christmas village coloring guide.
Video
- Swirling Twirling Ladybugs - July 21, 2026
- Drip Tie Dye Backpack - July 17, 2026
- Mini Coastal Clay Houses - July 14, 2026


Moana Blue says
I made one box of these little village houses in a deep frame I purchased from Goodwill. It turned out so cute! My two young grandchildren wanted to make one for themselves. Done, even better. I showed one to my mum, now she’s making 5 for her friends, and I’m making 5 more. This is such a fun project, costing very little from start to finish. I got the fairy lights at the .99¢ store. Thanks for this idea!