
I’ve seen many different ladders used for photo displays and shelving, they are usually distressed in one way or another. I’ve had an old ladder sitting in the garage for many months just waiting for a make over. Round 3 of Crafting with the Stars offered up that opportunity when the theme of fabric was announced. I looked around and couldn’t find any Mod Podge ladders on the web, so that did it for me. While I didn’t advance to round 4, I did get to complete a project that I’ve been wanting to do for ages! I had a blast participating in CWS and can’t wait to see what the final 3 ladies create in round 4. For now though, I’ll share with you how I made this shabby chic decoupage ladder.
I didn’t just use Mod Podge and fabric on the ladder rungs, I also put it on a wooden letter and covered 5 hard bound books with it. I learned a neat-o trick from Amy at Mod Podge Rocks, my star partner. In this post about her fabric covered table, she tells you to prepared the fabric first by placing it on waxed paper then covering the fabric with decoupage. It makes the fabric easy to cut and eliminates the possibility of fraying. I wish I would have known that when I made this tie dye decoupage monogram frame! I had all kinds of issues with fraying on that. As you can see from the close up of the letter F, it cut beautifully!
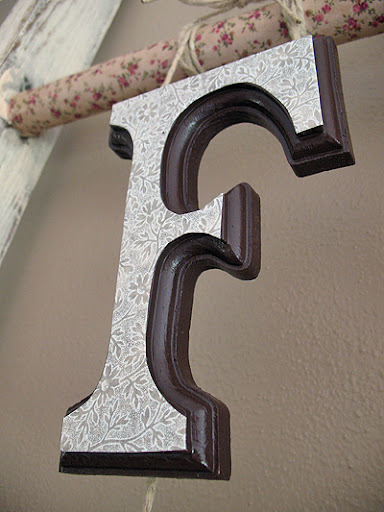
Decoupaged Wooden Letter
Again, I reiterate, brilliant idea to prepare the fabric with a layer of Mod Podge first. Meanwhile, paint the top raised area of the wooden letter, I chose a dark brown.
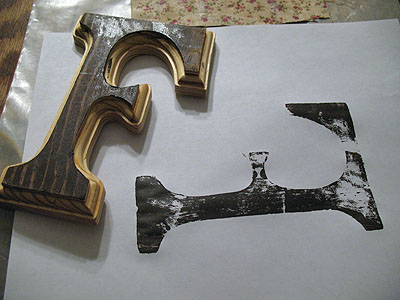
While the paint is still wet, hold it upside down and carefully press the letter down onto a clean sheet of white paper. Remove the letter and you’ve just created a pattern for cutting out your fabric. ;) Paint the entire letter brown and let dry.
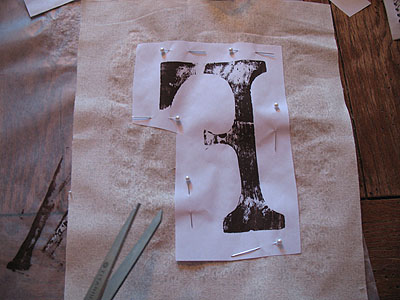
When both the paper and the fabric are dry, peel the fabric off the waxed paper. Cut around the letter pattern, leaving about an inch or so all the way around. Place your pattern onto the wrong side of the fabric and pin in place. Cut through the pattern and the fabric to cut out your fabric letter.
Now just use Mod Podge to apply the fabric to your wooden letter.
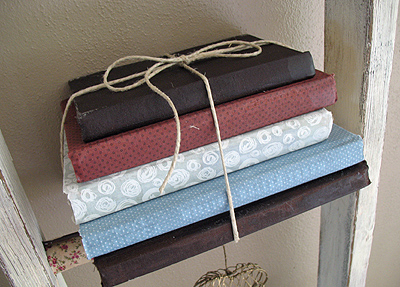
Decoupaged Book Covers
I had some old books I had picked up at a thrift store that I thought were kind of cool. They ended up being worth nothing LOL so I just had them sitting on a shelf looking antique-like. I covered each of those books with fabric. Now if you don’t want to actually decoupage onto the hard bound cover itself, you can follow my instructions over at Kaboose for making a decoupage paper bag book cover.
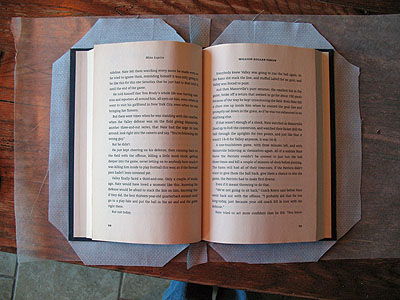
I had to do a little trial and error to get a good system, so I’ll spare you the process of the first two books! Here’s what seemed to work best. lay your book down onto the fabric, leaving enough seam at the top (about an inch or so) to be able to fold it over. You want enough seam all the way around the book, so only trim the top and bottom and the left, do the right side last. This will account for the way the book lays open vs. closed.
Paint a layer of Mod Podge onto the cover of the book. Press and smooth the fabric to the cover but don’t add Mod Podge on the outside of the fabric yet. Close the book, then turn it so that the front cover is face down. Add some Mod Podge to the binding and to the back cover. Press and smooth fabric in place, but again, don’t add a top coat of Mod Podge yet.
Open the book in front of you. Make diagonal cuts in the fabric as indicated in the picture above for each corner of the book. Cut diagonals toward the binding as well, then trim off that extra strip of fabric at the binding.
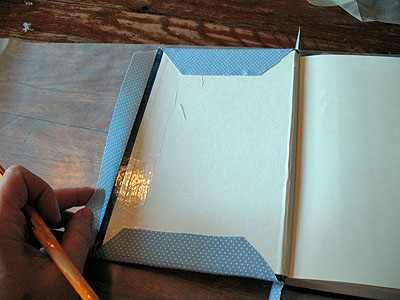
Close the book except keep the cover open. Paint some Mod Podge onto the left, bottom and top edges of the inside of the book cover. Press and smooth the fabric and then add some Mod Podge to the top of the fabric as well. Place a piece of waxed paper on top of the decoupaged pieces and close the book. This will keep the wet decoupage from sticking to your first page, so don’t skip this step! Now just repeat this process on the back cover, then add a layer of Mod Podge to the outside of the book and place it on waxed paper to dry.
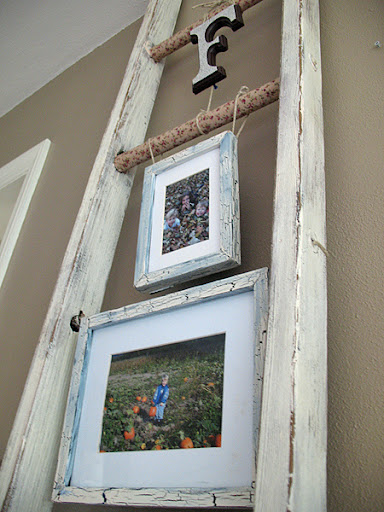
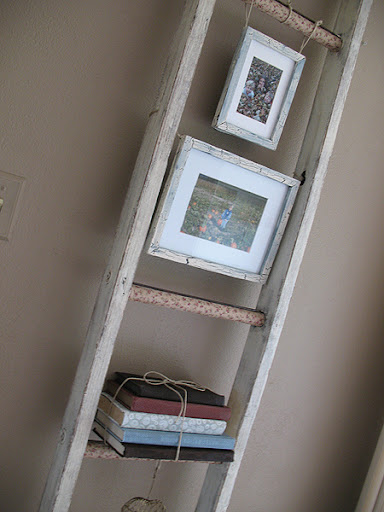
Decoupage Shabby Chic Ladder
For this ladder I actually wish I had put more paint on it than I did. But, it is what it is. :) Maybe another day. The painting and decoupaging was easy, the hardest part was tying all the items on and getting them to cooperate!
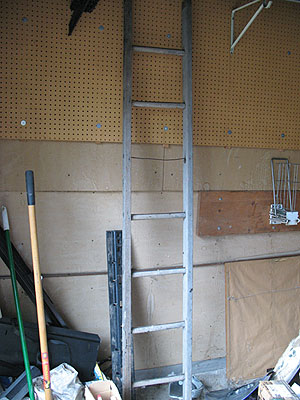
Here’s my old icky ladder, missing rung and all. Funny thing is, I spent over half an hour trying to unscrew the rusted out nut that was holding the wire in place. Then another 20 minutes searching for and finding wire snips, then trying to get the wire out from the missing rung. I finally got it out, but it turned out I could have left it in after all. See I ended up hanging a photo frame from that very section and stringing twine through the holes where the wire had been! It wasn’t my original intention for that area of the ladder, but that’s how it worked out. *sigh*
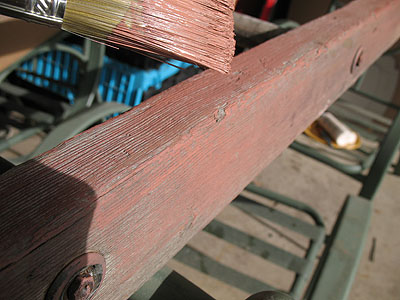
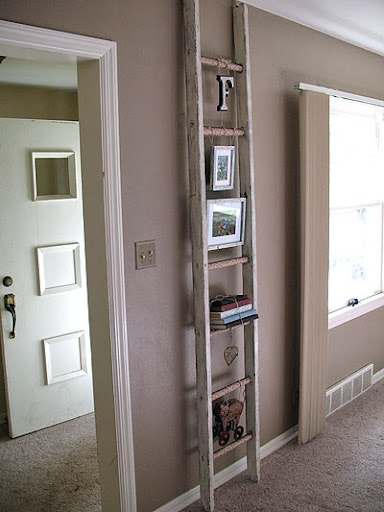
I painted the ladder lightly with a coat of this color called Toasted Nutmeg. It’s actually the color on my kitchen walls. Sounds weird, but you’ll love it :) I do! I’ll show ya later.

Then I added a coat of English Rose because I was just about out of Antique White. So I just added what I had left of the Antique White afterward. Then I sanded the edges and all areas to distress it. Still wish I would have done a thicker coat of white. Still may do that…
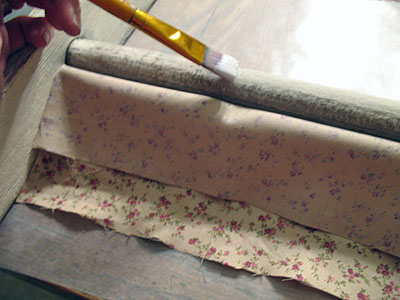
When the ladder was dry I brought it inside and put it on my dining room table. Ha ha. I know I know! I cut pieces of my chosen fabric to the length of the rungs and Mod Podged them on, making sure the seams were in the back. Didn’t really matter though, you really can’t see the seams now that it’s dry. I let the ladder dry overnight.
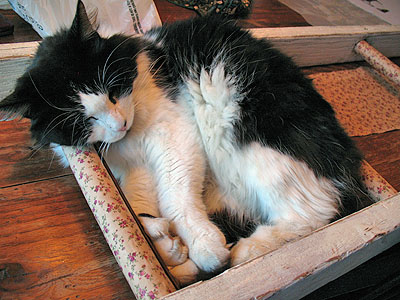
Umm….
Ok good morning Bonnie. Get out of the ladder. :) After shooing the cat away, I used twine to tie various items to the ladder and there you have it!
Here are my other projects from Crafting With the Stars:
French Fruit Wall Art
Distressed Eat Sign
Thanks for all of your votes and support for my projects during this fun competition!!


- Painted Rock Garden Markers - May 15, 2026
- A Watering Can That Pours Crystals - May 12, 2026
- How to Make Lavender Soap - April 28, 2026


Sherry says
I’ve been junkin for about a year,well actually probably all my life(in denile). I have many ladders<my sister-inlaw paints them and puts them in her garden.Putting them up against the wall would be the logical thing but I want something different. I've even used them to hang vine or pots and pans in my kitchen.
Bliss says
Stopping over from Funky Junk, your ladder caught my eye. Very cute! I’m looking in the shed tomorrow to see if I have a ladder, who knew my husbands old crap might find a place in the house!
~Bliss~
BlissRanch
Amanda says
What paint color is on your wall behind your ladder?
Amanda Formaro says
I’m sorry! I can’t seem to find the color in the basement. I know it was a glidden color though. Sorry :-/
Suzanne@Meridian Road says
That is COOL! I might have to take this idea and run with it!
Amanda says
Hey Jenna! So glad you found me too! Googling my name will definitely pop up a lot of results! LOL
Anonymous says
Hey, Amanda! I do a lot of crafting with kids and I often frequent Kaboose and Family Crafts for ideas. Tonight, I decided to google your name and am I glad I did. I found this blog! I have been browsing your crafts and I am absolutely amazed by your creativity. The best thing is that a lot of your crafts use recycled items and items around the home. Yay for that! Thank you for posting and for all the wonderful ideas! I'll never look at light bulbs and bread ties the same way! =D I often run dry on ideas for craft so I'll be coming back often to this blog. Thank you! Jenna.
Maria says
Can you come live with me? You are so talented!
Scott says
Hi Amanda, This is great, I love it. I keep a ladder upstairs (an aluminium one) so I can get access to the loft – makes me want to swap it for a rustic wooden one, so when it's not being used as a ladder, I can use it as piece of decor. Thanks Scott
Amanda says
Thanks Roeshel! Hope you had a great Thanksgiving as well :)
The DIY Show Off says
Super cute! I love old ladders! ;)
Happy Thanksgiving, Amanda! Have a great weekend!
Roeshel
Amanda says
Thank you Kristi and Ellie!!
Ellie says
Wow, I love this! I saved it to my inspiration file and will give you credit when I find a ladder. Thanks!
Kristi Flanagan says
This turned out great! Thanks for planting your creative seeds at Plant a Punkin Seed Party!
Hugs,
Kristi
Punkin Seed Productions
Amanda says
Thank you both so much!
creativejewishmom/sara says
Great project Amanda, and it looks great in your house….a fun place to display seasonal decorations too! thanks so much for sharing this and your lightbulb turkey on Craft Schooling Sunday! Thanks to you I've got some lightbulbs hanging out in my crafting bin…..
Biljana says
Amazing, great idea, bravo:))
Greetings from Europe, Biljana
Amanda says
Elizabeth – thank you so much for the feature!
Donna – I know! Every time I see Beethoven on your posts I think the same thing!
jenny – I remember seeing your ladder, very cool!
Thank you everyone!
April from HomeHinges.com says
I love the ladder and everything on it, especially the custom letter you created.
Julie says
Love it. I too, have an old ladder waiting in the garage for my hubby to cut down. It's TOO tall for the ceilings right now. Enjoyed seeing how you transformed yours! Thanks for sharing it!
Looks GREAT!
Jenny says
Very pretty, I did a similar one a couple months ago:
http://jennyerb.com/youll-never-believe-what-weve-been-up-to-home-projects-marathon
PEACHES says
Hey Amanda! Love this ladder… Great idea :)
Linda Q says
Very darling idea. You are making me rethink my old red ladder on our covered back deck. Hmmmm
Linda
brandy-son Zen master flash says
Totally awesome! I love that letter F.
Funky Junk Interiors says
How beautiful! I love your different take with the extra details you've added. And your cat is a double for my Beethoven. I gasped when I saw Bonnie! Awww… :)
Donna
http://funkyjunkinteriors.blogspot.com/
Elizabeth @ Ucreate with Kids says
This is so creative! Seriously! I just featured some of your kid's crafts.
http://ucreatewithkids.blogspot.com/2010/11/weekend-spotlight-crafts-by-amanda.html
Thanks for sharing your fun ideas!
Amanda says
Thanks you guys!!
Samantha says
This looks so great, I really really like it!!
Nike@ChooseToThrive says
I love how this turned out! The covered rungs had a great pop of color. Awesome!
Kelsie From Our Country Home says
I love this project and how totally chic is the result…I would love to do something like this a ladder for my bathroom but will have to wait until I don't have a 2yr old who would want to climb it for sure lol.
Sorry you did not make if farther in the contest, you are very clever.
Kelsie
San says
Try hanging it horizontally and display you treasures that way for now!
Amanda Dale says
Love it!
Jamie says
This is so beautiful. I love the block letter. I'm a new follower from the Look at me party. http://diyhshp.blogspot.com/
DANA says
That is awesome! I would love for you to come link up at my Strut Your Stuff Linky Party!
http://danajeanward.blogspot.com/2010/11/strut-your-stuff-party.html
Matt, Erin and Linden says
Love this idea, how did you attach the ladder to the wall? Just wondering how I can keep my 3 year old from knocking it over:)
Midwest Cottage says
I love this project and I love that little kitty cat! So cute and unique. Love it!
Amanda says
Thanks so much you guys! I still think I want to put more white on it, but that's a project for another day! LOL :)
Tammy@ Not Just Paper and Glue says
That is awesome! I love it!!
Creative Decor by Brooke says
I love that. It is so unique and fun. I would never have thought to fix it up like that and you made it look great.
Love it.
Brooke
Angie @ The Country Chic Cottage says
Fabulous job!! :)
Sue says
You are so creative, Amanda! Really!
Mandi says
Amanda!
I loved your project! It was totally unique and awesome! Its been so fun getting to know you and I hope that we can stay BBFF's!
love you lady!
mandi
Lorie says
I LOVED this project and it was the first one I voted for. Unfortunately I think my vote might be the kiss of death in this competition!! ;D
Hi, I'm Susan! says
thank you so much for doing this project! i purchased 2 small ladders from an amish yard sale a couple months ago and they have been sitting in my closet just waiting for me to do something to them. i had this project in mind but i wasn't sure how it would turn out. seeing yours makes me so excited to do this project now!!!
Judy @ In His Grip says
This is a great idea and I love the creative things that you put in and on your ladder. I love, love, love it.
Corinna says
This is fabulous. I love it. I've been planning my own ladder redo that is in my garage right now. Just waiting for the time. :)
Michele {The Scrap Shoppe} says
I totally voted for ya, girl! I loved all of the techniques you used. I thought your used of fabric were great!