
Why we love this project
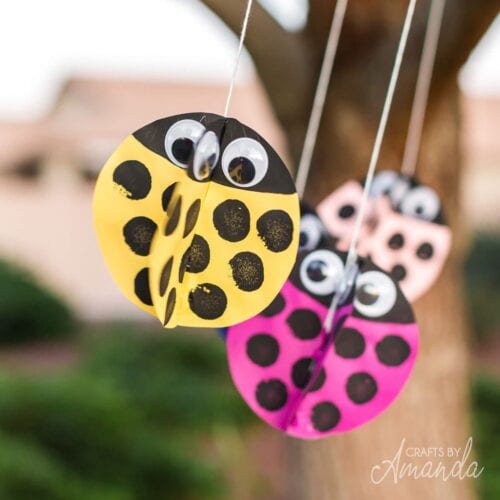
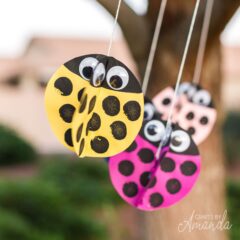
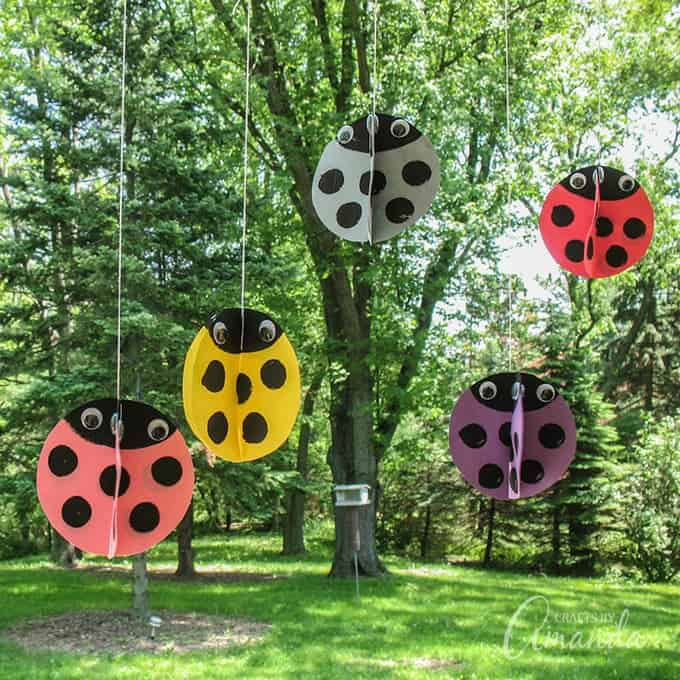
Now that the weather has warmed up, you and your kids will love these adorable twirling ladybugs! They swirl and twirl and look so cute, all you need is a little breeze. Similar to my Twirling Bees and these adorable Twirling Lovebugs, your children will love watching them twist and turn, or to simply have them hang from the ceiling in their bedroom.
This cute kid’s craft would be a fun ladybug decoration for a birthday party, barbecue or just to dress up your child’s bedroom or playroom. They are so fun to watch and with a variety of different colors, they add a nice colorful touch to any place or occasion!

RELATED – While ladybugs are all about summer, when fall comes try our twirling paper monsters, great for Halloween!
Supplies you will need
Get full list of supplies and directions in the printable version at the end of this post.
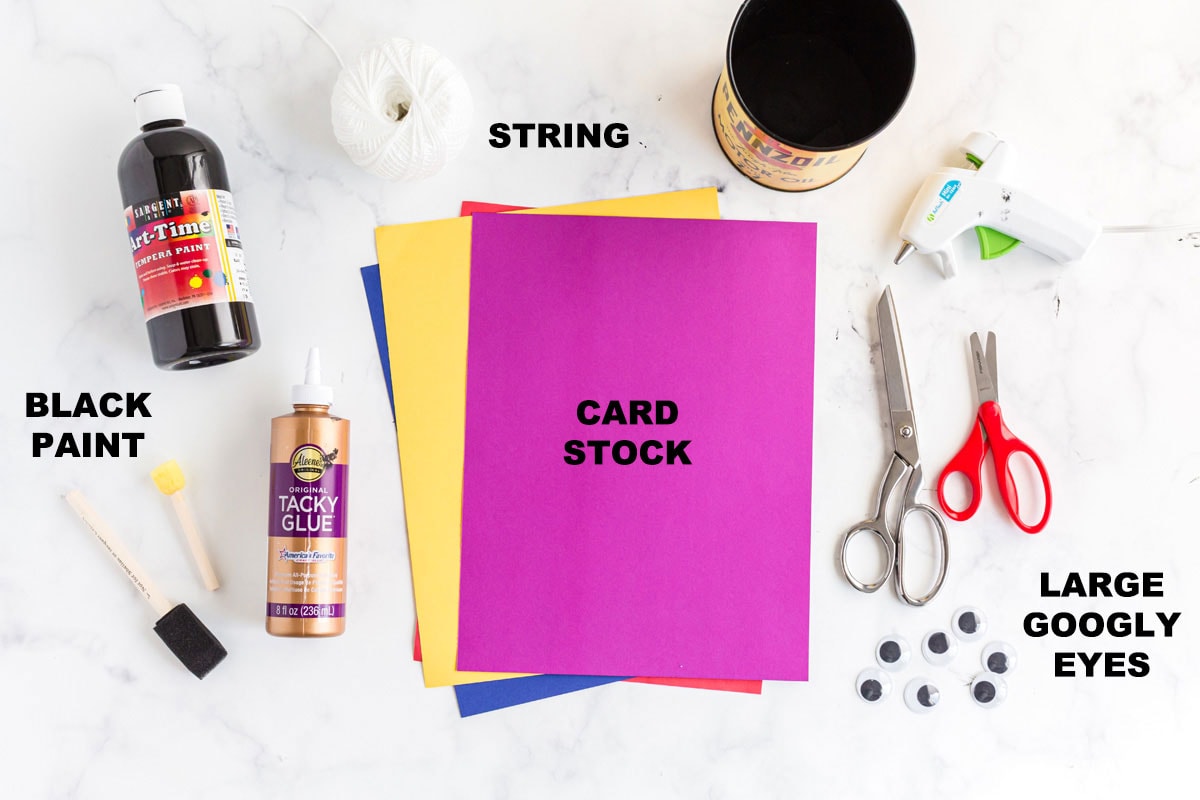
- card stock or construction paper, various colors
- pencil
- something round for tracing (jar, can, etc)
- scissors
- black craft paint
- small round spouncer
- paintbrush
- 8 large (approximately 1-inch) googly eyes for each ladybug
- string
- white craft glue
- hot glue gun (optional but recommended)
How To Make Swirling Twirling Ladybugs
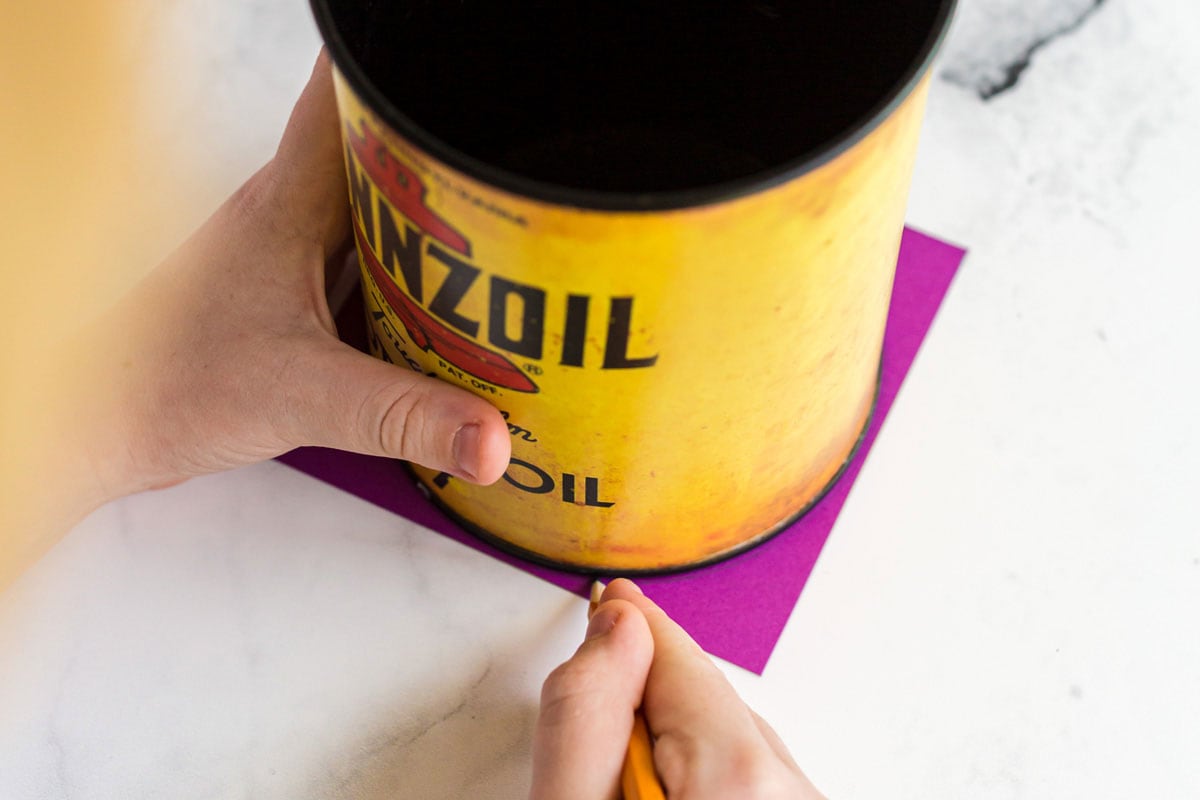
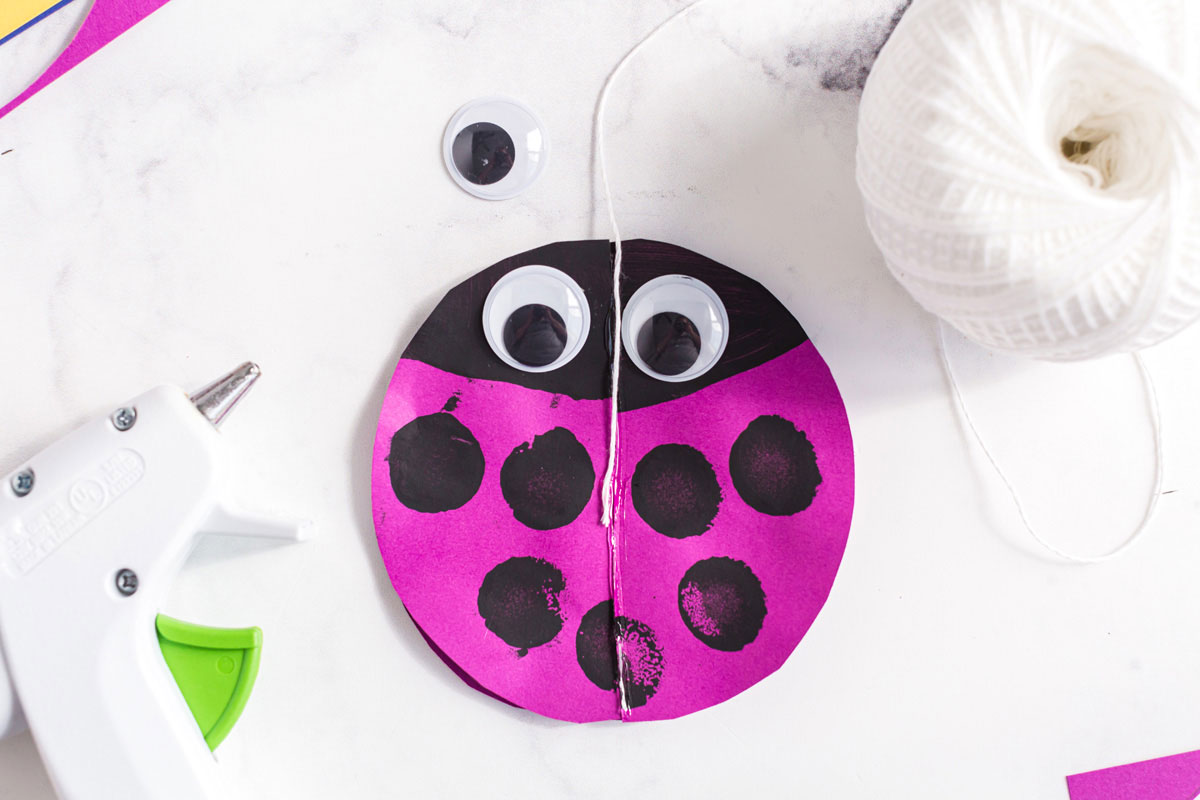
- You will need two construction paper circles for each of the twirling ladybugs. Cut construction paper into 4.5″ squares. Stack two squares on top of each other and trace around something round to create your circle. I used a small can.
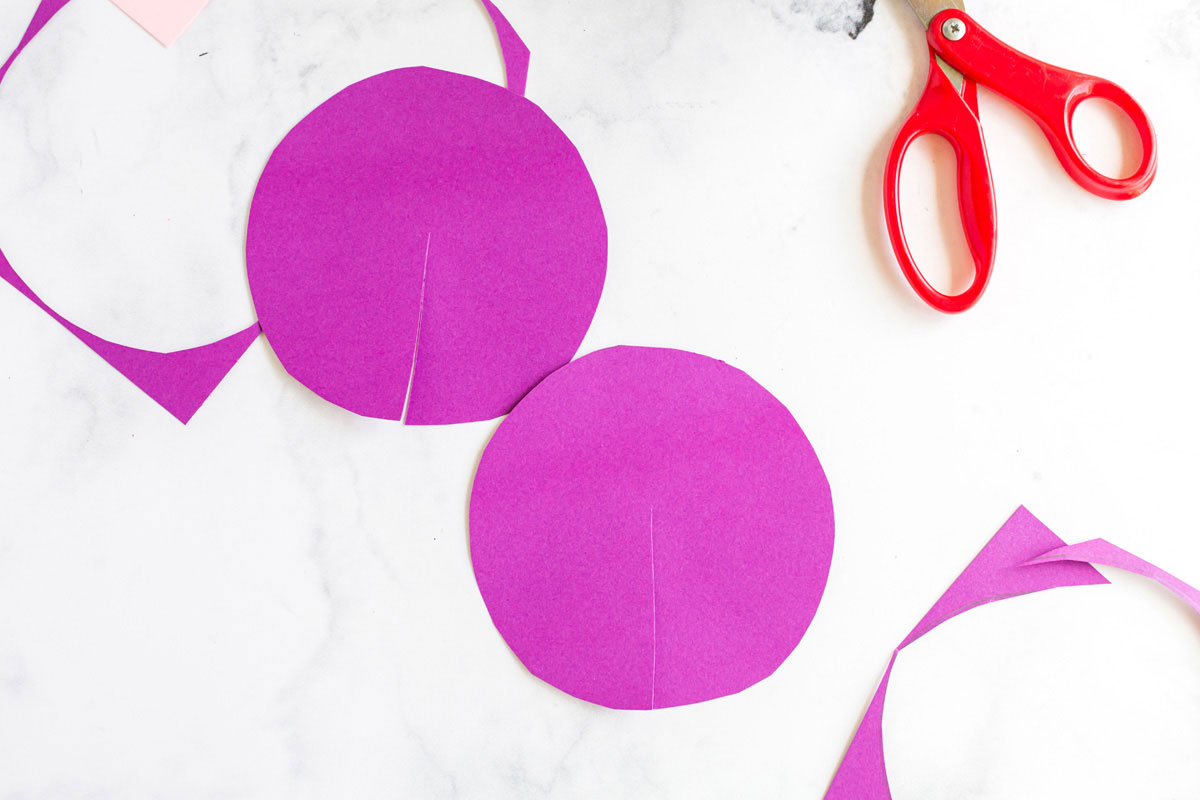
- Holding the stacked paper together, cut the circles out of the paper.
- Still holding the two circles together, cut a slit from one edge of the circle up into the middle of the circle.
- Use as many colors as you like. I used pink, red, orange, yellow, blue, green and purple.
- Place one of the circle onto a piece of scrap paper. Paint a section for the ladybug’s head, overlapping the paint brush onto the scrap paper. This will give you a guide to use for all the remaining circles.
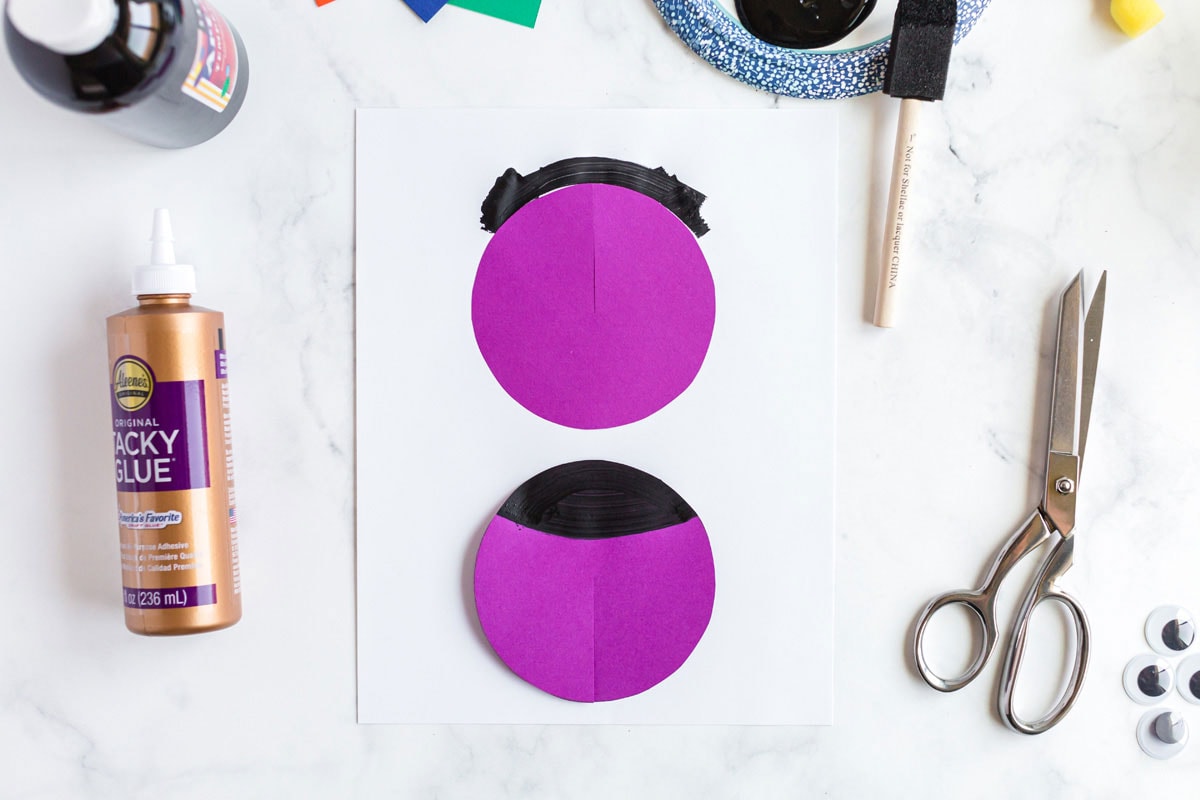
- For each pair of circles, you will paint a head at the opposite end of each one. So for the first one, line up the slit you cut so that it points directly downward and paint the head at the top, the end of the slit is the bottom. For the other circle, turn it the opposite direction so that the slit is at the top and paint the head there. This will ensure that your “heads” line up together.
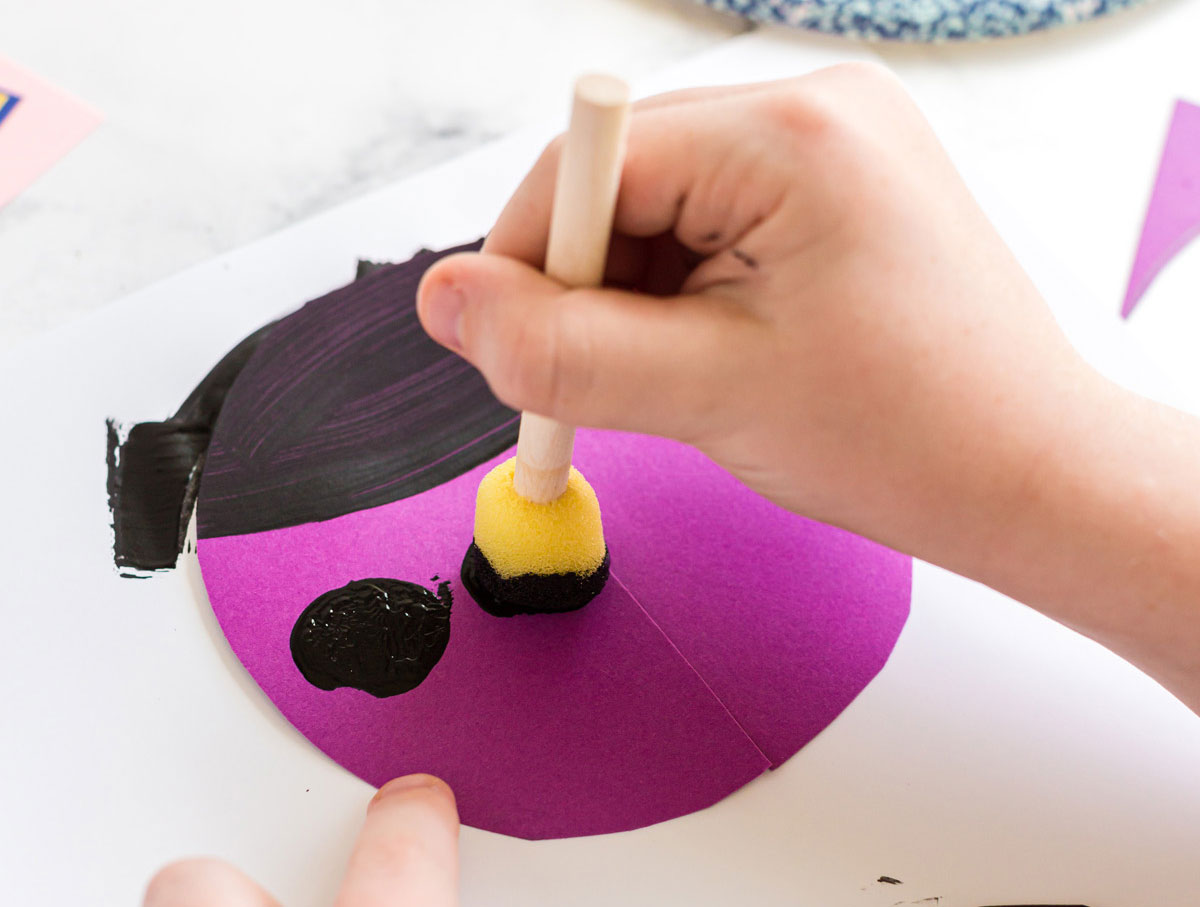
- Use the small spouncer dipped in black paint to add the ladybug’s spots. Set each one out to dry and continue painting until all are done. Let them dry before turning the over and repeating this process on the other side.
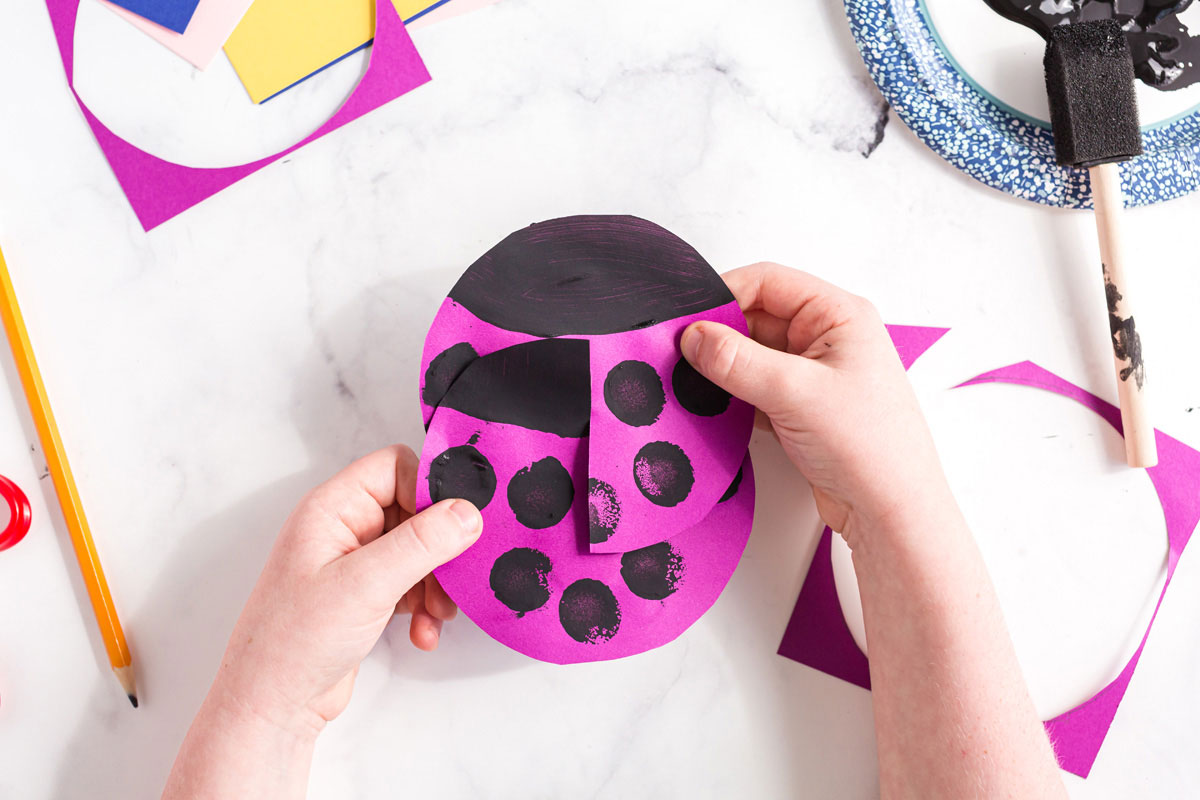
- Take the two circles and line up the slits. Insert them into each other. The heads should line up as shown. Now lay them out flat and glue wiggle yes onto head, one on each side. Don’t put the eyes too close together. Farther apart is better. You will need eyes on every section. There are 4 sections.
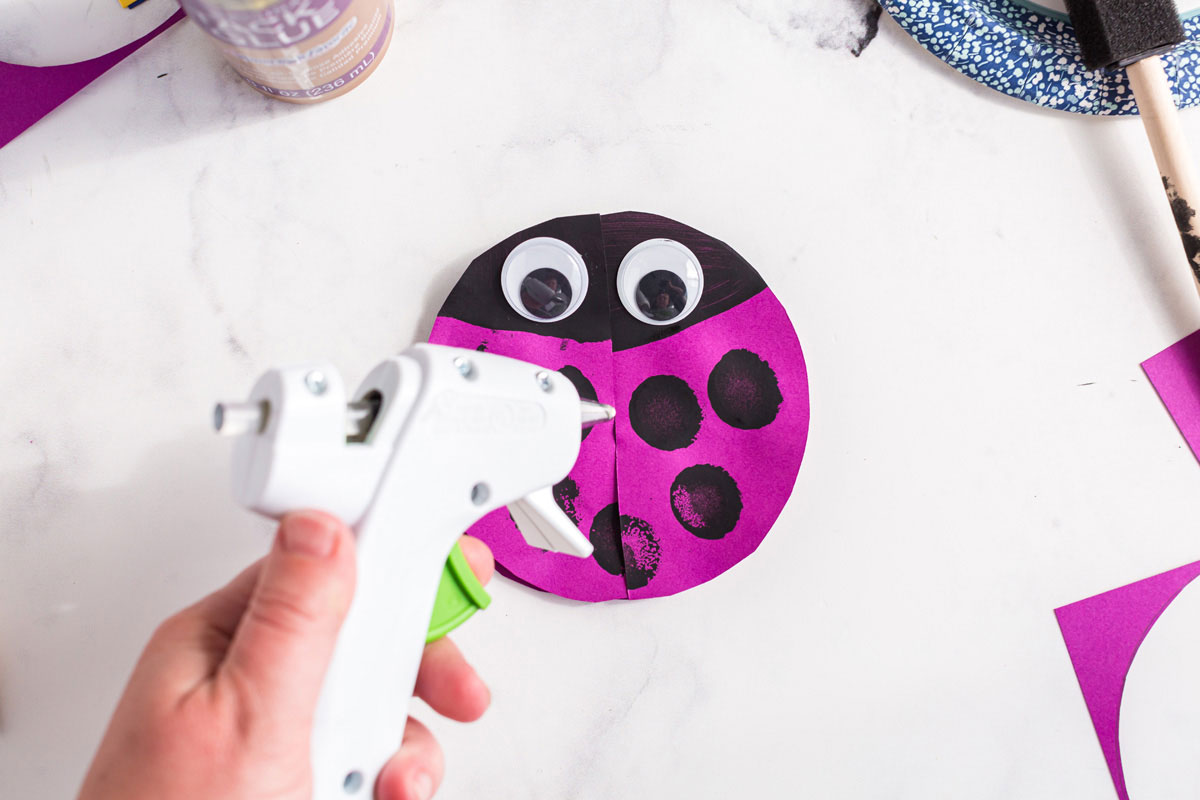
- Run a thin line of hot glue where the slits intersect to connect them together. Cut a piece of string and glue it in with the slits.
Now you are ready to hang your twirling ladybugs!

More Easy Crafts for Kids
- Ladybug Painted Rocks
- Paper Plate Tropical Fish
- Paper Plate Watermelon Sun Catchers
- Paper Plate Ladybug Craft
Swirling Twirling Ladybugs
Supplies
- card stock or construction paper various colors
- pencil
- something round for tracing jar, can, etc
- scissors
- black craft paint
- small round spouncer
- paintbrush
- 8 1-inch googly eyes for EACH ladybug
- string
- white craft glue
- hot glue gun optional but recommended
Instructions
- You will need two construction paper circles for each ladybug. Cut construction paper into 4.5″ squares. Stack two squares on top of each other and trace around something round to create your circle. I used a small can of paint.
- Holding the stacked paper together, cut the circles out of the paper.
- Still holding the two circles together, cut a slit from one edge of the circle up into the middle of the circle.
- Use as many colors as you like. I used pink, red, orange, yellow, blue, green and purple.
- Place one of the circle onto a piece of scrap paper. Paint a section for the ladybug’s head, overlapping the paint brush onto the scrap paper. This will give you a guide to use for all the remaining circles.
- For each pair of circles, you will paint a head at the opposite end of each one. So for the first one, line up the slit you cut so that it points directly downward and paint the head at the top, the end of the slit is the bottom. For the other circle, turn it the opposite direction so that the slit is at the top and paint the head there. This will ensure that your “heads” line up together.
- Use the small spouncer dipped in black paint to add the ladybug’s spots. Set each one out to dry and continue painting until all are done. Let them dry before turning the over and repeating this process on the other side.
- Take the two circles and line up the slits. Insert them into each other. The heads should line up as shown. Now lay them out flat and glue wiggle yes onto head, one on each side. Don’t put the eyes too close together. Farther apart is better. You will need eyes on every section. There are 4 sections.
- Run a thin line of hot glue where the slits intersect to connect them together. Cut a piece of string and glue it in with the slits.
- Now you are ready to hang your twirling ladybugs!
Video
Originally published on this blog on April 14, 2012 but has since been updated with new photos.
- Swirling Twirling Ladybugs - July 21, 2026
- Drip Tie Dye Backpack - July 17, 2026
- Mini Coastal Clay Houses - July 14, 2026


shaina thompson says
You always come up with such smart ideas!!! These are super cute. Thanks so very much.
Amanda Formaro says
Thank you so much Shaina!
Deebi27 says
Love this idea, thinking about making some and laminating the pieces after decorating, so they are more weather safe!
Amanda Formaro says
Great idea!! :)
Hilde says
I was thinking maybe the plastic sheets and they are also colored
Darla L. Harris says
I was thinking the same thing!
valaria says
i like that idea! i thought about using cardboard to make them a bit more sturdy.
Marsha says
they looked adorable but maybe you could use old cd’s that way they would be weather proof you could also paint them
Claire says
THIS WAS VERY NICE LOVE IT. WILL TRY THIS OUT. THANKS.
Megan Bayliss from The Junk Wave says
Beautiful, beautiful craft. I made them into Ladybabies by reusing the waxy white rounds found underneath milk and drink bottles. Have credited the idea back to you.
Amanda says
These are wonderful, thanks so much for sharing!
abraxandria says
That was fun to make! :)
I like this craft!!!
Thanx for that nice idea!
Kaye says
Cut out circles from gal milk cartons and your lady bugs will be weather perfect.
Amanda says
I like that idea Kaye, but they would be plain white. So I got thinking and your idea led me to think of plastic laundry soap bottles! Colorful and the perfect sturdiness!
Hope says
I was actually thinking about using craft foam.
Amanda Formaro says
Yes craft foam would work great :)
Maria says
Is craft foam waterproof? I ve never used it sorry.
Amanda Formaro says
It won’t last forever, but yes it’s resistant to water :)
Lillipilli Lane says
Thank you Amanda! Discovered your crafts recently and love the ideas! I have reposted on FB:) https://www.facebook.com/LillipilliLanehandmadeclothing
regards
Keryn
Amanda says
Thanks so much!
Kristin @brilliantlikefireflies says
These are so cute. My little sister would love this.
Amanda says
Thanks Kristin!
jalet says
Great tut! On the FB site I posted this comment, and thought it may be helpful for other readers with fruit trees wthat sustain bird damage: “If a few of the black dots were replaced with foil or something shiny, these would be great to hang in the fruit trees as a way to scare off the would be bird thieves that destroy the fruit. Cute idea!”
Amanda says
Great idea!
Ruth says
These are perfect to replace the easter decorations we’ll take down thisd week. Thank you!
Amanda says
Thanks Ruth!
Linda says
Oh how sweet! Thank you for all of your inspiration.
Amanda says
Thanks Linda!
Cookie 17 says
Hey Amanda Another great job,Thank’s keep up great work,,
Amanda says
Thank you Cookie!