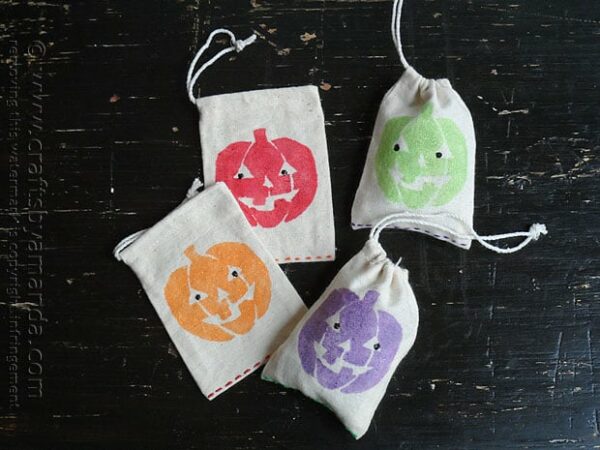
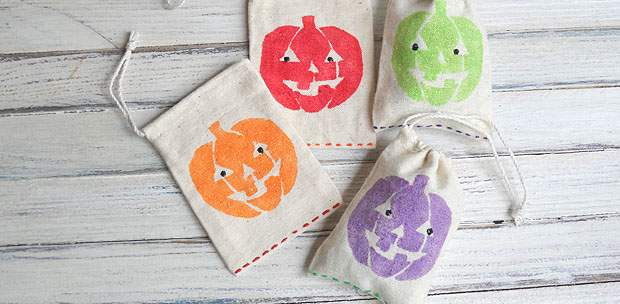
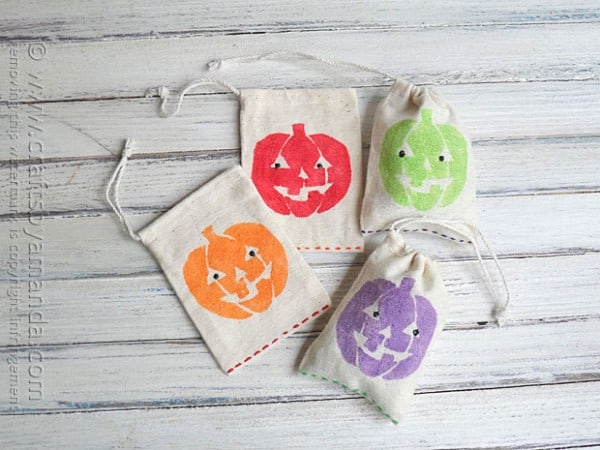
Are you having a Halloween party for the kids this year? Or maybe you just need a fun way to send some treats in to the classroom. I’ll show you how to use a simple Jack o’Lantern stencil and some glitter paint to make these festive muslin treat bags!
These would be the perfect little goodie bags for a Pumpkin Painting Party!
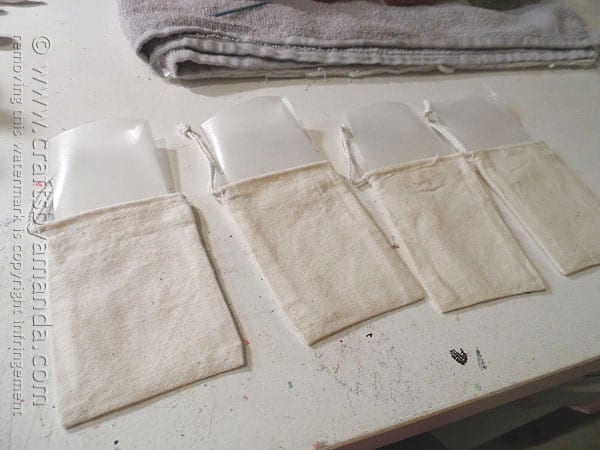
I used strips of waxed paper inside the bags to keep any paint from seeping through.
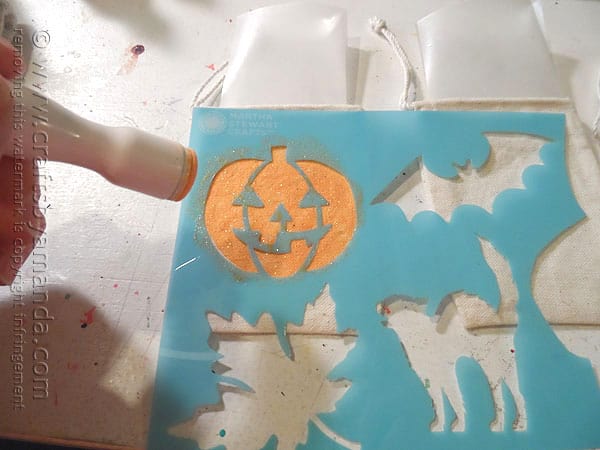
Remember, with stenciling you don’t want a ton of paint on the applicator. Dab off the excess onto paper towel. Too much paint can cause it to sep underneath the stencil. You’ve heard the phrase “less is more”, well that definitely applies here!
I made these bags before I discovered the magical powers of cosmetic sponges, available from the dollar store. They are my go-to applicator now for stenciling, but for this project I used a spouncer.
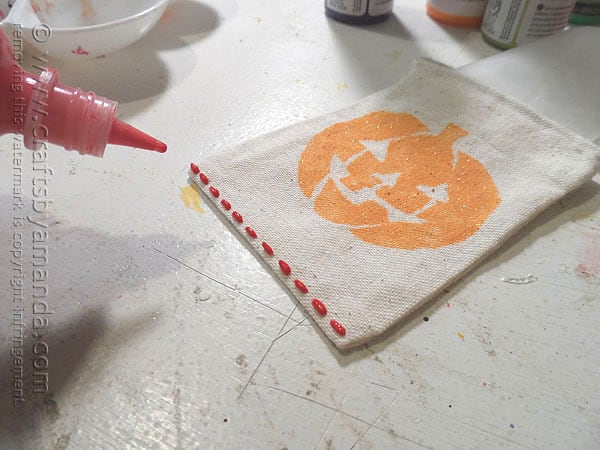
I added the dashes along the bottom of the bag uses puffy paint, corresponding the puffy paint color with the pumpkin color. Black puffy was great for adding the dots for the eyes.
Now just let it all dry for several hours. if you can, overnight is your best bet. Remove the waxed paper and you’re ready to go!
Tip: While this paint is non-toxic, it’s best to put only wrapped candies inside the bags. If you are making something homemade, place the items inside plastic wrap or a sandwich baggie before placing inside the muslin bag.
If you are having a Halloween party, these are great for take away treats or prizes. You might also like these Halloween Treat Cups that look like Frankenstein, a Jack o’Lantern, some spooky eyes and a monster. These Bleeding Place Cards are also fun for a party and these Monster Treat Bags would be great too.
Happy Halloween!
Glitter Jack o’Lantern Treat Bags
Supplies
- 3 "x4" muslin treat bags
- Waxed paper
- Pumpkin stencil
- Spouncer or stencil brush
- Puffy paint: red purple, green, orange, black
So Soft Glitter fabric paint:
- Sizzling Red
- Purple Passion
- Limelight
- Tiger Orange
Instructions
- Insert waxed paper inside of each muslin page to keep paint from seeping through.
- Place stencil onto bag and apply glitter paint with spouncer. Repeat for each bag and each color.
- Use puffy paint to add dashes along the bottom of each bag.
- Use black puffy paint to add dots to the eyes.
- Allow everything to dry undisturbed for several hours.
- Snowman Slime - December 20, 2024
- Paper Plate Santa, Snowman and Rudolph - December 13, 2024
- Cinnamon Ornaments - December 6, 2024


Pamela says
Thank you so much for your craft projects – my sister and I are going to make the bags up except bigger and with Christmas stencils to put gifts into.
Also, we are going to do both the luminary crafts – I have 2 bags of pinecones I got when on vacation.
Amanda Formaro says
Hooray, sounds super fun!
Wendy Byde says
These are so cute! I totally want to make them!
Amanda Formaro says
Thank you Wendy! :)