
January means it’s time to put away the Christmas decorations, but there are still a couple months of winter left. Winter decor, such as snowflakes, are a great way to spruce up your home before it’s time to break into spring decor!
Why we love this project
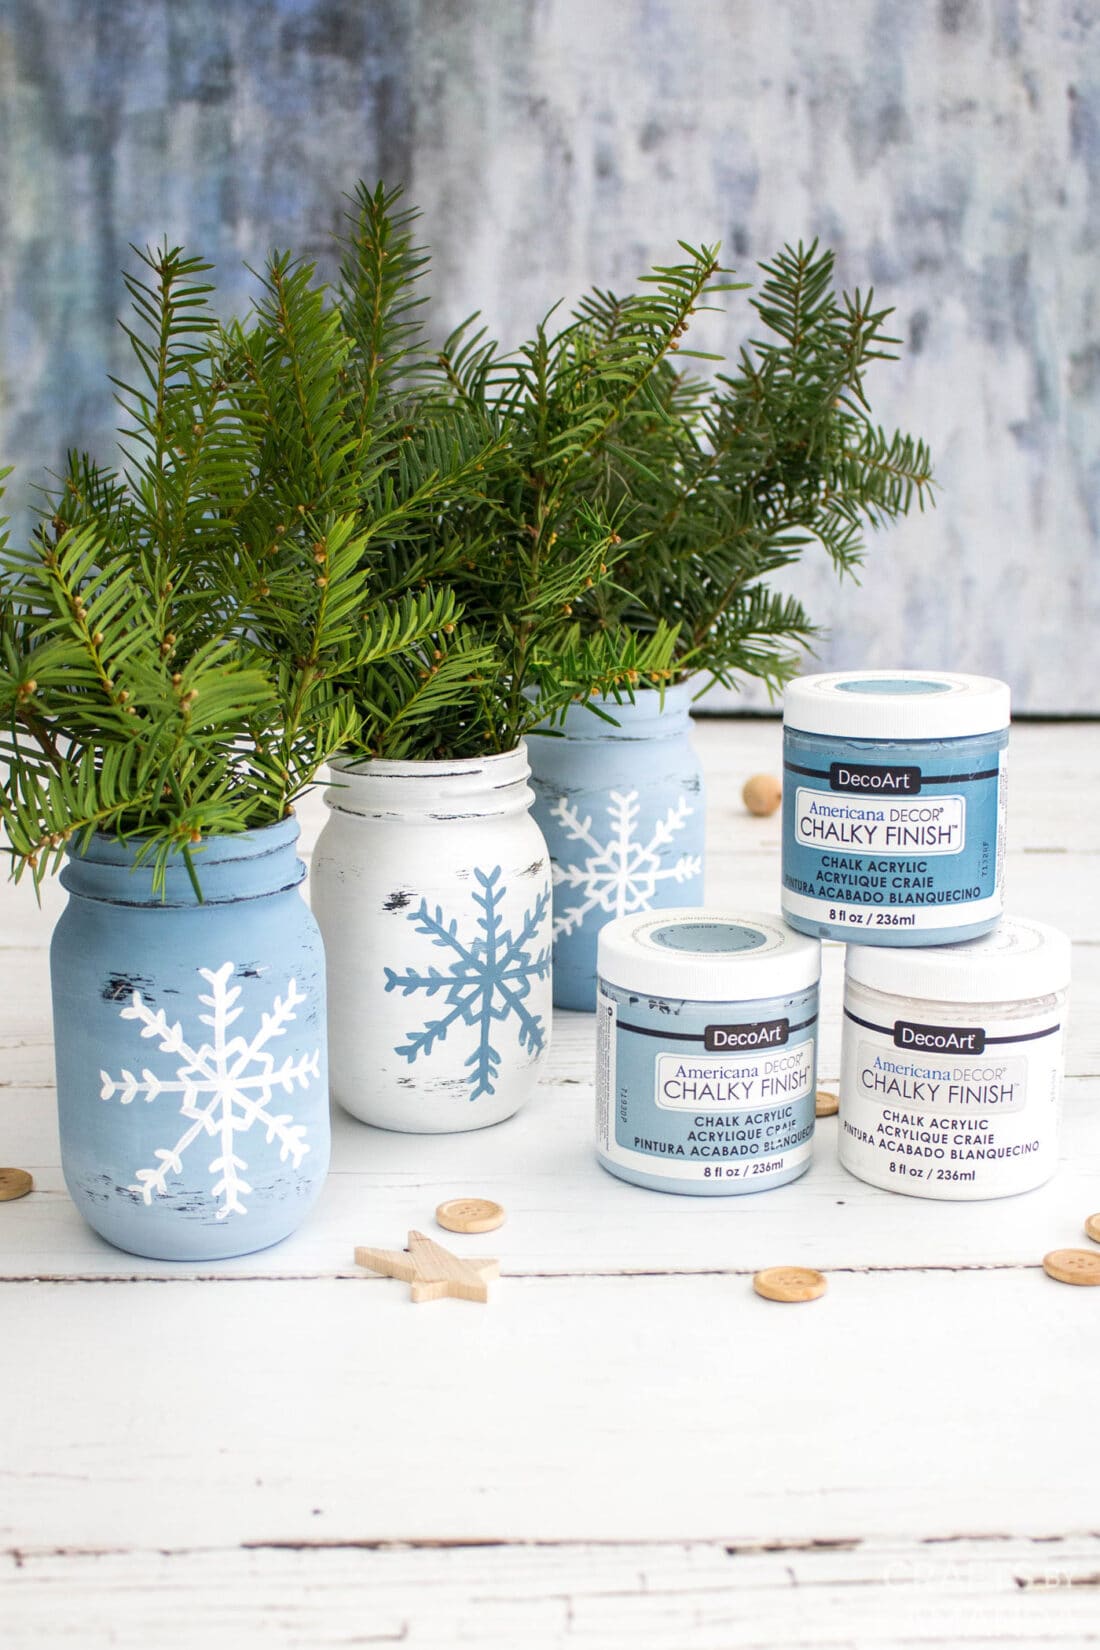
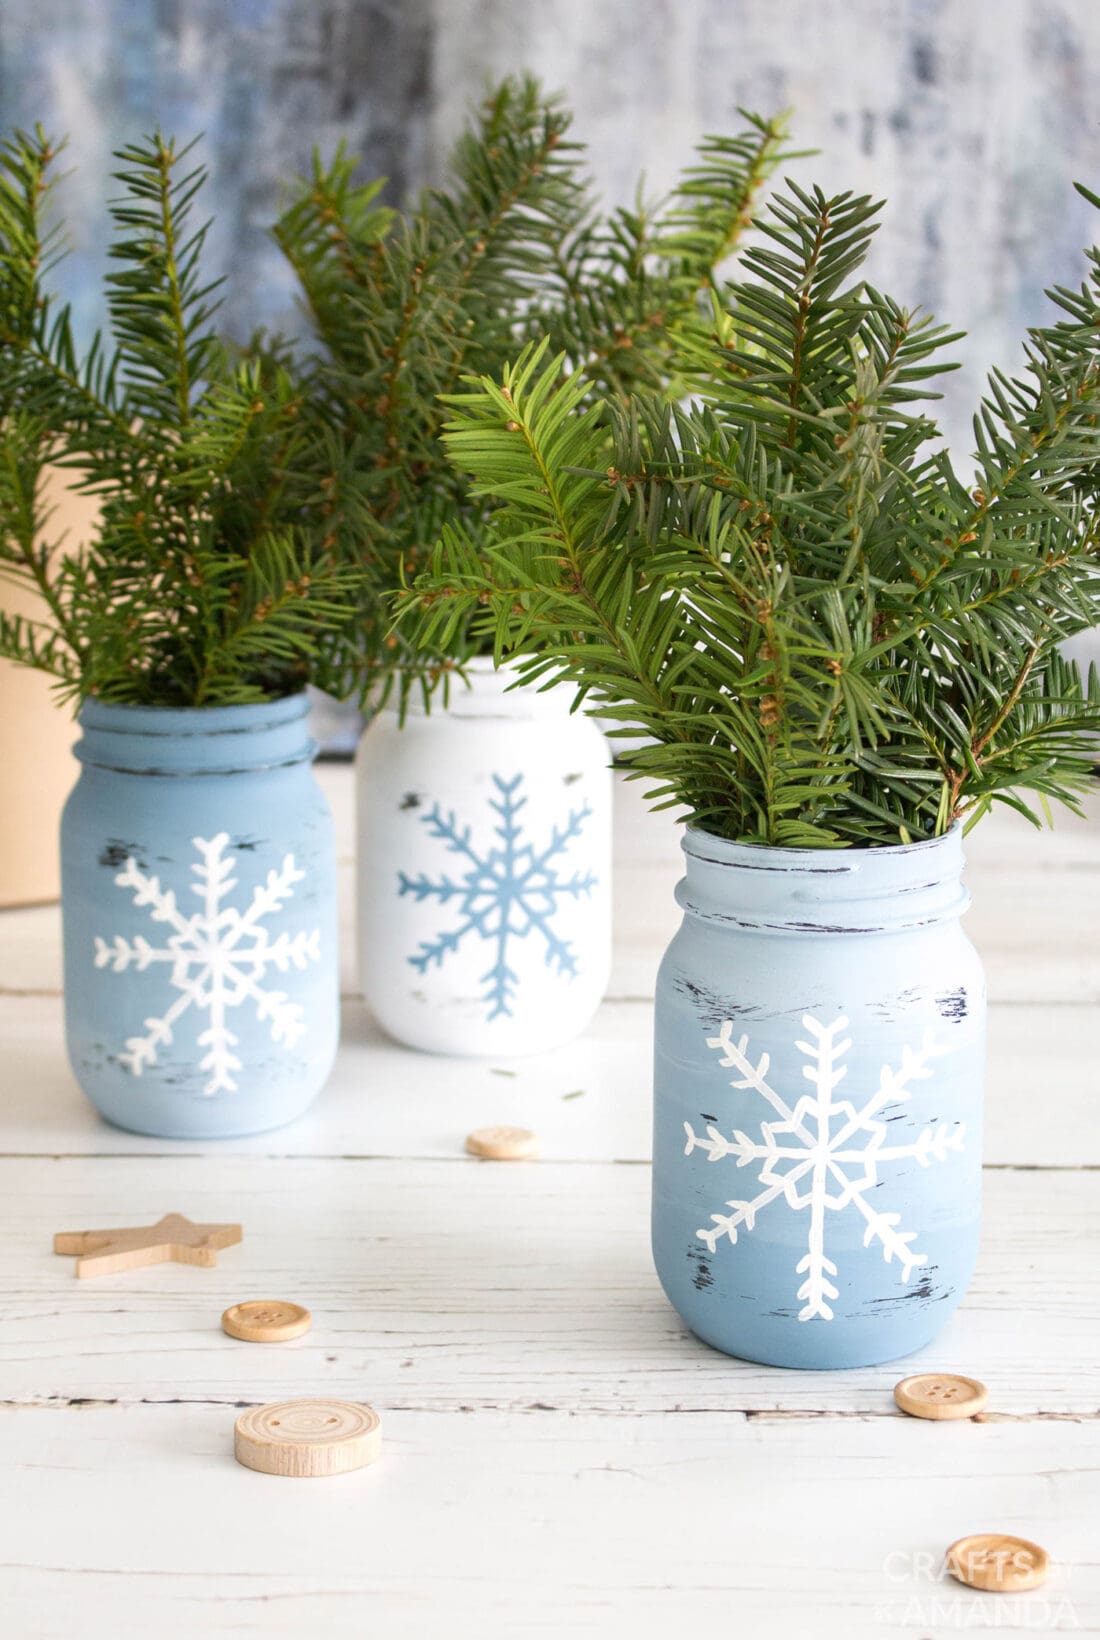
We love the look and finish of chalky paint, and it works beautifully on these snowflake mason jars. Do you remember our mason jar canisters (perfect for the bathroom) that are also made with chalk paint? Works great on painted wine bottles as well!
Crafts by Amanda is a proud member of the DecoArt core blogger family! And just so you know, we were compensated for this project, though all of the opinions are 100% ours and we love this product!
Helpful Project Information:
- Age Level: 12 and up
- Mess Factor: Medium
- Level of Difficulty: Medium
- Time to Complete: Less than 60 minutes
- Cost Estimate: Less than $10.00
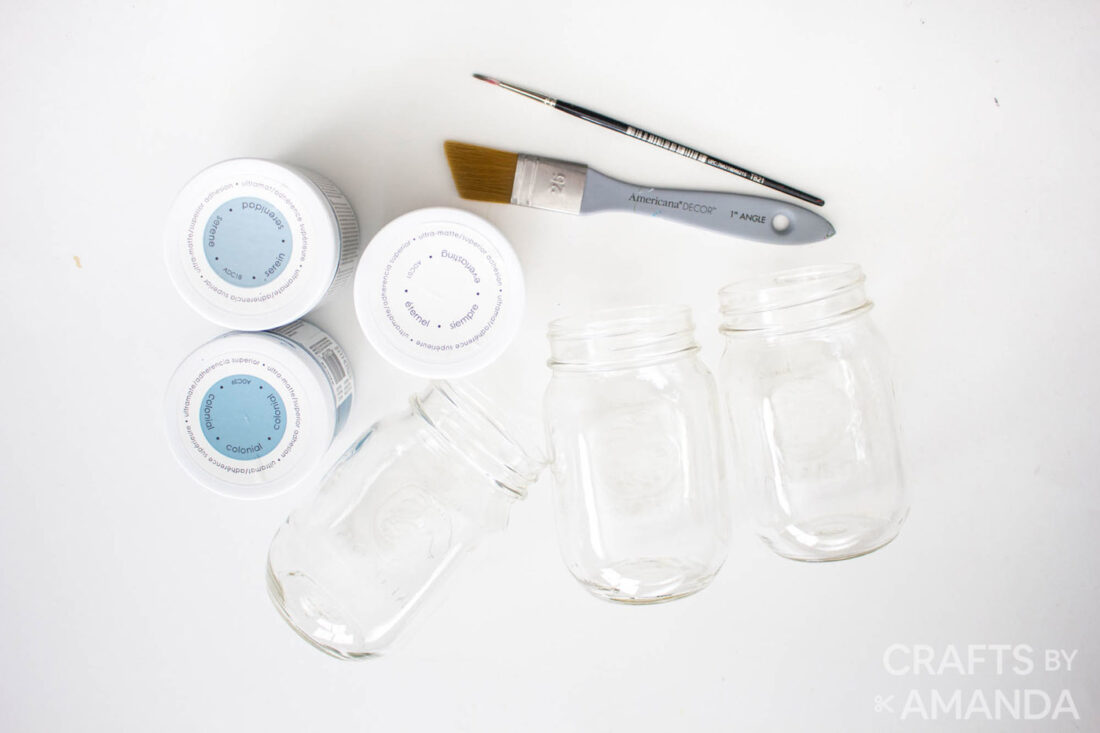
Craft supplies you will need
We used Americana Decor® Chalky Finish™ in Colonial, Serene and Everlasting.
P.S. if you buy your paint from the link above (the DecoArt shop) you can take 20% off! Use this code: CraftsbyAmanda20
How to a Make Snowflake Mason Jars
These step by step photos and instructions are here to help you visualize how to make this project. Please scroll down to simply print out the instructions!
Preparation
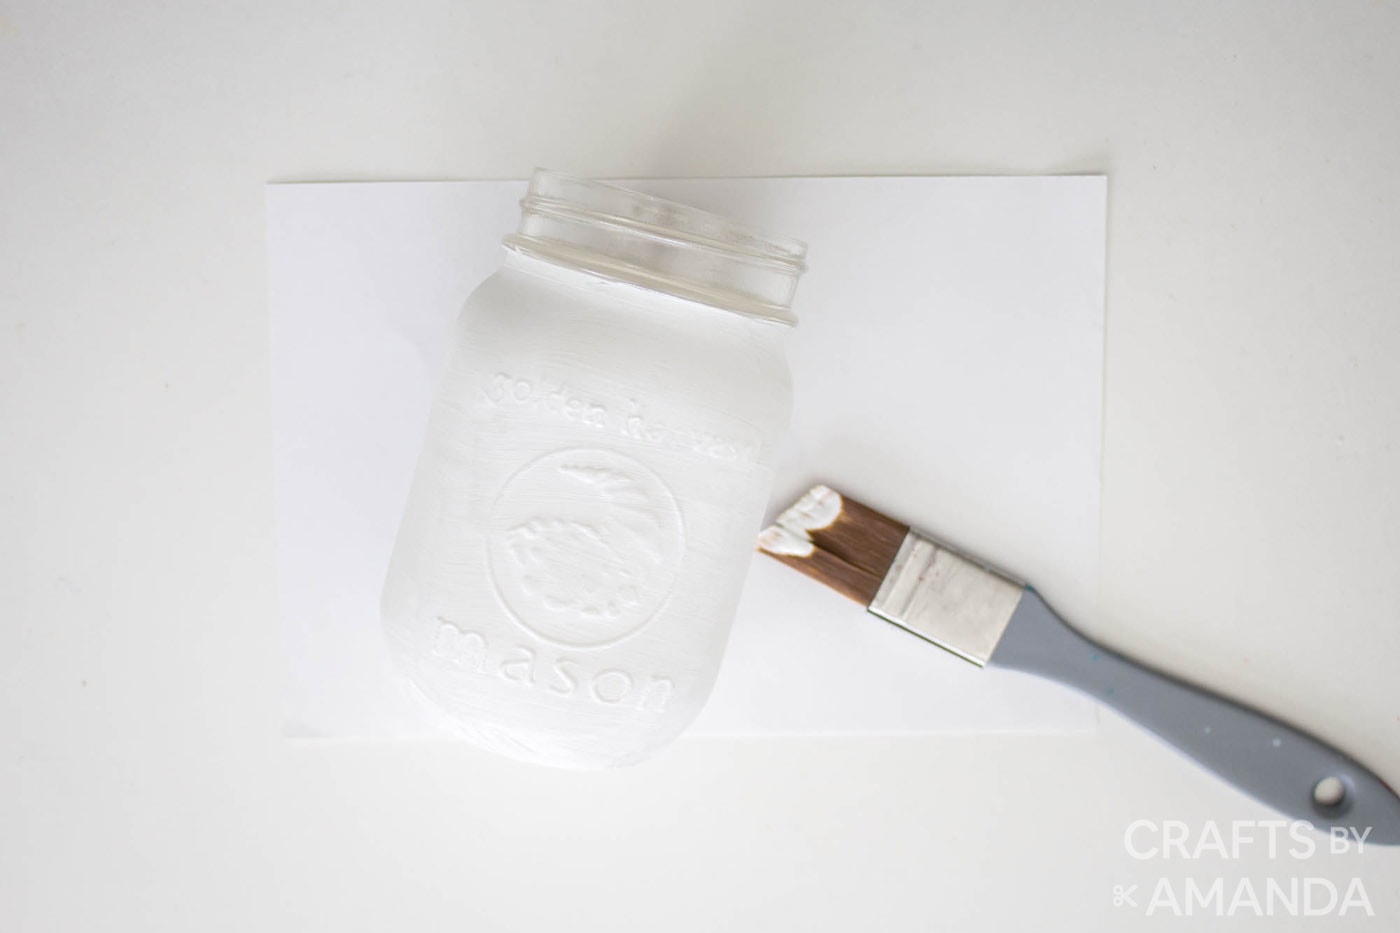
- Thoroughly clean the glass jars with hot soapy water and a soft dishcloth. Remove any labels or stickers from the jar. Place the jar to air dry or use a soft paper towel.
- Use a cotton pad or paper towel with rubbing alcohol to clean the outside of the jar. This will remove any built up oils, fingerprints and smudges from the jar. Ensure hands are clean when handling the glass to paint.
Painting the Jars
- Dip the larger paintbrush in the Chalky Finish Everlasting and while holding the mouth of the jar, apply long, even brush strokes around the jar in the same direction. Apply paint to the bottom of the jar as well. Apply a generous amount of paint but be careful to avoid paint drips and globs. Leave the jar standing upside down until it dries fully.

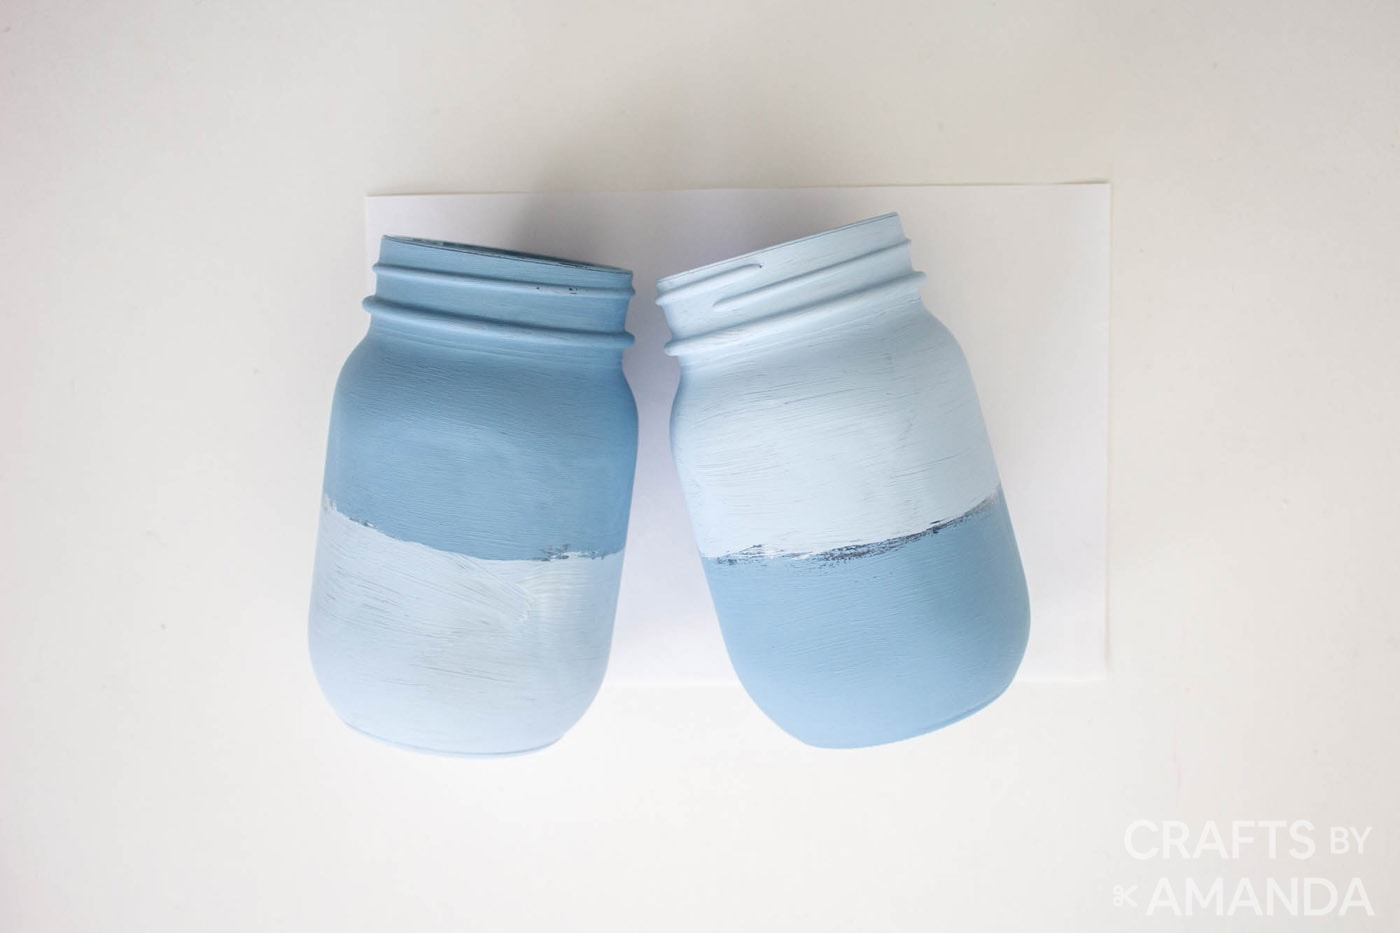
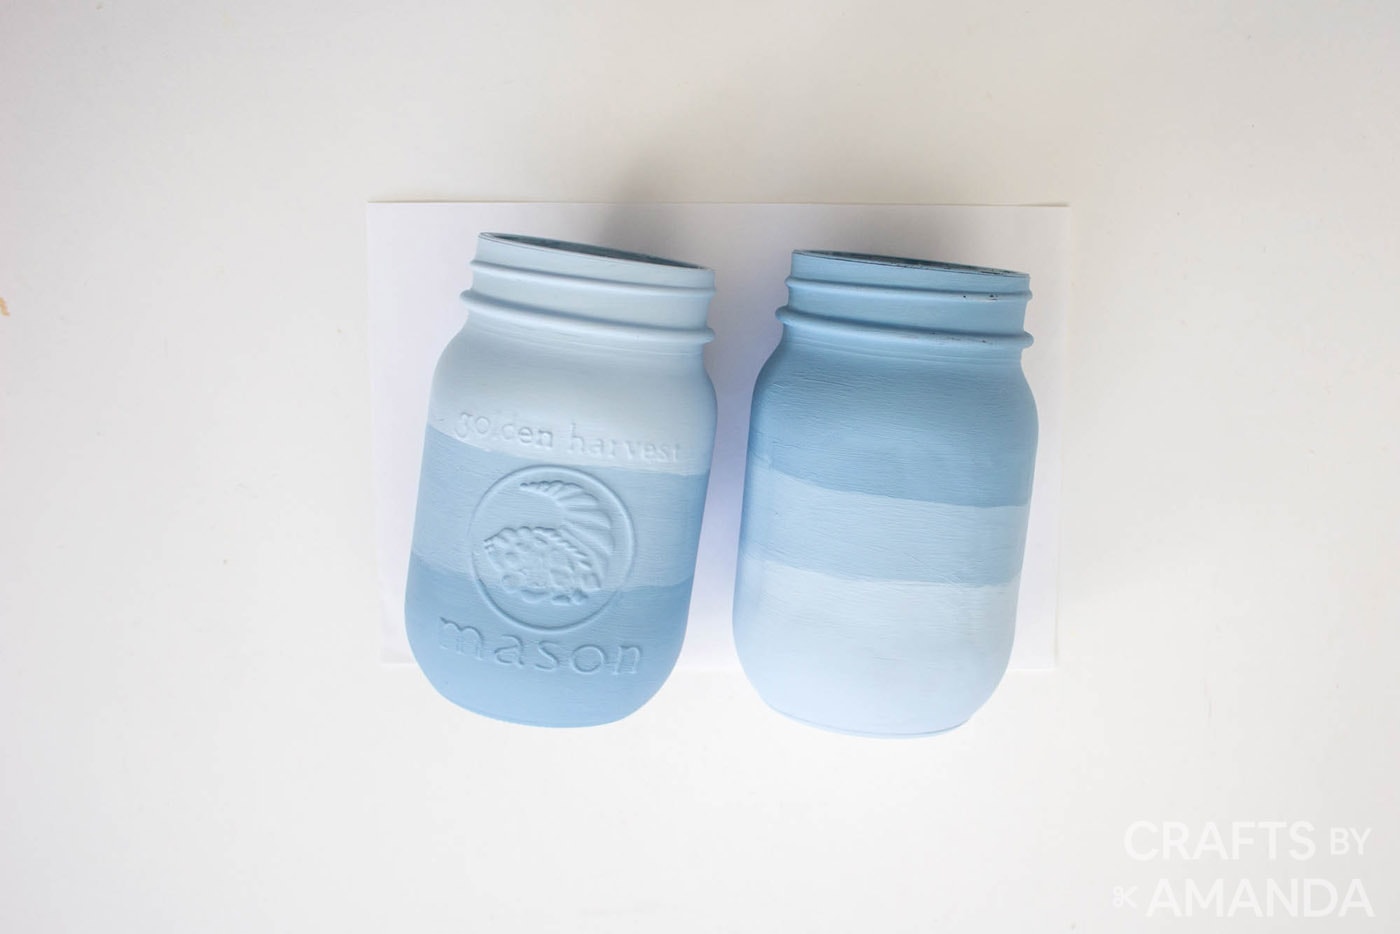
- For the other jars, paint the lower half in Chalky Finish Colonial on one jar and the upper half on the other jar.
- Paint the other half of the jars in Chalky Finish Serene. Leave the jars to dry fully before proceeding.
- Once dry, mix equal parts Serene and Colonial and apply the paint to the middle portion of the jars connecting the painted upper and lower halves.

- While center paint is still wet, smooth the transitions by brushing long even strokes with a moist paintbrush.
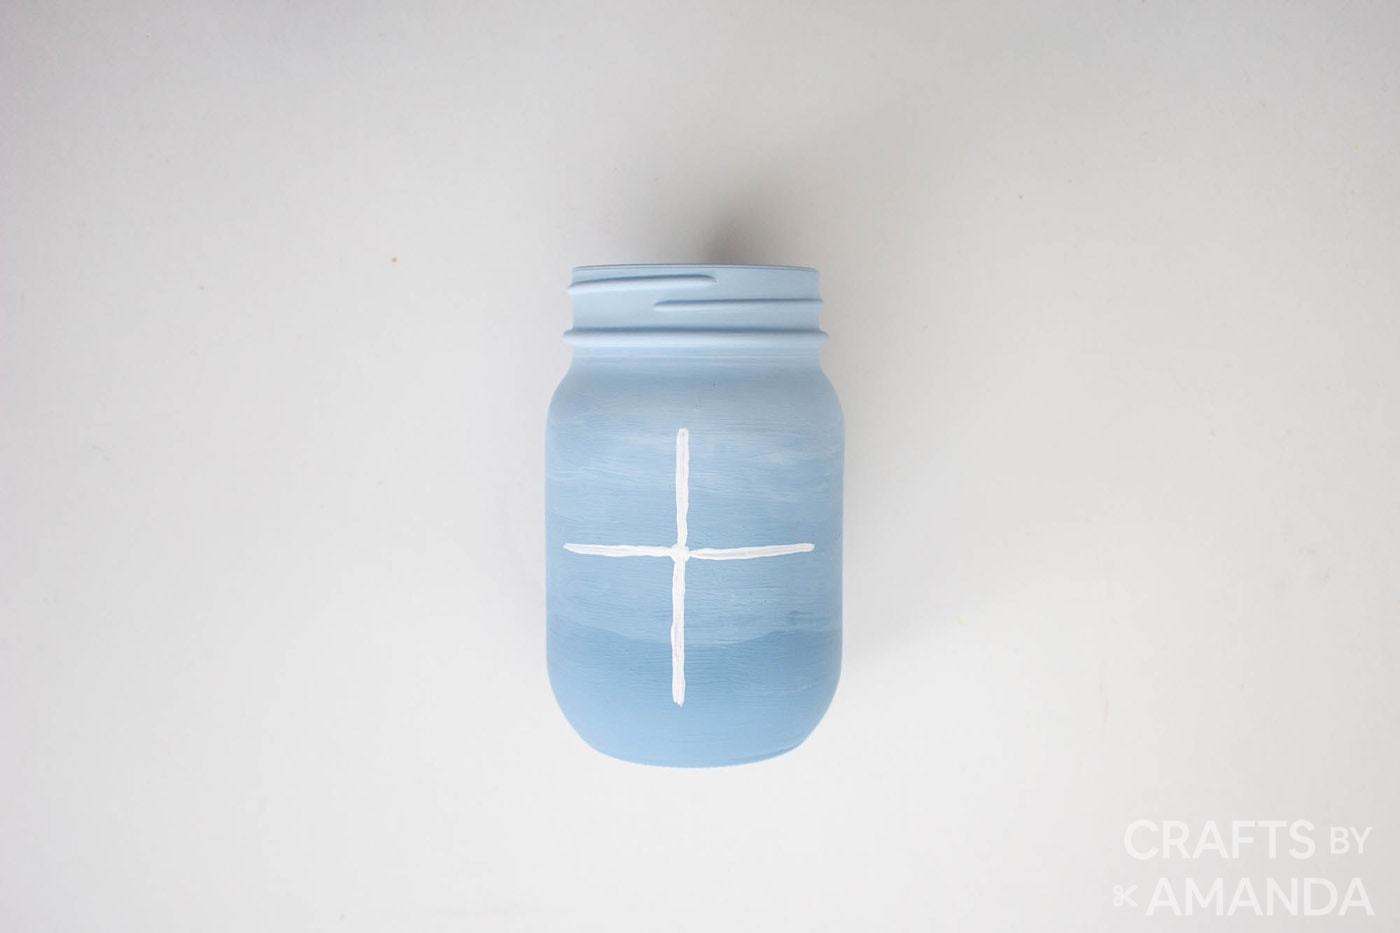
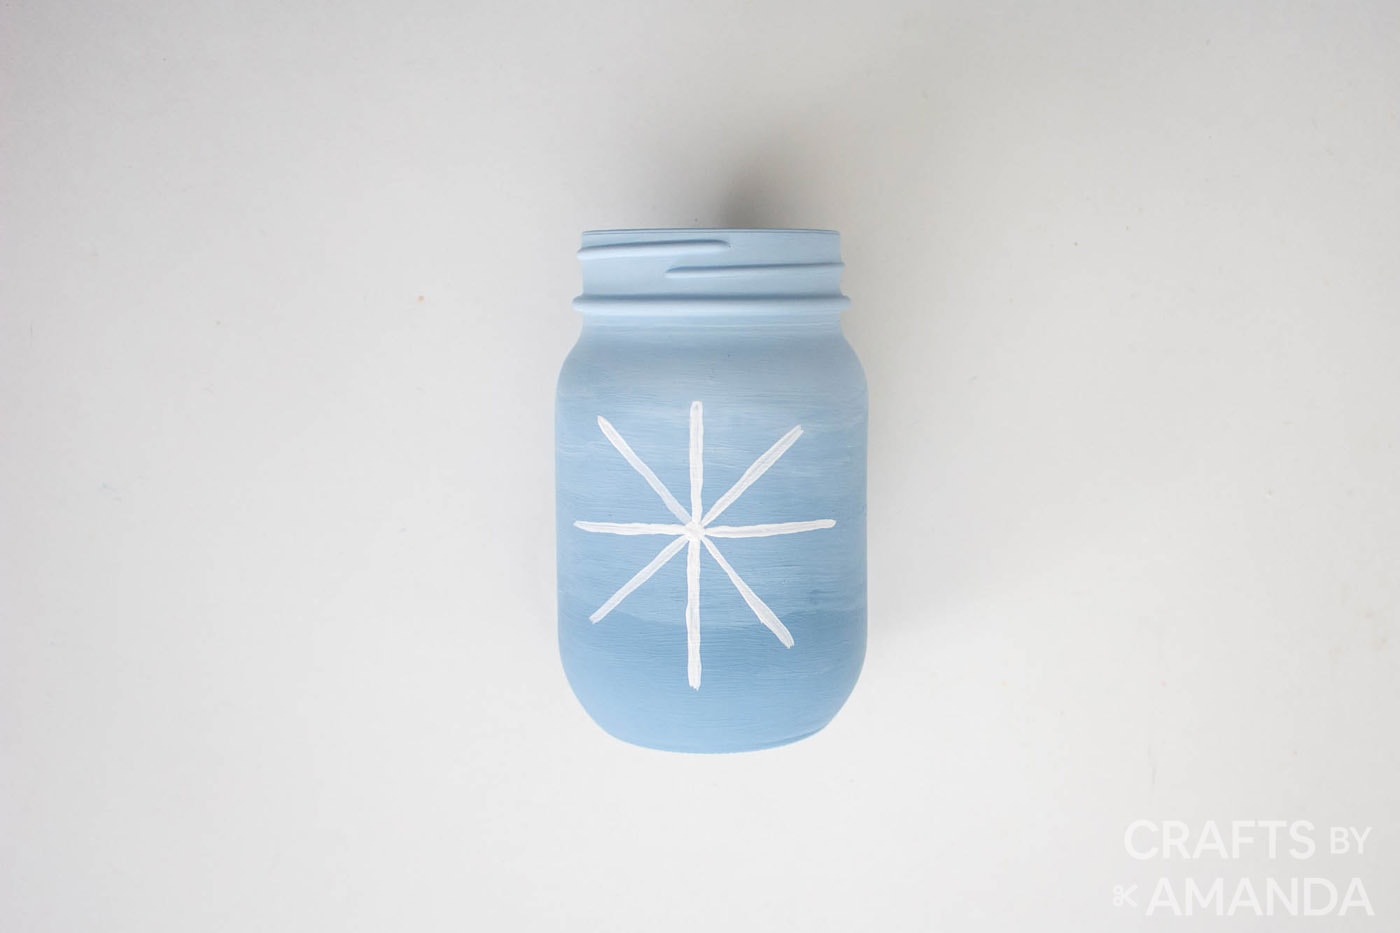
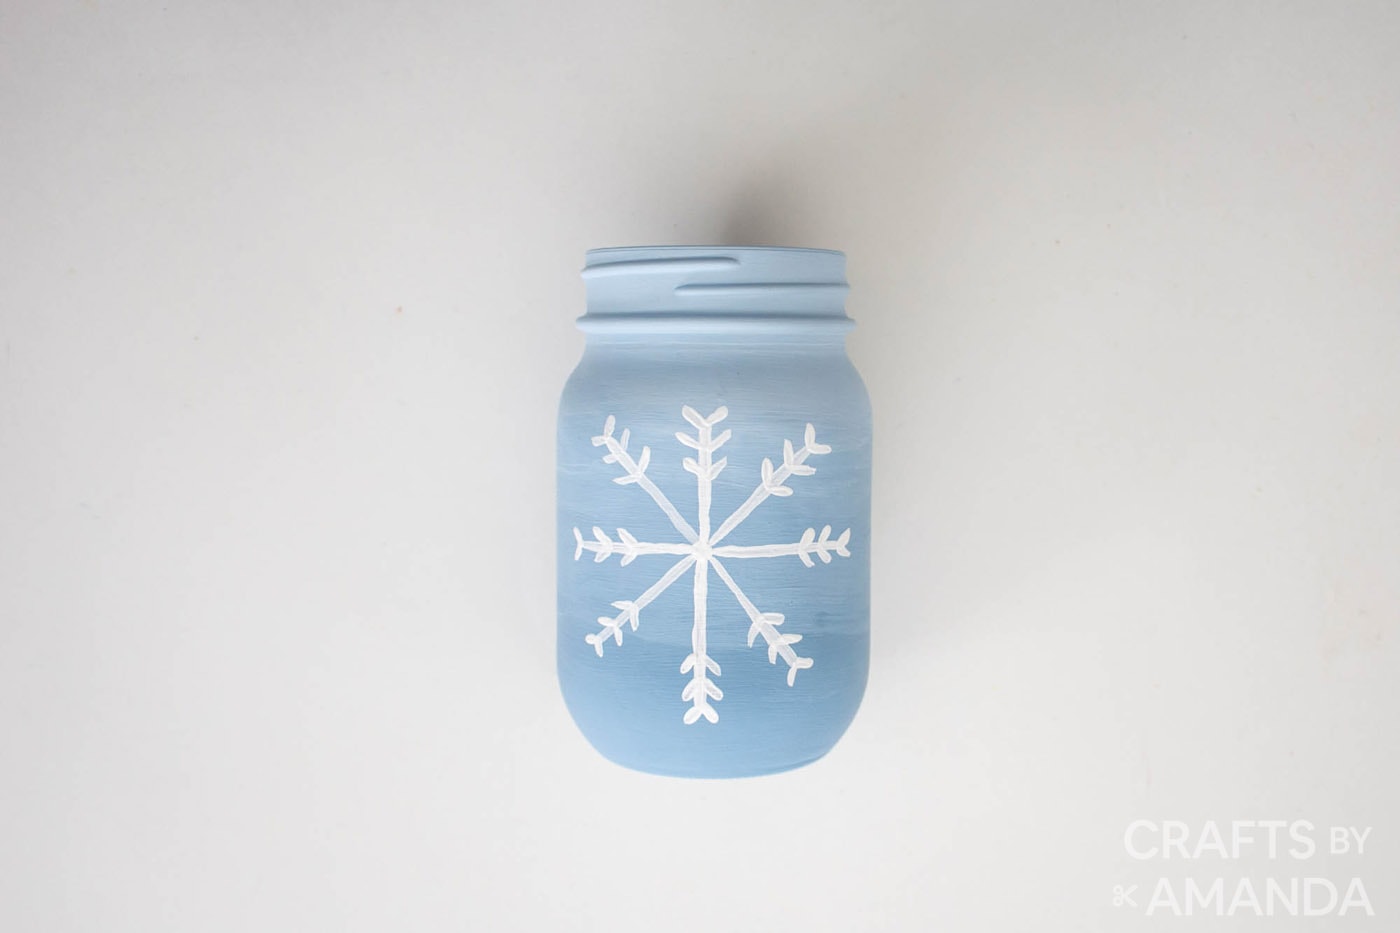
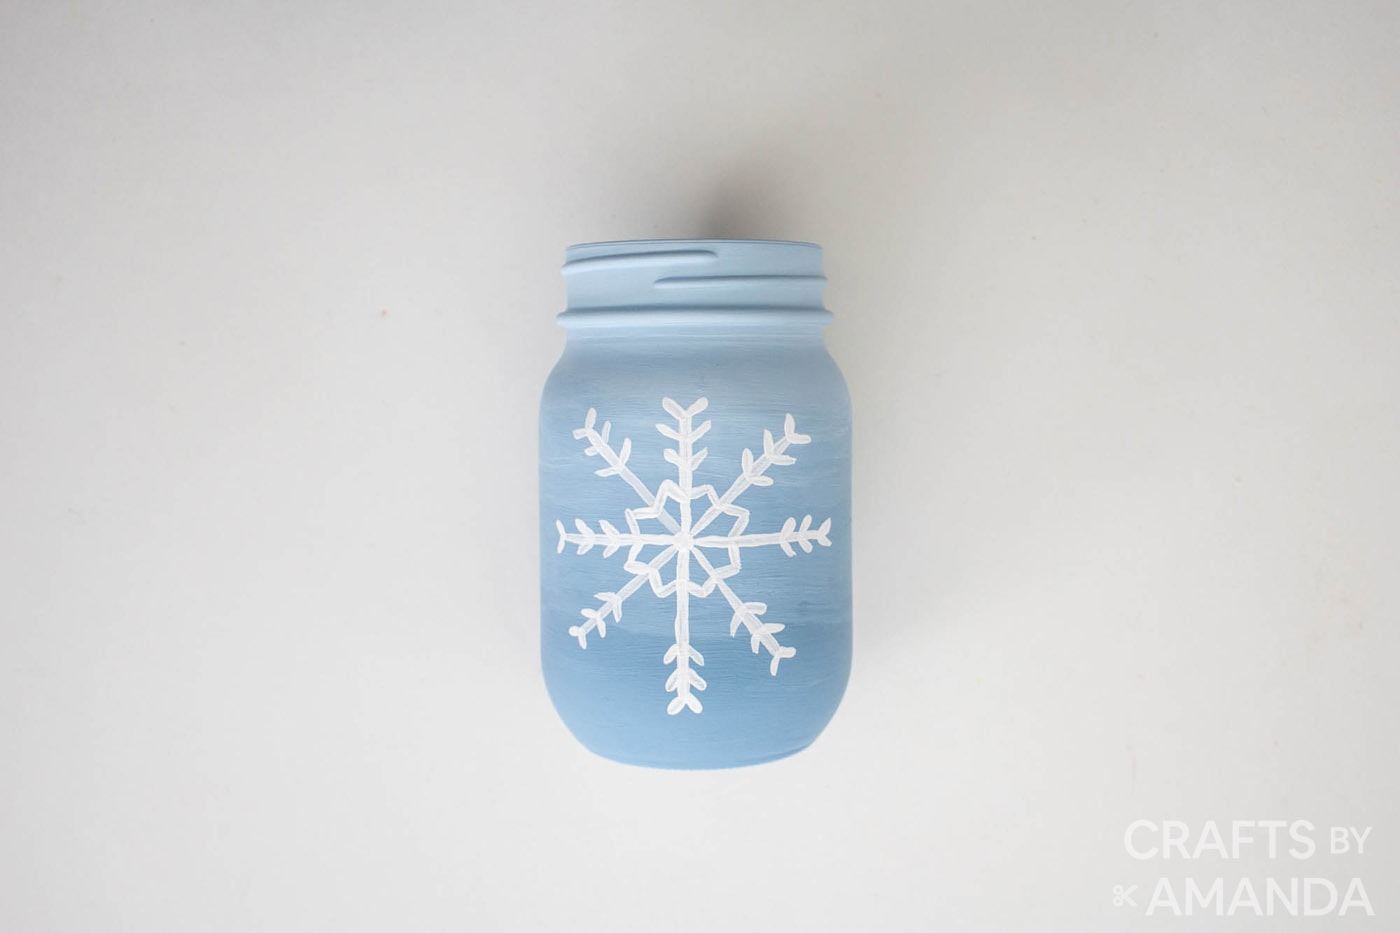
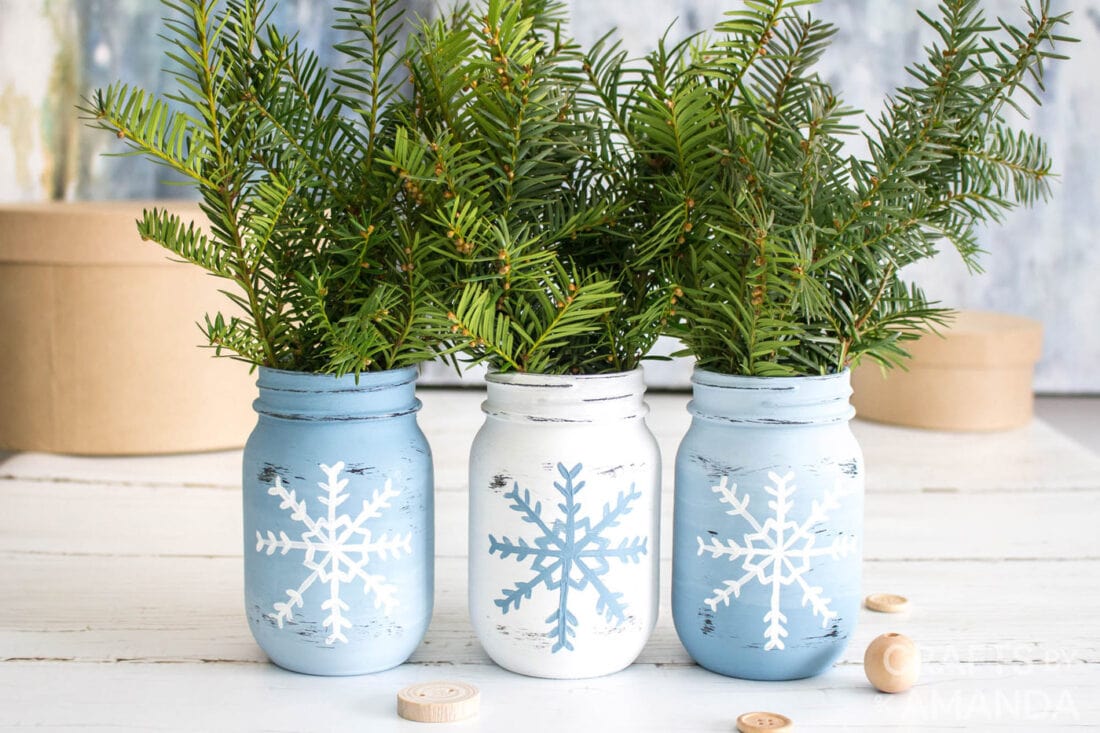
- Using a fine tip paintbrush, paint the snowflakes on the smooth side of the jars. Use Everlasting to paint on the blue jars and use Colonial to paint on the white jar.
- Paint thin intersecting lines and then add small angles dashes extending outward along each line.
- Lastly, paint connecting bottomless triangle shapes between each line close to the center.

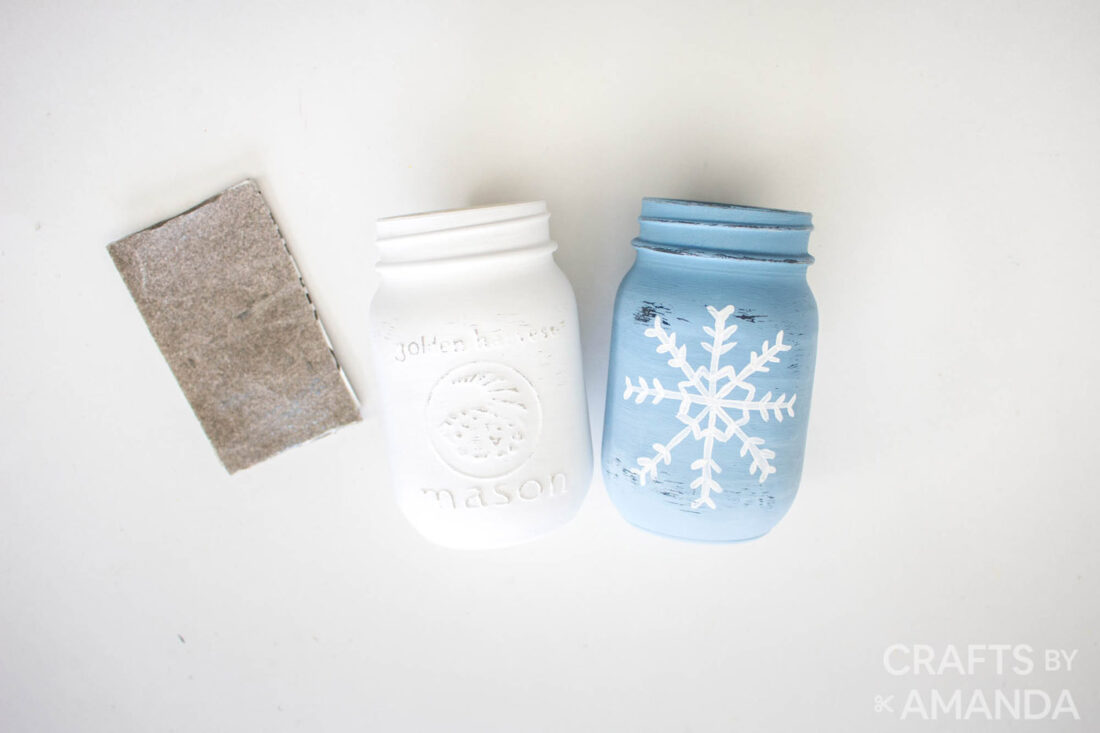
Distressing the Jars
Once dry, use a sheet of soft grit sandpaper and gently rub away the paint at the raised surfaces and edges.
Expert Crafting Tips
You can also use Chalky Finish intended for glass, which is bakeable giving it a permanent, dishwasher-safe finish. The paint needs a longer time to cure. Be sure to follow the instructions provided on the product label.
Sprucing up your home for the winter months can give you a fresh outlook, a great way to start the new year! These pretty snowflake mason jars are perfect as a centerpiece, on shelves, or part of your winter mantel.
More Chalk Paint Projects
- Polka Dot Wine Bottle Vases
- Fall Mason Jars
- Driftwood Crab Wall Art
- Mason Jar Wall Sconces
- Easter Egg Wreath
I’m sure you’ve noticed over the years my preference for DecoArt’s products. They are my preferred paints! You can see DecoArt’s library of free projects here.
I love to create and share my projects with you! I know it’s hard to remember to come back and search, so I’ve made it easy for you with my weekly newsletter! You can subscribe for free and I’ll send you fun crafts and delicious recipes every week right to your email.
Snowflake Mason Jar Vases
Supplies
- Americana Decor® Chalky Finish™ in Colonial, Serene and Everlasting
- 3 glass jars equally shaped and sized, 16oz
- Rubbing Alcohol
- cotton pad or paper towel
- Sandpaper fine grit 220g
Craft tools
- Paintbrush, 1” angled
- Fine tip paintbrush, round tipped
Instructions
Preparation
- Thoroughly clean the glass jars with hot soapy water and a soft dishcloth. Remove any labels or stickers from the jar. Place the jar to air dry or use a soft paper towel.
- Use a cotton pad or paper towel with rubbing alcohol to clean the outside of the jar. This will remove any built up oils, fingerprints and smudges from the jar. Ensure hands are clean when handling the glass to paint.
Painting the Jars
- Dip the larger paintbrush in the Chalky Finish Everlasting and while holding the mouth of the jar, apply long, even brush strokes around the jar in the same direction. Apply paint to the bottom of the jar as well. Apply a generous amount of paint but be careful to avoid paint drips and globs. Leave the jar standing upside down until it dries fully.
- For the other jars, paint the lower half in Chalky Finish Colonial on one jar and the upper half on the other jar.
- Paint the other half of the jars in Chalky Finish Serene. Leave the jars to dry fully before proceeding.
- Once dry, mix equal parts Serene and Colonial and apply the paint to the middle portion of the jars connecting the painted upper and lower halves.
- While center paint is still wet, smooth the transitions by brushing long even strokes with a moist paintbrush.
- Using a fine tip paint brush, paint the snowflakes on the smooth side of the jars. Use Everlasting to paint on the blue jars and use Colonial to paint on the white jar.
- Paint thin intersecting lines and then add small angles dashes extending outward along each line.
- Lastly, paint connecting bottomless triangle shapes between each line close to the center.
Distressing the Jars
- Once dry, use a sheet of soft grit sandpaper and gently rub away the paint at the raised surfaces and edges.
Expert Tips & FAQs
- You can also use Chalky Finish intended for glass, which is bakeable giving it a permanent, dishwasher-safe finish. The paint needs a longer time to cure. Be sure to follow instructions provided on the product label.
- You will have plenty of Americana Decor® Chalky Finish™ paint leftover for more fun projects! Be sure to check the links in this post for more tutorial ideas.
This post originally appeared here on Jan 5, 2021.
- Swirling Twirling Ladybugs - July 21, 2026
- Drip Tie Dye Backpack - July 17, 2026
- Mini Coastal Clay Houses - July 14, 2026


Ken Chan says
To be correct, snowflakes have 6 points.