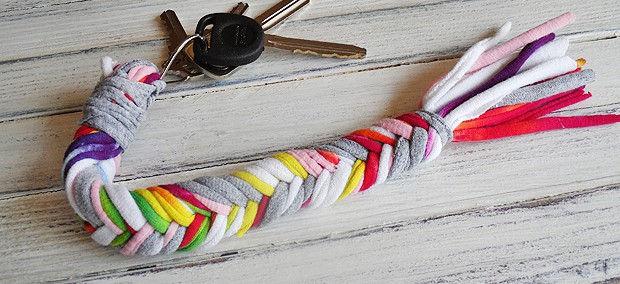
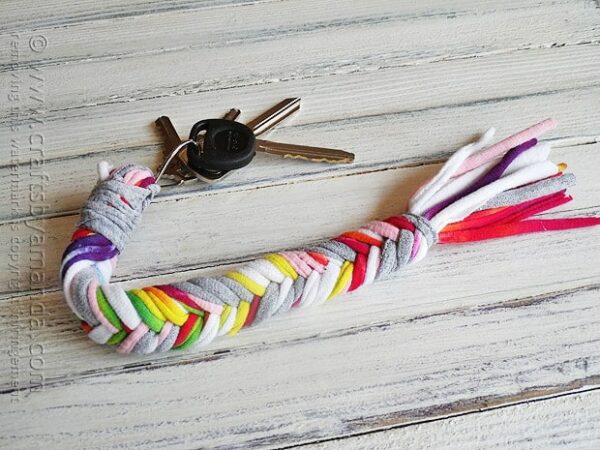
When you have kids, you go through a lot of t-shirts. Usually they outgrow them faster than you can replace them, but sometimes they end up with stains you can’t get out before they’ve finished their useful life. Some people turn them into cleaning rags, and then there’s people like me who see other ways to make use of them.
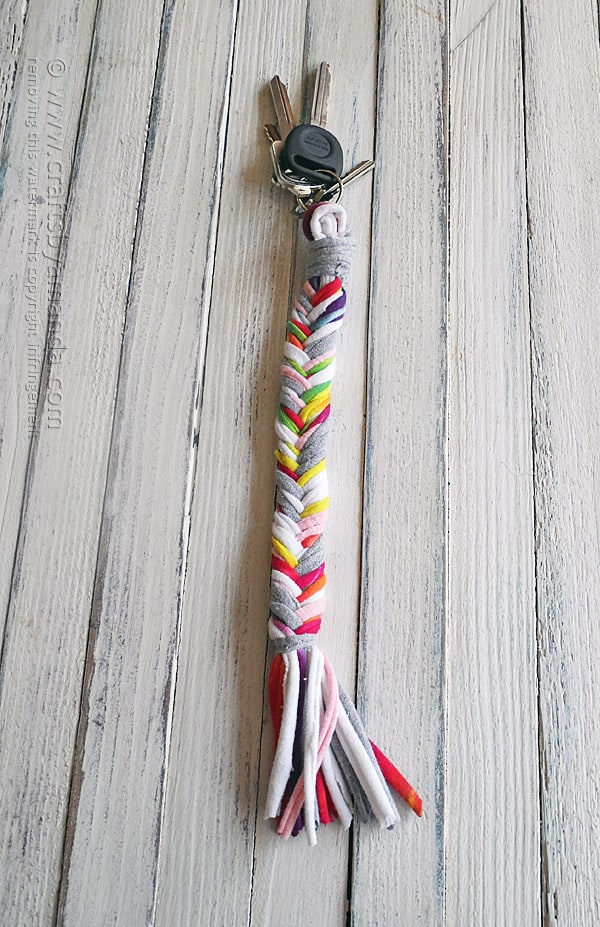
I had been throwing shirts into a basket in my craft room for quite some time. So luckily for me I had a lot of colors to choose from. I’m also one of those people that likes to have a big, visible keychain so I can quickly find my keys. So making this braid was the perfect project for me.
[There are full printable instructions at the end of this post]

Cut a long t-shirt strip in half (set the second half aside) and stretch it out. Make a lark’s head knot by folding the strip in half and slipping the looped end through key ring.
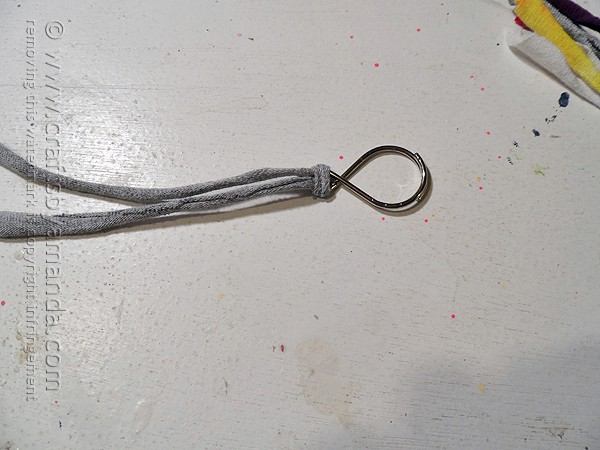
Now thread the two loose ends up through the loop and pull tight.
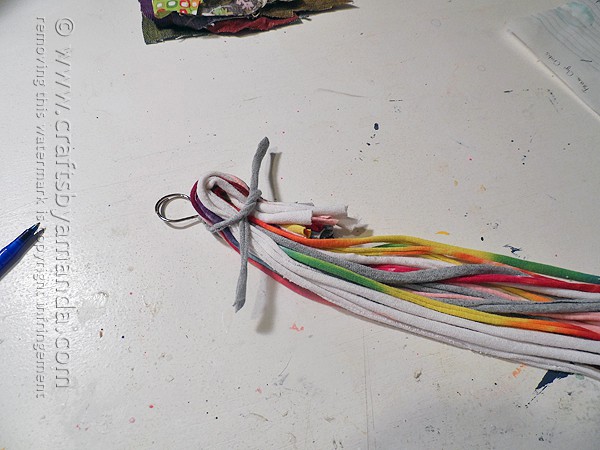
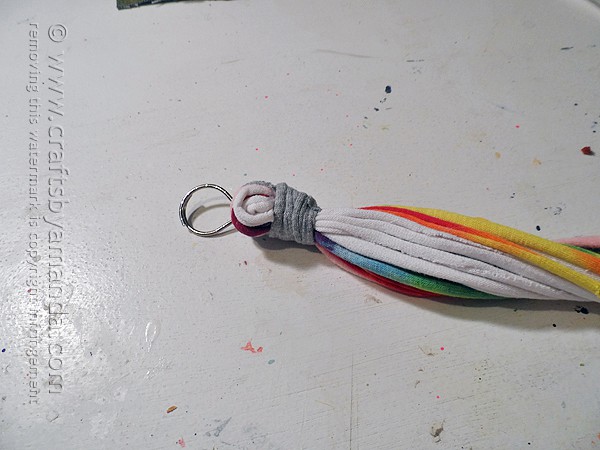
Take 15-16 long t-shirt strips and stretch them all out. Gather them all together, side by side. Fold the top few inches down and tie the strip that is on the key ring around all the strips. Tie a knot and add a little hot glue, then tie another knot and glue again. Trim the ends of the key ring knot completely off.
Turn it over and add a little hot glue to the strips where the bend is.
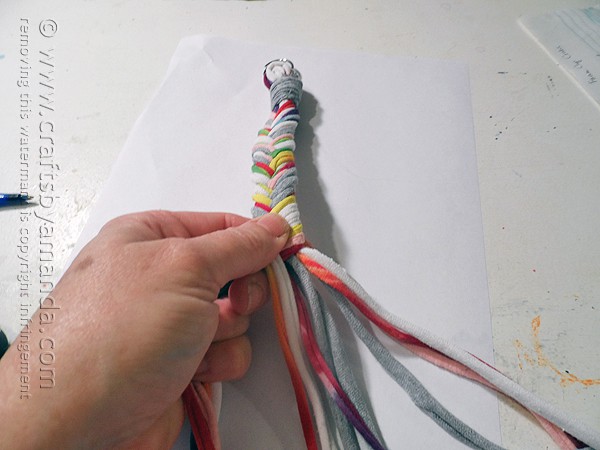
Trim the short ends of the strips off as short as you can.
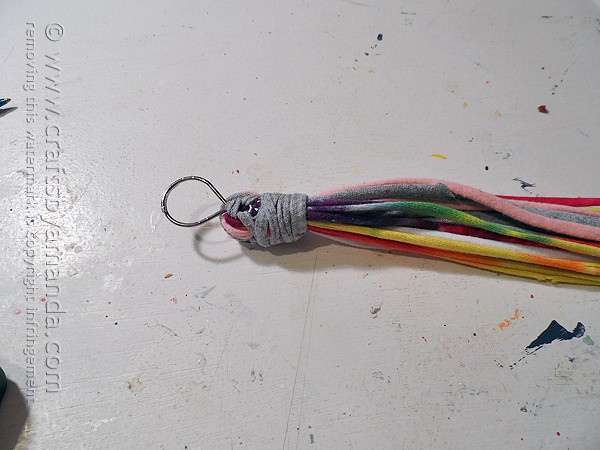
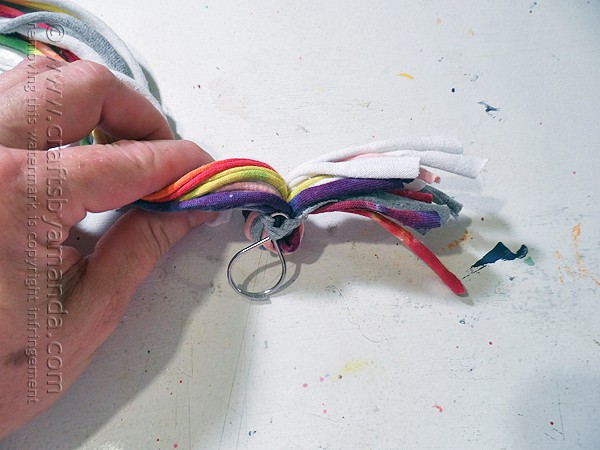
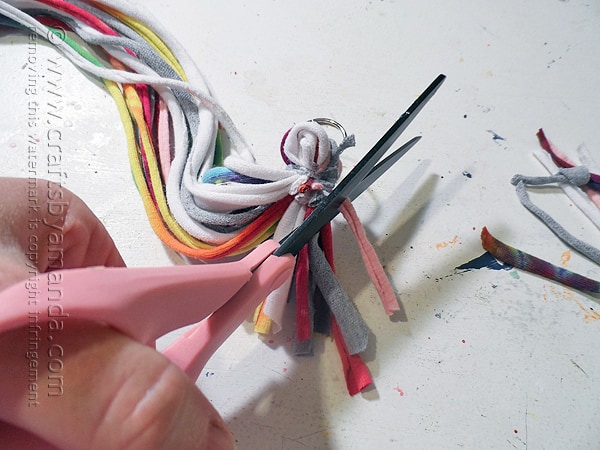
Take the other half of the strip that you set aside in step 1 and using hot glue as you go, wrap it around the trimmed edges, hiding them.
Lay the keychain down facing right side up.
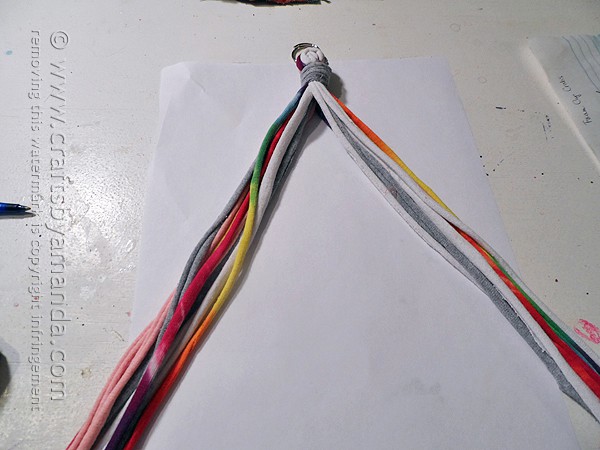
Separate the strands into two sections.
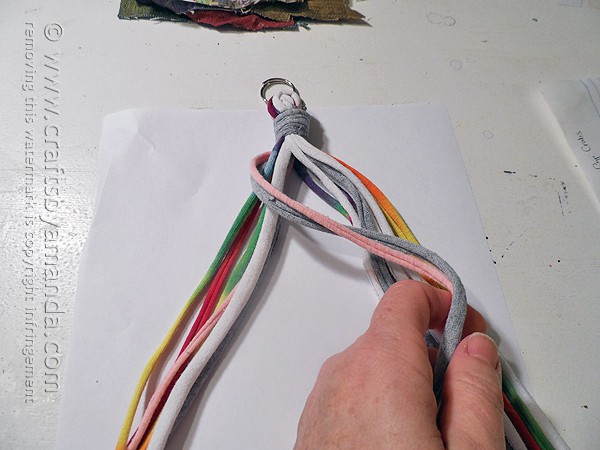
Grab two strips from the BACK left and cross them over and add them to the strips on the right.
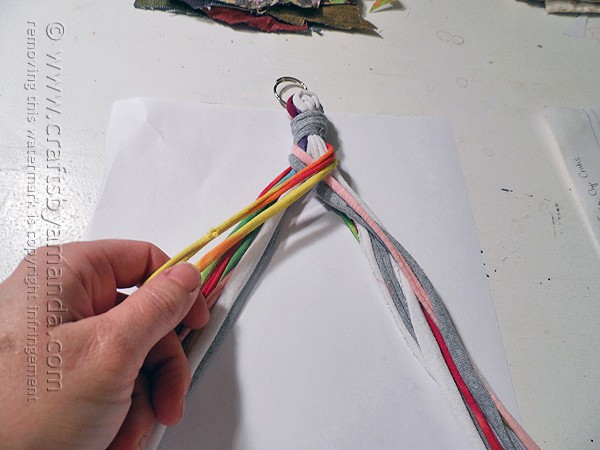
Grab two strips from the BACK right and cross them over and add them to the strips on the left.
Repeat this process, working your way down until your braid is as long as you want it.
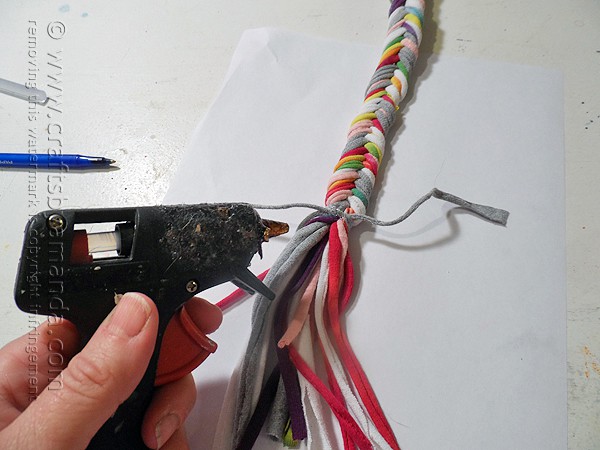
Turn the keychain over. Take another strip, stretch it out and wrap it around the end of the braid, tying in a knot and securing with hot glue. Trim off the ends of the knot.
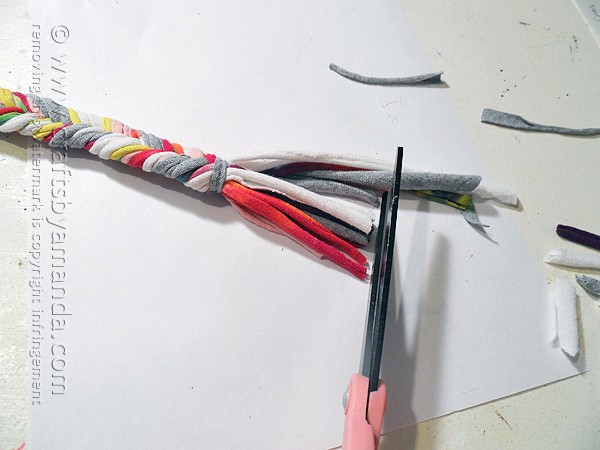
Trim the fringe and you’re all done!
Printable version after these additional ideas!
More T-shirt Craft Ideas
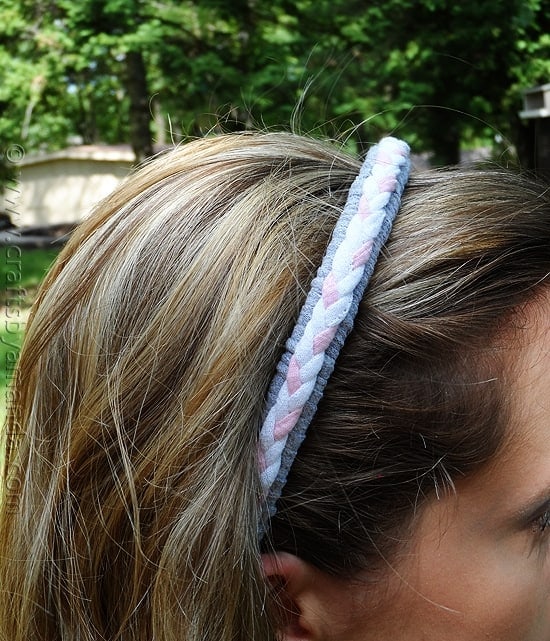
Braided Recycled T-shirt Headband
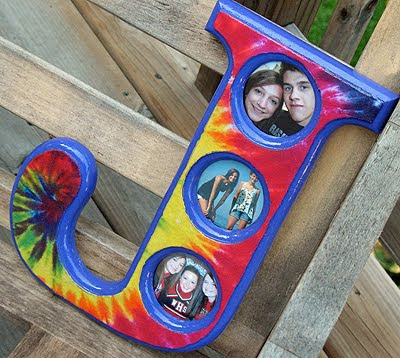
Tie Dye Decoupage Monogram Frame
Upcycled T-shirt Dress – from Infarrantly Creative

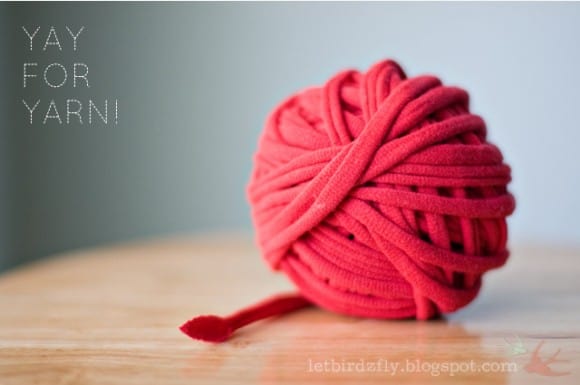
How to Make T-shirt Yarn – from Dollar Store Crafts
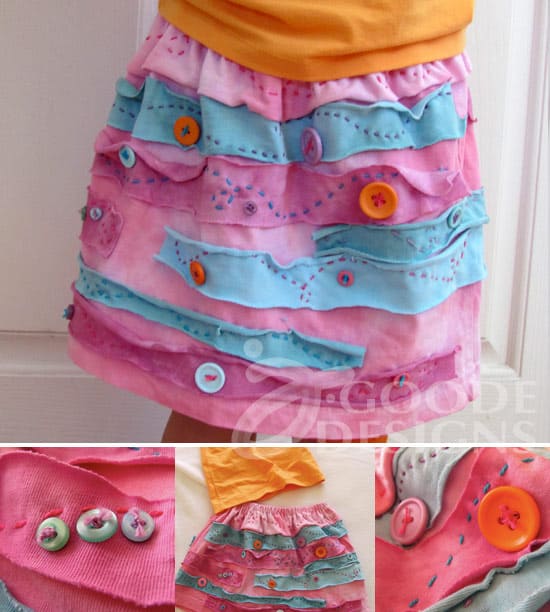
Recycled T-shirt Button Skirt – from 100 Directions
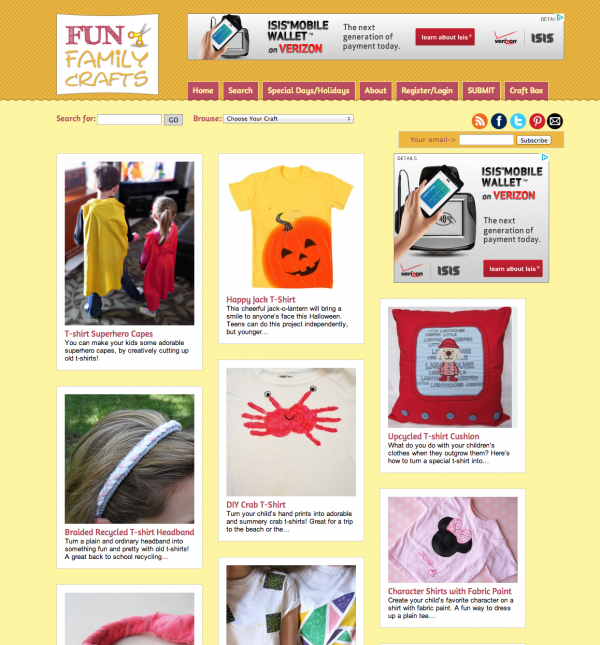
All sorts of T-shirt Crafts – from Fun Family Crafts
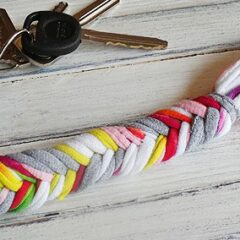
Braided T-shirt Keychain
Supplies
- Recycled t-shirts cut into long strips, about 15" long
- metal key ring
- Hot glue gun
- Scissors
Instructions
- Cut a long t-shirt strip in half (set the second half aside) and stretch it out. Make a lark's head knot by folding the strip in half and slipping the looped end through key ring. Now thread the two loose ends up through the loop and pull tight.
- Take 15-16 long t-shirt strips and stretch them all out. Gather them all together, side by side. Fold the top few inches down and tie the strip that is on the key ring around all the strips.
- Tie a knot and add a little hot glue, then tie another knot and glue again. Trim the ends of the key ring knot completely off. Turn it over and add a little glue to the strips where the bend is.
- Trim the short ends of the strips off as short as you can.
- Take the other half of the strip that you set aside in step 1 and using hot glue as you go, wrap it around the trimmed edges, hiding them.
- Lay the keychain down facing right side up. Separate the strands into two sections.
- Grab two strips from the BACK left and cross them over and add them to the strips on the right.
- Grab two strips from the BACK right and cross them over and add them to the strips on the left.
- Repeat this process, working your way down until your braid is as long as you want it.
- Turn the keychain over. Take another strip, stretch it out and wrap it around the end of the braid, tying in a knot and securing with hot glue. Trim off the ends of the knot.
- Trim the fringe and you're all done!
- Tie Dye Beach Towels - July 24, 2026
- Swirling Twirling Ladybugs - July 21, 2026
- Drip Tie Dye Backpack - July 17, 2026


Carolyn Murray says
I’ve been asked to think of some easy crafts for women with trauma or mental deficiencies. I’ve selected a few of your ideas such as bookmarks, magnets with clay, wooden spoons with paint, In fabric sleeve for coffee cups. Wondering if you can think of anything else that’s simple Thank you
Emily says
You give an estimate of how long to cut strips, but do you have an approximation of thickness?
Amanda Formaro says
Hi Emily! I’m not sure i understand your question. The thickness is determined by the t-shirt you are using. Unless I misunderstood?
Beth Kovacic says
How wide is the strip? 1″ wide?
Amanda Formaro says
Roughly yes :)
Kathy Nolan says
THANK YOU SO MUCH for making it so easy to print directions to your projects!! Love your projects….
Amanda Formaro says
Thanks Kathy! So glad the printable version is helpful too :)
Alexis @ Persia Lou says
Love the way this looks! I wouldn’t have ever thought of the fishtail braid. So cute!
Amanda Formaro says
Thanks Alexis!
Gloria Anderson says
Enjoying the crafts.
Amanda Formaro says
Thank you Gloria!