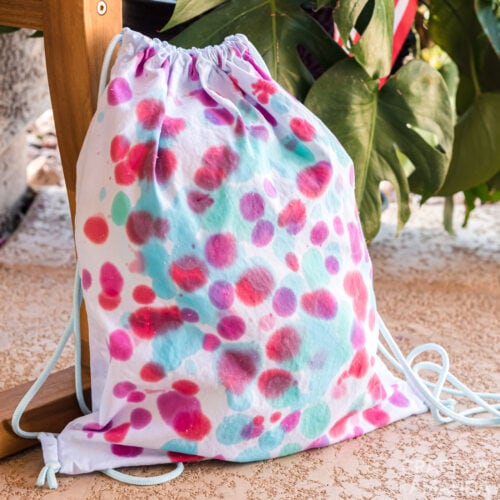
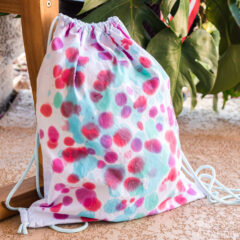
Create your own personalized drip tie dye backpack with this fun and easy method. Fill it with vibrant colors of your choice or arrange the colors in a pattern, the drip tie dye method can’t be easier!

Why we love this project
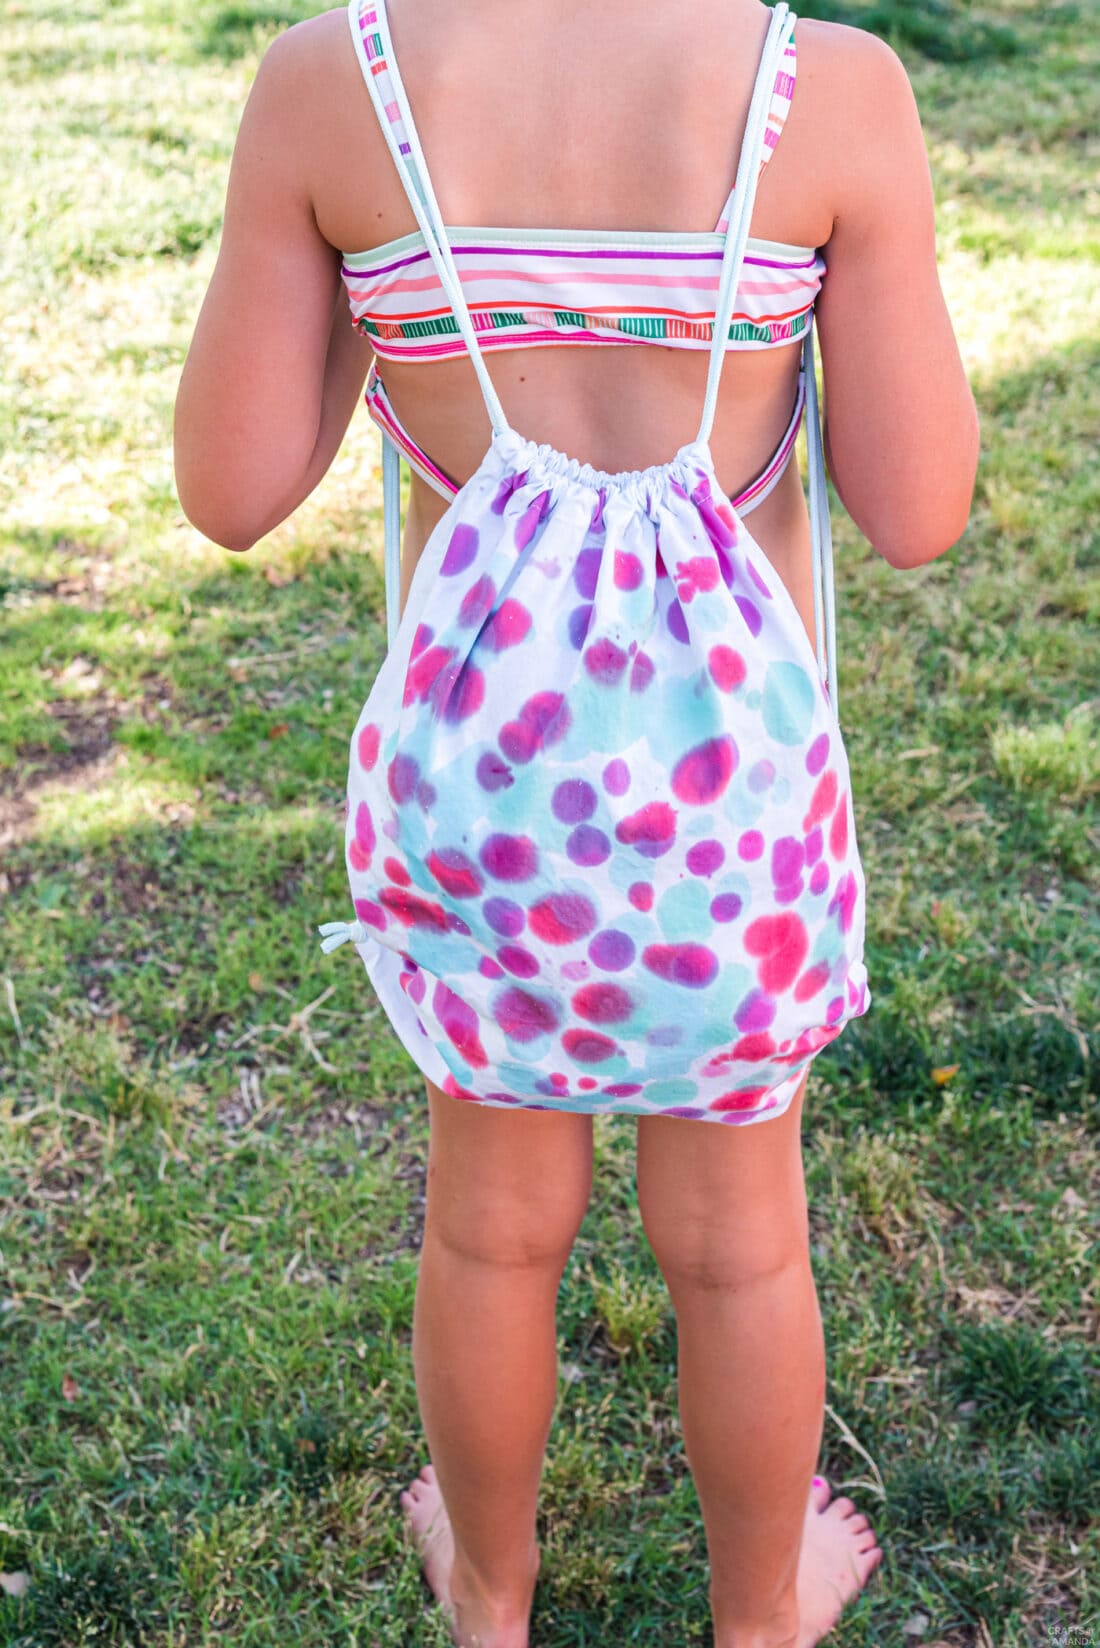
Making a drip tie dye backpack is a fun end of summer craft for kids. They’ll enjoy showing their friends their creations when they go back to school! The best part of this drip tie dye method is how easy and customizable it is. This versatile project is great for kids and adults alike. Mix and match colors to create your favorite combination or align the drips in a pattern.
See our tie dye beach towels for two other methods you can use on this backpack including the crumple method and the rainbow method. You can use any type of canvas backpack for this project, drawstring backpacks and regular white canvas backpacks work great.
Helpful Project Information:
- Age Level: 6 and up with younger ones having supervision
- Mess Factor: High (squeeze bottle dye)
- Level of Difficulty: Easy
- Time to Complete: Less than 30 minutes, minus soak time
- Cost Estimate: Less than $15.00
Craft supplies you will need
Get full list of supplies and directions in the printable version at the end of this post.
How to Make a Drip Tie Dye Backpack
These step by step photos and instructions are here to help you visualize how to make this project. Please scroll down to simply print out the instructions!
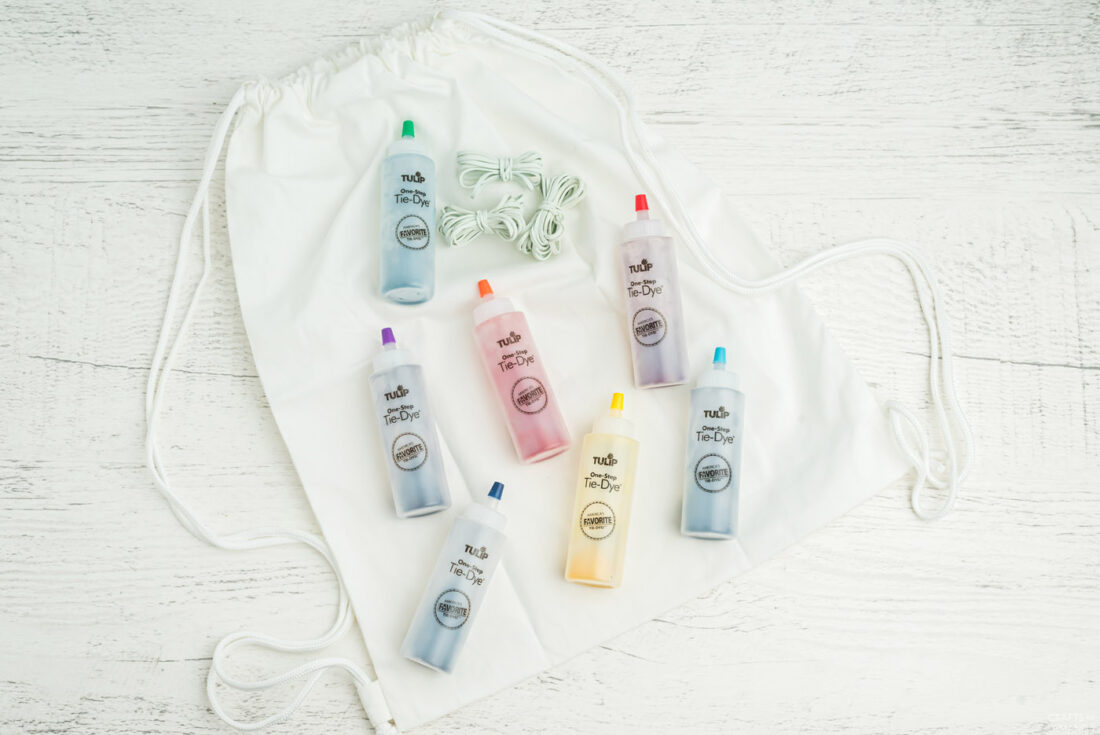
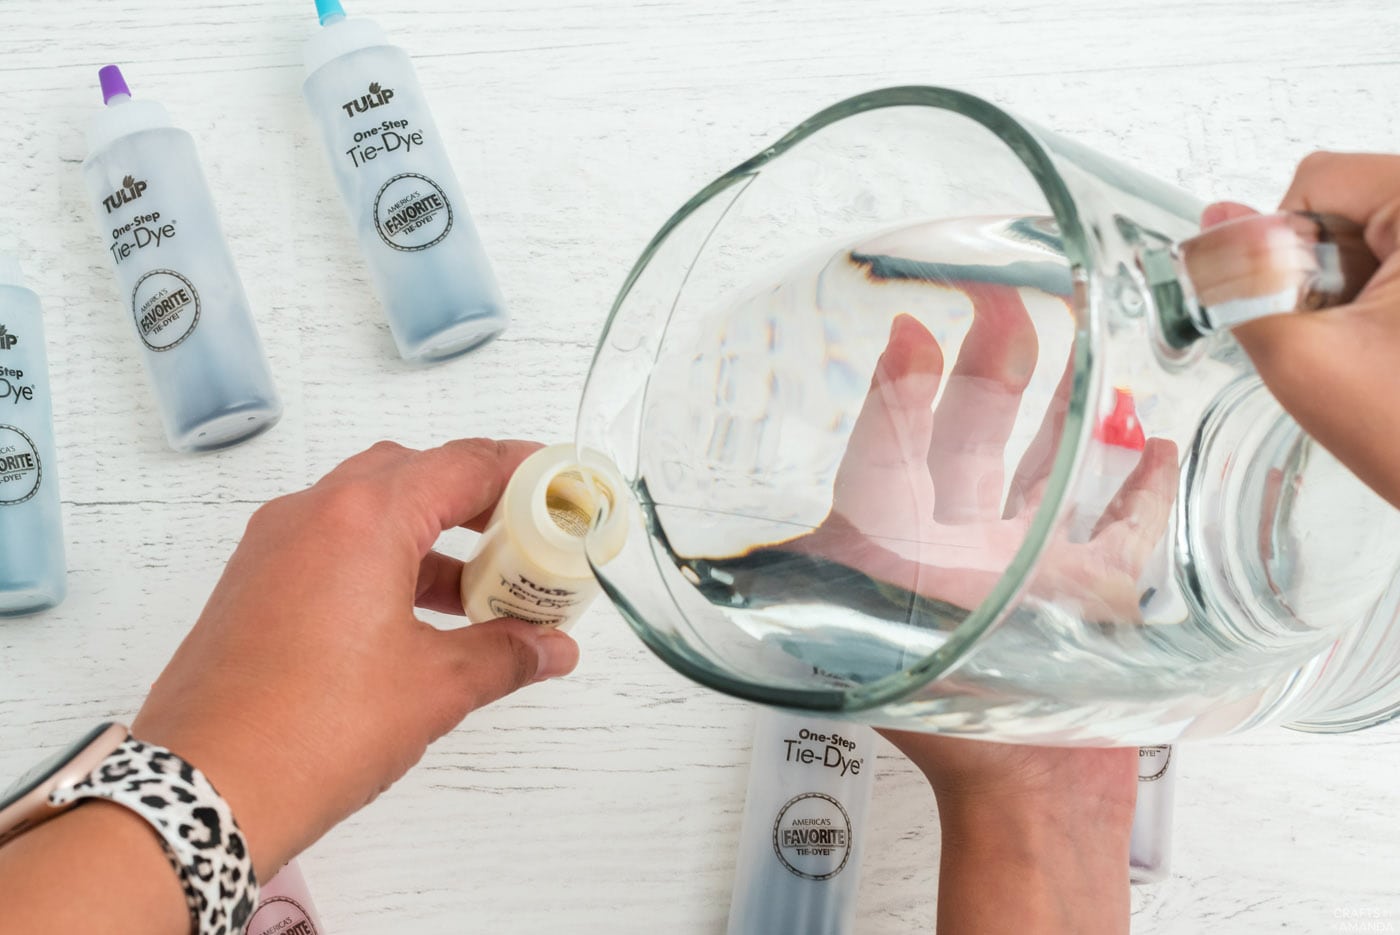
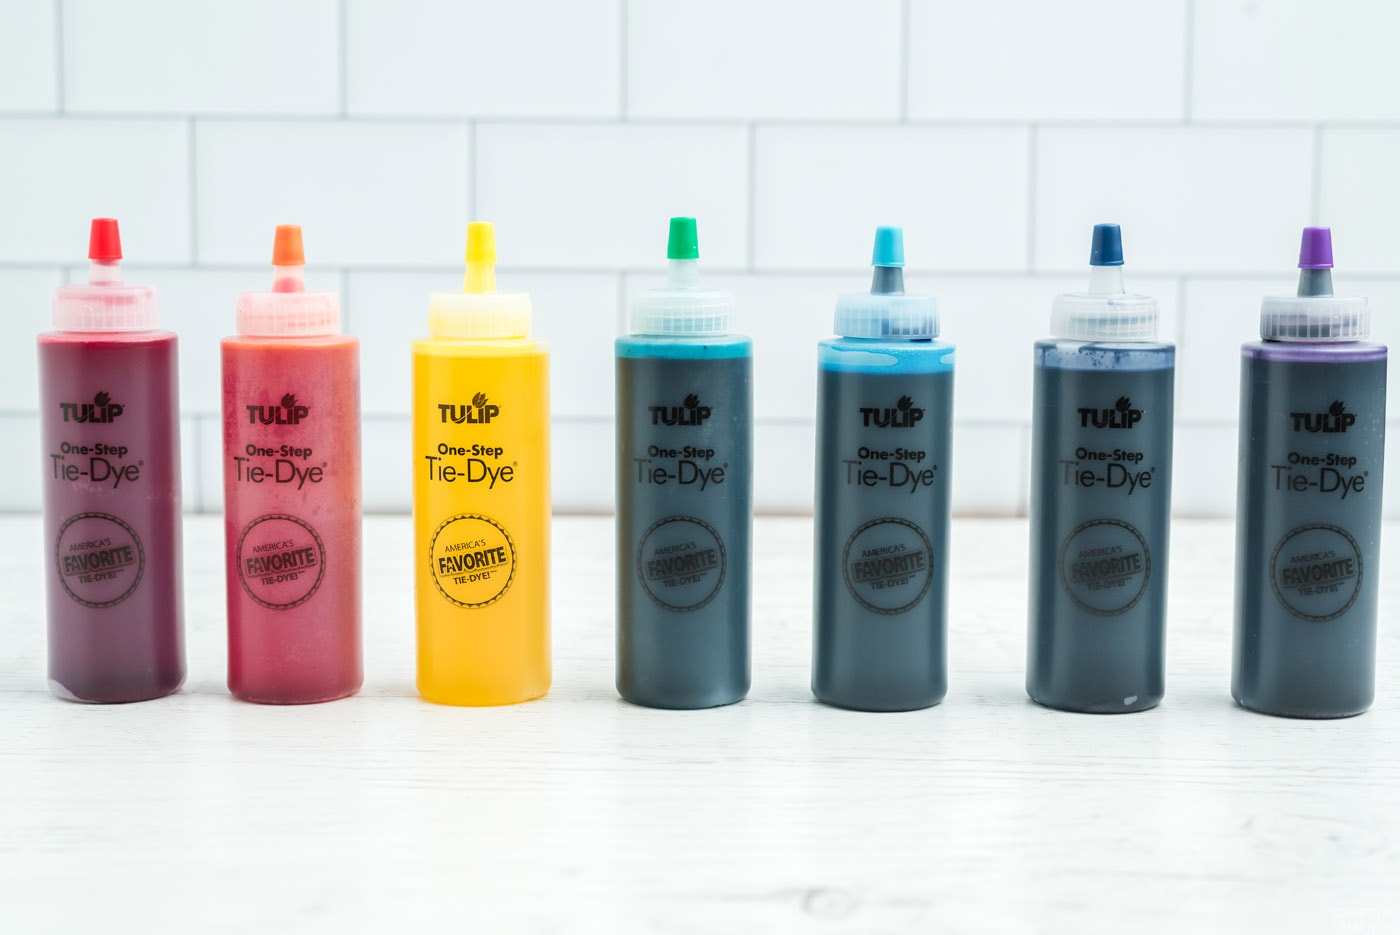
- Prepare your squeeze bottles with dye according to package instructions, we’re using Tulip’s One-Step Tie Dye Kit.

- Wet your backpack and squeeze out any excess water leaving it damp, but not soaking wet.
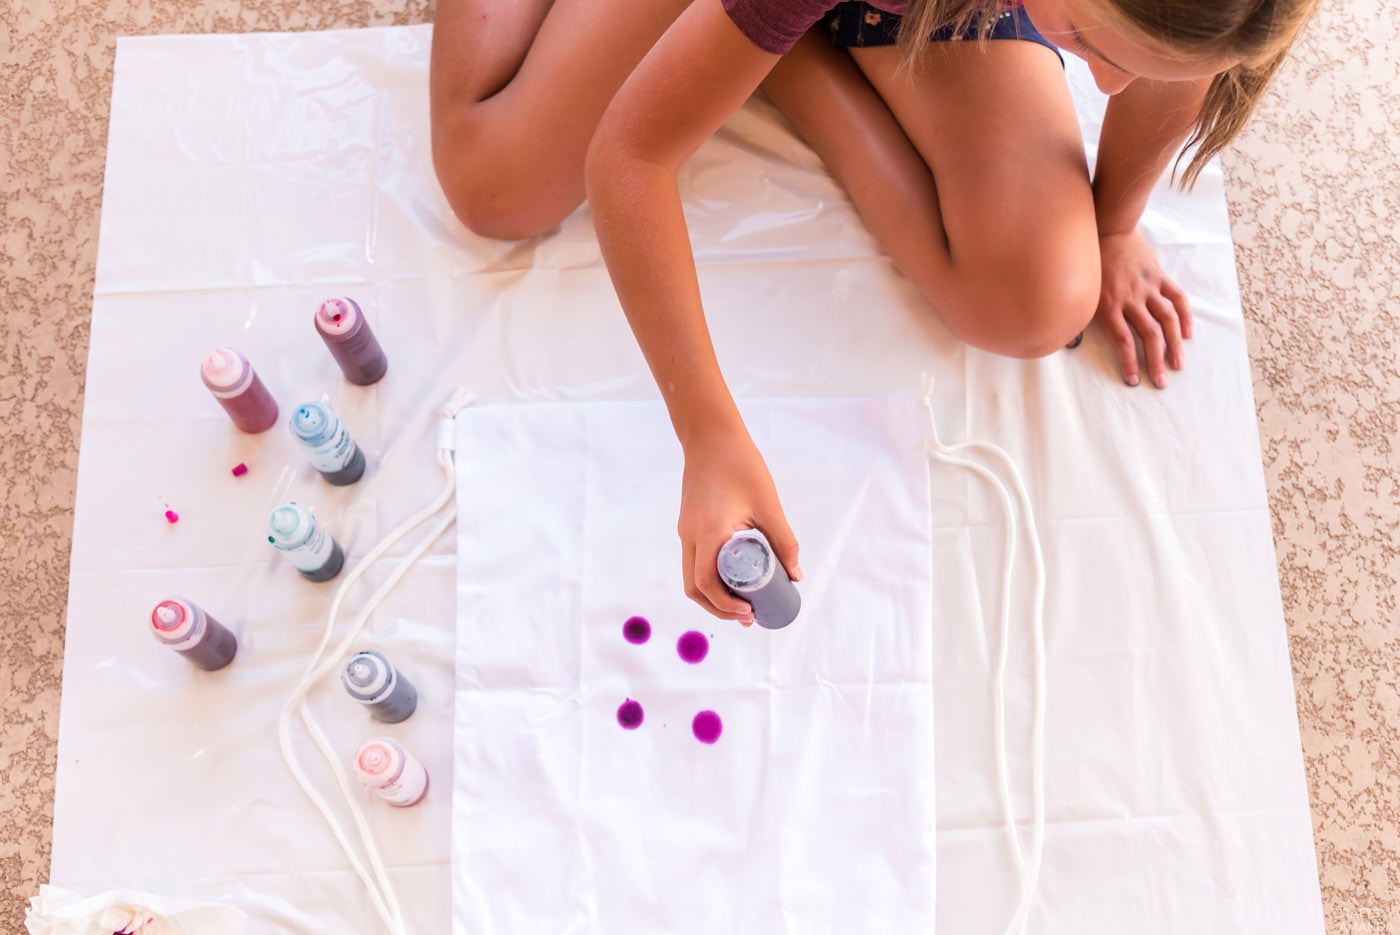
- Cover the surface you’ll be working on. Spread the backpack flat onto the covered surface while it’s still damp.
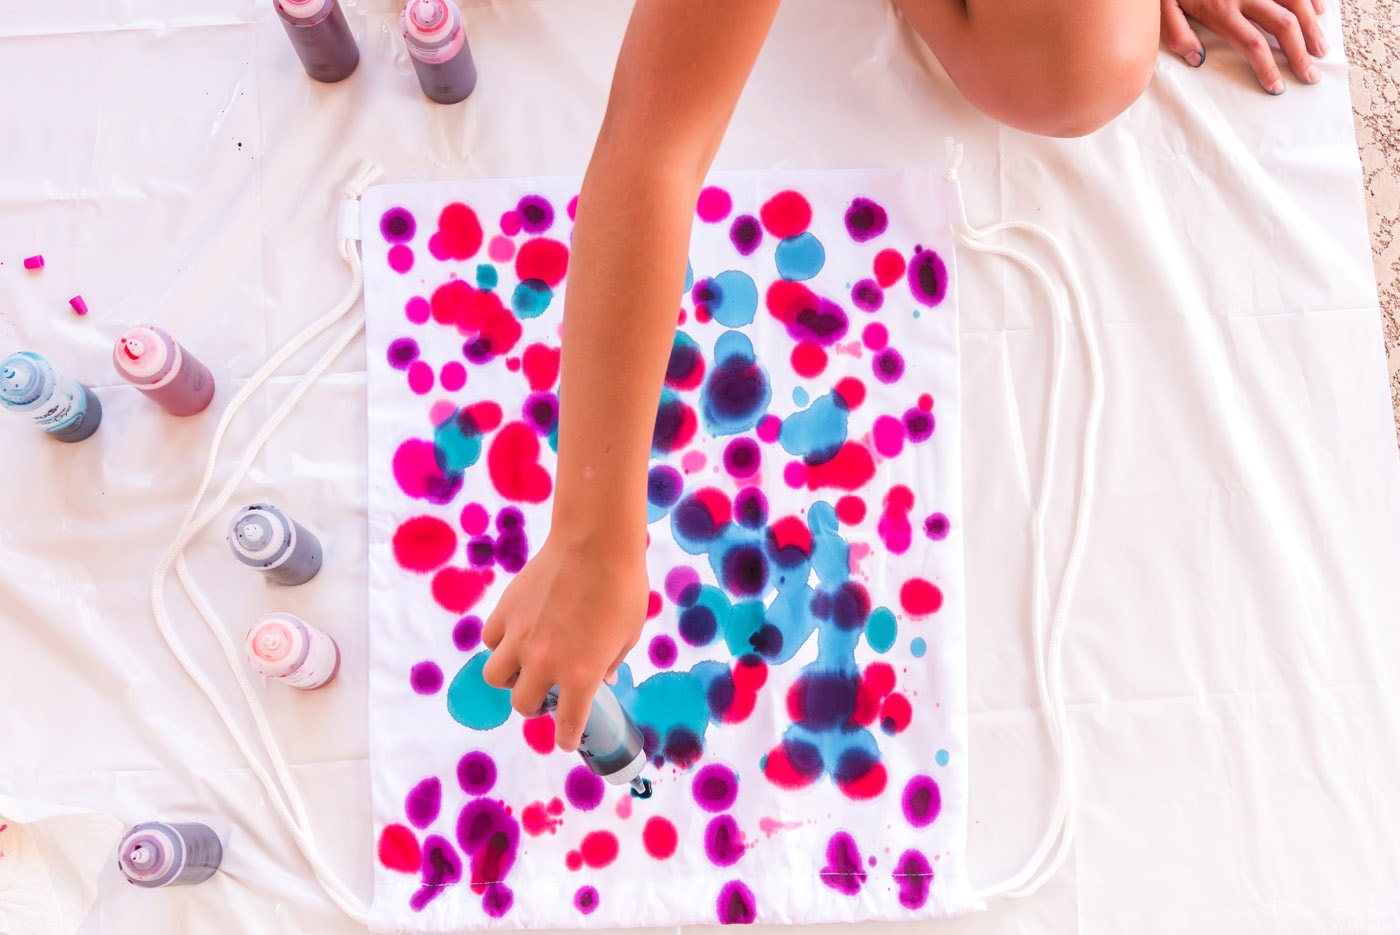
- Holding the dye upside down, without squeezing, allow the colored dye to drip onto the backpack. Move it around or create a pattern however you’d like. Alternate colors as you see fit.
- Once you’ve reached your desired color combination, place the backpack in a plastic bag or garbage bag to sit for around 8 hours or overnight.
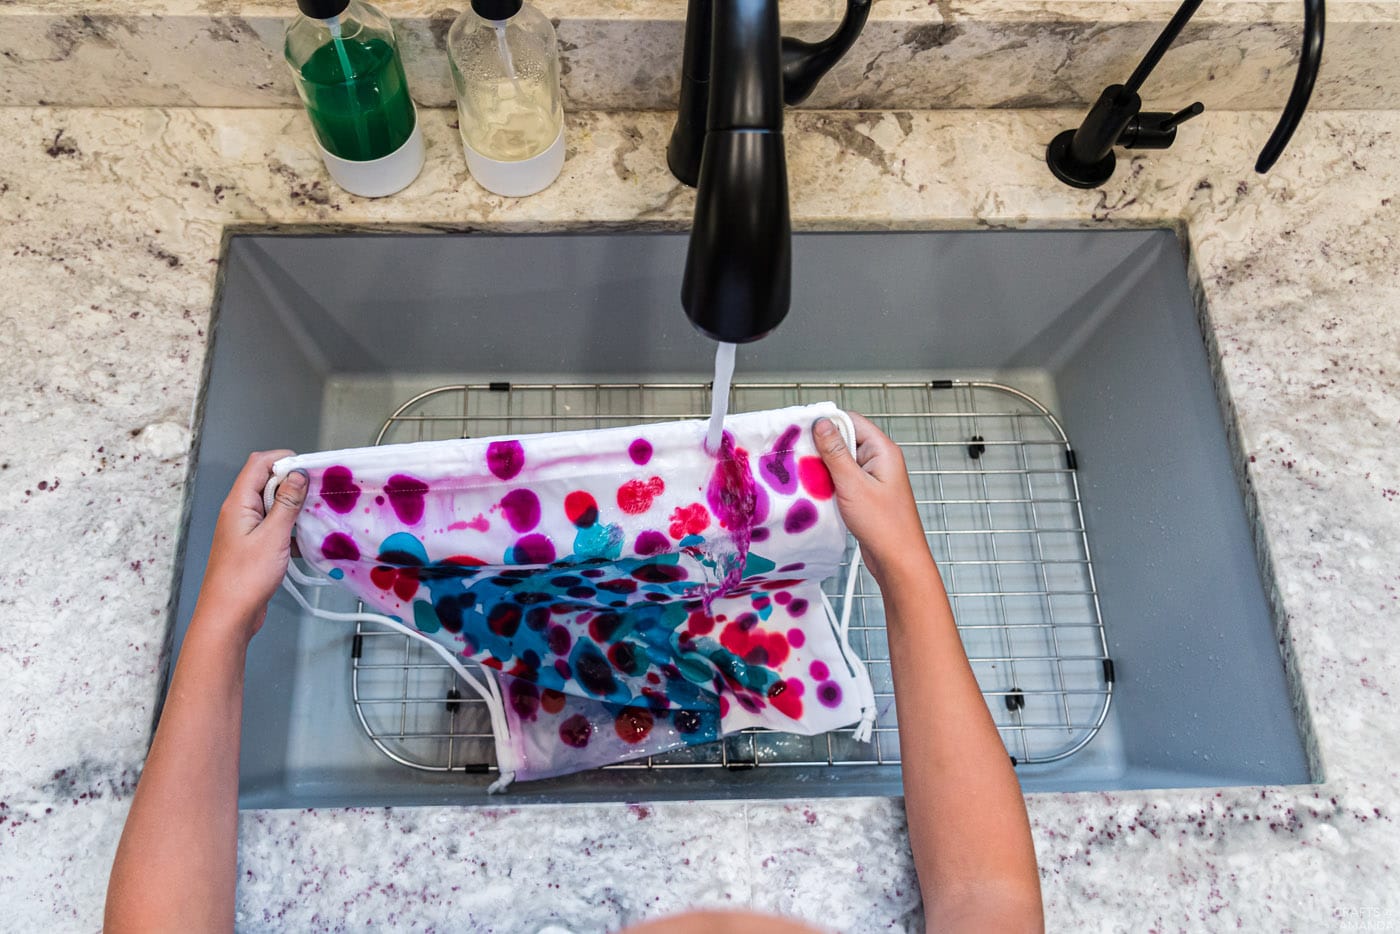
- Rinse the backpack using warm water. Switch to cool water, then back to warm, ending with cool water. Follow with running through the washing machine.

Expert Crafting Tips
- Try to avoid dripping colors over the top of each other. You can do so to fill in gaps if you’d like, but dripping too much may create a muddy color. You want a little bit of white space between the colors as the dye will expand as it sits.
- Plastic tablecloths, disposable gloves, and smocks are recommended. We like to work on tie dye projects outside to avoid any staining on furniture or floors indoors.
- Wetting your backpack before dying will help the colors absorb and create a more vibrant, colorful outcome.
- You can use the drip tie dye method on hats, socks, towels, t-shirts, sweaters, sweatpants, you name it!
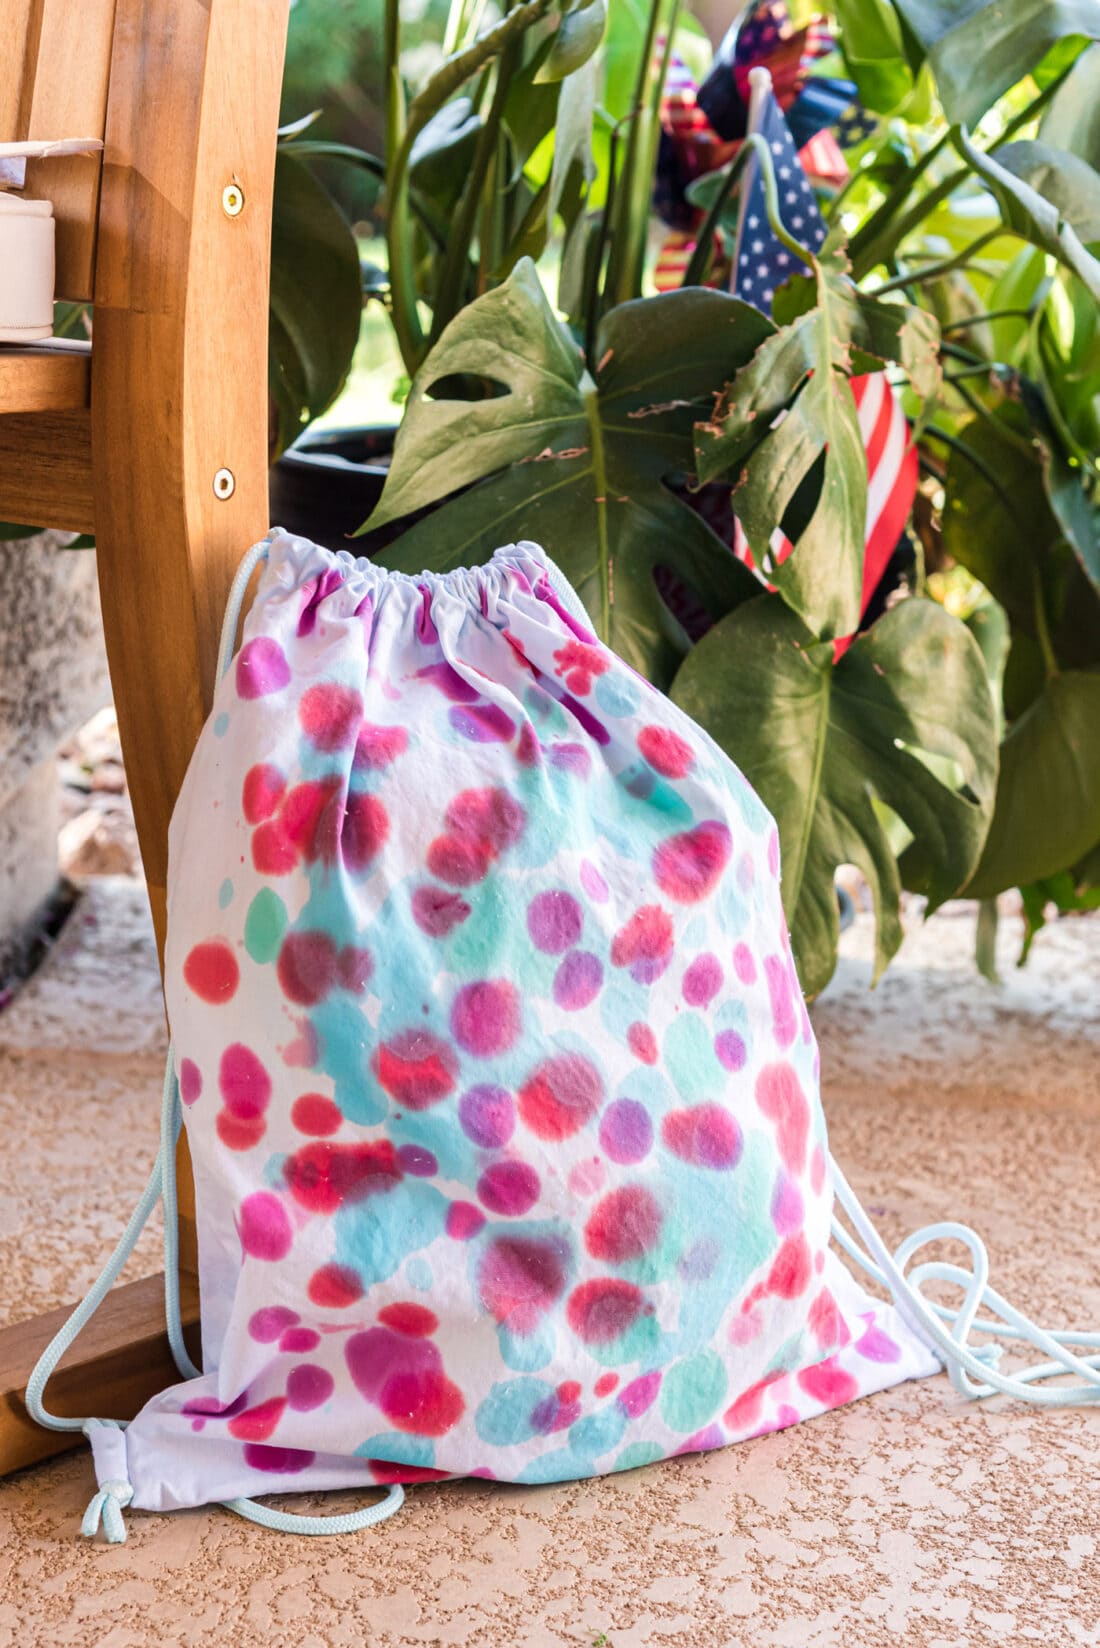
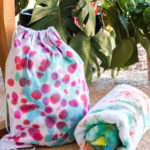
This tie dye backpack is a fun, tangible project you can use for whatever you want. Use it for back to school, beach trips, or as a carry-all for wherever you go!
More Tie Dye Projects
- Drip Dye Tees
- Shibori Tie Dye
- Tie Dye Beach Towels
- Rainbow Tie Dye Shirts
- Sunshine Ombre Shibori Tie Dye
I love to create and share my projects with you! I know it’s hard to remember to come back and search, so I’ve made it easy for you with my weekly newsletter! You can subscribe for free and I’ll send you fun crafts and delicious recipes every week right to your email.
Drip Tie Dye Backpack
Supplies
- Tie Dye in various colors we're using Tulip's One Step Tie Dye Kit
Craft tools
- Plastic tablecloth
- Disposable gloves
Instructions
- Prepare your squeeze bottles with dye according to package instructions, we’re using Tulip’s One-Step Tie Dye Kit.
- Wet your backpack and squeeze out any excess water leaving it damp, but not soaking wet.
- Cover the surface you’ll be working on. Spread the backpack flat onto the covered surface while it’s still damp.
- Holding the dye upside down, without squeezing, allow the colored dye to drip onto the backpack. Move it around or create a pattern however you’d like. Alternate colors as you see fit.
- Once you’ve reached your desired color combination, place the backpack in a plastic bag or garbage bag to sit for around 8 hours or overnight.
- Rinse the backpack using warm water. Switch to cool water, then back to warm, ending with cool water. Follow with running through the washing machine.
Expert Tips & FAQs
- Try to avoid dripping colors over the top of each other. You can do so to fill in gaps if you’d like, but dripping too much may create a muddy color. You want a little bit of white space between the colors as the dye will expand as it sits.
- Tie Dye Beach Towels - July 24, 2026
- Swirling Twirling Ladybugs - July 21, 2026
- Drip Tie Dye Backpack - July 17, 2026


Leave a Reply