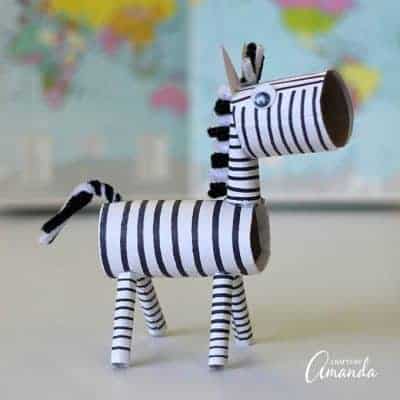
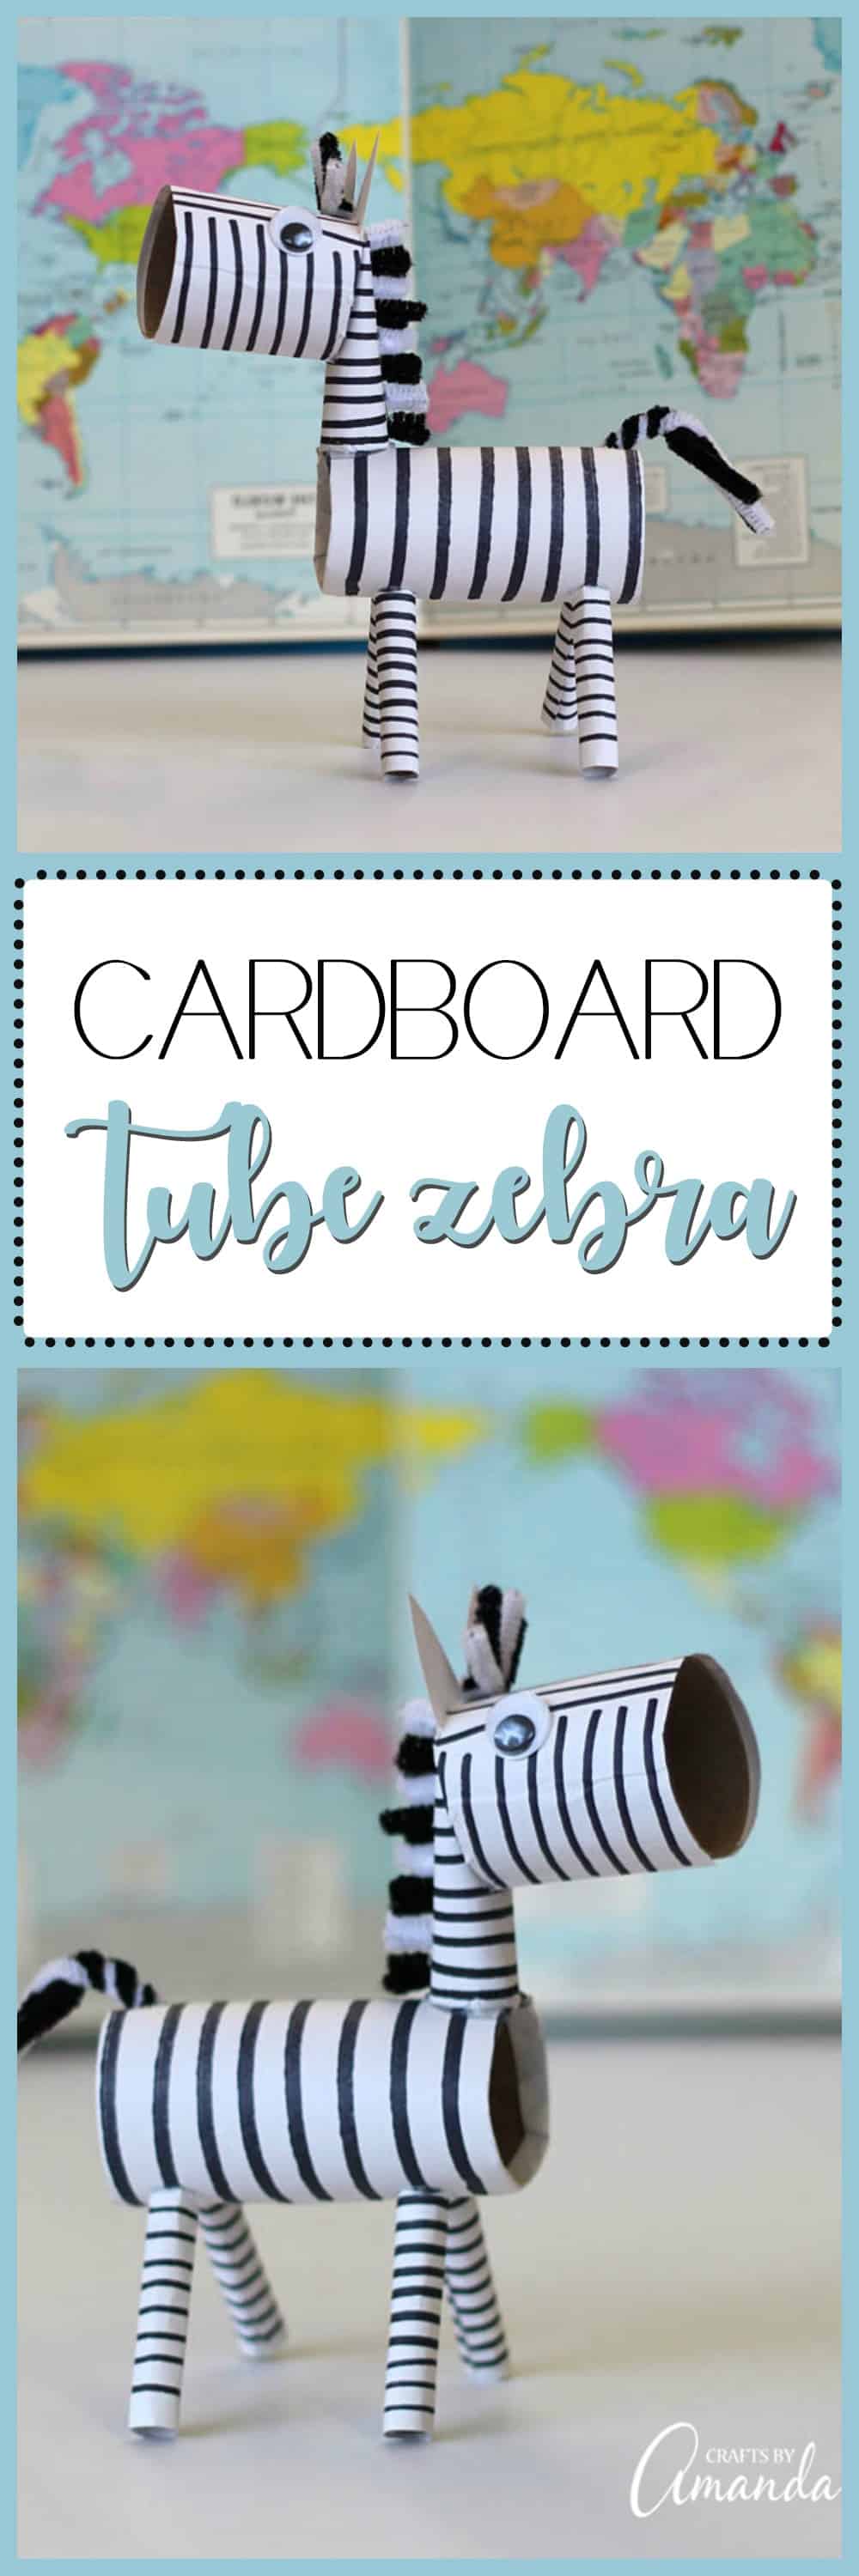
I have made lots and lots of cardboard tube crafts in my day! While I haven’t done it yet, I could certainly put together a list of cardboard tube animals from A to Z, so why not be backwards and start my list with a zebra? This super duper cute cardboard tube zebra is a great project for those working on a zoo unit or a jungle unit. Or really, it’s just a fun and cute kid’s craft with no specific intentions!
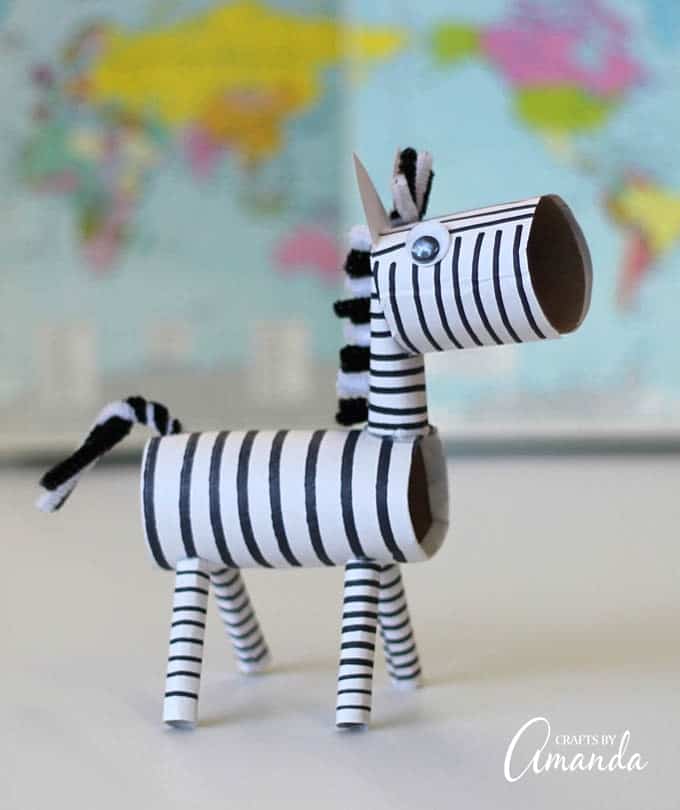
Cardboard Tube Zebra
I recently posted another jungle animal, this cardboard tube alligator, and figured another wild animal was in order. This isn’t the first time I’ve made a zebra craft for kids. There’s also these adorable clothespin zebra and hippo magnets I made a couple of years ago.
There are affiliate links in this post. That means if you buy something from that link, I will earn a small commission, but it won’t cost you anything additional.

This cardboard tube giraffe is also a great project for a jungle theme for kids and would be great alongside my cardboard tube zebra. While the giraffe craft uses felt, my zebra craft is made using white paper or card stock.
You will need these supplies:
- Paper towel cardboard tube
- White card stock or construction paper
- White pipe cleaner
- Black pipe cleaner
- Black marker
- 2 large google eye
- Scissors
- Pencil
- Craft knife
- Hot glue gun (parental supervision recommended)
- Tape
Here’s how you make it:
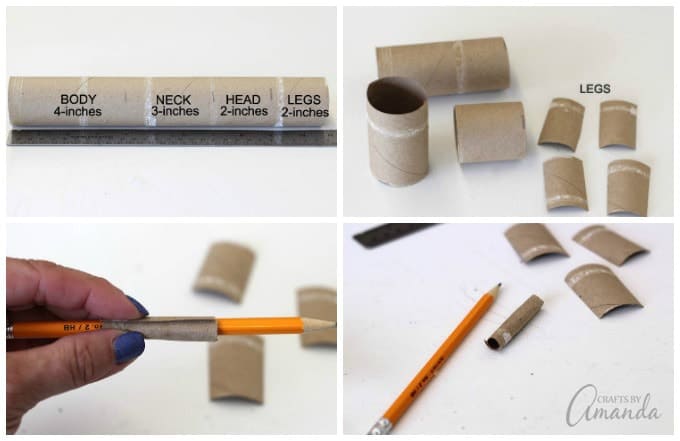
- Cut cardboard tube into four pieces: body – 4 inches, neck – 3 inches, head – 2 inches and legs – 2 inches.
- Cut the 2-inch leg piece in half lengthwise. Cut both of those pieces in half lengthwise so that you have a total of four long pieces.
- Roll each of the leg pieces around a pencil to create a tube. Tape the tube to keep it from unrolling.
- Repeat for the remaining three legs.
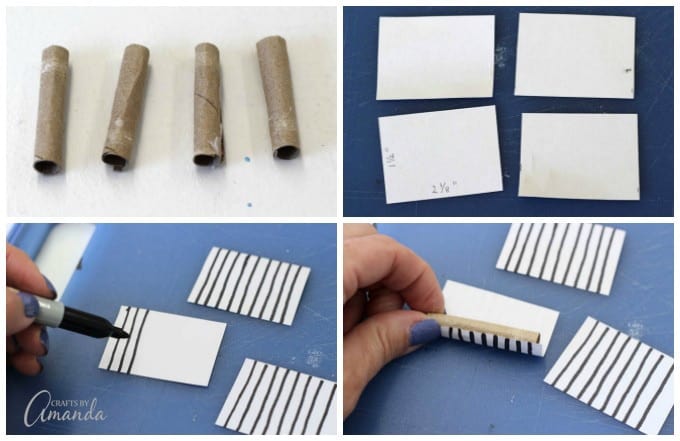
- Cut a piece of card stock into four pieces that each measure 1 1/2” (one and a half inches) x 2 1/8” (two and one eighth inches).
- Starting at the short side (1 1/2”) use the black marker to draw stripes across the piece of card stock. Repeat for the remaining 3 pieces.
- Roll each cardboard tube leg inside of the striped card stock and tape to secure.
- Repeat for the remaining three legs.
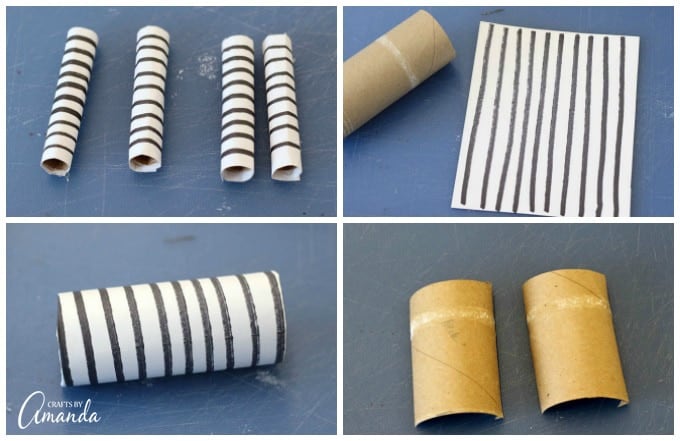
- Cut a piece of white card stock approximately 4-inches by 3-inches and draw stripes across it with the black marker.
- Wrap the body cardboard tube with this striped paper and tape closed.
- Cut the neck piece of cardboard tube lengthwise into two pieces.
- Roll one of the pieces into a tube and tape closed. You can recycle the remaining piece or save it for another craft.
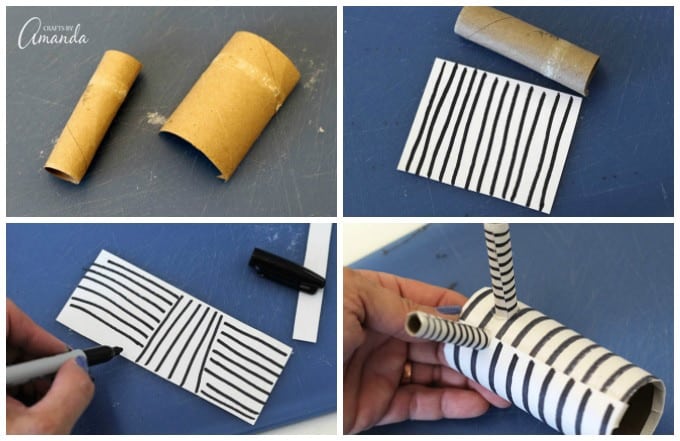
- Cut a piece of white card stock approximately 3-inches by 2-inches and draw stripes across it with the black marker. Roll the neck tube inside the paper and tape it shut.
- Cut a piece of white card stock approximately 5-inches by 2-inches and draw stripes using the photo as a guide. Wrap the head tube inside the card stock and tape shut.
- Hot glue the legs to the bottom of the body.
- Bend one end of the neck tube, about 1-inch from the top, and flatten the end.
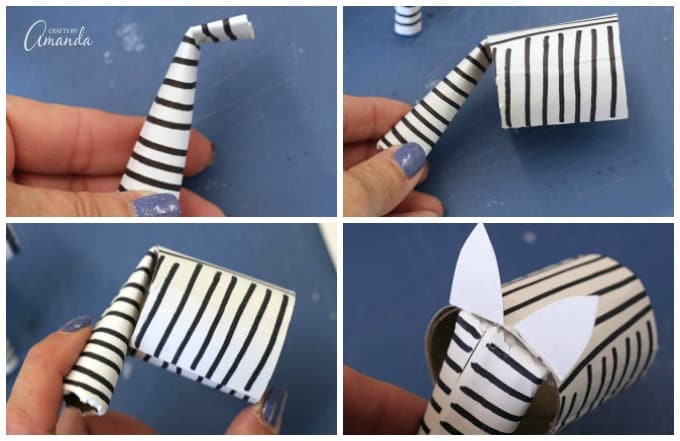
- Hot glue the flat end of the neck piece into one end of the head piece (see photo).
- Bend the remaining portion of the neck toward the head so that it lays flush then hot glue in place.
- Cut two triangles from the whit card stock for the ears and glue them to the top of the head.
- Cut two 2-inch long pieces from pipe cleaners, one from black and one from white. This is for the “forelock” which is the hair between the zebra’s ears, kind of like their bangs.
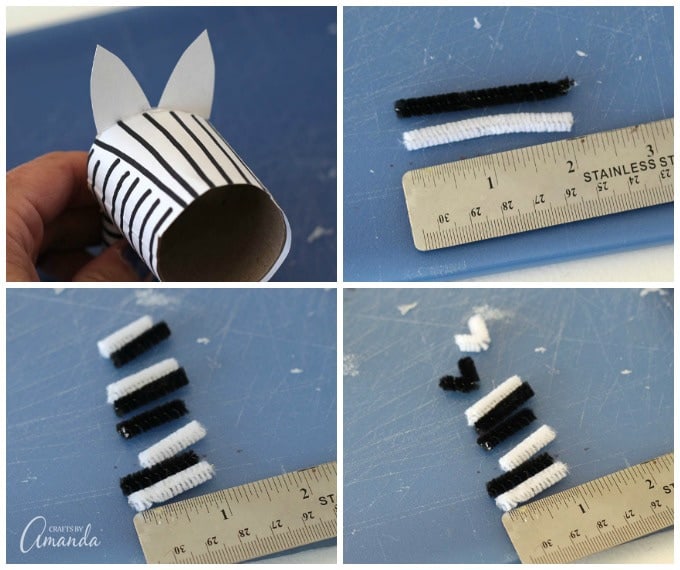
- Cut four 1-inch pieces of black pipe cleaner and four 1-inch pieces of black pipe cleaner for the mane (hair on neck).
- Bend each of the mane pieces in half.
- Hot glue the mane pieces to the back of the neck. Bend the forelock pieces in half and hot glue between the ears.
- Cut two 6-inch pieces from pipe cleaners, one black and one white.
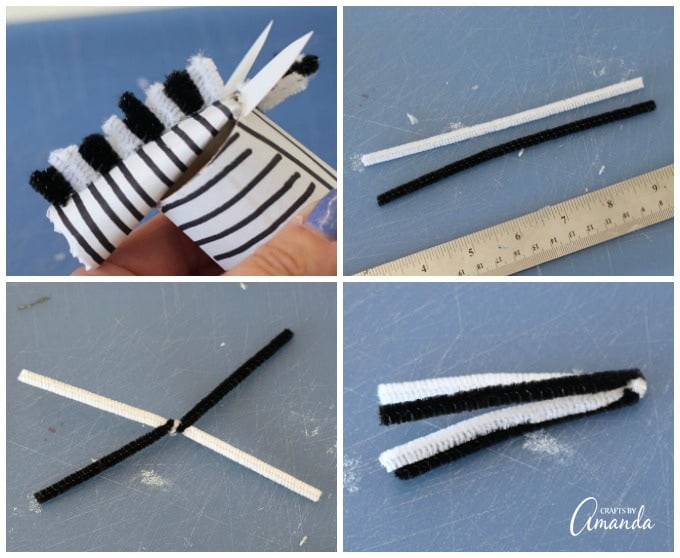
- Twist these two pieces together in the center.
- Fold the pieces.
- Twist the pieces together.
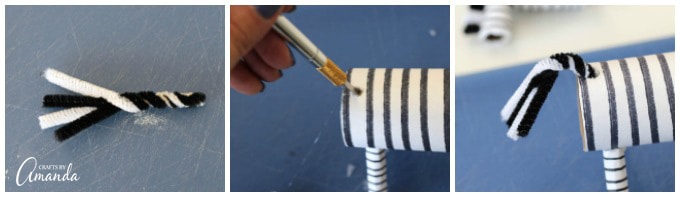
- Use your craft knife to poke a hole in the top of the zebra’s rear end.
- Squirt a little hot glue into the hole then insert the twisted pipe cleaners into the hole for the tail. When dry bend the tail into shape.
- Glue a googly eye to each side of the head.
I hope you enjoyed making this cardboard tube zebra with me! I think the kids are going to love it! Be sure to check out my collection of cardboard tube crafts for kids and check out the animal crafts for kids too.

Cardboard Tube Zebra
Supplies
- Paper towel cardboard tube
- White card stock or construction paper
- White pipe cleaner
- Black pipe cleaner
- Black marker
- 2 large google eye
- Scissors
- Pencil
- Craft knife
- Hot glue gun parental supervision recommended
- Tape
Instructions
- Cut cardboard tube into four pieces: body - 4 inches, neck - 3 inches, head - 2 inches and legs - 2 inches.
- Cut the 2-inch leg piece in half lengthwise. Cut both of those pieces in half lengthwise so that you have a total of four long pieces.
- Roll each of the leg pieces around a pencil to create a tube. Tape the tube to keep it from unrolling.
- Repeat for the remaining three legs.
- Cut a piece of card stock into four pieces that each measure 1 1/2” (one and a half inches) x 2 1/8” (two and one eighth inches).
- Starting at the short side (1 1/2”) use the black marker to draw stripes across the piece of card stock. Repeat for the remaining 3 pieces.
- Roll each cardboard tube leg inside of the striped card stock and tape to secure.
- Repeat for the remaining three legs.
- Cut a piece of white card stock approximately 4-inches by 3-inches and draw stripes across it with the black marker.
- Wrap the body cardboard tube with this striped paper and tape closed.
- Cut the neck piece of cardboard tube lengthwise into two pieces.
- Roll one of the pieces into a tube and tape closed. You can recycle the remaining piece or save it for another craft.
- Cut a piece of white card stock approximately 3-inches by 2-inches and draw stripes across it with the black marker. Roll the neck tube inside the paper and tape it shut.
- Cut a piece of white card stock approximately 5-inches by 2-inches and draw stripes using the photo as a guide. Wrap the head tube inside the card stock and tape shut.
- Hot glue the legs to the bottom of the body.
- Bend one end of the neck tube, about 1-inch from the top, and flatten the end.
- Hot glue the flat end of the neck piece into one end of the head piece (see photo).
- Bend the remaining portion of the neck toward the head so that it lays flush then hot glue in place.
- Cut two triangles from the whit card stock for the ears and glue them to the top of the head.
- Cut two 2-inch long pieces from pipe cleaners, one from black and one from white. This is for the “forelock” which is the hair between the zebra’s ears, kind of like their bangs.
- Cut four 1-inch pieces of black pipe cleaner and four 1-inch pieces of black pipe cleaner for the mane (hair on neck).
- Bend each of the mane pieces in half.
- Hot glue the mane pieces to the back of the neck. Bend the forelock pieces in half and hot glue between the ears.
- Cut two 6-inch pieces from pipe cleaners, one black and one white.
- Twist these two pieces together in the center.
- Fold the pieces.
- Twist the pieces together.
- Use your craft knife to poke a hole in the top of the zebra’s rear end.
- Squirt a little hot glue into the hole them insert the twisted pipe cleaners into the hole for the tail. When dry bend the tail into shape.
- Glue a google eye to each side of the head.
- Tie Dye Beach Towels - July 24, 2026
- Swirling Twirling Ladybugs - July 21, 2026
- Drip Tie Dye Backpack - July 17, 2026


Leave a Reply