
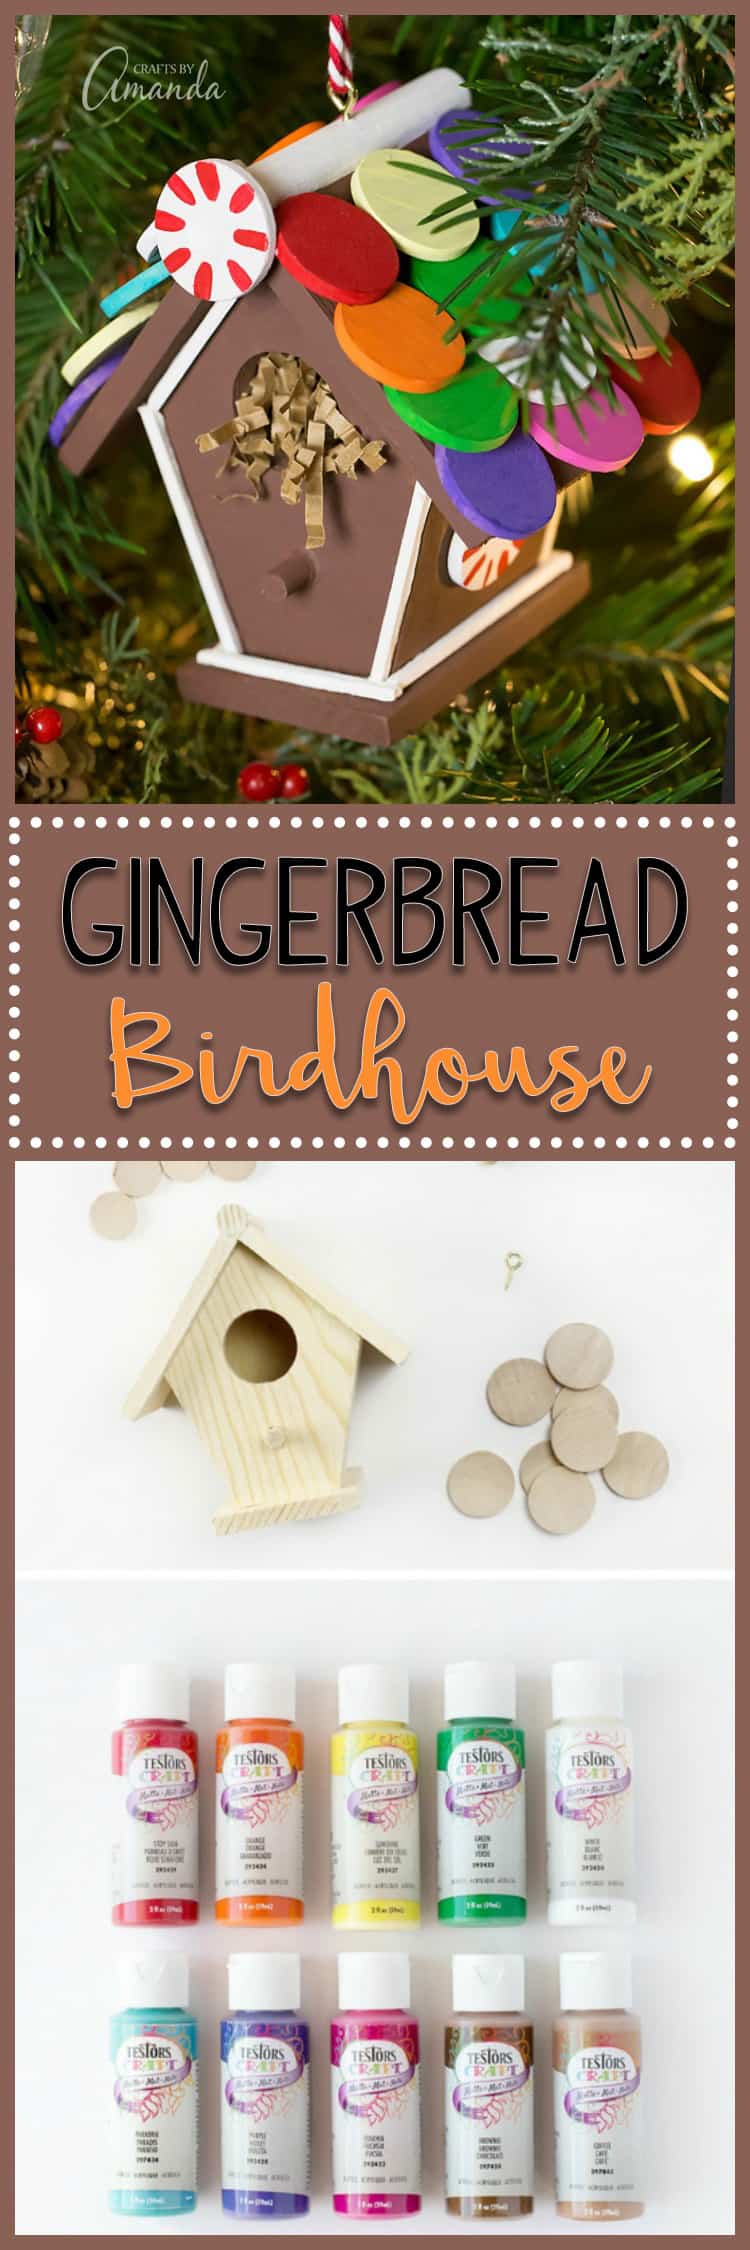
Just in time for the holidays, learn how to make a colorful wooden Gingerbread Birdhouse Ornament from a miniature craft birdhouse, wooden circles, and acrylic paint. This festive craft is perfect for kids and adults of all ages to make, keep, or give for Christmas. This post is sponsored by Testors but all opinions expressed are 100% my own.
Gingerbread Birdhouse Ornament
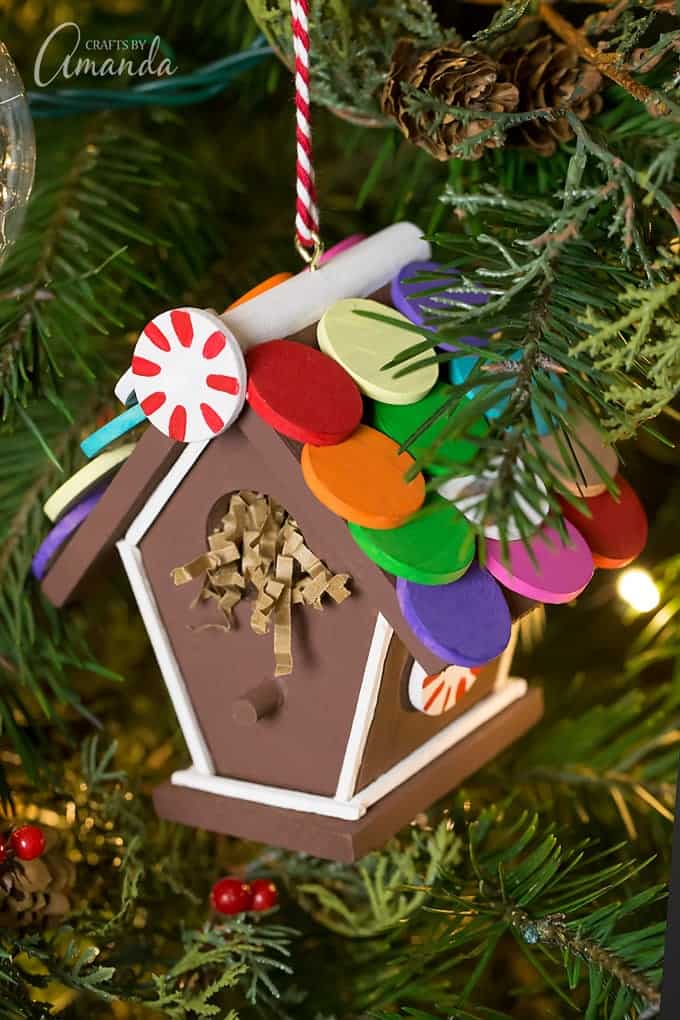
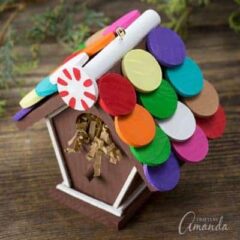
My children and I enjoy creating homemade ornaments to share with teachers, neighbors, family, and friends. This holiday season we created a Gingerbread Birdhouse Ornament with wooden craft supplies and Testors Craft Matte Acrylic Paint. The vibrant, rich colors of the creamy Testors Craft paint were just what we needed to create colorful faux candies to decorate our gingerbread birdhouse.
Doesn’t it look adorable hanging on the tree?
To make this craft you will need:
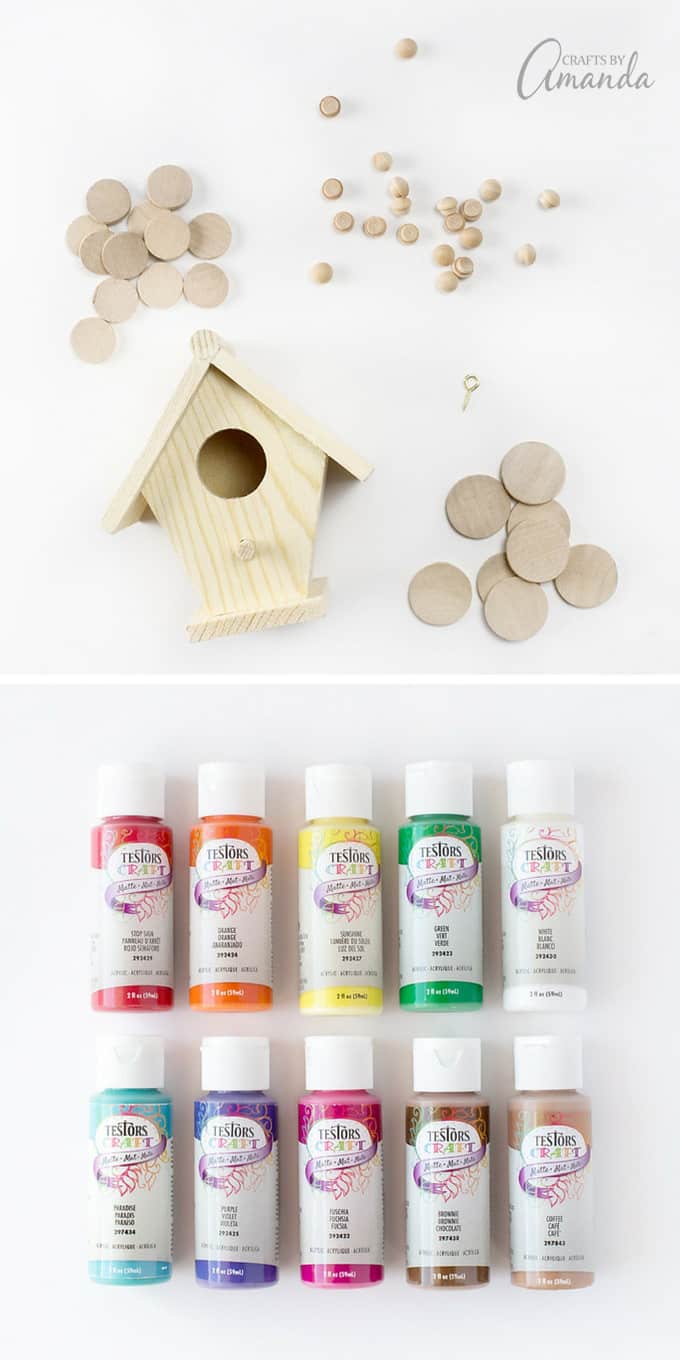
- Miniature wooden birdhouse
- 1 x 1/8 inch wooden circles
- 3 1/2 ” wooden craft picks
- 3/4 x 1/8 inch wooden circles (optional)
- 3/8″ furniture button (optional)
- 7 mm screw eyes
- Acrylic paint
- Paintbrushes
- Hot glue gun
- Scissors
- Twine
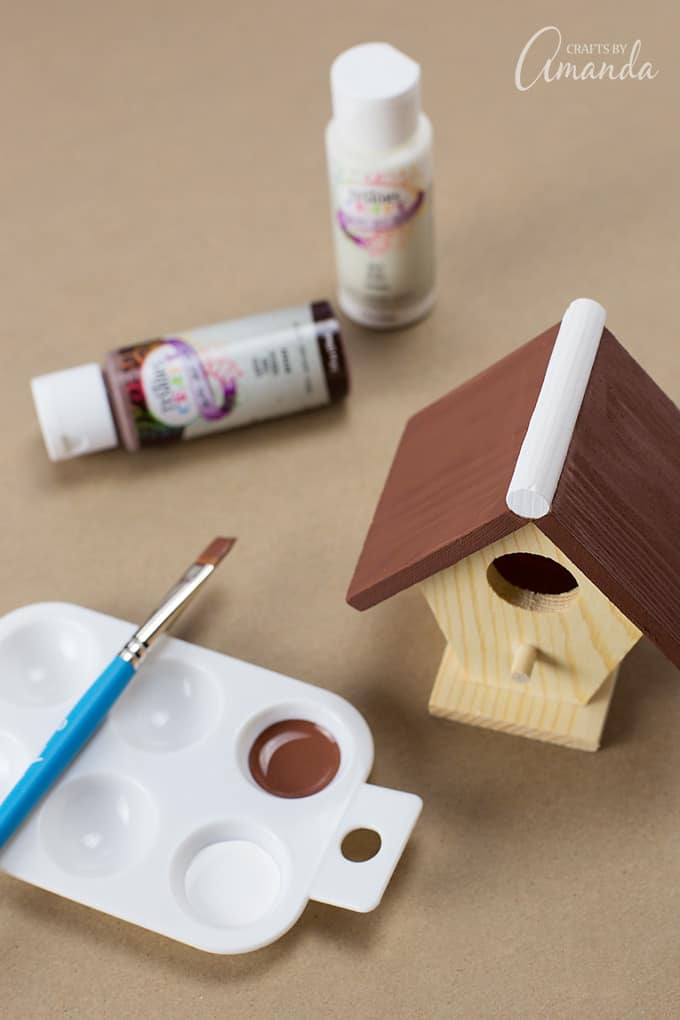
After gathering your supplies, paint the decorative dowel on the top of the birdhouse white. Paint the rest of the birdhouse brown. We enjoyed using Testors Craft Brownie, as it was the perfect shade of brown for gingerbread. Apply a second coat of paint after the first coat is dry.
While the birdhouse is drying, paint the 1 x 1/8 inch wooden circles in wafer candy inspired colors. We used Testors Craft Coffee, Fuschia, Purple, Orange, White, Green, Sunshine, Ruby, and Paradise. When the wooden circles are dry, apply a second coat, being sure to cover the sides completely with paint.
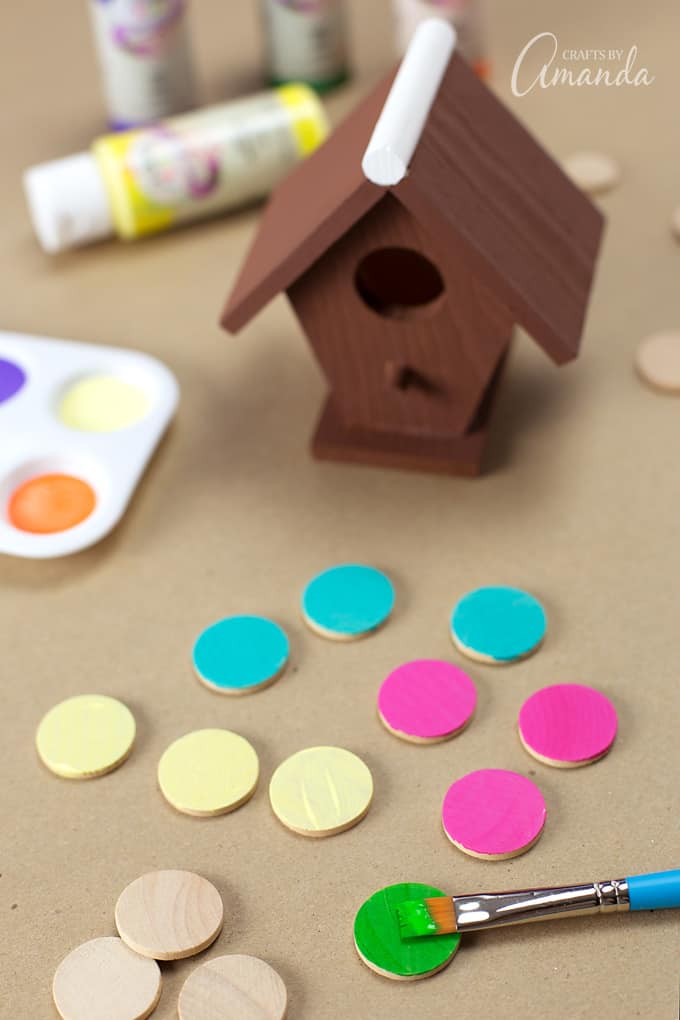
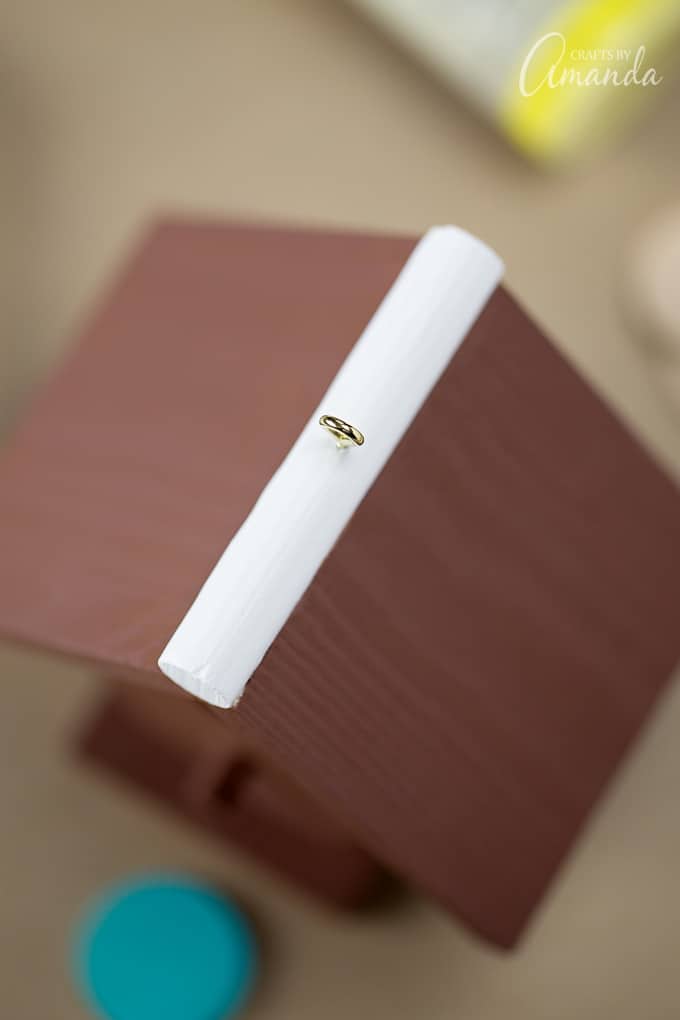
While the circles are drying, twist one 7 mm screw eye into the top of the birdhouse. Now is also a great time to plug in the hot glue gun and paint 15 craft picks white. The craft picks will later become icing!
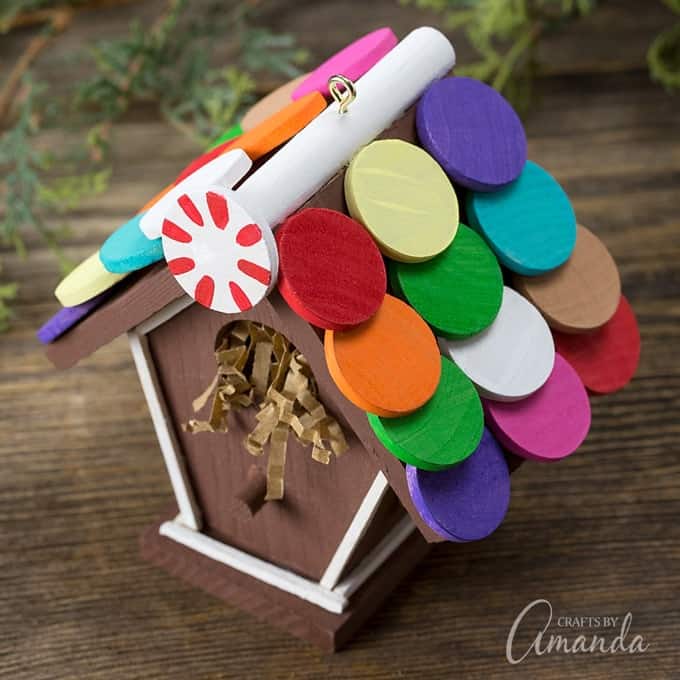
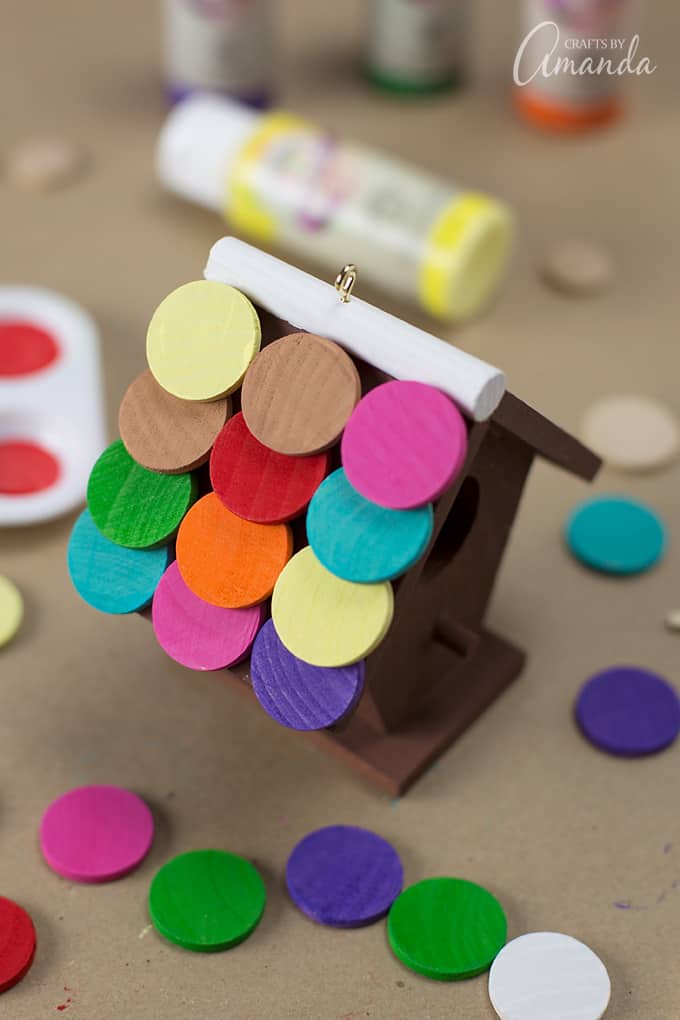
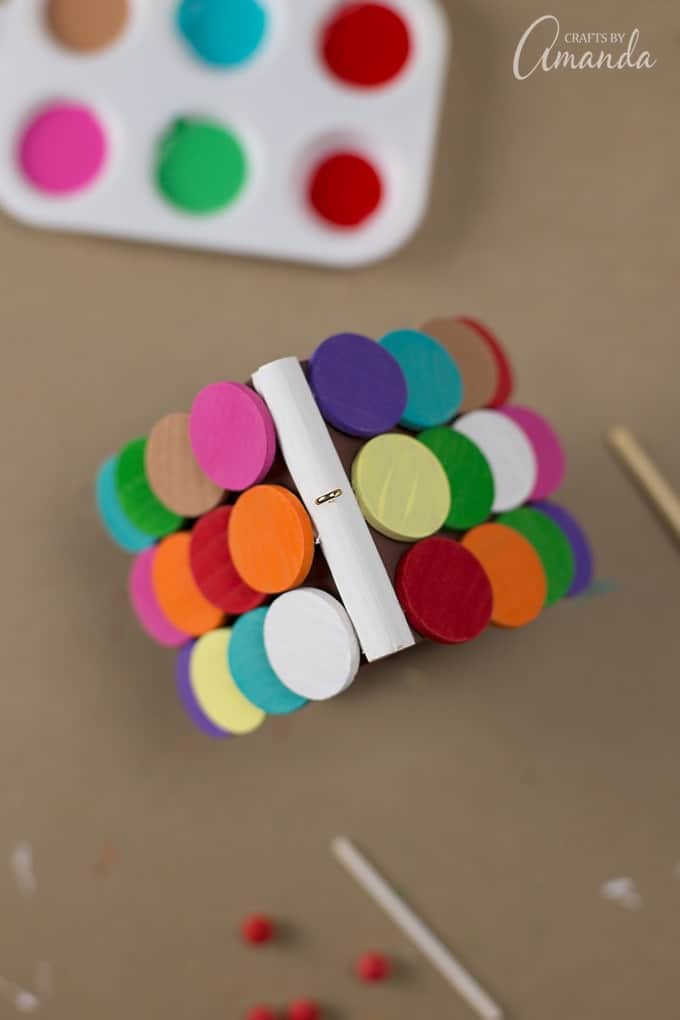
While the craft picks are drying, begin hot gluing the wooden circles to the roof of the gingerbread birdhouse. Start at the bottom, securing 3 circles in a row with hot glue. Slightly overlap each new row until you reach the white dowel. Repeat on the other side of the roof.
Next, glue the white craft picks along the sides of the wooden birdhouse to emulate icing. I used scissors to cut the craft picks to ensure a perfect fit.
Finally, kids will enjoy decorating the house with additional wood pieces. We used extra 1 x 1/8 inch wooden circles to make peppermint candies, 3/8″ furniture button to create M&Ms, and turned 3/4 x 1/8 inch wooden circles into Sprees. I placed a peppermint candy on all 4 sides of the gingerbread house. The smaller round circles and furniture buttons were quickly used by my children and I didn’t get a chance to put any on the house I made!
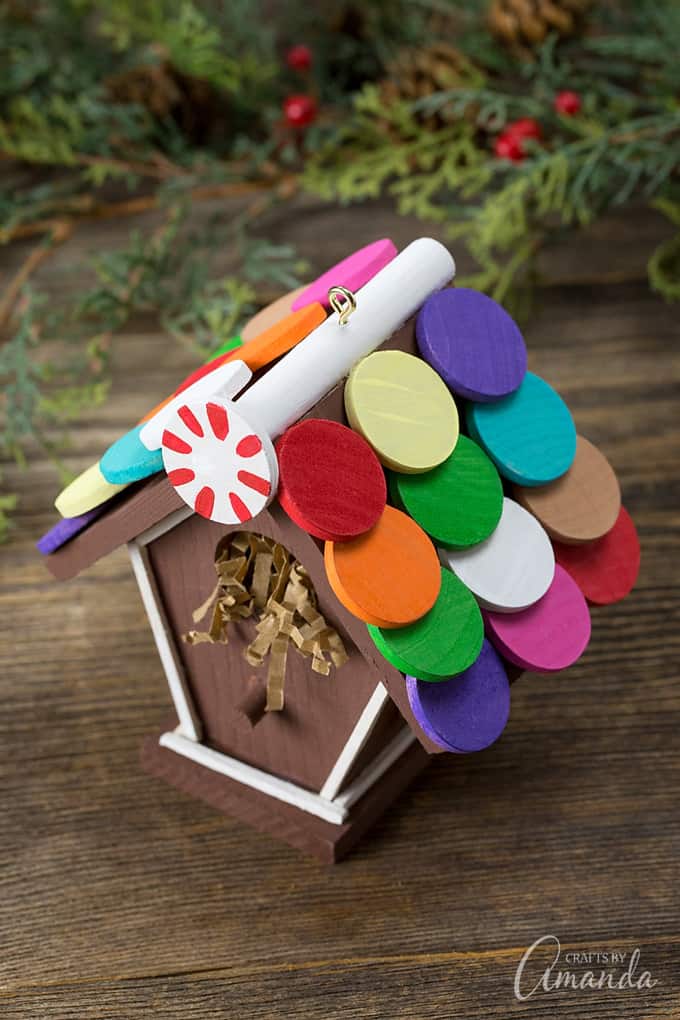
If desired, seal the gingerbread birdhouse with clear acrylic spray before stringing a piece of twine through the screw eye. I filled the birdhouse with a small bit of gift wrap crinkle to make it look like a little holiday bird was enjoying her new festive abode!
Fun and Festive Gingerbread Birdhouse Ornament
Supplies
- Miniature wooden birdhouse
- 1 x 1/8 inch wooden circles
- 3 1/2 ” wooden craft picks
- 3/4 x 1/8 inch wooden circles optional
- 3/8 ″ furniture button optional
- 7 mm screw eyes
- Acrylic paint
- Paintbrushes
- Hot glue gun
- Scissors
- Twine
Instructions
- After gathering your supplies, paint the decorative dowel on the top of the birdhouse white. Paint the rest of the birdhouse brown. We enjoyed using Testors Craft Brownie, as it was the perfect shade of brown for gingerbread. Apply a second coat of paint after the first coat is dry.
- While the birdhouse is drying, paint the 1 x 1/8 inch wooden circles in wafer candy inspired colors. We used Testors Craft Coffee, Fuschia, Purple, Orange, White, Green, Sunshine, Ruby, and Paradise. When the wooden circles are dry, apply a second coat, being sure to cover the sides completely with paint.
- While the circles are drying, twist one 7 mm screw eye into the top of the birdhouse. Now is also a great time to plug in the hot glue gun and paint 15 craft picks white. The craft picks will later become icing!
- While the craft picks are drying, begin hot gluing the wooden circles to the roof of the gingerbread birdhouse. Start at the bottom, securing 3 circles in a row with hot glue. Slightly overlap each new row until you reach the white dowel. Repeat on the other side of the roof.
- Next, glue the white craft picks along the sides of the wooden birdhouse to emulate icing. I used scissors to cut the craft picks to ensure a perfect fit.
- Finally, kids will enjoy decorating the house with additional wood pieces. We used extra 1 x 1/8 inch wooden circles to make peppermint candies, 3/8″ furniture button to create M&Ms, and turned 3/4 x 1/8 inch wooden circles into Sprees. I placed a peppermint candy on all 4 sides of the gingerbread house. The smaller round circles and furniture buttons were quickly used by my children and I didn’t get a chance to put any on the house I made!
- If desired, seal the gingerbread birdhouse with clear acrylic spray before stringing a piece of twine through the screw eye. I filled the birdhouse with a small bit of gift wrap crinkle to make it look like a little holiday bird was enjoying her new festive abode!
- Footprint Penguin - February 14, 2025
- Twirling Lovebugs - February 11, 2019
- Cardboard Tube Spiderman - June 7, 2017


Kate says
What dimensions would the miniature birdhouses be?
Thanks❤
Amanda Formaro says
Not exact dimensions, but probably about 4 inches high