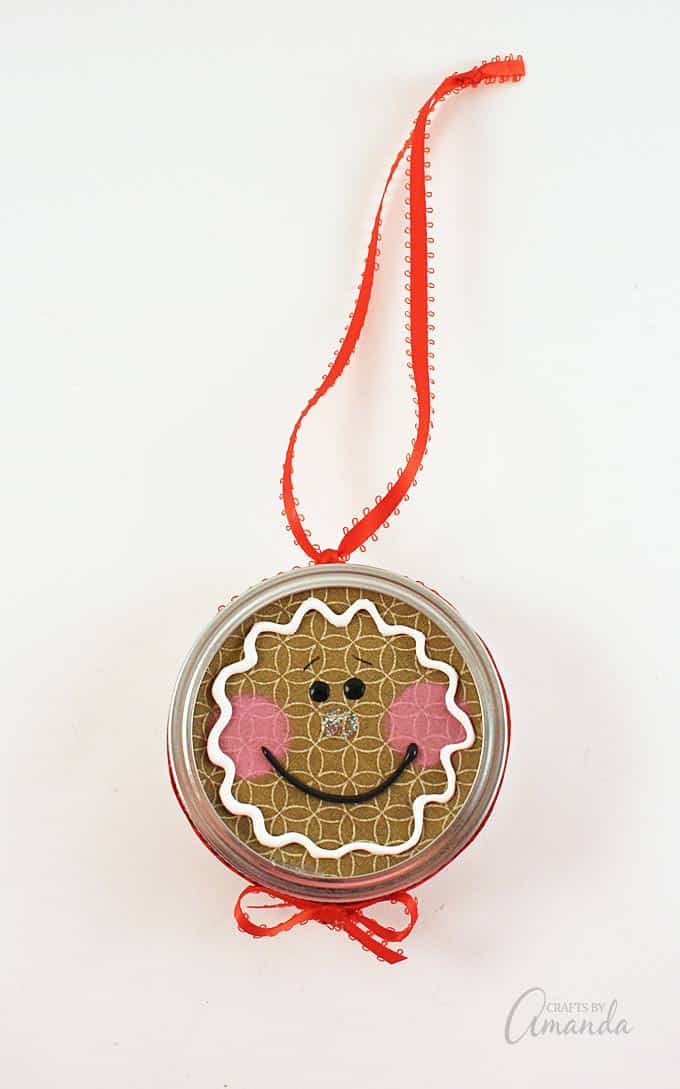
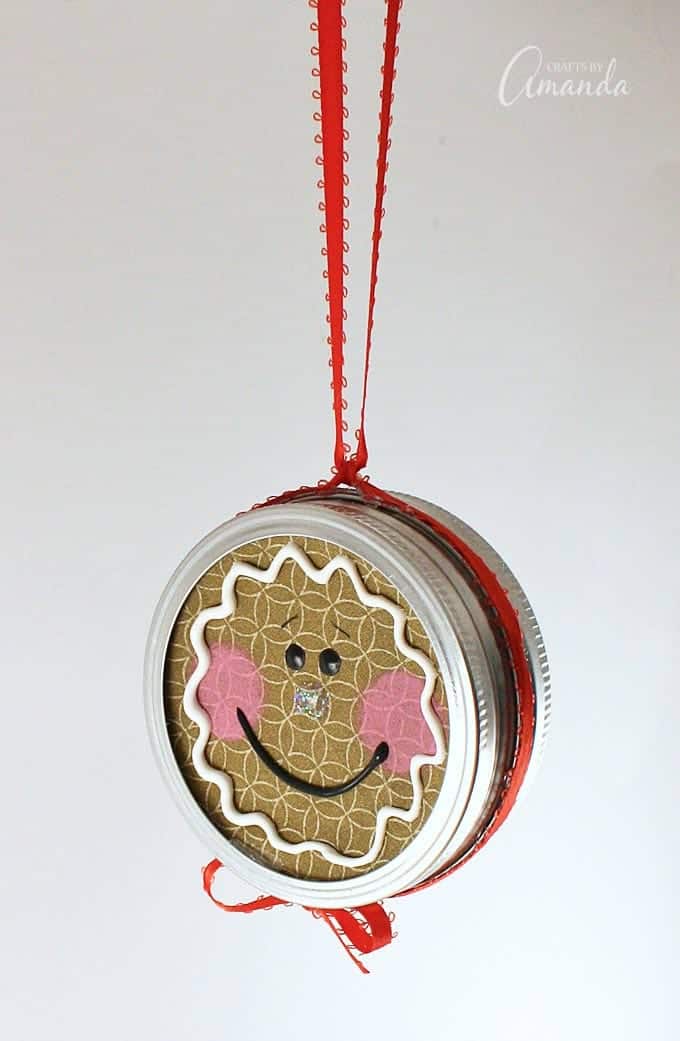
Turn a canning jar lid into a sweet gingerbread man with this canning lid ornament project! These are a great way to recycle used lids that you are no longer using for canning. A Christmas ornament makes a fun and festive gift; imagine how cute this little guy would look tied into the bow on a present!
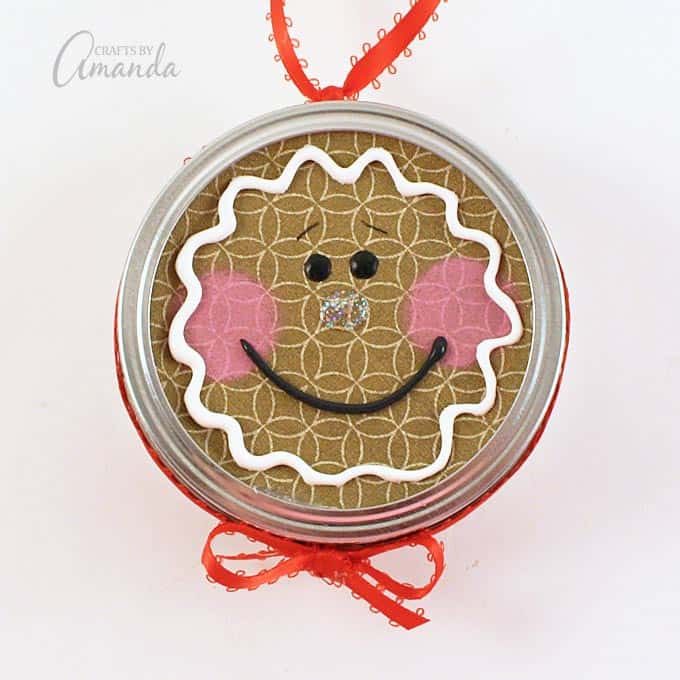
Making a canning lid ornament
This gingerbread man ornament is a quick, easy way to add a festive touch to your decor, as well as a potential opportunity to use up scrap fabric and recycle used – or underutilized – canning supplies. It’s also a family-friendly project, suitable for both kids and adults.
There are affiliate links in this post. That means if you buy something from that link, I will earn a small commission, but it won’t cost you anything additional.
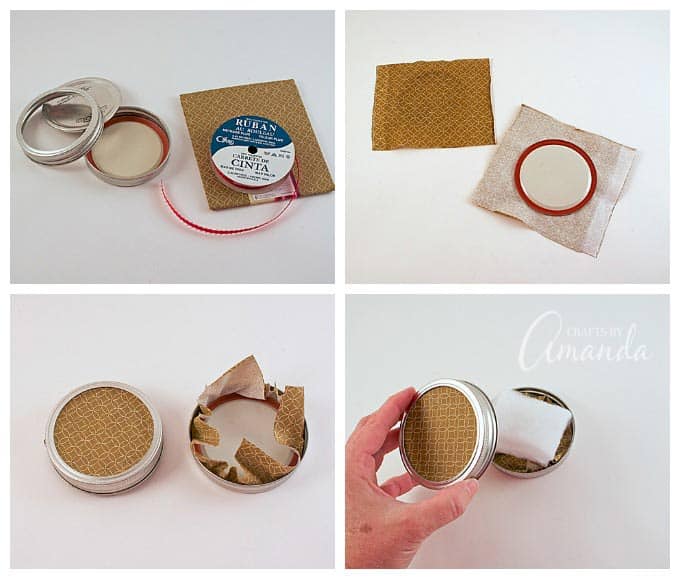
Supplies needed to make a gingerbread man canning lid ornament
Supplies:
- 2 canning lids and bands
- Light brown or tan fabric
- Red ribbon
- Cotton batting
- Pink and black craft paint
- puffy paint
: white glitter, black and white
Tools:
1. Spread instant grab glue all over the top of both canning lids and press fabric to it. Use your fingers to even out the fabric.
2. Place fabric covered canning lid inside canning band. Add a couple spots of hot glue to hold it in place. Hot glue the fabric down inside the lid and band.
3. Add some cotton batting or stuffing inside one of the lids. This will keep the lids from accidentally collapsing inward.
4. Glue the two lids together using the instant grab glue. Hot glue will not work properly, so be sure to use the instant grab. White glue will work too, it just takes a lot longer to dry.
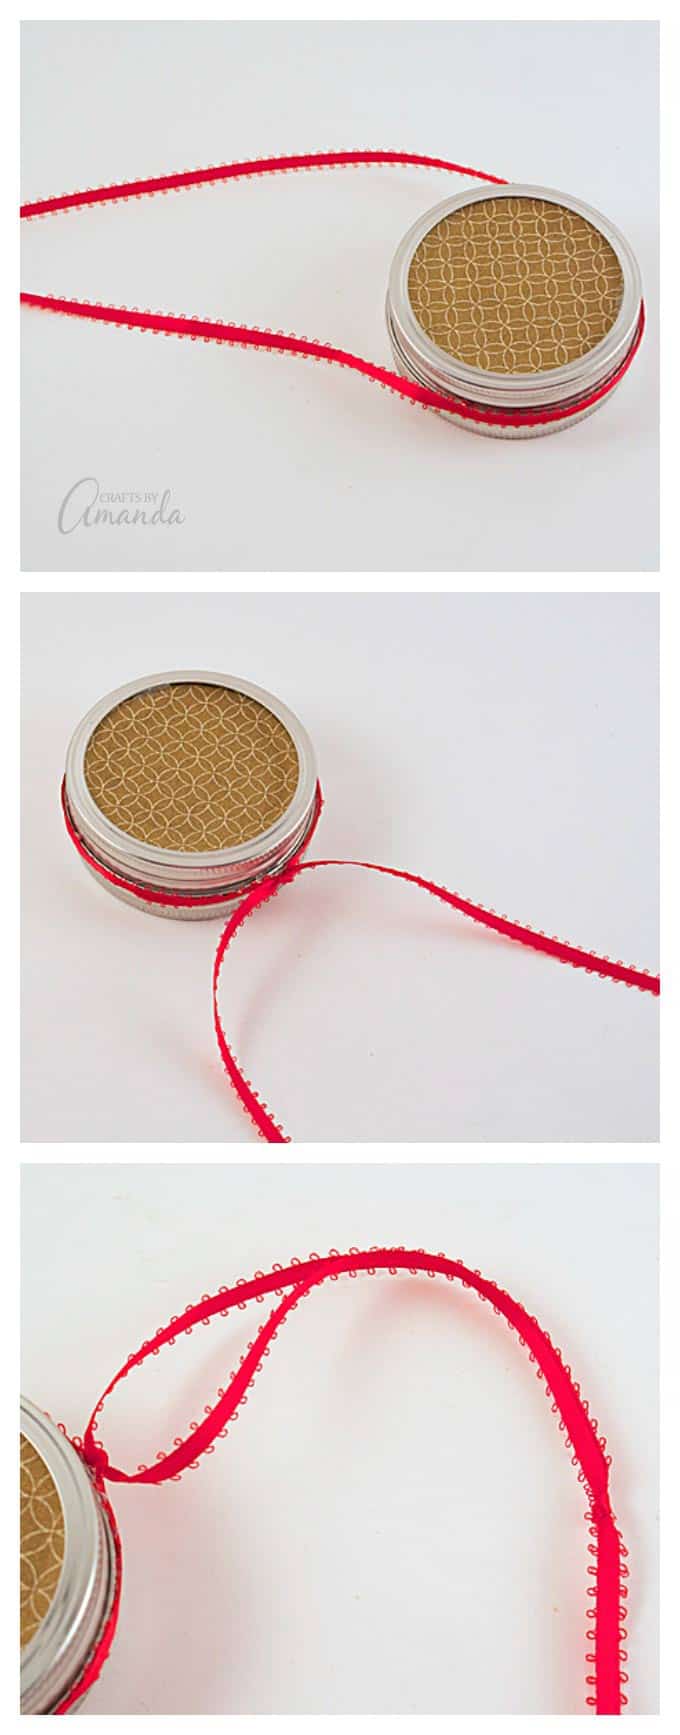
5. Cut a long piece of red ribbon and hot glue it around the center of the two bands. When the two ends of the ribbon meet, tie them in a knot. Tie the open ends of the ribbon together to create the hanger. Trim off excess. Make a small bow from another piece of ribbon and hot glue it to the bottom of the ornament.
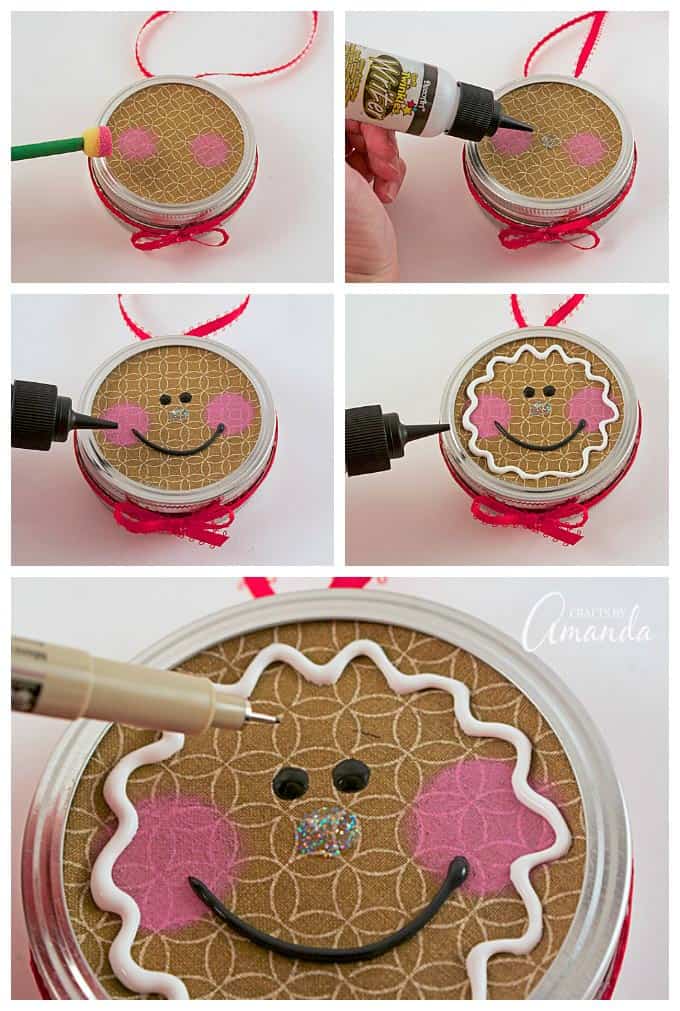
6. Dip round applicator into pink paint and dab off the excess paint onto a piece of paper towel. Gently apply pink circles to the “face” to create the cheeks.
7. Use white or clear glitter paint to draw on a nose.
8. Use black 3D paint for the smile and dip the handle end a paintbrush into black craft paint to dot on the eyes.
9. Use white 3D paint to draw on rick rack around the face.
10. Draw eyebrows on with fine point marker.
11. Repeat all the facial steps on the other side.
12. Allow everything to dry completely.
I hope you enjoyed this cute gingerbread craft. If you like gingerbread, check out the darling gingerbread village I made from milk cartons (though they aren’t edible!).
More canning lid ornament projects you might like:
- If you prefer a shabbier look to your Christmas decor, check out my antiqued canning lid snowman ornament.
- For a more whimsical look, you can also make a canning lid and button snowman ornament.
- My recycled canning lid angel ornament is another fun project for those who prefer to decorate on a more religious theme for the holidays.
- Add some bling to your tree with a rhinestone encrusted canning lid ornament.
Gingerbread Man Canning Lid Ornament
Supplies
- 2 canning lids and bands
- Light brown or tan fabric
- Red ribbon
- Cotton batting
- Pink and black craft paint
- 3 D or puffy paint: white glitter black and white
- Tools: hot glue gun instant grab glue, scissors, round sponge applicator, black fine point marker
Instructions
- Spread instant grab glue all over the top of both canning lids and press fabric to it. Use your fingers to even out the fabric.
- Place fabric covered canning lid inside canning band. Add a couple spots of hot glue to hold it in place. Hot glue the fabric down inside the lid and band.
- Add some cotton batting or stuffing inside one of the lids. This will keep the lids from accidentally collapsing inward.
- Glue the two lids together using the instant grab glue. Hot glue will not work properly, so be sure to use the instant grab. White glue will work too, it just takes a lot longer to dry.
- Cut a long piece of red ribbon and hot glue it around the center of the two bands. When the two ends of the ribbon meet, tie them in a knot. Tie the open ends of the ribbon together to create the hanger. Trim off excess. Make a small bow from another piece of ribbon and hot glue it to the bottom of the ornament.
- Dip round applicator into pink paint and dab off the excess paint onto a piece of paper towel. Gently apply pink circles to the "face" to create the cheeks.
- Use white or clear glitter paint to draw on a nose.
- Use black 3D paint for the smile and dip the handle end a paintbrush into black craft paint to dot on the eyes.
- Use white 3D paint to draw on rick rack around the face.
- Draw eyebrows on with fine point marker.
- Repeat all the facial steps on the other side.
- Allow everything to dry completely.
- Watercolor Luminaries - February 11, 2025
- Free Valentine Printables: Cards, toppers, and tags - February 4, 2025
- Valentine Hugs - January 31, 2025


Roxi says
Amanda, I love this craft. I love the way you give a supply list and all the instructions are so well written. I also like that you have a “printer friendly” version of your craft to print. Thank you for your inspirations! Happy Holidays!
Amanda Formaro says
Thanks Roxi, I appreciate that!