
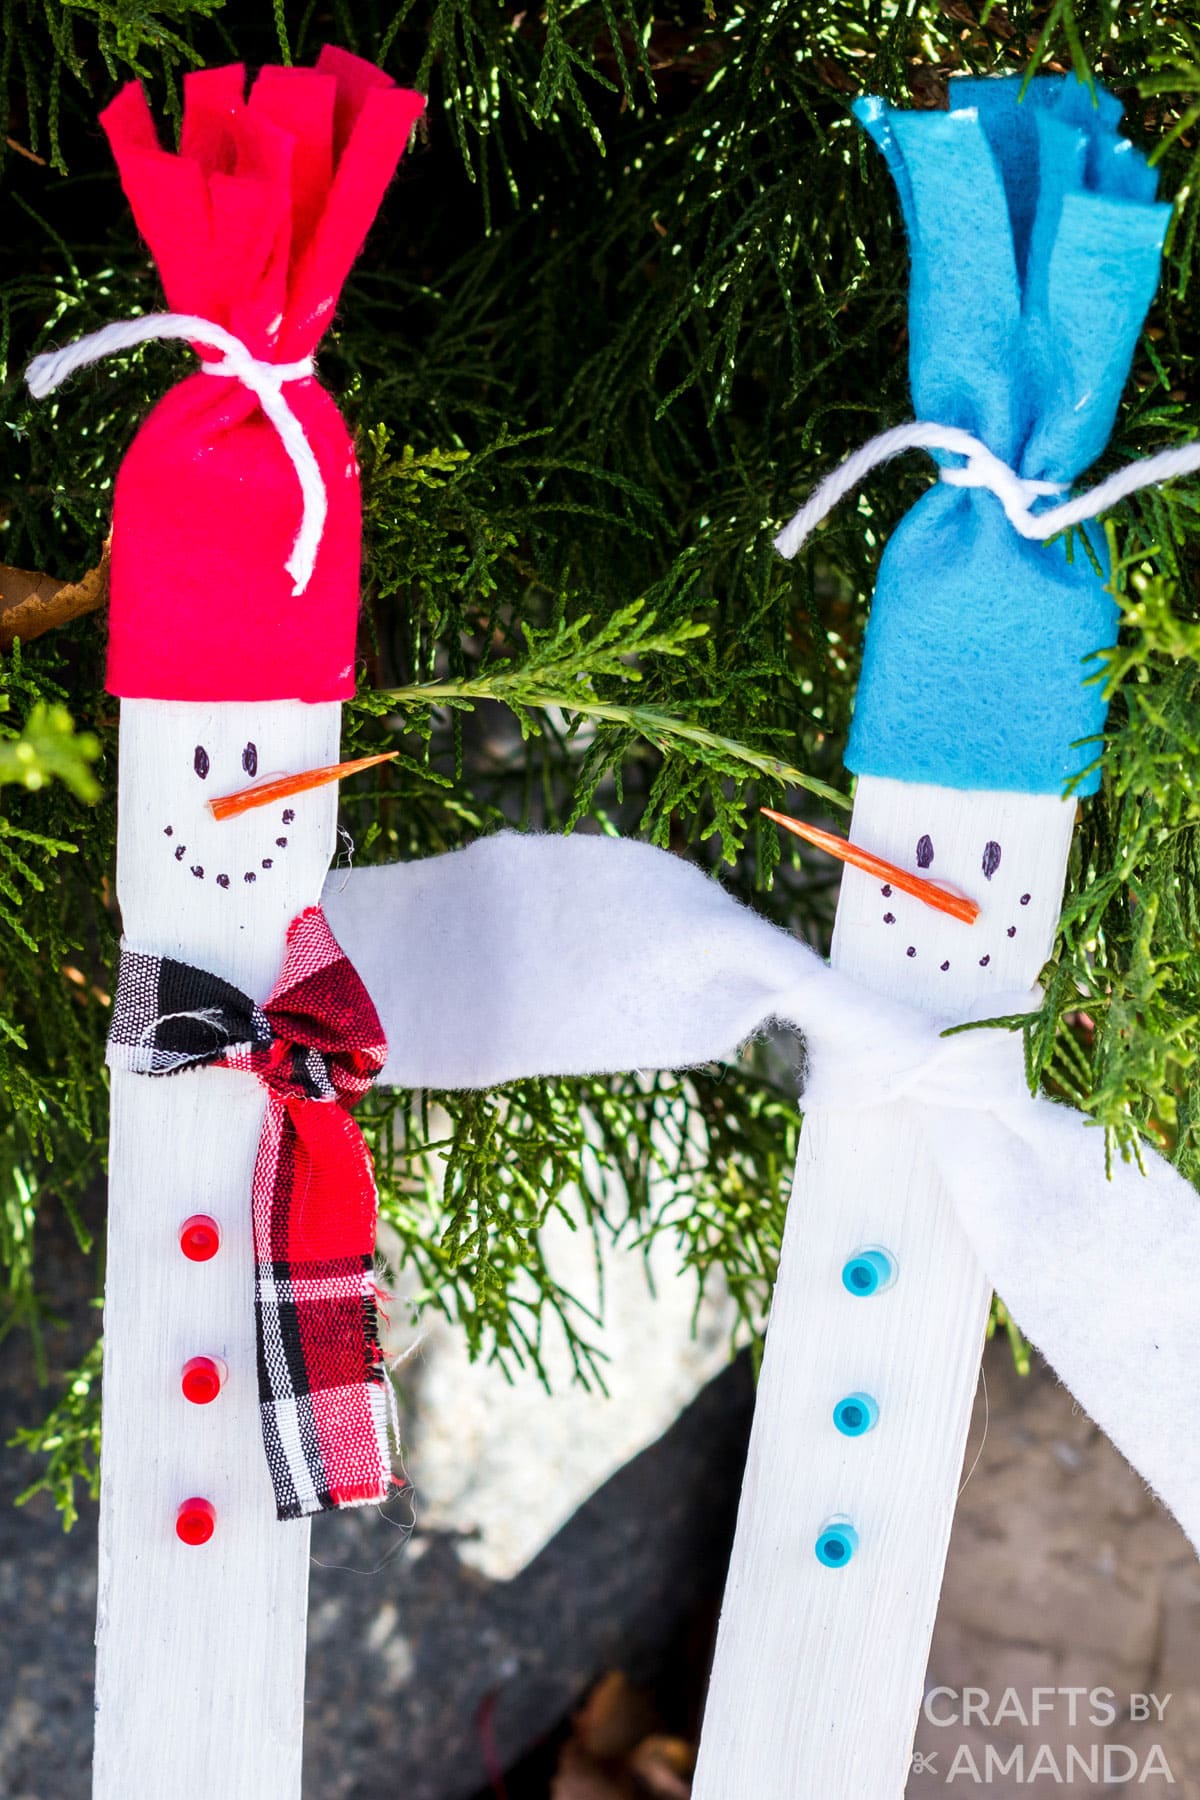
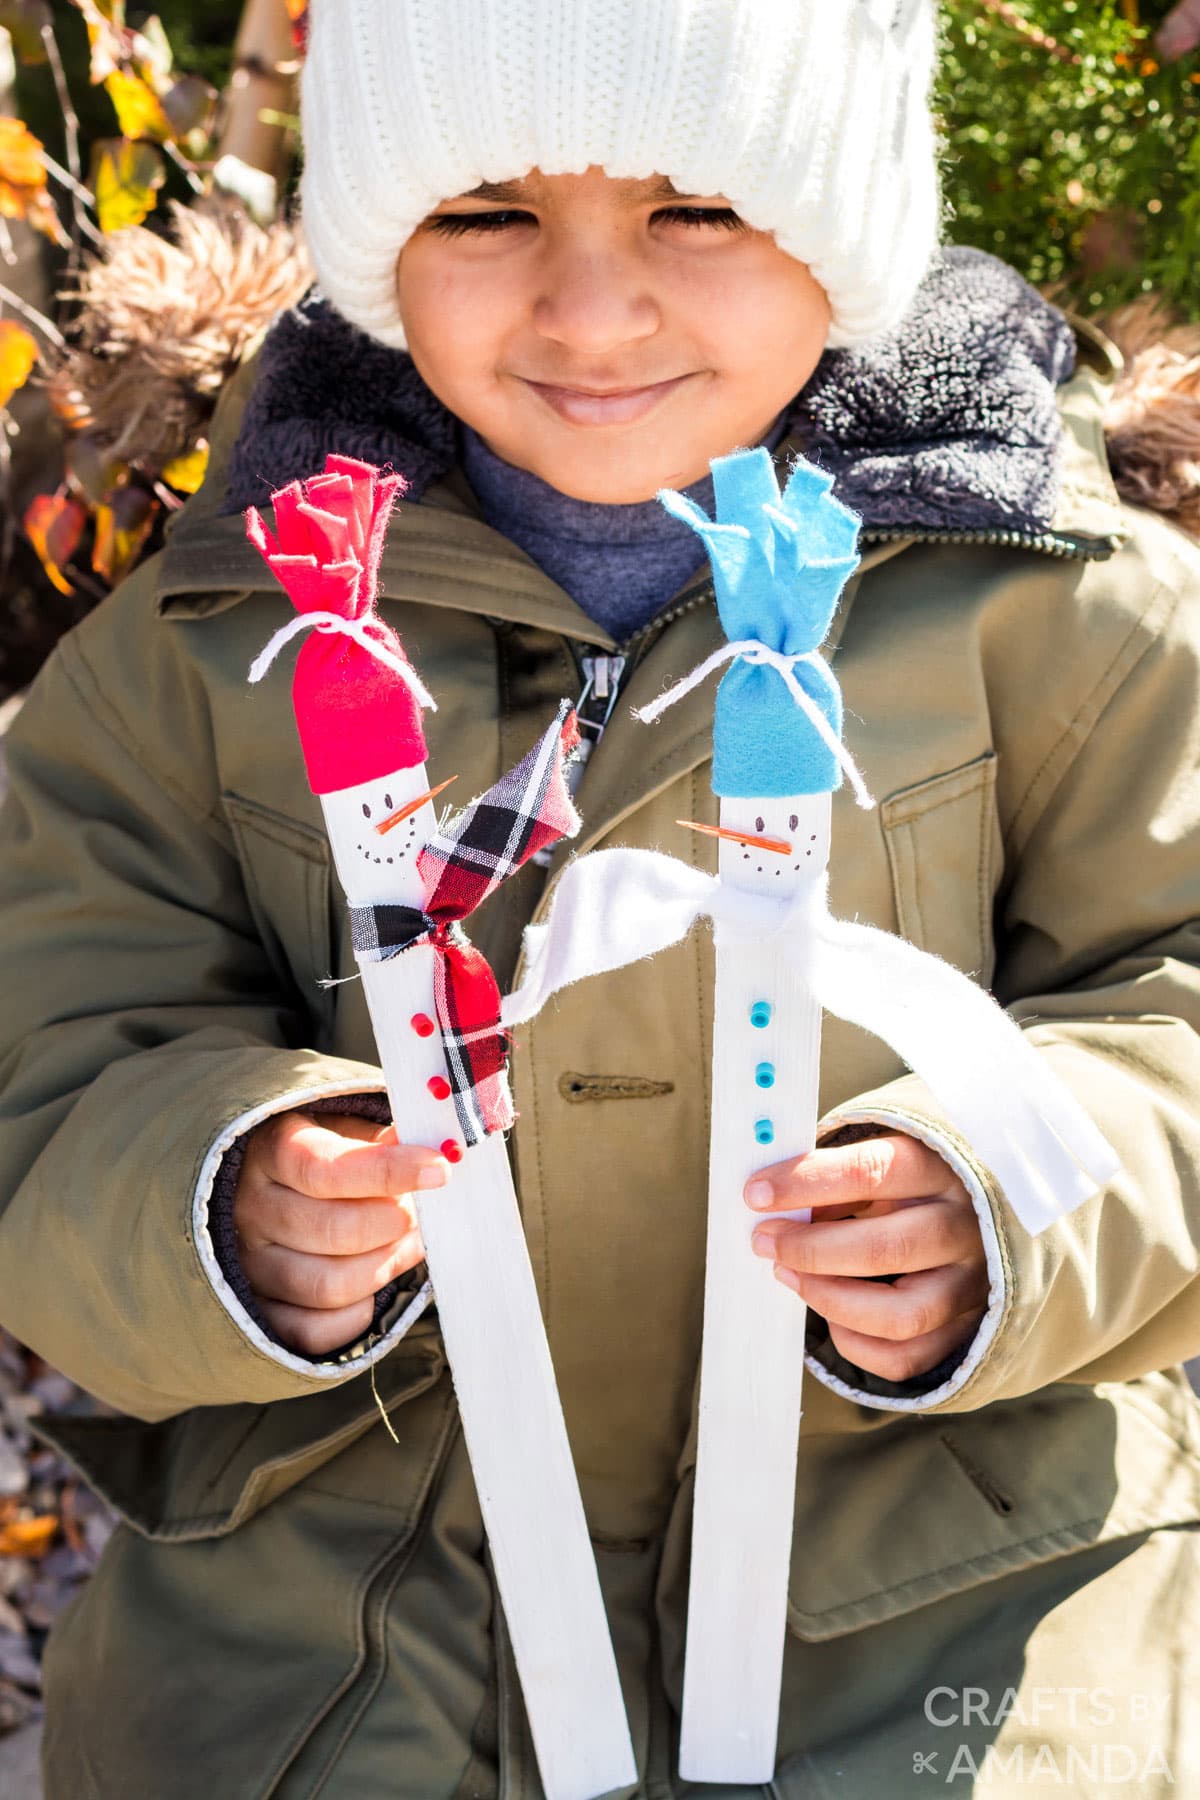
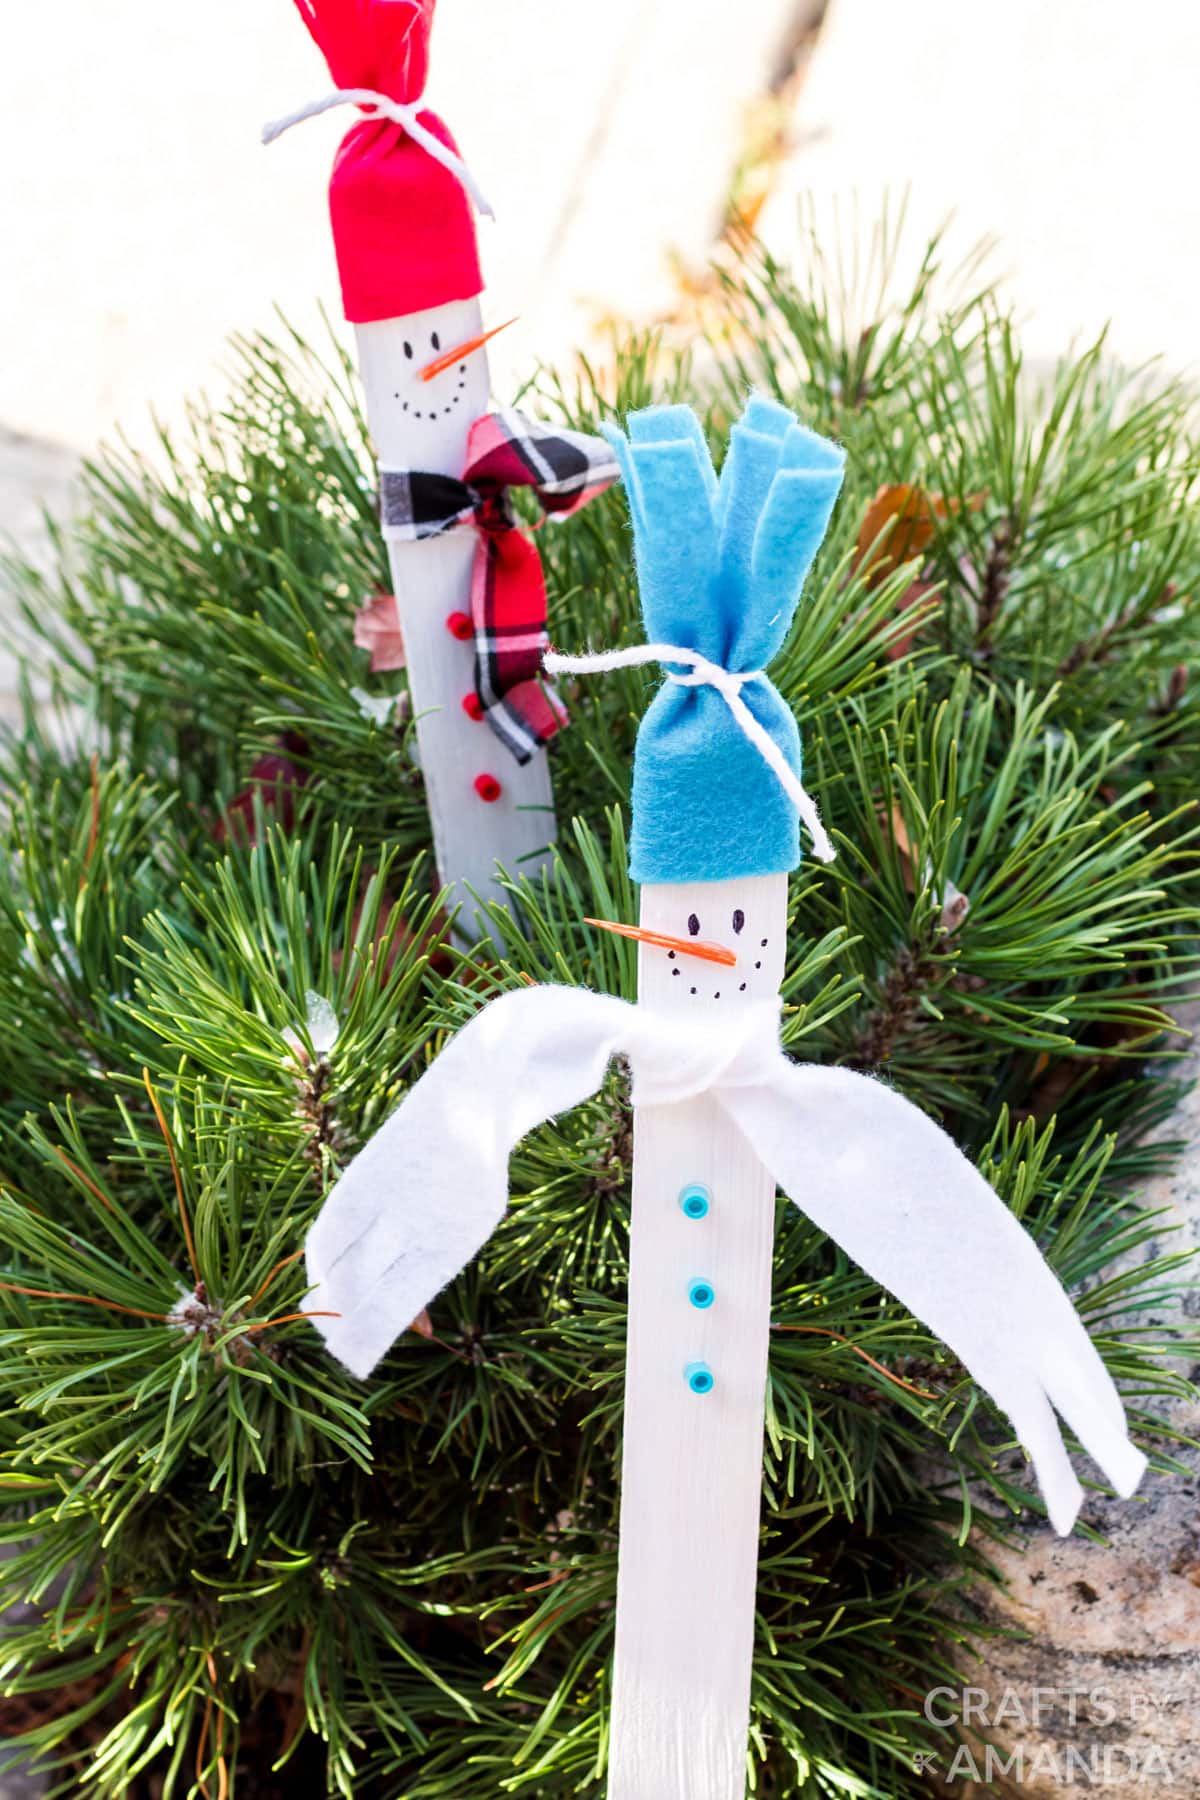
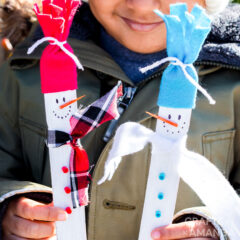
If you need a fun winter craft for the kids, these paint stick snowmen are super cute and make fun puppets! After painting the sticks, this craft comes together in less than 15 minutes.
Why this project works
If it’s just too cold outside, this adorable paint stick snowman craft is a great way to pass the time on a snowy afternoon. You will likely have most supplies on hand!
Snowmen are simply the star of the winter season, so many snowman crafts to be made, so little time!
Helpful Project Information:
- Age Level: 4 and up
- Mess Factor: Medium (glue)
- Level of Difficulty: Easy
- Time to Complete: 30 minutes, plus dry time
- Cost Estimate: Less than $0.50 each
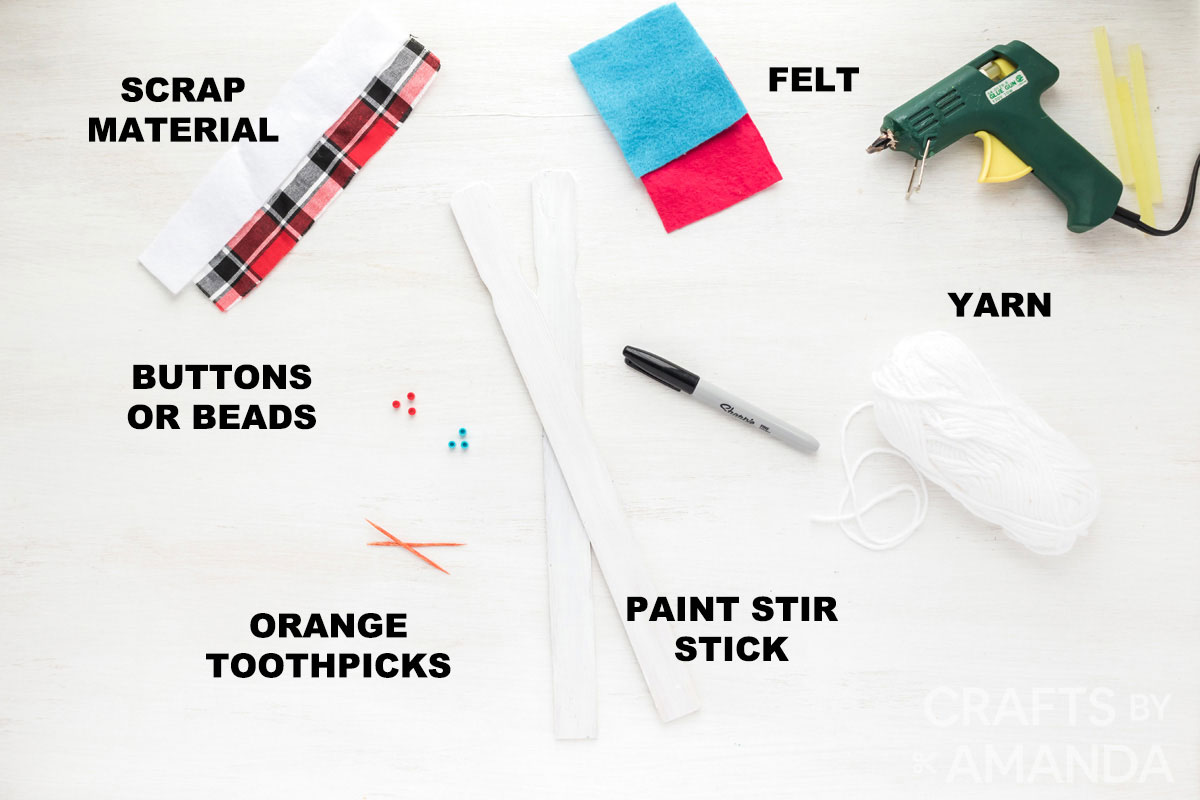
Craft supplies you will need
How to Make a Paint Stick Snowman
These step by step photos and instructions are here to help you visualize how to make this project. Please scroll down to simply print out the instructions!
- Paint the stick white and let dry. Repeat on the other side.
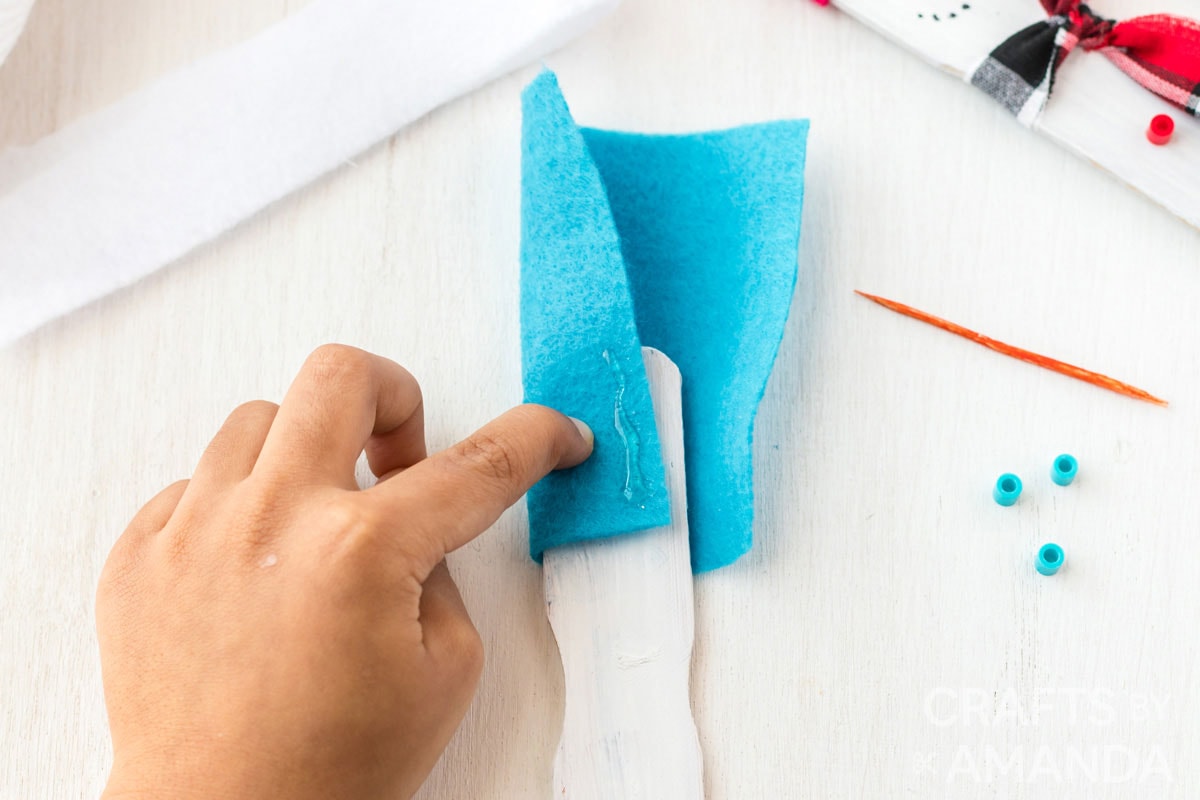
- Cut felt into 3″x3″ squares. Wrap around the top of the stick and hot glue together in the back. If you have more time, you can use white craft glue or felt glue and attach a wooden clothespin to the stick and hat to hold it in place while it dries.

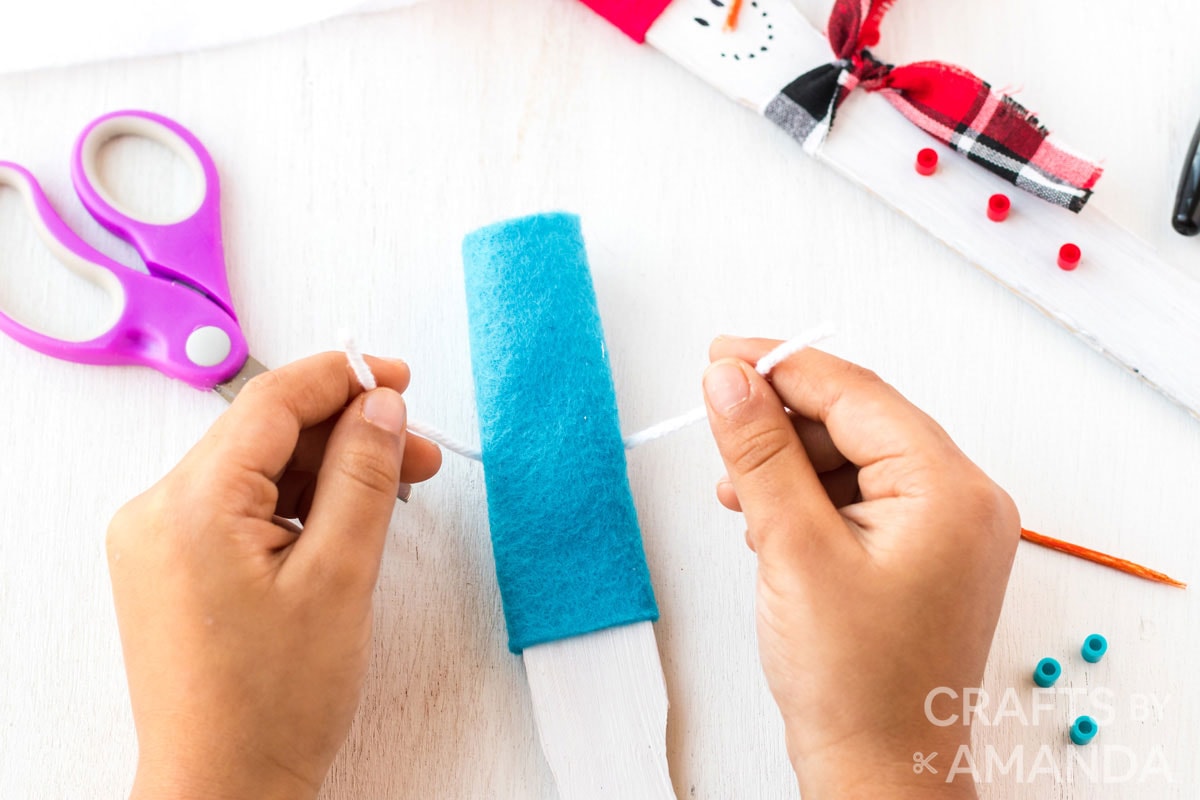
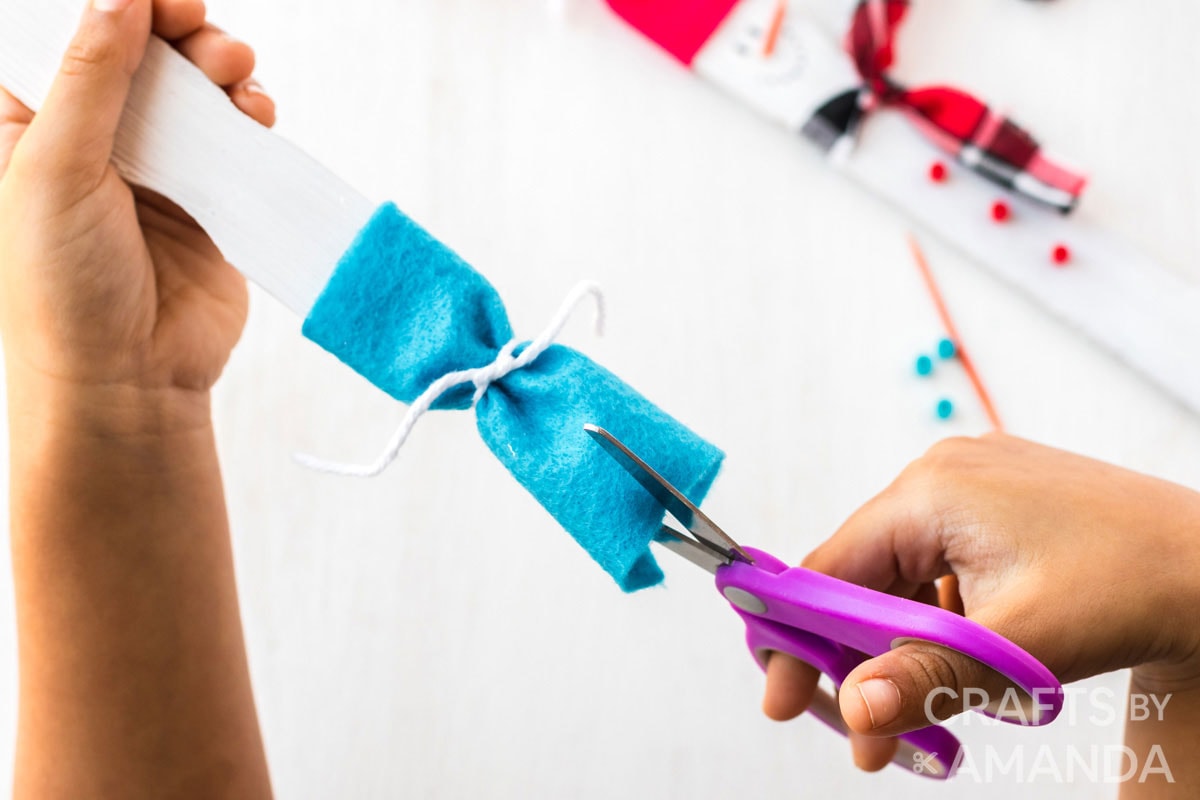
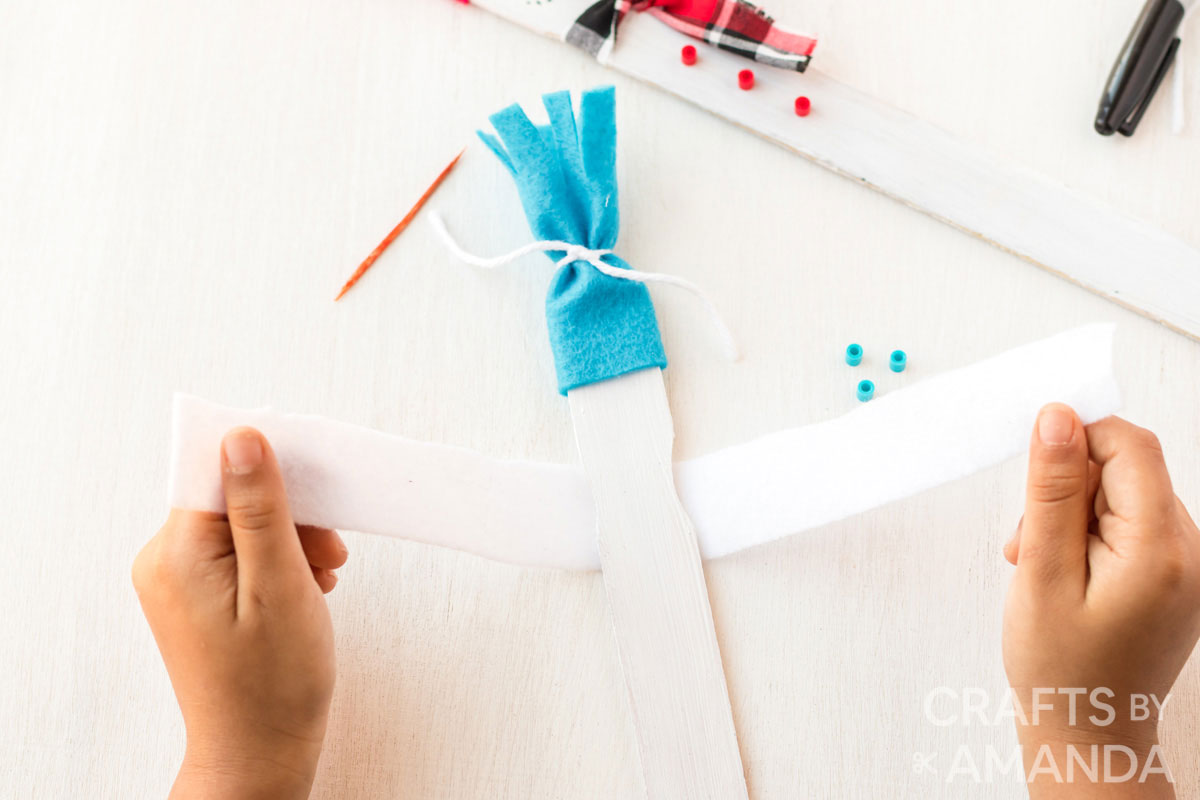
- Tie yarn around the top of the hat and trim ends. Fringe the top of the hat with scissors if you like.
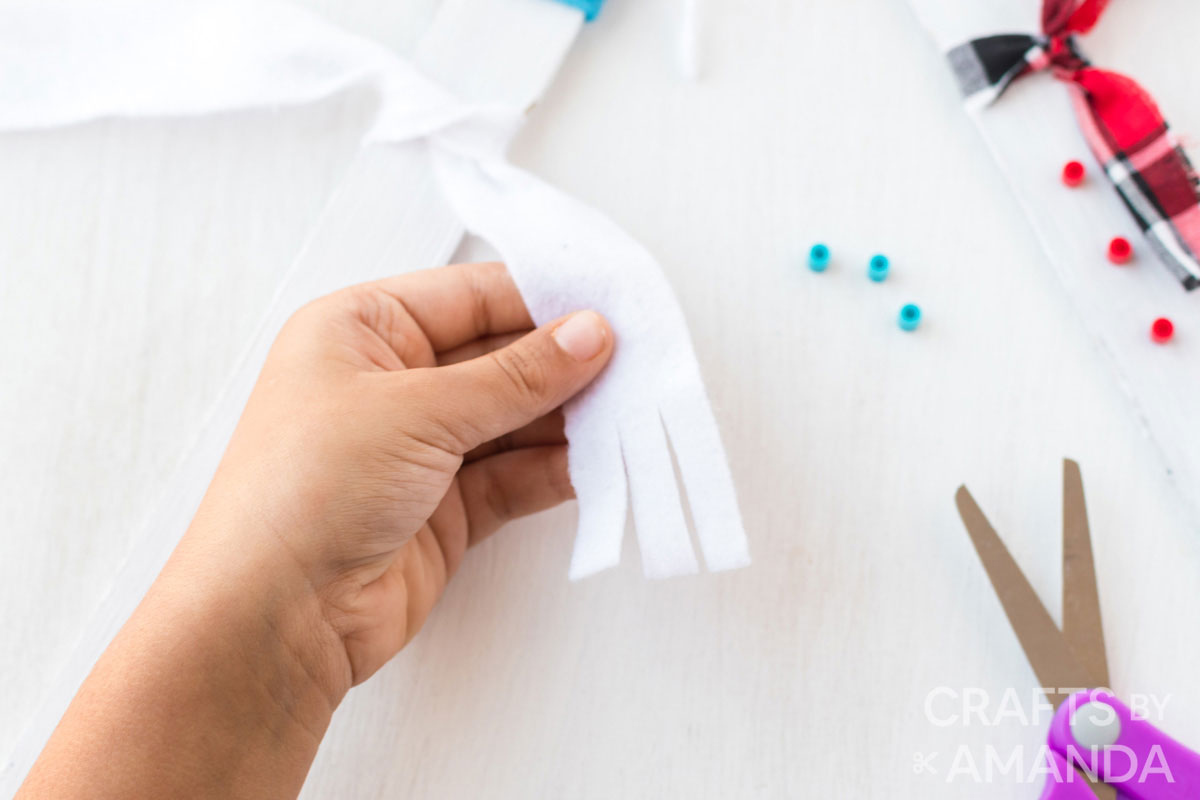
- Cut fabric into 8″x1″ strips. Wrap strip of material around the neck, tie in a knot. Fringe the ends with scissors.
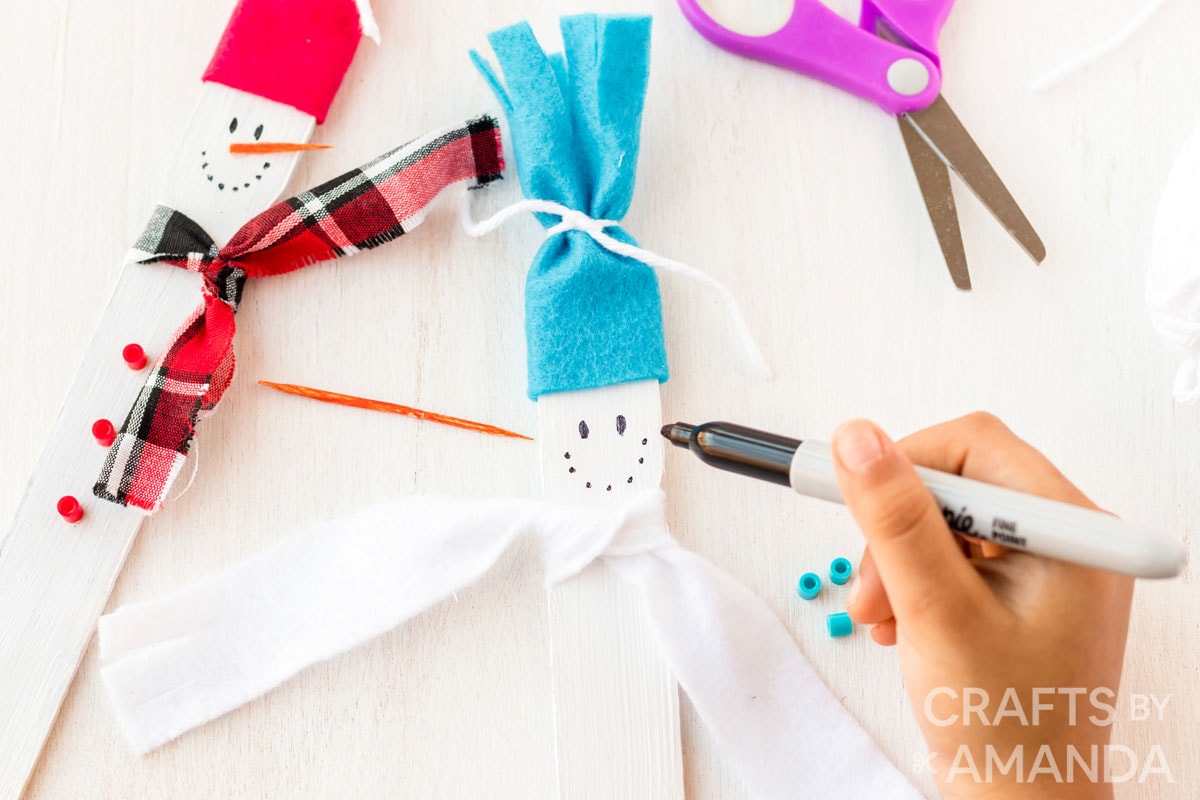
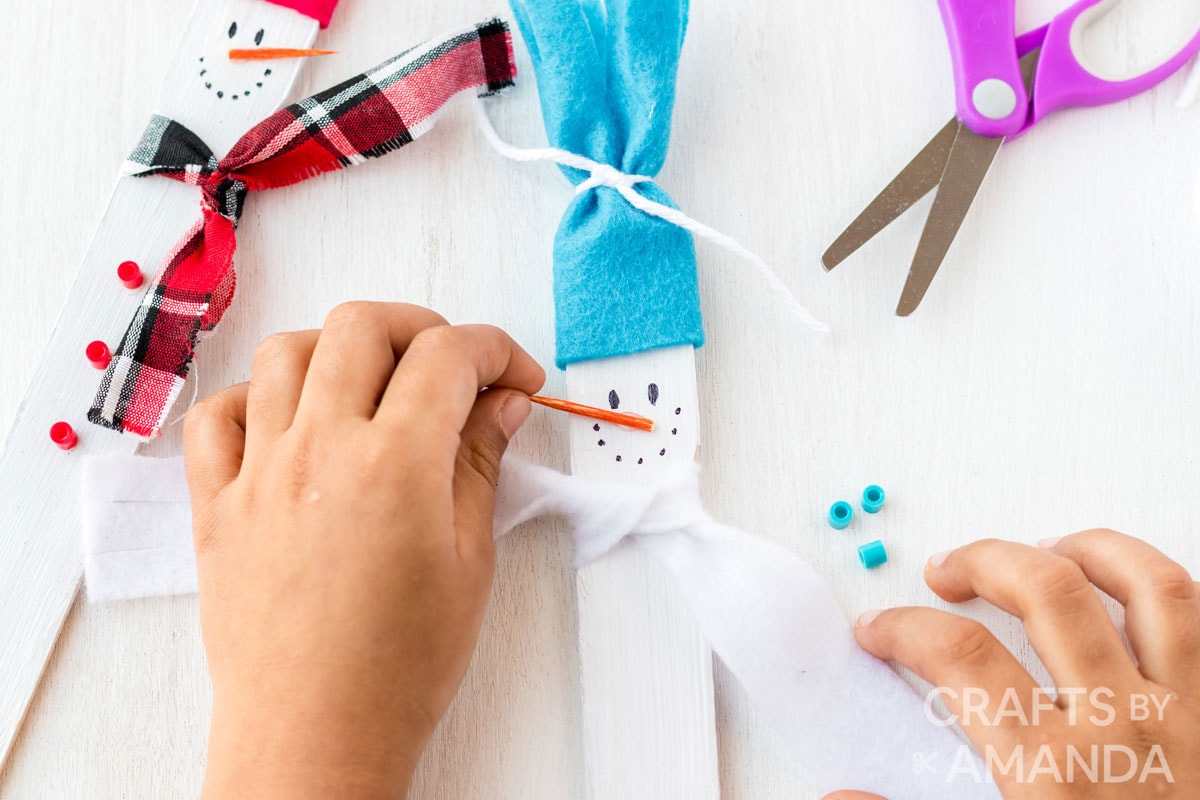
- Use black marker, or a toothpick dipped in black paint to create the mouth and eyes.
- Cut an orange toothpick in half. Glue half of the orange toothpick on for the nose.
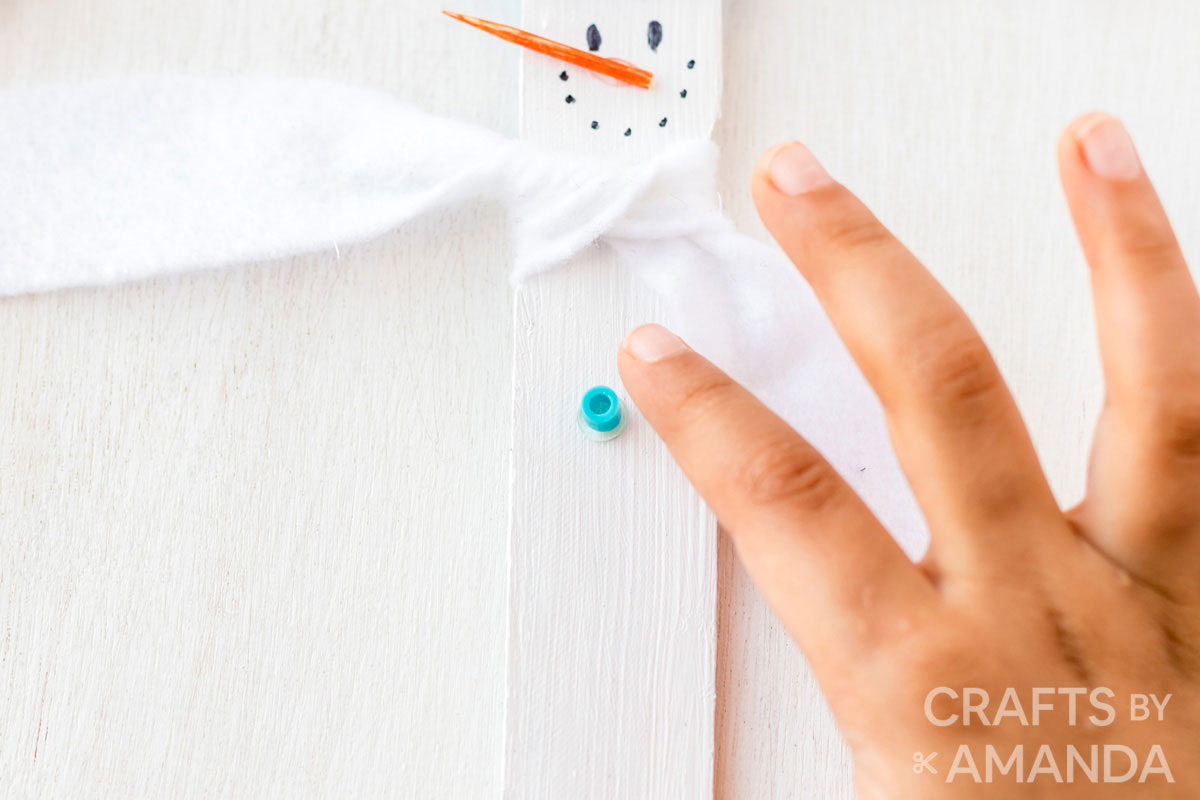
- Use white craft glue to attach 3 buttons or beads below the scarf.
Allow everything to dry before having a puppet show!
Expert Crafting Tips
- Check WalMart, Home Depot, or any large store with a paint department. They are happy to give you a few free paint stick sticks if you don’t have any on hand.
- If you are doing this project with a group and need to keep the mess to a minimum, you can do some prep work. Paint the sticks white and let them dry, and pre-cut all the felt and fabric scraps.
- If you can’t find orange toothpicks, you can paint a regular toothpick or color it with an orange marker ahead of time.
This is a fun winter time project, especially during a snow day. Make a crockpot full of hot chocolate and bake up some cookies for a sweet treat to go with your day of crafting!
More Snowman Crafts for Kids
I love to create and share my projects with you! I know it’s hard to remember to come back and search, so I’ve made it easy for you with my weekly newsletter! You can subscribe for free and I’ll send you fun crafts and delicious recipes every week right to your email.
Paint Stick Snowmen
Supplies
- wooden paint stir stick
- white acrylic craft paint
- 3" x 3" piece of felt for hat
- 8" x 1" strip of material or felt
- 3 buttons or pony beads
- 1/2 of a orange toothpick
- 6" piece of yarn
- white craft glue
- black marker or black paint
Craft tools
Instructions
- Paint the stick white and let dry. Repeat on the other side.
- Cut felt into 3″x3″ squares. Wrap around the top of the stick and hot glue together in the back. If you have more time, you can use white craft glue or felt glue and attach a wooden clothespin to the stick and hat to hold it in place while it dries.
- Tie yarn around the top of the hat and trim ends. Fringe the top of the hat with scissors if you like.
- Cut fabric into 8″x1″ strips. Wrap strip of material around the neck, tie in a knot. Fringe the ends with scissors.
- Use black marker, or a toothpick dipped in black paint to create the mouth and eyes.
- Cut an orange toothpick in half. Glue half of the orange toothpick on for the nose.
- Use white craft glue to attach 3 buttons or beads below the scarf.
Expert Tips & FAQs
- Check WalMart or Home Depot, or any large store with a paint department. They are happy to give you a few free paint stick sticks if you don’t have any on hand.
- If you are doing this project with a group and need to keep the mess to a minimum, you can do some prep work. Paint the sticks white and let them dry, and pre-cut all the felt and fabric scraps.
- If you can’t find orange toothpicks, you can paint a regular toothpick or color it with an orange marker ahead of time.
This post originally appeared here on Jan 9, 2010 and has since been updated with new photos.
- Swirling Twirling Ladybugs - July 21, 2026
- Drip Tie Dye Backpack - July 17, 2026
- Mini Coastal Clay Houses - July 14, 2026


Helen Weber says
I was thinking dollar store gloves and cut the fingers off for the hats, You get 10 hats for $1.00!
Amanda Formaro says
great idea!
Ananasa says
That’s actually a really cute idea! Thank you so much for sharing this! Love it
Amanda Formaro says
Thanks Ananasa!
Nancy Marks says
These are an old favorite of mine. I used tongue depressors and for the nose I painted whole sunflower seeds orange and glued them at an angle. For the hat I bought 1/8th yd of stretching knit fabric – I still have some left after many years. Have fun.
Amanda Formaro says
Fun! Thanks for sharing Nancy!
JoEllen says
Amanda, why can’t I view your snowman measuring stick photo? I found it once but it won’t show. Can you send me a picture?
Thanks.
Amanda Formaro says
Hi JoEllen. Is this the one you are talking about? http://spoonful.com/crafts/snowman-thermometer
Rini Hoffman says
Awesome Project! I’m going to be making these with my Beaver Scout colony. Thank you so much for the idea.
Amanda says
That’s great Rini, hope they have fun!
Melba of buggalcrafts says
Just wanted to let u know how cute I think this is. I had to make ome myself. I did the craft stick and used peppercorns for the eyes and mouth and colored a tooth pick with an orange Sharpie. I also added a snow blanket brim to the hat. I will be doing the project at church with our Wednesday night kid’s group. I think the kids will have a blast!
paula says
Planned on doing this with the paint stirrers for my daughters girl scout troop. Her 5th grade teacher did them with the tongue depressors and made them ornaments for the parents for the holiday. Still plan on doing it with the troop because they are an excellent idea.
Beth says
LOVE these -they are too cute! I wanted to invite you to link up to TGIF kid-oriented LInky Party here: http://livinglifeintentionally.blogspot.com/search/label/Linkey%20Parties
Merry Christmas,
Beth =-)
Laura says
Great idea for my cub scouts to make for the community tree decorating. Many thanks for sharing!
Amanda Formaro says
Thanks Laura!
Kigger says
love these! Plan to do them for our class winter party.
I think instead of the felt for hats, I may try buying “dollar store” adult size cotton/stretchy gloves and cut the fingers off. 2 pairs of gloves will be enough for my child’s class. and then there is no need to worry about glue drying..
Amanda Formaro says
Good idea!
Anonymous says
I love this idea, so I think I will paint this snowman on the fence pickets you can purchase at the bldg. supply stores! They are not expensive! They can be attached to the mailbox in 2s or in other places around your yard or house, or you can use them inside as well!
Amanda says
Thanks Andrea, that is so fun! Love your idea of using the orange sharpies instead of the toothpicks, so smart!
Andrea says
This was a very fun project to do with my second graders. Thanks for the great idea! I linked you over at http://www.addicted2tutes.blogspot.com
~Andrea
Missy says
I am going to be trying these for my preschool classes! Can't wait to see how it goes. Thanks for sharing.
Amanda says
Thanks More than a Mom! :)
More Than A Mom says
Fabulous project. I'm your newest follower – can't wait to see what other projects you come up with (for me to do with my kiddies) ;)
Amanda says
That's so fun Lisa!
Lisa says
We made a version of these today in my son's class! But we used the big tongue depressors and they can be used as bookmarks. The kids loved them:)
LaurieStar says
These are adorable! Thanks for sharing. We have a holiday shop coming up this week with our school's PTO, and I have been looking for some good ideas! Thanks! :)
Anonymous says
Amanda, I just now found your blog and I'd like to say that of all the blogs I've looked at yours is one of the BEST. I love the simpleness yet how adorable your crafts are. I love this type of thing. I plan on spend a lot of time today looking through all your past posts. I'll be back to see what you come up with next. Joan from Missouri
Sonia says
Uber cool..cute and so simple to make..love your stuff!
Tami says
This is one of my favorite projects that you've ever done. Of course, we did the first version with the wooden hats but this version is so darn cute, too!
We did the other version as a class project 4 yrs. ago when my son was in 2nd grade. While I was packing away my Christmas stuff this year, I found his snowman stick! I would love for my daughter to make one next year when she is in second grade.
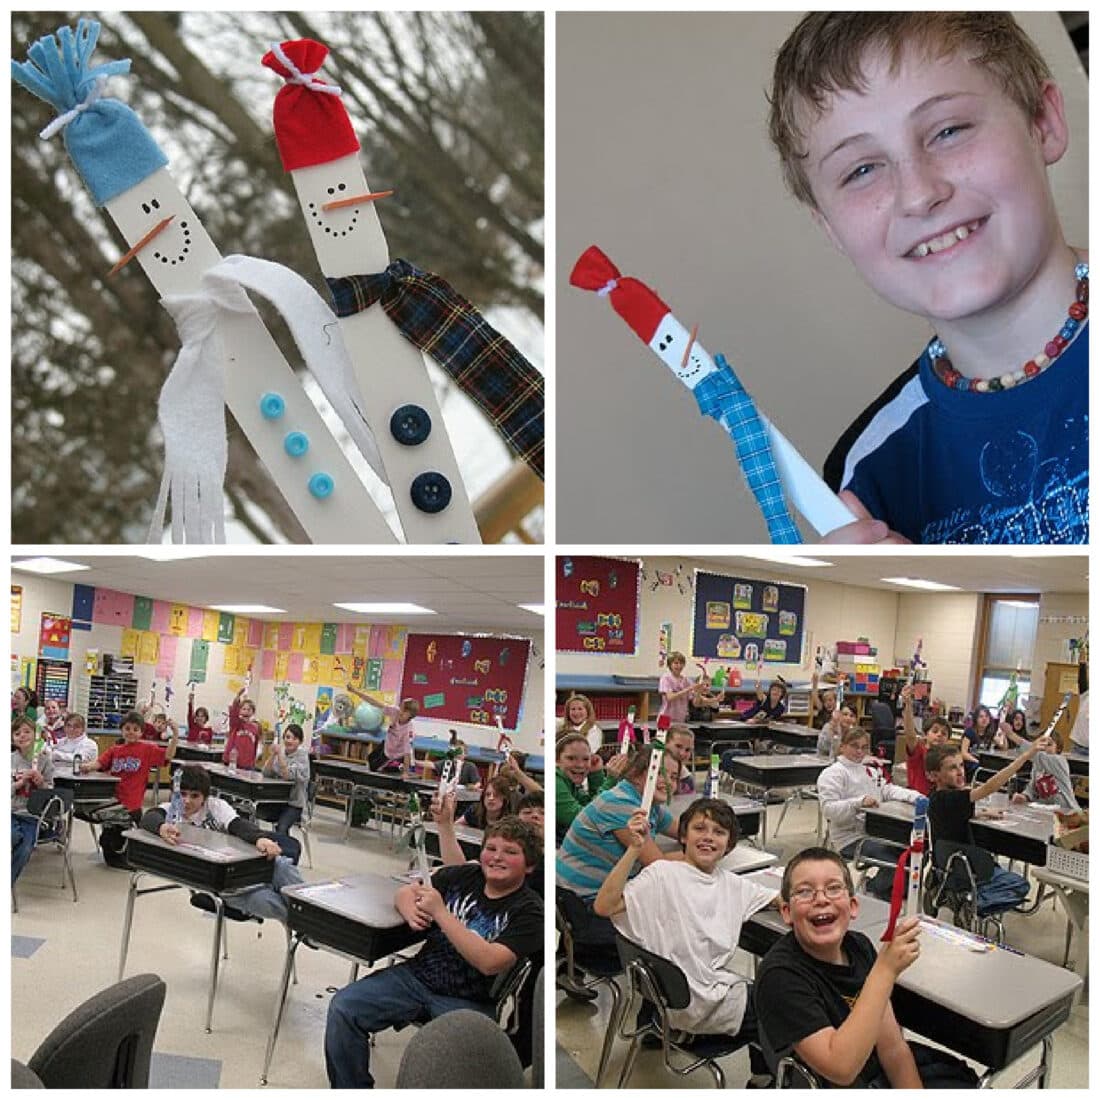
The kids look like they were having fun!
Sue Sparks says
I LOOOOOOVE this! A keeper for sure! THANKS! :)
Anne @ Floralshowers Creative Craft Blog says
ha ha. this is so cute! I made a snowman very similar to these but a little different. My mom made some smaller ones as well and used them as ornaments on her tree. You can view mine here:
http://floralshowers.com/crafts/wood-snowman/
KKL Primitives says
Very cute!!!
Amanda says
Thanks guys :)
Heather, yes! Those exact ones are on familycorner.com, I site I used to own :) I decided to do the fabric hats so the kids could choose colors instead of just going with the black. But I know exactly which ones you are talking about :)
Großmutters Nähkästchen says
Oh, it's a verry nice idea an think the kids had a lot of fun!
Wish you more fun an a warm winter!
Friendly greetings from Germany!
The Grandmother
Michaela
Heather@ theherberfamily.blogspot.com says
My daughter's 2nd grade class made these, but instead of putting a hat on, they painted the top inch black, then added a mini Popsicle stick, also painted black, to make it look like a top hat. They then added a ribbon to the back, so they can be hung up.
Fun & easy!
kudoskookies says
Great project! Those are really cute! I suppose you can make snow kids by using tongue depressors and have an entire family.
Renee