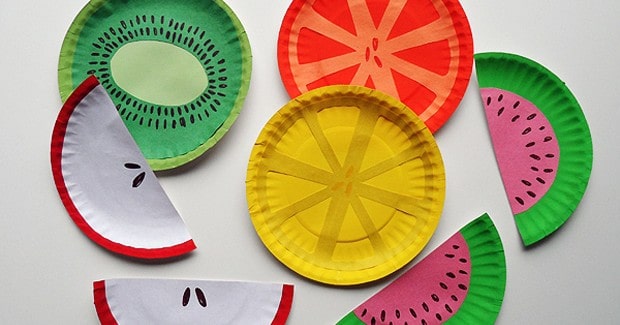
Looking for a colorful, fun craft to do with the kids this summer? Create some paper plate fruit! The kids will love playing with the bright paint colors while creating their favorite summer fruit.

Paper Plate Fruit Craft
With summer here, we are able to enjoy fresh fruits at the peak of their season. This fun craft for kids is colorful and simple and a great way to celebrate the sweet treats Mother Nature has to offer. All you’ll need to make this paper plate fruit craft are miniature paper plates, some paint, and construction paper.
What You’ll Need
- 5 miniature paper plates
- Craft paint: red, orange, green, olive green, yellow, white
- Construction paper: yellow, orange, green, pink, white
- Markers: brown, yellow, orange
- Scissors
- Glue stick
How To Make the Paper Plate Fruit
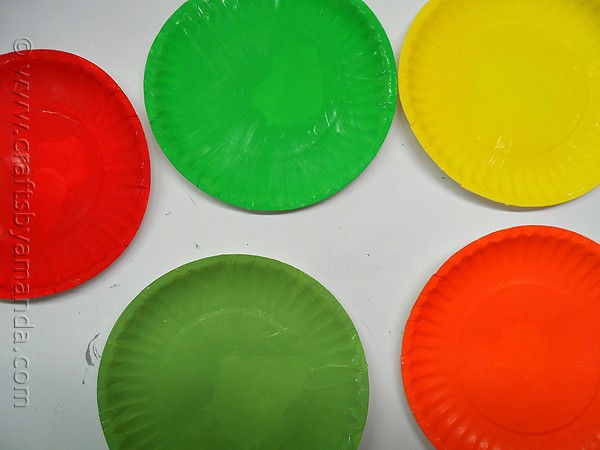
Start off by painting the paper plates, one each red, orange, olive green, green and yellow. You may need to add a second coat. Allow to dry.
When you’re finished with this project, pull out the salad spinner and try these!
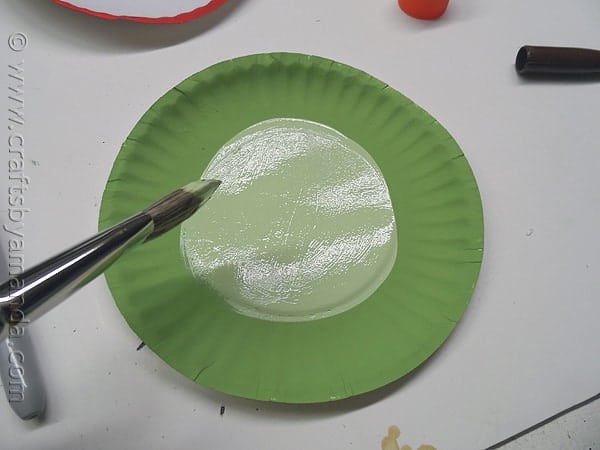
For the kiwi plate (olive green), mix a little olive green with white to lighten it up and paint the center of the olive green plate.
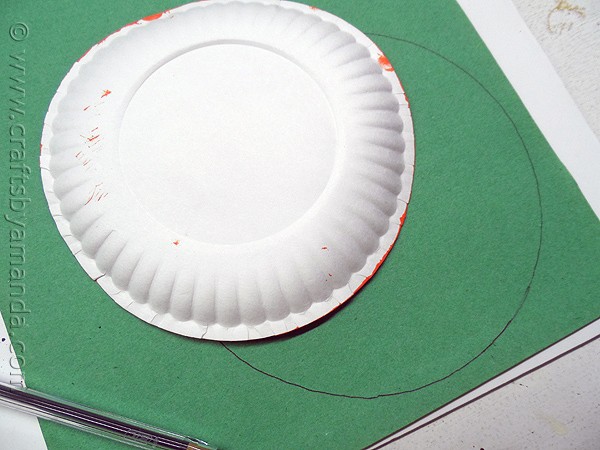
Using one of the paper plates as a template, draw a circle onto each piece of construction paper. Follow the directions for each piece of fruit below:
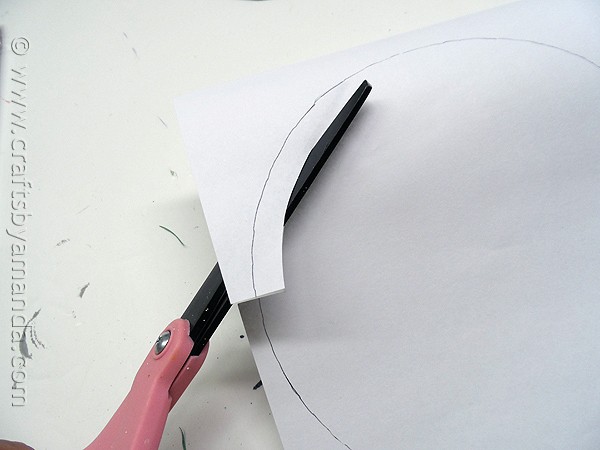
For the apple, cut the circle from the white paper, trimming off about 1/2-inch all the way around. Use glue stick to attach the white circle to the red paper plate. Cut the paper plate in half and use the brown marker to draw seeds.
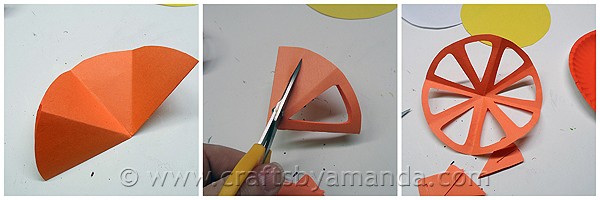
For the orange, cut the circle from the orange paper, trimming off about 1/2-inch all the way around just like you did for the apple. Fold the orange circle in half, then in half again and finally in half again. Unfold once. use scissors to cut out the center sections of each triangle, cut through several layers of paper at once. Unfold and attach the circle (which should look like a wagon wheel) to the orange plate using a glue stick. Use an orange marker to draw a few seeds in the center.
For the lemon, repeat the steps as with the orange above using yellow paper and a yellow marker.
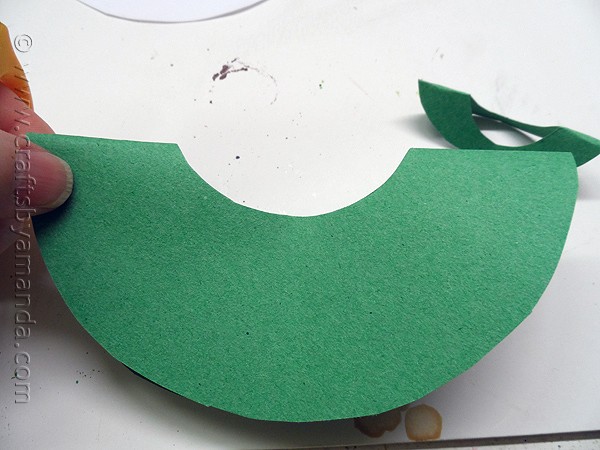
For the kiwi, cut the circle from the green paper, trimming off about 1/2-inch all the way around. Fold the green circle in half and cut an oval from the center at the fold. Unfold and draw seeds on the green paper around the center hole using a brown marker. Attach to the olive green plate using a glue stick.
For the watermelon, cut the circle from the pink paper, trimming away enough paper to only cover the center of the green plate. Attach to the center of the green plate using a glue stick then cut the plate in half. Draw seeds using a brown marker.
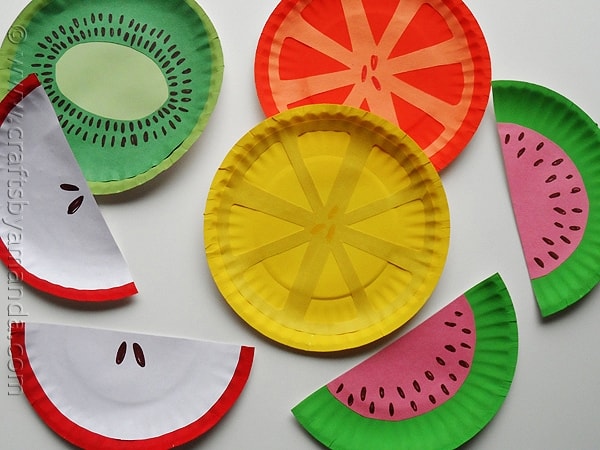
Now you have a vibrant collection of fruit which will make for great wall art in your child’s bedroom or playroom. Have fun!
Check out all of my paper plate crafts!
Paper Plate Fruit
Supplies
- 5 miniature paper plates
- Craft paint: red, orange, green, olive green, yellow, white
- Construction paper: yellow, orange, green, pink, white
- Markers: brown, yellow, orange
- Scissors
- Glue stick
Instructions
- Paint the paper plates, one each red, orange, olive green, green and yellow. You may need to add a second coat. Allow to dry. For the kiwi plate (olive green), mix a little olive green with white to lighten it up and paint the center of the olive green plate.
- Using one of the paper plates as a template, draw a circle onto each piece of construction paper. Follow the directions for each piece of fruit below:
Apple
- Cut the circle from the white paper, trimming off about 1/2-inch all the way around. Use glue stick to attach the white circle to the red paper plate. Cut the paper plate in half and use the brown marker to draw seeds.
Orange
- Cut the circle from the orange paper, trimming off about 1/2-inch all the way around. Fold the orange circle in half, then in half again and finally in half again. Unfold once. use scissors to cut out the center sections of each triangle, cut through several layers of paper at once. Unfold and attach the circle (which should look like a wagon wheel) to the orange plate using a glue stick. Use an orange marker to draw a few seeds in the center.
Lemon
- Repeat the steps as with the orange above using yellow paper and a yellow marker.
Kiwi
- Cut the circle from the green paper, trimming off about 1/2-inch all the way around. Fold the green circle in half and cut an oval from the center at the fold. Unfold and draw seeds on the green paper around the center hole using a brown marker. Attach to the olive green plate using a glue stick.
Watermelon
- Cut the circle from the pink paper, trimming away enough paper to only cover the center of the green plate. Attach to the center of the green plate using a glue stick then cut the plate in half. Draw seeds using a brown marker.
This post originally appeared here on Jun 29, 2013.
- Tie Dye Beach Towels - July 24, 2026
- Swirling Twirling Ladybugs - July 21, 2026
- Drip Tie Dye Backpack - July 17, 2026


Annie says
These would be fantastic to use in teaching fractions as well. An inexpensive, fun, do-it-yourself, delicious fraction activity. Simply cut them up in the right sized pieces. Thank you oodles for the inspiration! And for all your fantastic ideas!
Amanda Formaro says
That’s a great idea Annie!
priyanka says
Nice
Deborah says
I am loving these – and I know my kids would, too!!
Amanda Formaro says
Thanks you Deborah! :)
maestra maria says
Belli!
Rena says
FUN!
Amanda Formaro says
Thanks Rena!
Lisa@hooplapalooza says
these are so cute! :>D
Amanda Formaro says
Thank you Lisa!
Carmen Sanchez says
Amanda, love your creativity. Thanks for sharing!!! I have used, and will continue to use your ideas in my teacher “sharing” spots and workshops!
Amanda Formaro says
Thank you Carmen, so glad they are helpful, I appreciate that!
Joy Metzger says
Love it. This a cute idea that kids would have fun making. I could even see using these as inexpensive decorations for a Summer party.
Amanda Formaro says
I agree, and what a fun way for the kids to get involved in the decorating!