
Kids will love making these adorable paper plate ladybugs this spring and summer using colorful paint, paper plates, felt, and googly eyes.
Why we love this project
This paper plate ladybug craft is perfect as a summer camp activity or as a classroom project. You could also easily work it into a homeschool lesson on insects or simply have fun on a rainy day indoors.
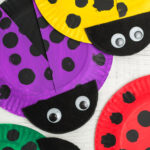
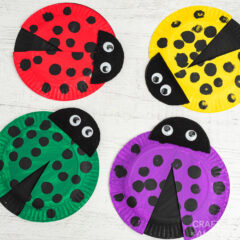
There’s no doubt that we love paper plate crafts for kids around here. These ladybugs can be painted in so many different color combinations, so let your child’s creative direction take the lead on this project!

Helpful Project Information:
- Age Level: 6 and up
- Mess Factor: Medium
- Level of Difficulty: Easy
- Time to Complete: Less than 30 minutes
- Cost Estimate: Less than $5.00
Craft supplies you will need
Get full list of supplies and directions in the printable version at the end of this post.
How to Make Paper Plate Ladybugs
These step by step photos and instructions are here to help you visualize how to make this project. Please scroll down to simply print out the instructions!
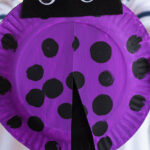
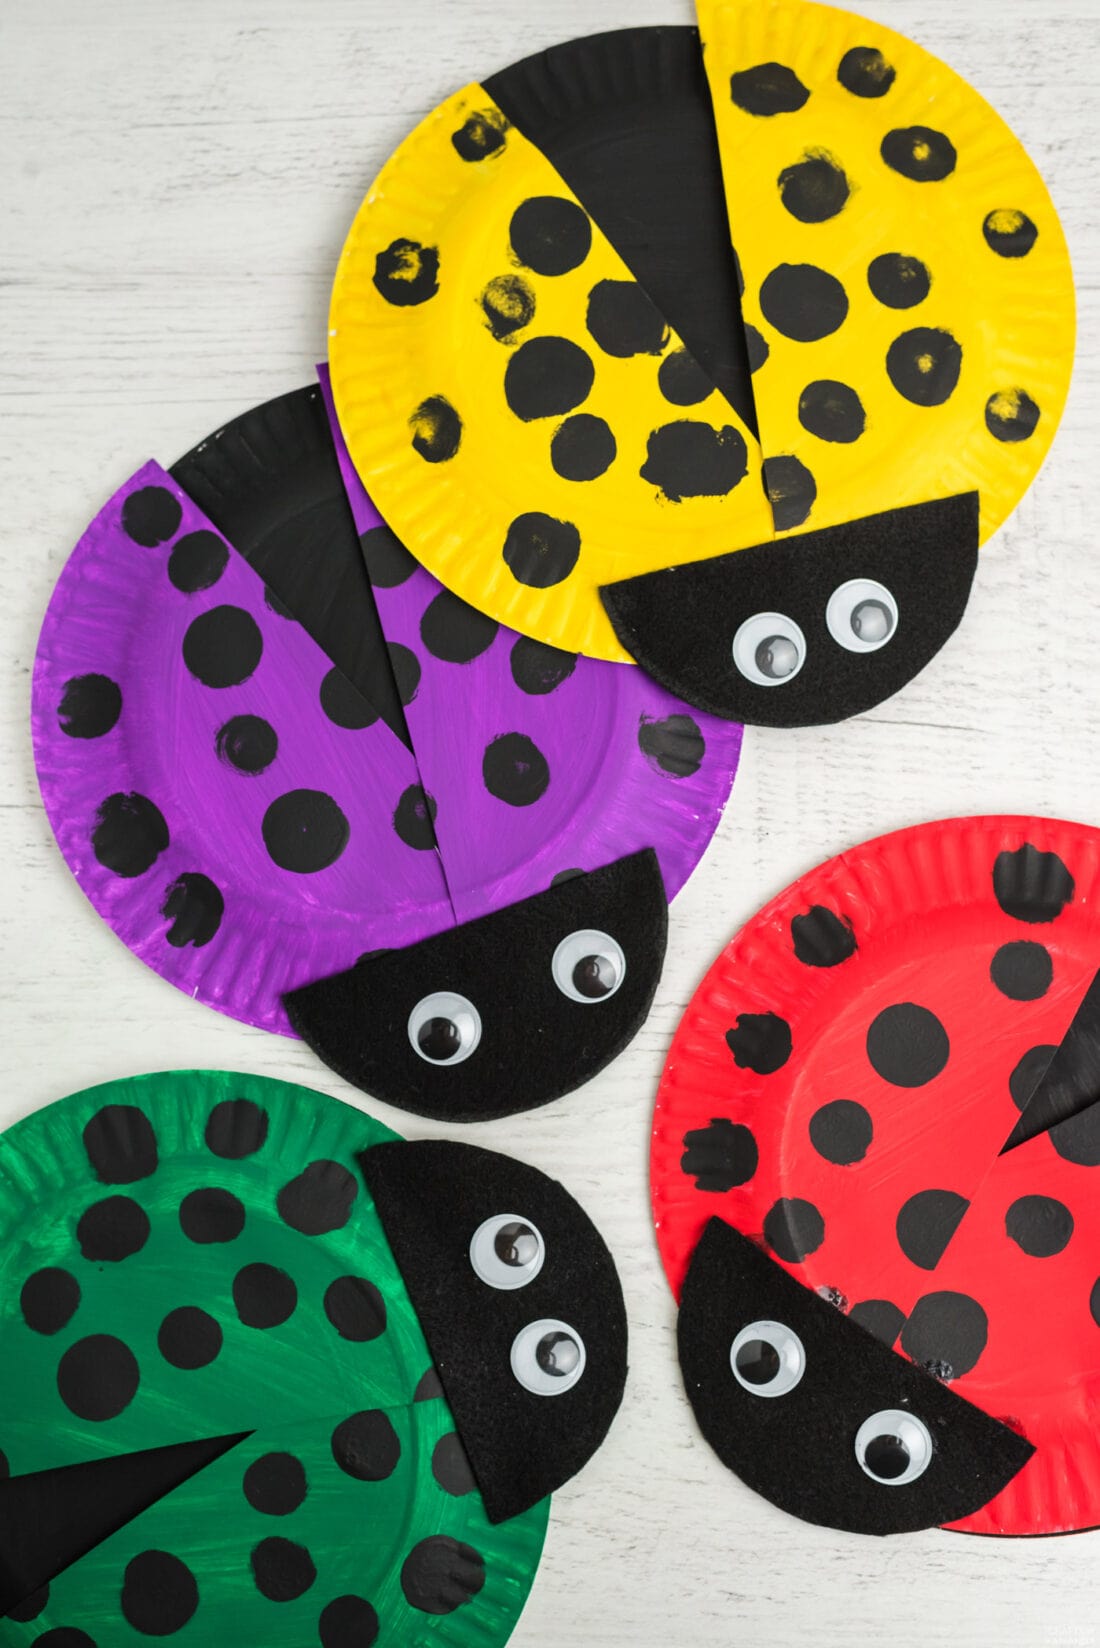
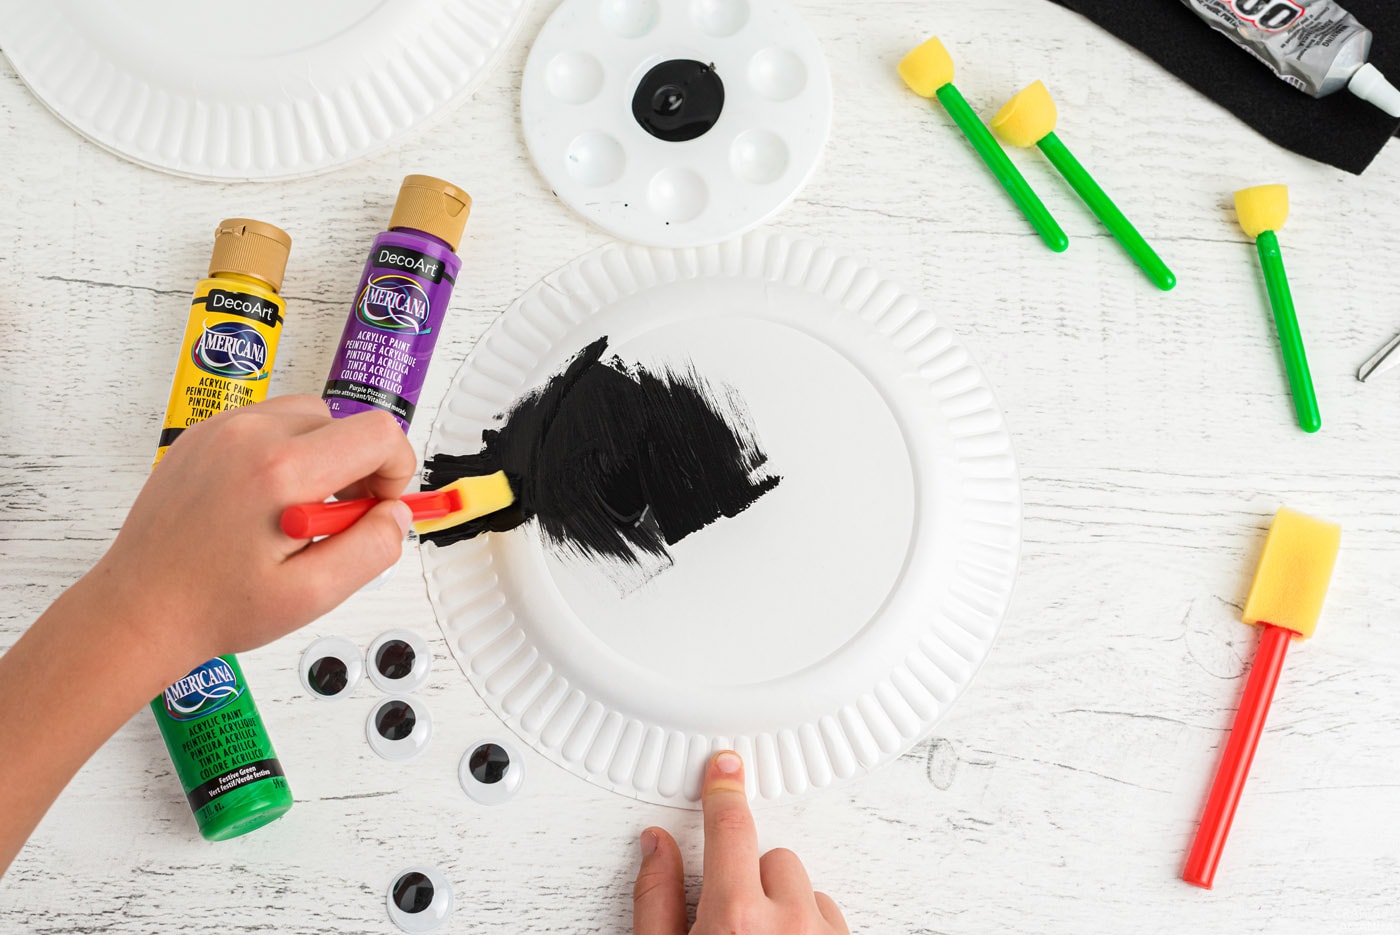
- Paint one paper plate black and the other in whatever color you choose. Red is traditional for ladybugs, but you can get colorful like we did if you want. Set aside to dry.

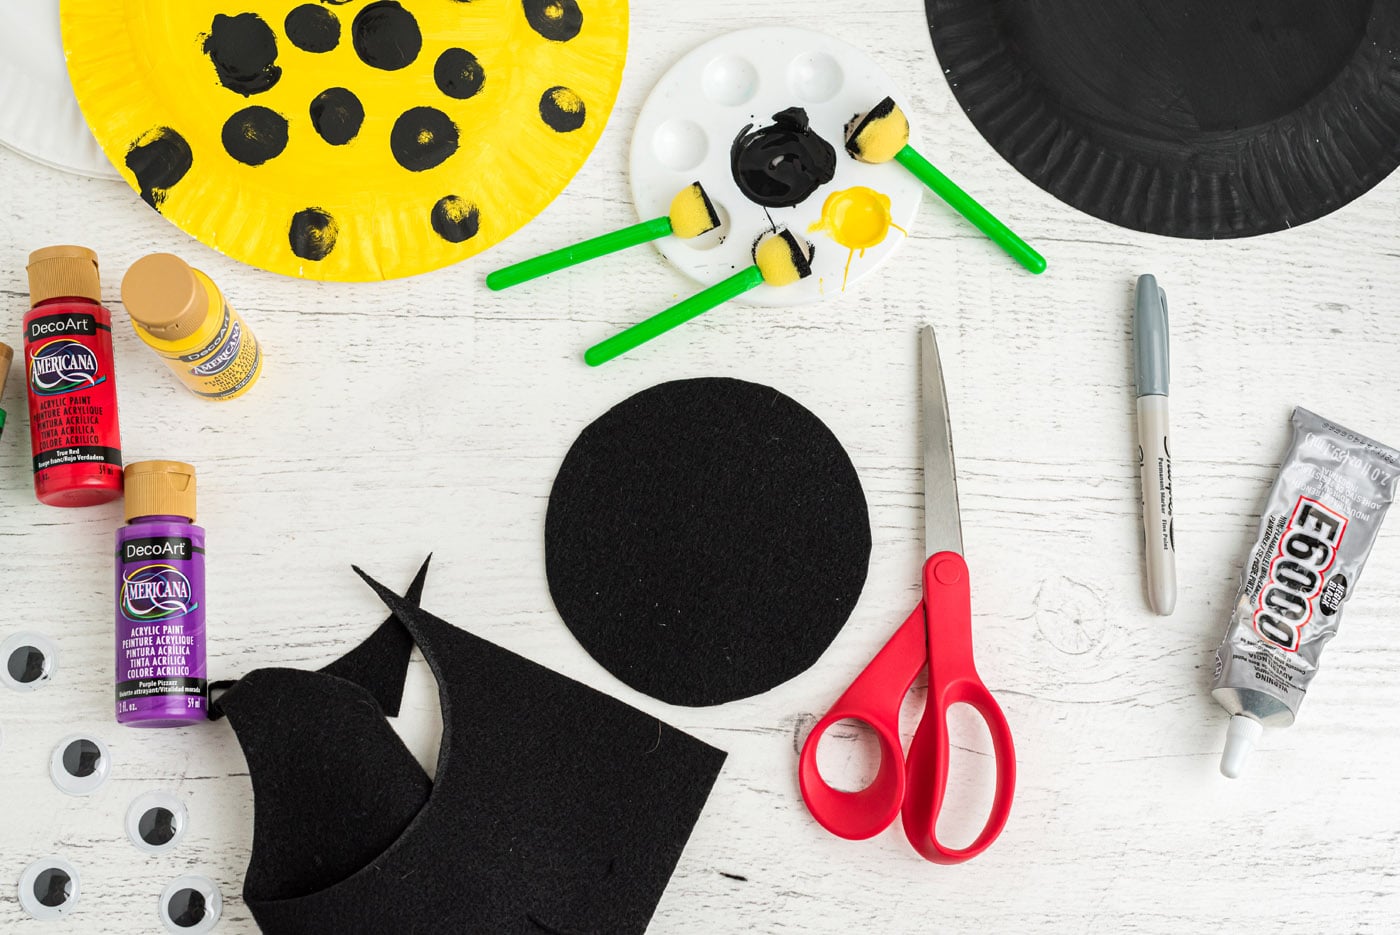
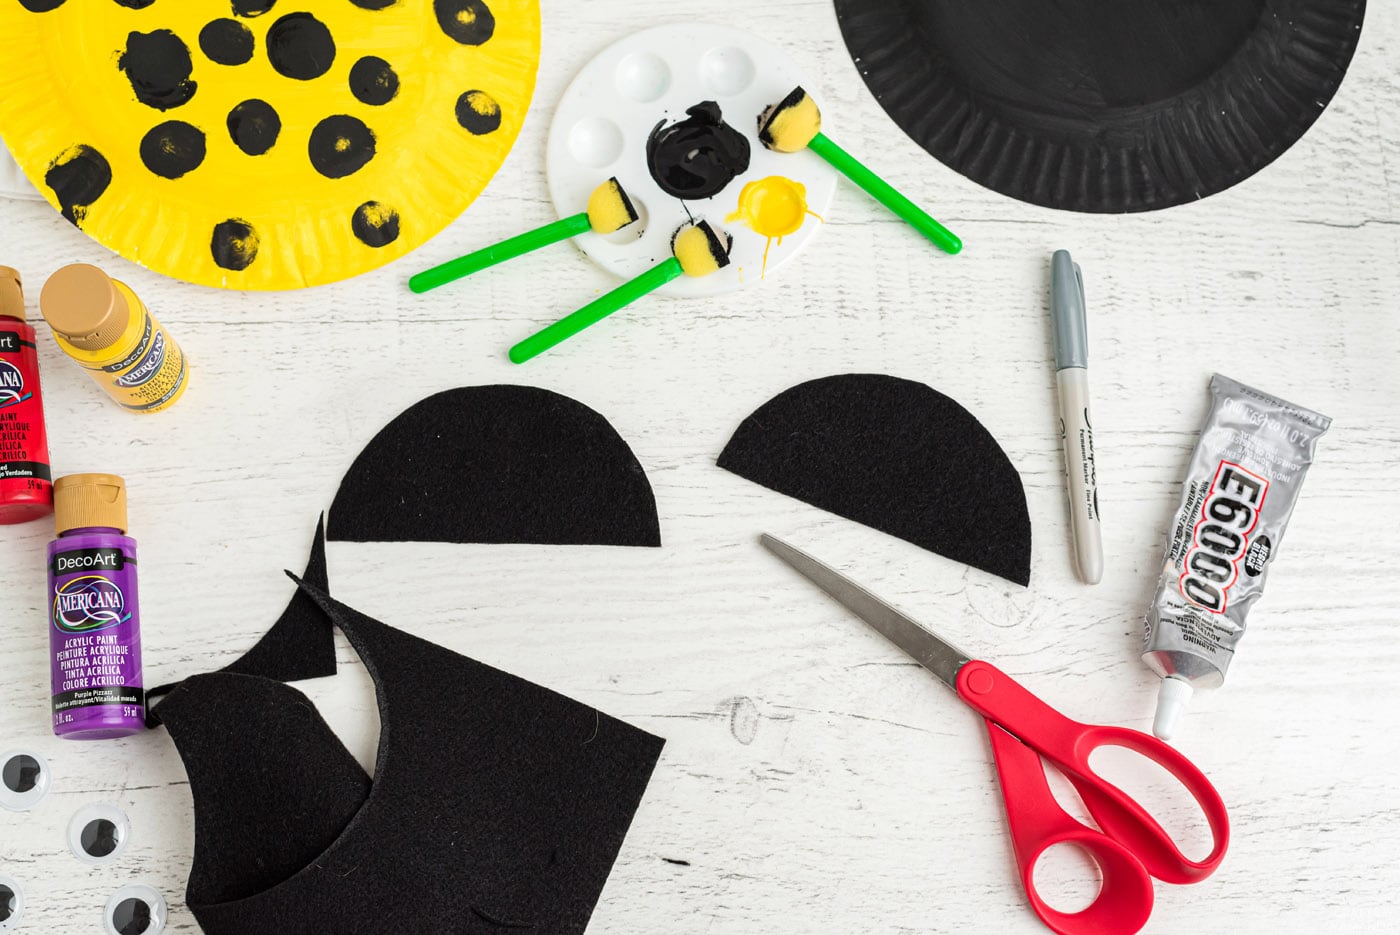
- From black felt, cut out half a circle for the head.
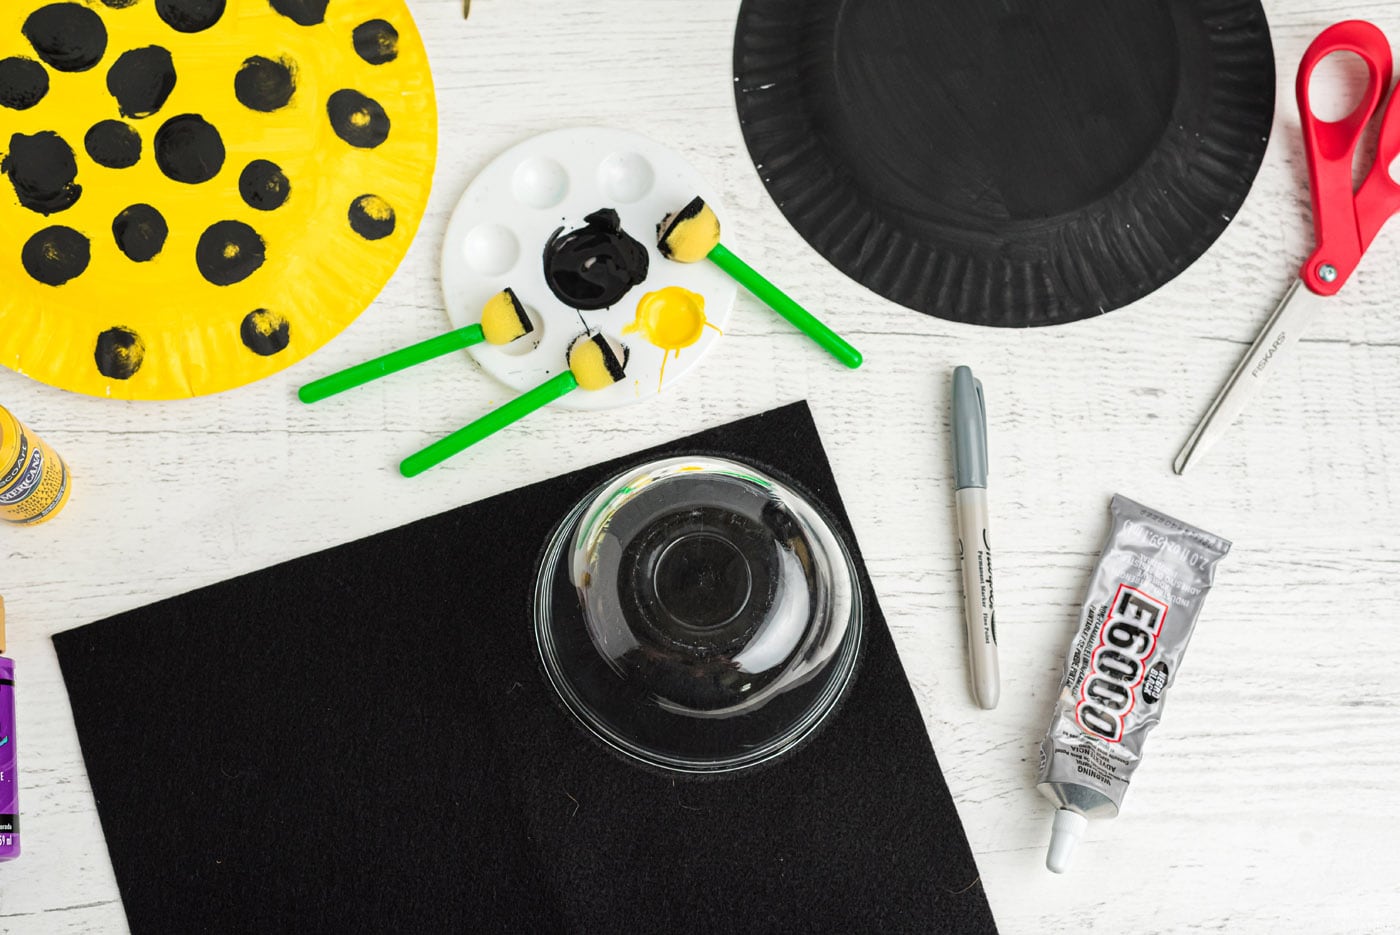
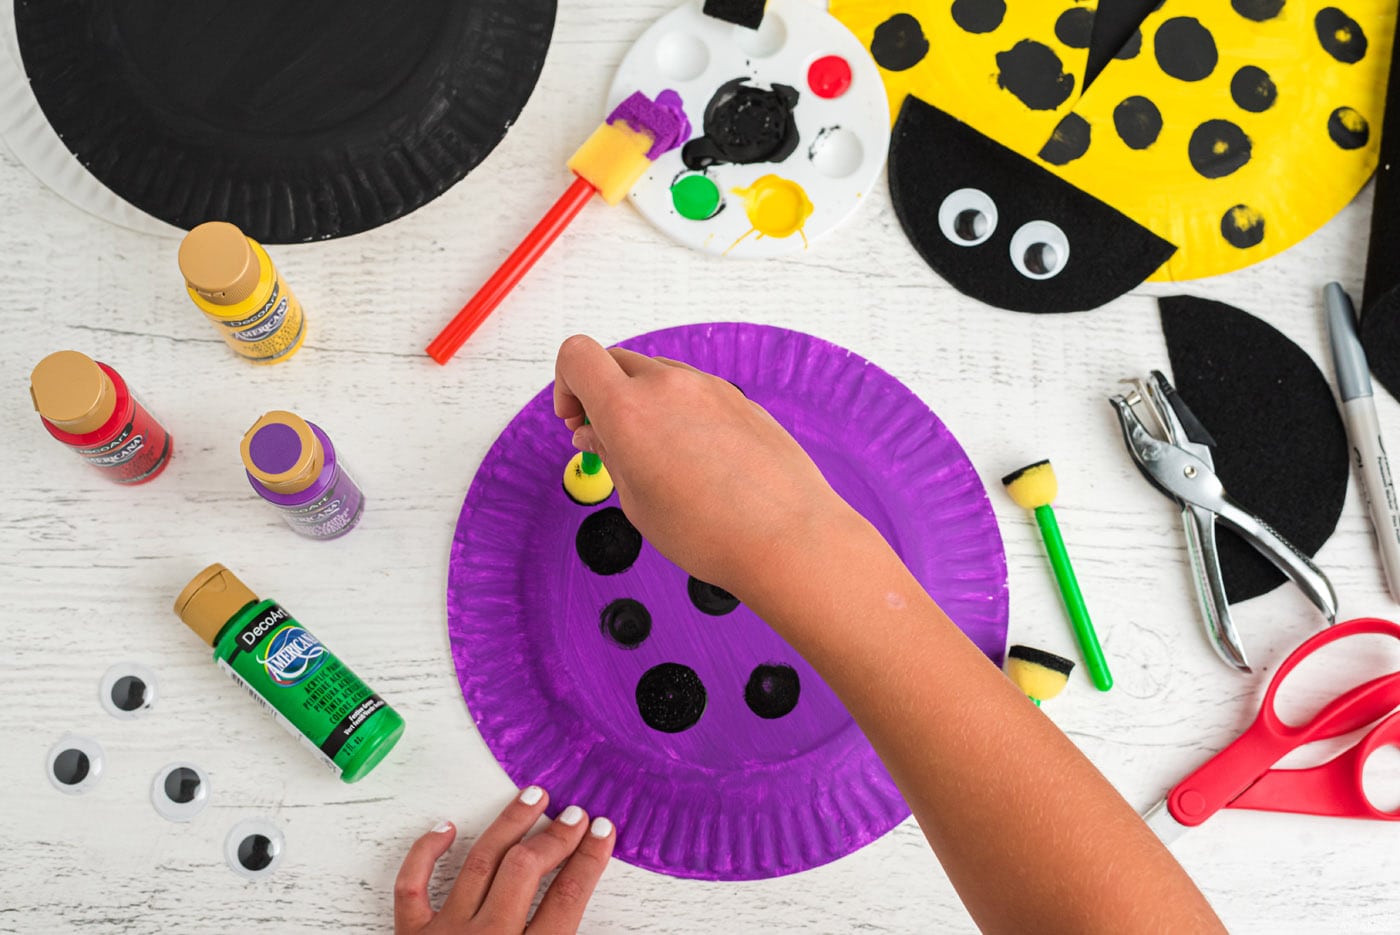
EXPERT TIP: Use a medium-size jar, bowl, or cup to trace a circle onto the fabric. - Once the paint has dried, take your colorful painted plate and begin making polka dots using a pouncer sponge that’s lightly dabbed in black paint. Use medium and large-sized pouncer sponges to create a realistic ladybug pattern.
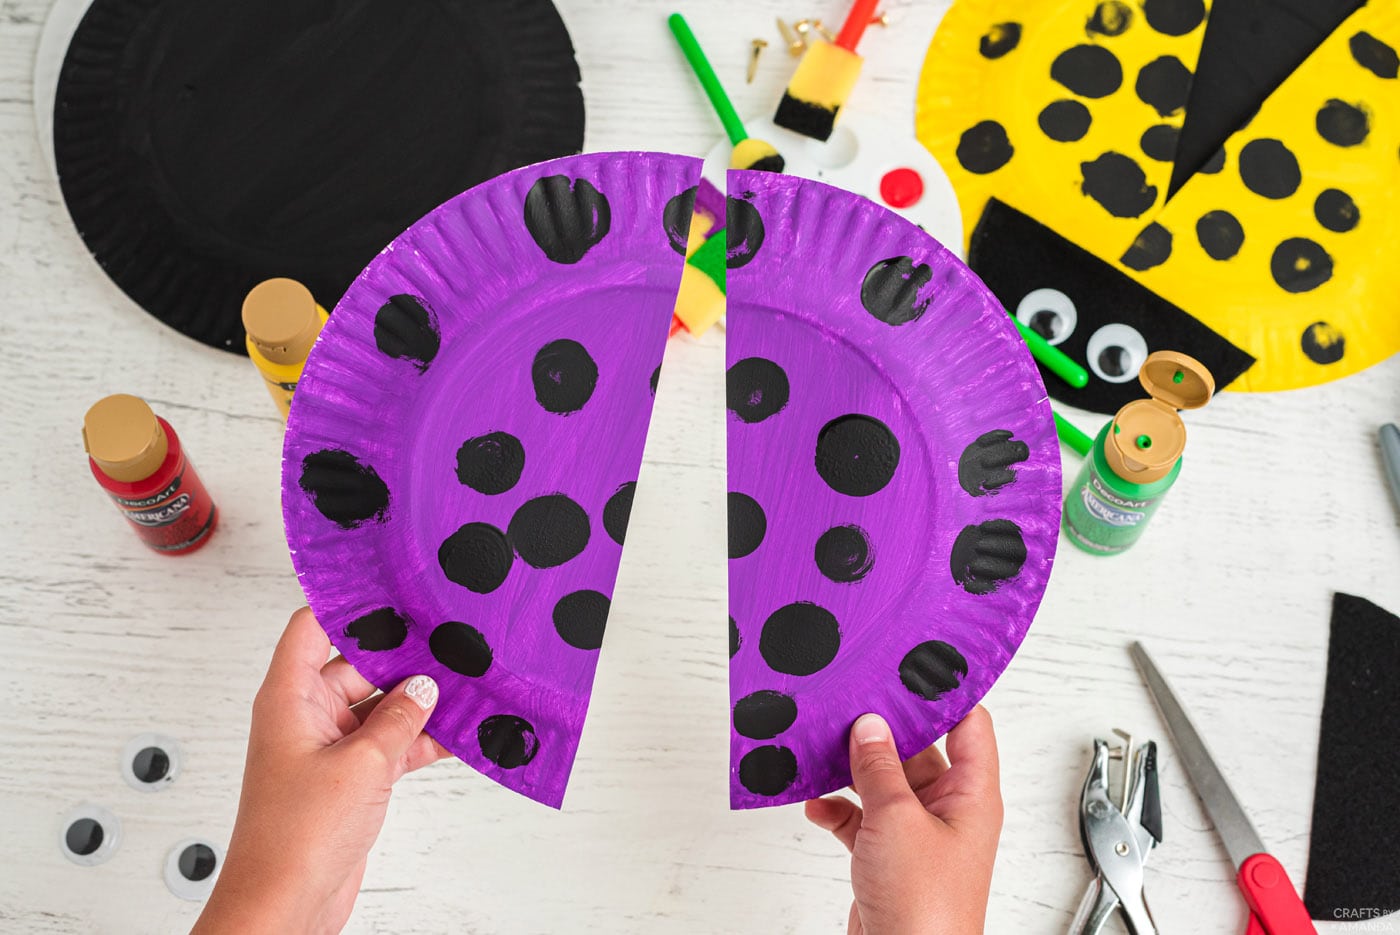
- After allowing the polka dots to dry, take the color paper plate (not the black one) and cut it in half.
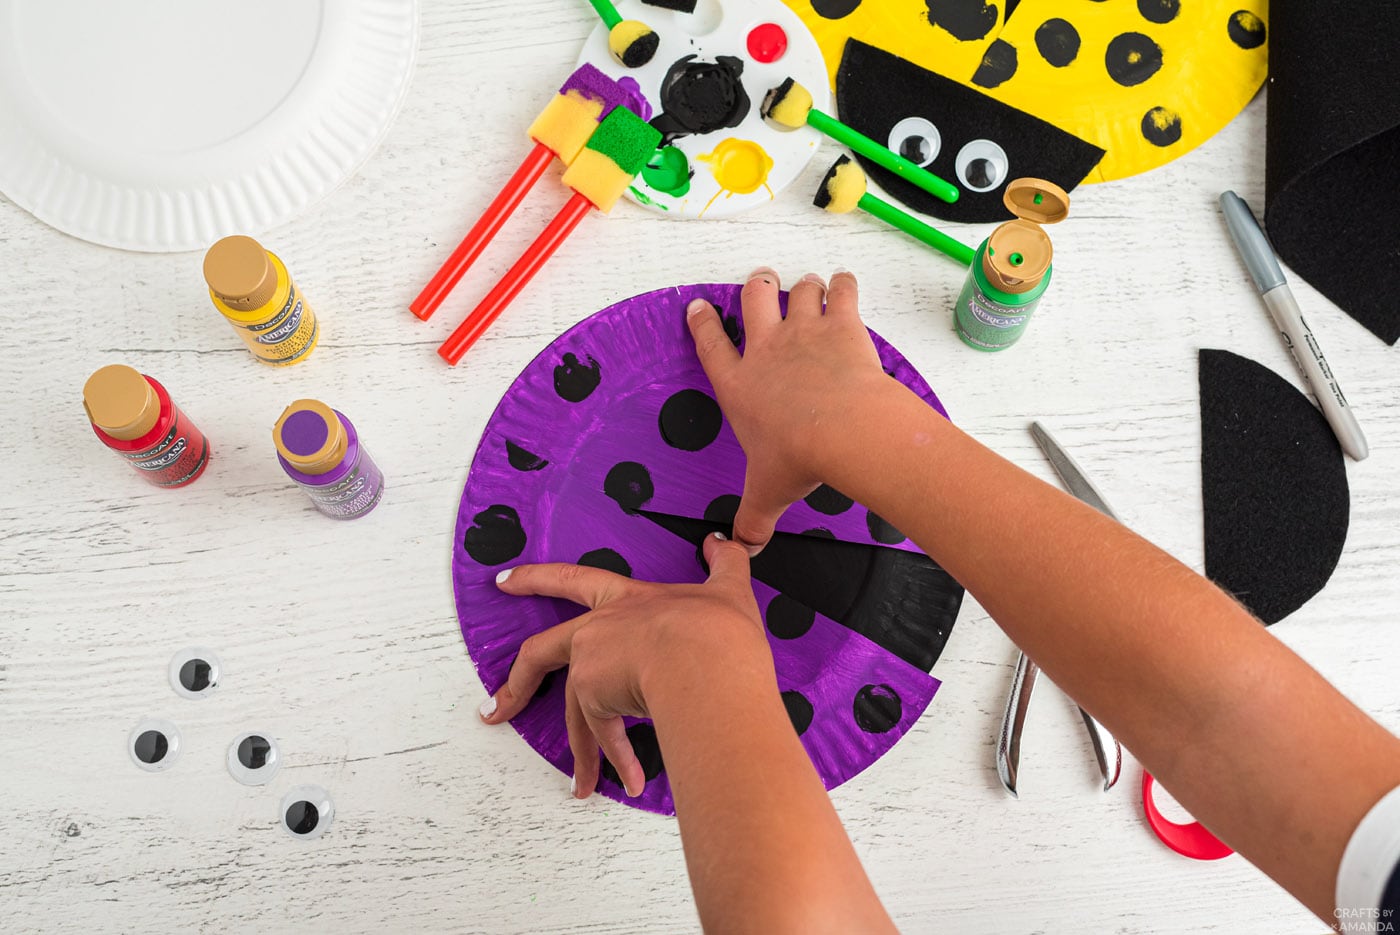
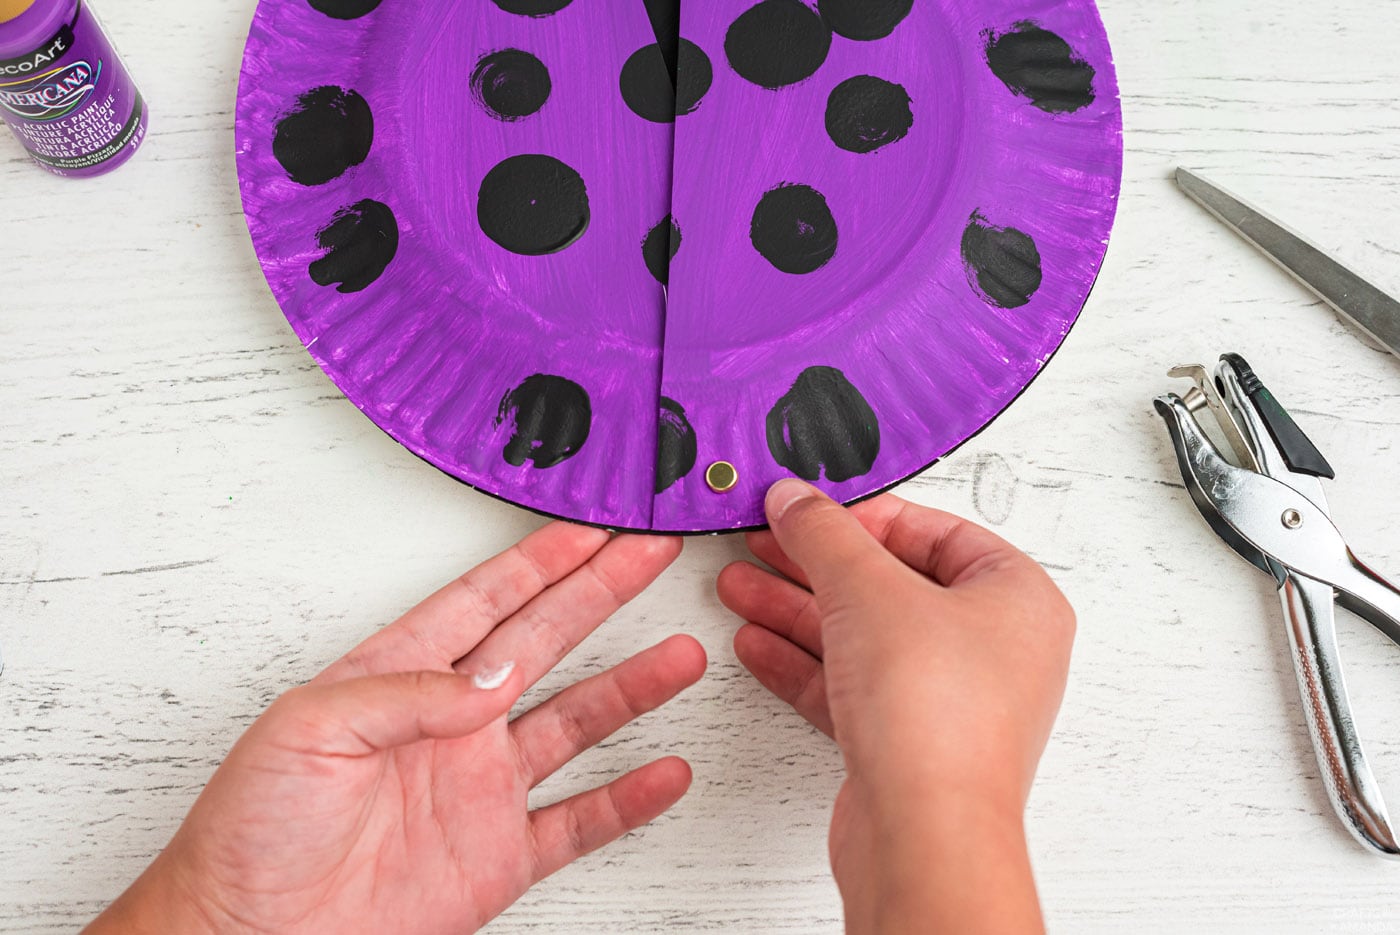
- Line the two halves up with the black paper plate and spread the “wings” open a bit.
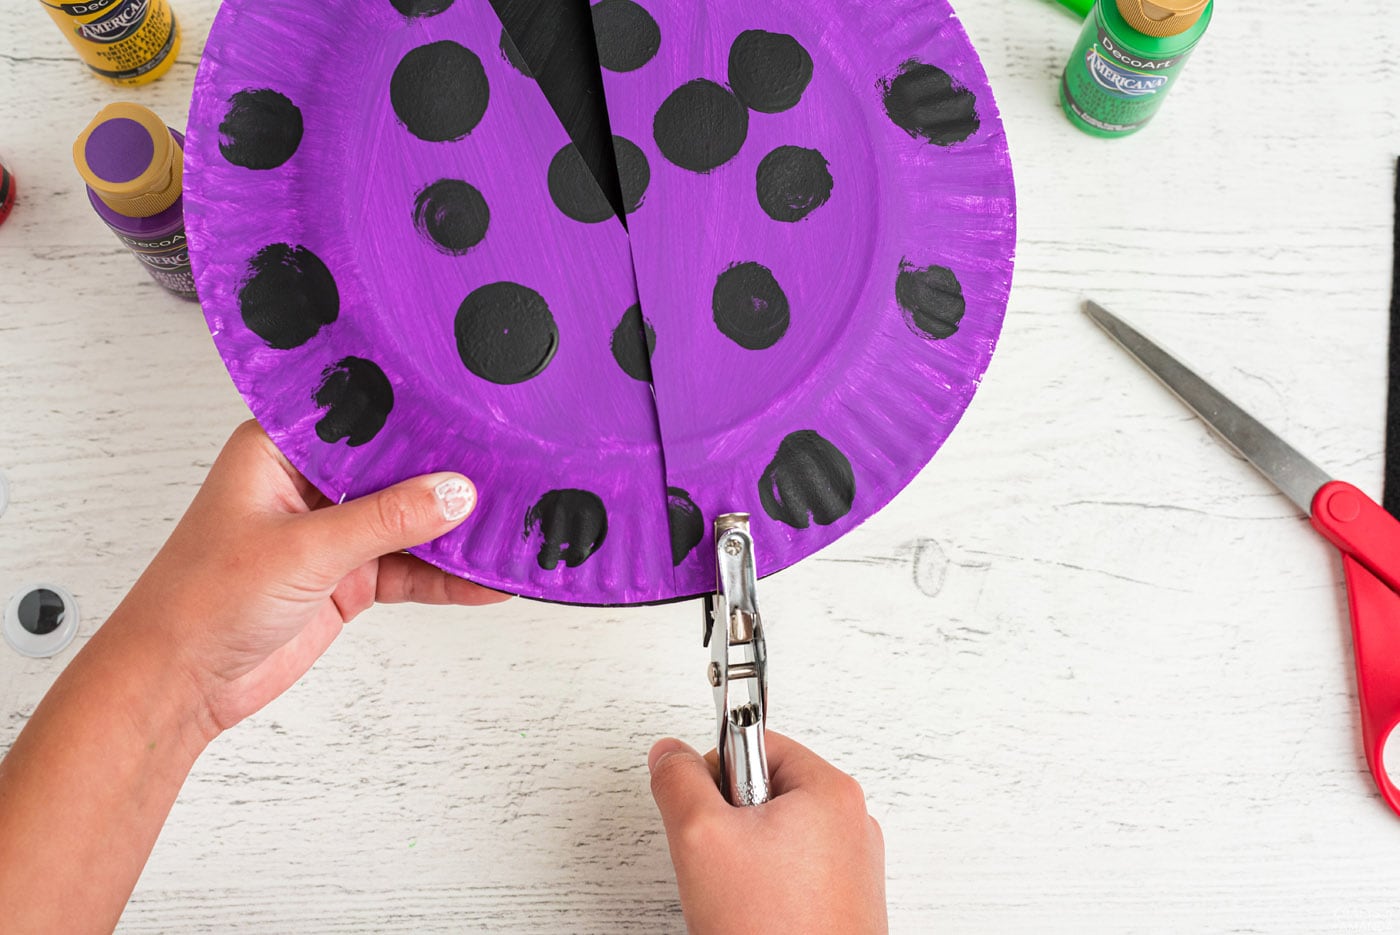
- Hold at the top and carefully poke a hole through the top of the wings and through the black plate underneath.
- Still holding it in place, push the fastener through the hole and secure it.
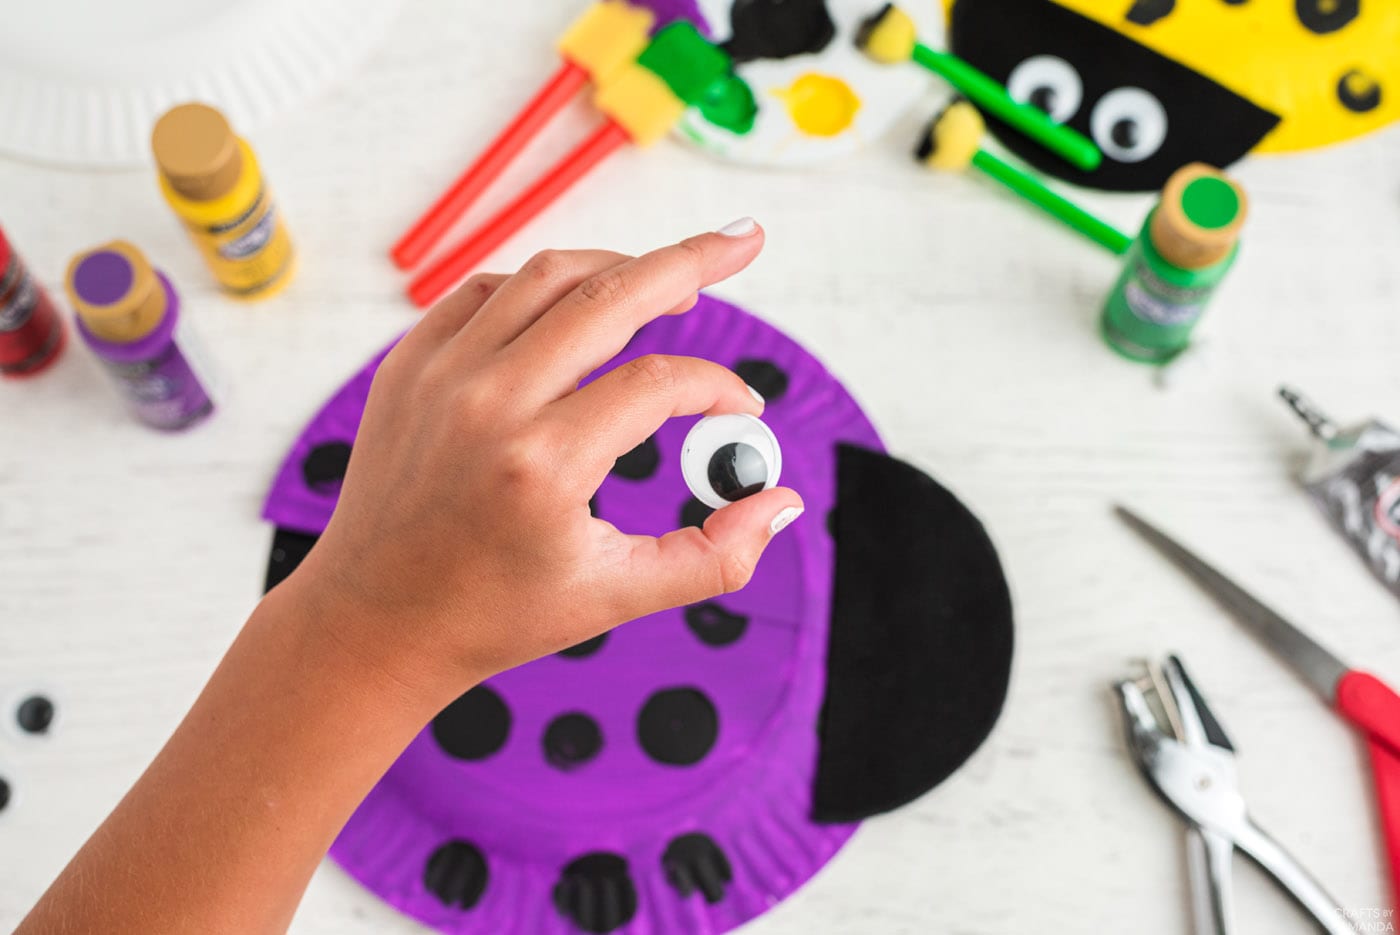
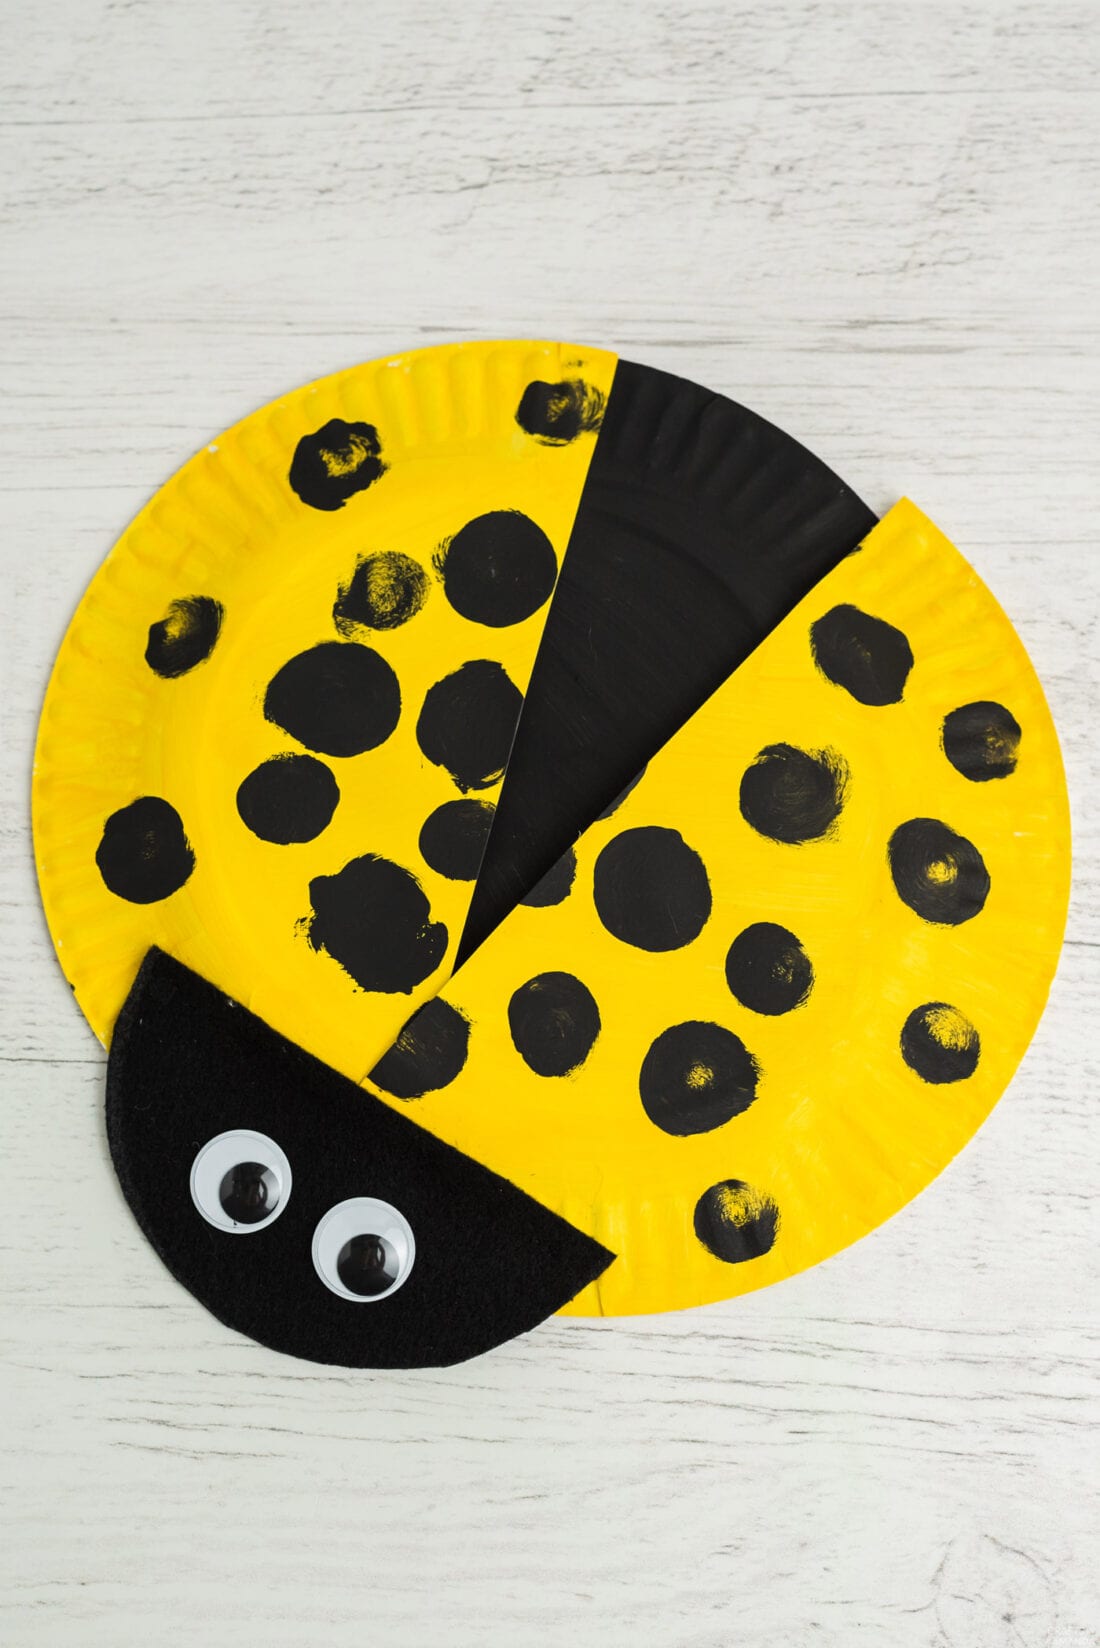
- Glue the head over the top of the wings to hide the fastener.
- Glue googly eyes onto the head.

Expert Crafting Tips
- You may substitute the black felt with patterned fabric, craft foam, or construction paper. If you don’t have wiggle eyes on hand, make your own out of white and black felt or craft foam.
These paper plate ladybugs are a great painting project for kids of all ages. It’s awesome for helping fine-tune your child’s motor skills while having lots of fun in the process!
More Ladybug Crafts
- Ladybug Painted Rocks
- Swirling Twirling Ladybugs
- Plastic Lid Ladybugs
- Ladybug Tic Tac Toe Game
- Decoupage Paper Plate Ladybug Craft
I love to create and share my projects with you! I know it’s hard to remember to come back and search, so I’ve made it easy for you with my weekly newsletter! You can subscribe for free and I’ll send you fun crafts and delicious recipes every week right to your email.
Paper Plate Ladybugs
Supplies
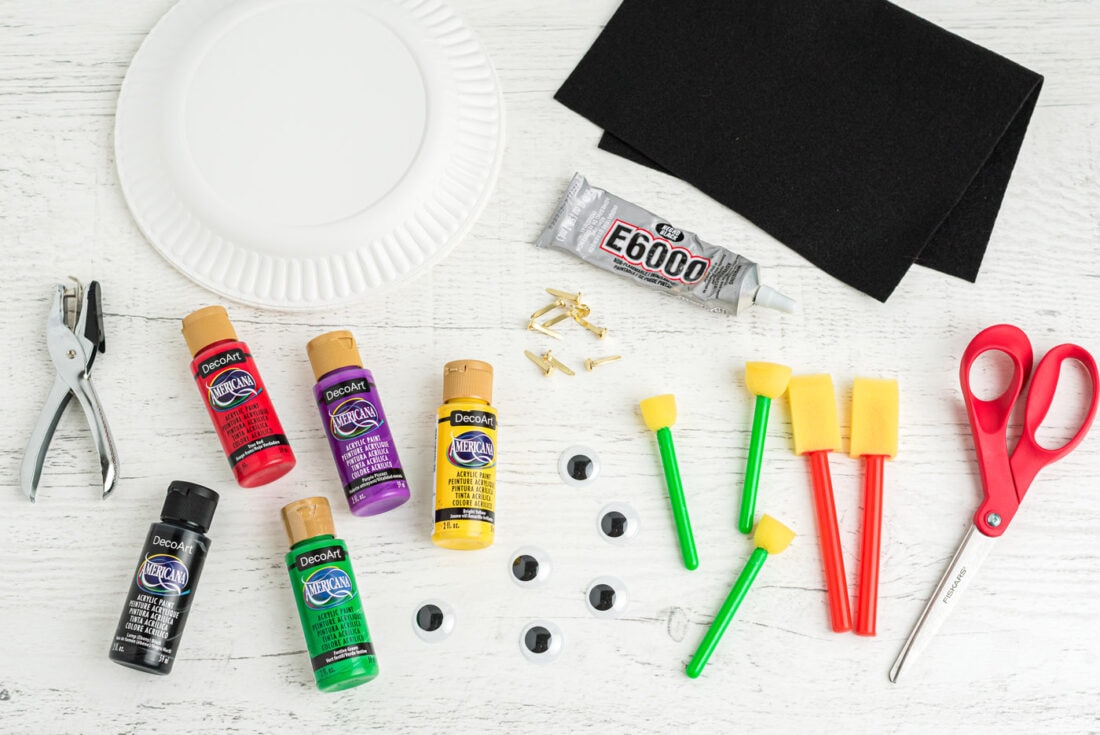
- 2 paper plates
- acrylic paint in black and your choice of colors
- 2 large googly eyes
- E6000 glue or glue stick
- black felt
Craft tools
- Hole punch
- Paper fastener
- Pouncer sponges
- paintbrushes
Instructions
- Paint one paper plate black and the other in whatever color you choose. Red is traditional for ladybugs, but you can get colorful like we did if you like. Set aside to dry.
- From black felt, cut out half a circle for the head. Use a jar, small bowl, or cup to trace a circle onto the fabric.
- Once the paint has dried, take your colorful painted plate and begin making polka dots using a pouncer sponge lightly dabbed in black paint. Use multiple sponge sizes to create a realistic ladybug pattern.
- After allowing the polka dots to dry, take the color paper plate (not the black one) and cut it in half. Line the two halves up with the black paper plate and spread the "wings" open a bit. Hold at the top and carefully poke a hoe through the top of the wings and through the black plate underneath. Still holding it in place, push the fastener through the hole and secure.
- Glue the head over the top of the wings to hide the fastener. Glue wiggle eyes onto the head.
Expert Tips & FAQs
- You may substitute the black felt with patterned fabric, craft foam, or construction paper. If you don’t have wiggle eyes on hand, make your own out of white and black felt or craft foam.
This post originally appeared here on March 10, 2007 and has since been updated with new photos and expert tips.
- DIY Mosquito Repellent Candles - July 10, 2026
- Mason Jar Solar Lights - July 3, 2026
- Patriotic Pinwheels - June 23, 2026


Mom of Two says
Thanks for the idea. We made this one too. I let DD put glitter on (what little girl doesn't love glitter) and made paint dots. Check it out: http://makesthree.blogspot.com/2010/07/more-crafts.html
Amazing_Grace says
I have my 1st grade CCD students make these lady bugs for the Bible story the Good Samaritan. It is to remind us to "love others". They always enjoy making them and I think it really gets the point across. :)
Amanda says
Thank you all!
Anonymous says
What an fun craft for those doing storytimes or units on spring or insects.
Barbara @ Modern Comfort Food says
A wonderful use of an everyday object that children of any age are sure to love. I particularly like the bold graphic design. Great work, Amanda!
jenjen says
What a cute craft to do with the kids. I will give it a whirl over Spring Break! Thanks!!
Thanks so much for linking up to my party! I really appreciate it!
XOXO
Jen
JDaniel4's Mom says
I love the bright colors you chose.
Jenn says
Thanks for linking up today! :)
Jenn says
These are really cute! I’ve got a new MckLinky party called Tot Tuesdays which started today. I hope you'll stop by & share: http://delicious-ambiguity-nennyk.blogspot.com/2010/03/first-ever-tot-tuesdays-mcklinky-party.html
Cheers, Jenn
Kevin and Angie says
These are REALLY cute!! So creative!! We have a ladybug website, Everything-Ladybug.com, and would love to post these in our craft section with a link back to your blog! Please let us know if this is okay with you and we will get it up on the site! Thanks!
Andy Porter says
I'm definitely making these with my kids. SO CUTE!
KJ says
CUTE!!! I hope it's okay, I'm linking to this today!
http://thissweetlifeofours.blogspot.com/
jennwa says
Super cute Lady Bugs !!!
Lori says
Those are just wonderful. Another great project from ya!!
Thanks for joining Get Your Craft on Thurs. Please come by next week for another great party.
Lori
fawnda says
Very cute! I love it! : ) What a fun project!
Denise says
LOVE THIS IDEA!
Stopping by from LIFE AS LORIE!
Please stop by!
http://extremepersonalmeasures.blogspot.com/
Kim @ seven thirty three says
Too cute! And perfect for toddlers!
Thanks for linking up today!
Kim
seven thirty three – – – a creative blog
Lanie Ree says
SO cute! I just love these. And what a kid friendly craft :)
Thank you for linking up to A Little Craft Therapy with Life in the Pitts.
Craftify It! says
Just found you from a soft place to land! LOVE your blog! I teach preschool, so I will be back OFTEN for ideas! I think we will do your leprechaun hats tomorrow! THANKS:)
The Frugal Designer says
These are absolutely adorable!
Megan says
Very cute indeed!
Amanda says
Thank you all so much!
Rachel – Thank you!! Love your linkies :)
Leanne says
I agree. These are stinking cute. I think I'll make these even if my kids don't want too.
[email protected] says
Aww, those are way cute! The paper plate is so amazing. What can't it do?? Thanks so much for this, I'll be linking.
Akela Joy says
so clever!
HoneyB says
These are adorable! Almost makes me want grandkids around to do crafts with. ;) LOL. I won't pressure my kids though!
Rena says
Those are really cute! We make a lot of crafts using paper plates. Thanks!
Amanda says
Thank you! They are one of my faves :)
artsy_momma says
Those are beyond adorable!