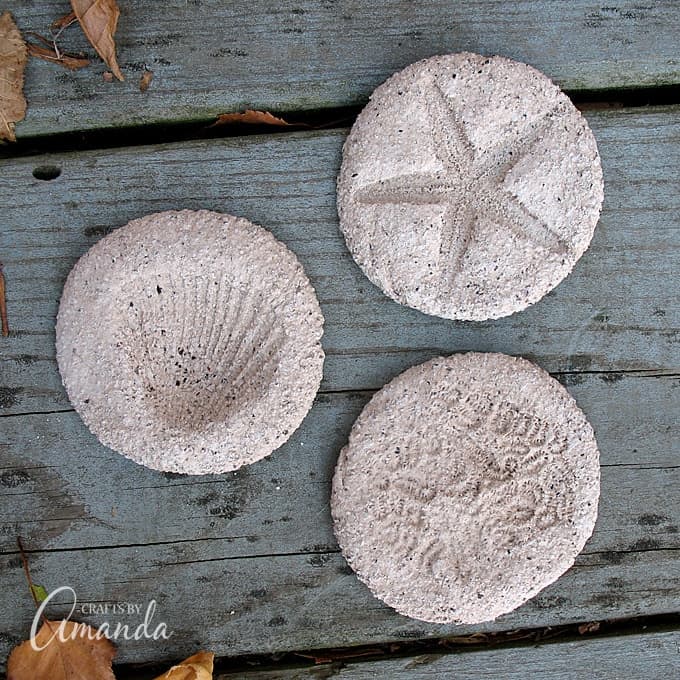
If you’re spending any time at the beach this summer you’ll want to do this fun sand casting project with the kids! It’s easy to make a sand cast starfish using sticks, rocks and seashells. Think of all the fun the kids will have finding objects for their sand cast, then putting it all together and running off to swim while the plaster dries. You can take home a wonderful keepsake you made right at the beach!
Sand Cast Starfish
If you would like to make this project at home you absolutely can! You’ll need a big bowl to put the sand in then you can build your sand cast starfish right inside it. That means you can make this fun sand casting in the middle of winter if you like! What a fun way to pretend it’s summer.
There are affiliate links in this post. That means if you buy something from that link, I will earn a small commission, but it won’t cost you anything additional.
For this sand cast starfish you will need:
- Sand
- Plaster of Paris
- Water
- 5 3”-long twigs
- assorted shells
- stiff bristled paintbrushes
- 4 cup measuring cup
- spoon
Things you may find helpful if crafting at home:
- Smocks to keep the kids from messing up their clothes
- Paper towels
- Newspaper or a plastic or vinyl tablecloth to cover the work surface
- Large bowl
This project can be made at the beach right there in the sand or in a large bowl filled with moist sand. If sand is dry, mist it with a spray bottle, or sprinkle it with handfuls of water.
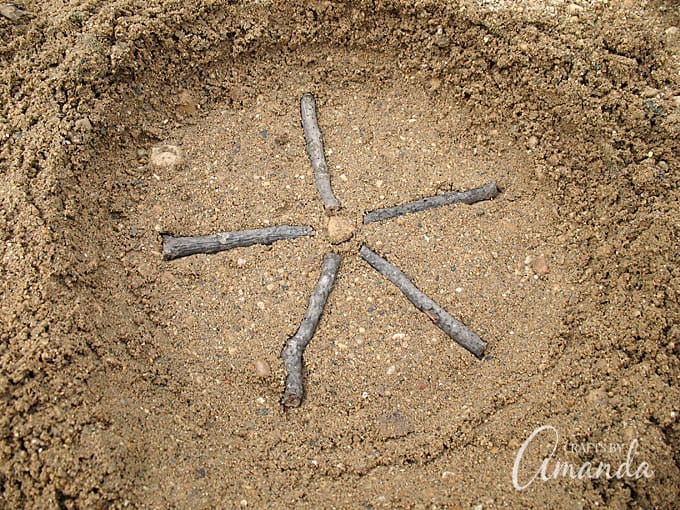
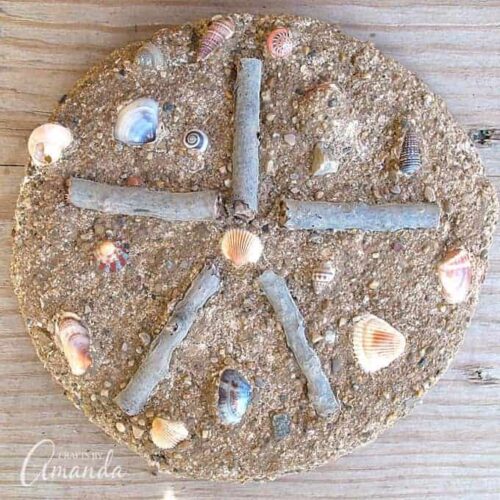
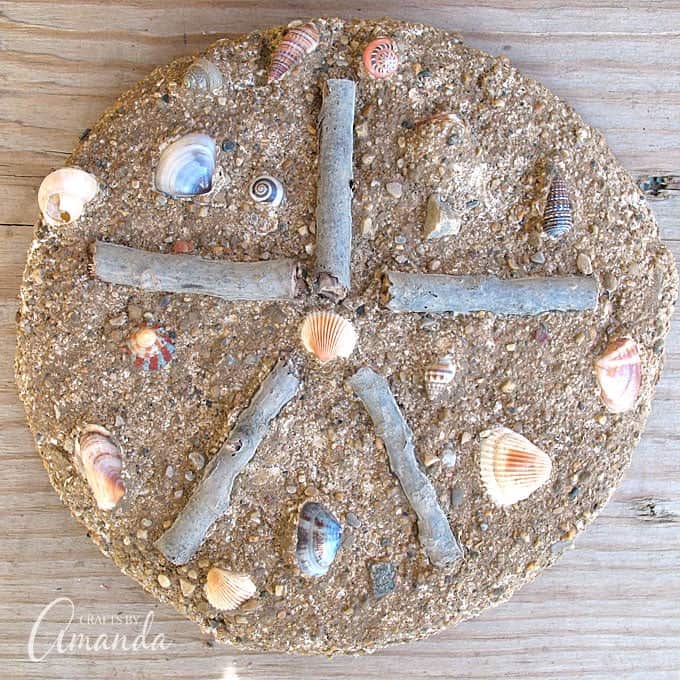
Get the sand evenly moist by spreading and mixing with your hands. Form a 6-inch diameter circle, about 2-inches deep, this will be your mold. Smooth the floor of the mold with your hand and pat it down gently. Place the twigs into the circle, pressing down firmly, but gently, forming a starfish. You do not want any plaster to seep underneath them.
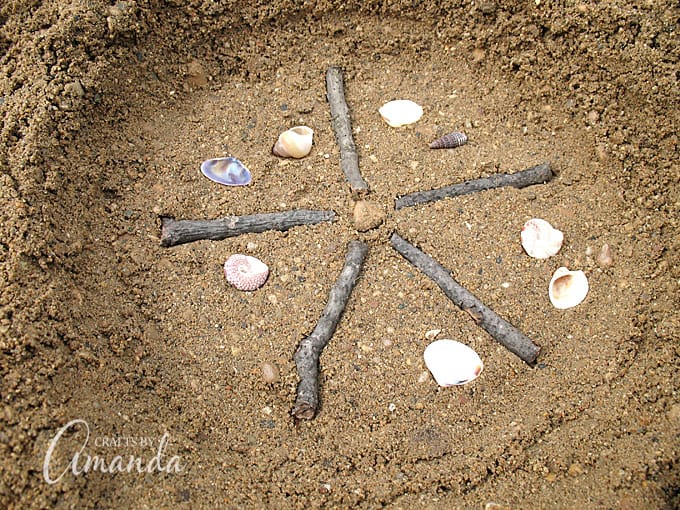
Arrange the sea shells face down in the sand, pressing in firmly, but gently.
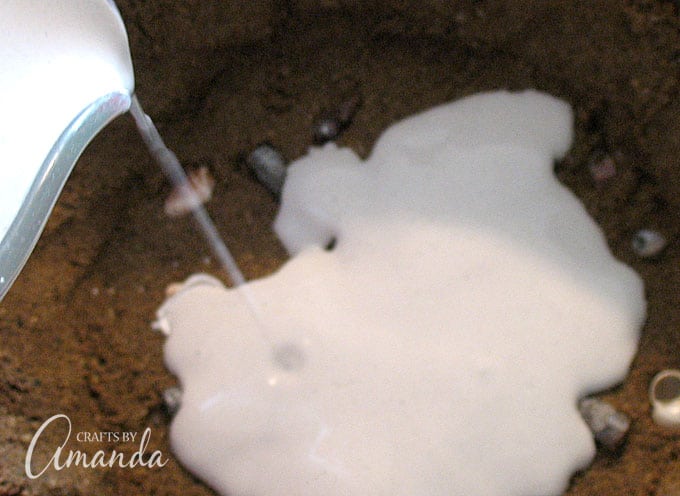
Mix 3 cups of plaster with 1 1/2 cups of water in 4-cup measuring cup. Stir mixture well until creamy, be sure to remove all lumps. Slowly pour the plaster mixture into the sand mold. You do not want to pour it too quickly or you may disturb the placement of your objects (see tips at the end of these instructions for disposal of your remaining plaster).
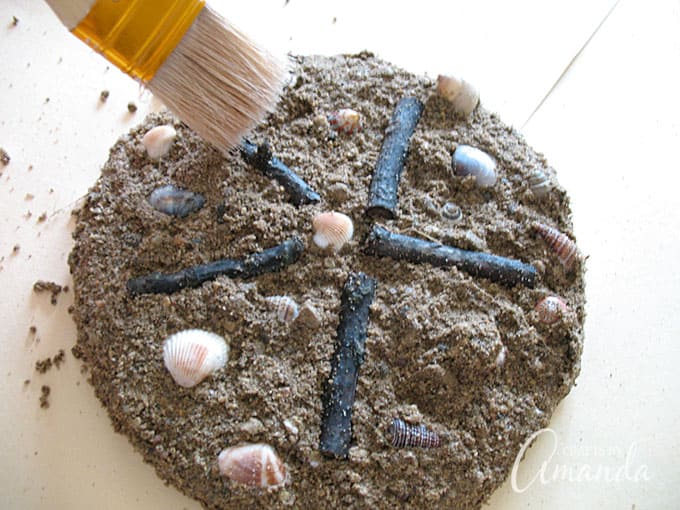
Allow plaster to dry for at least an hour to let it harden. Carefully dig around the edges of your mold with the spoon and gently loosen and lift the plaster cast. Let the sand casting dry for another hour. Use stiff bristled paintbrushes to remove the excess sand.
Helpful Hints
- If you will be making this project at the beach or at a lake or pond, please be sure to bring along a roll of paper towels and a couple of small trash bags (plastic grocery bags are ideal). Do not wash out the bucket or bowl you mixed the plaster in by sticking it in the lake or ocean water! Instead, wipe out as much of the plaster as you can with paper towels and dispose of them in the small trash bags.
- Use whatever you have available to you, such as sticks, pebbles, shells, and stones.
- If making this project at home, do not rinse plaster of Paris down your sink drain. Instead, wipe as much out of the bowl as you can with paper towels and throw away.
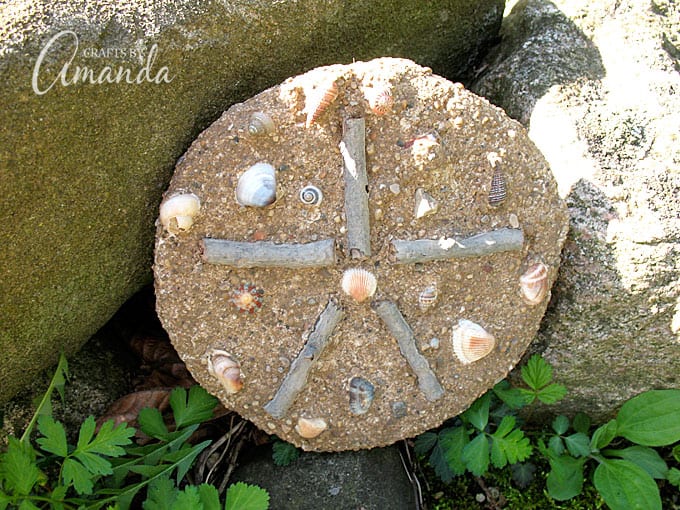
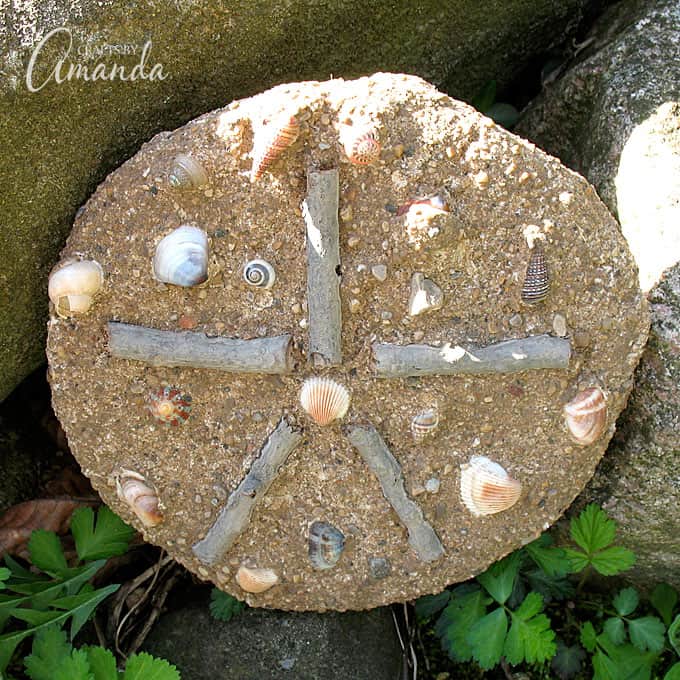
Display on a mantle or a shelf, great as a gift too! Your kids will love making this!
SCROLL DOWN FOR THE PRINTABLE VERSION OF THIS CRAFT
MORE SUMMER CRAFT IDEAS:
These coffee ground fossils are super fun to make and make a great project for school or home. Talk about dinosaurs, fossils and excavating!
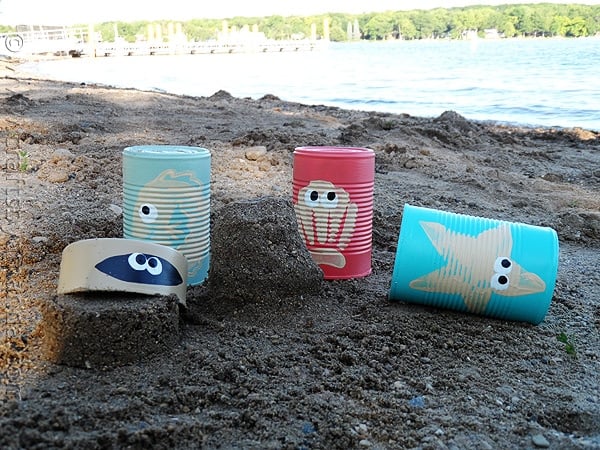
These adorable sea creature sand castle makers are recycled vegetable and soup cans. Fun for the beach or sand box!
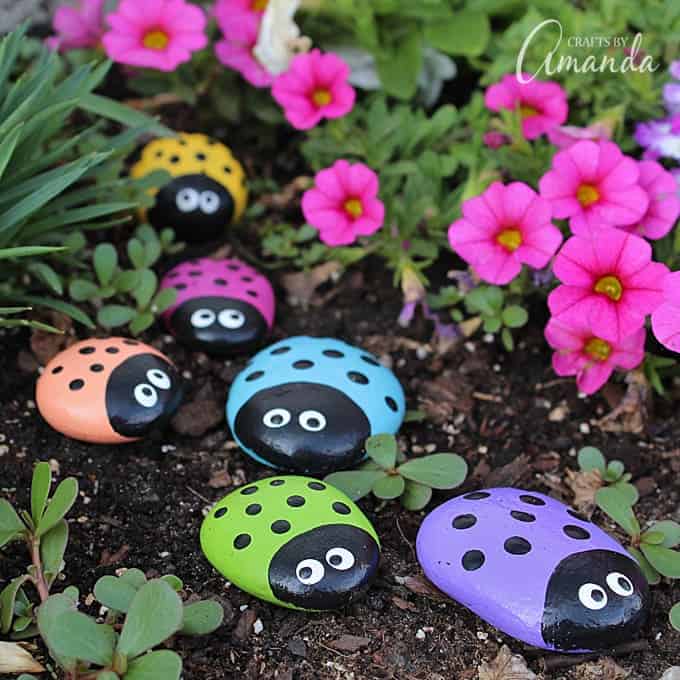
My ladybug painted rocks are super cute and a great sumer project for the kids. Hide them around the garden to find later!
Want even more free craft ideas? Be sure to subscribe to my newsletter for FREE and craft ideas sent to your inbox every week.

Sand Cast Starfish
Supplies
- Sand
- Plaster of Paris
- Water
- 5 3 ”-long twigs
- assorted shells
- stiff bristled paintbrushes
- 4 cup measuring cup
- spoon
Instructions
- This project can be made at the beach right there in the sand or in a large bowl filled with moist sand. If sand is dry, mist it with a spray bottle, or sprinkle it with handfuls of water. Get the sand evenly moist by spreading and mixing with your hands. Form a 6-inch diameter circle, about 2-inches deep, this will be your mold. Smooth the floor of the mold with your hand and pat it down gently.
- Place the twigs into the circle, pressing down firmly, but gently, forming a starfish. You do not want any plaster to seep underneath them.
- Arrange the sea shells face down in the sand, pressing in firmly, but gently.
- Mix 3 cups of plaster with 1 1/2 cups of water in 4-cup measuring cup. Stir mixture well until creamy, be sure to remove all lumps. Slowly pour the plaster mixture into the sand mold. You do not want to pour it too quickly or you may disturb the placement of your objects (see tips at the end of these instructions for disposal of your remaining plaster).
- Allow plaster to dry for at least an hour to let it harden.
- Carefully dig around the edges of your mold with the spoon and gently loosen and lift the plaster cast.
- Let the sand casting dry for another hour. Use stiff bristled paintbrushes to remove the excess sand.
- Tie Dye Beach Towels - July 24, 2026
- Swirling Twirling Ladybugs - July 21, 2026
- Drip Tie Dye Backpack - July 17, 2026


Buske Azariah says
So Cool. I really want you to reply!
Amanda Formaro says
Have fun!