I’ll admit, I don’t really know too much about fairy houses. Yes, I have four kids, but three of them are boys. My daughter and I seemed to learn about fairy houses far too late for her to be able to get “into them” like some little girls do.

And yeah, the boys didn’t really have an interest, no surprise! I still don’t know a lot about fairy houses other than they are constructed mostly from things found in the woods and are often surrounded by pretty flowers. So when I created my fairy house, these were the aspects I built into it.
Related – fast forward several years and I’ve made many fairy gardens!

I used a $1.00 wooden bird house from the craft store. I dug around in my craft room and found some moss, pine cones and acorns. I had a lot of fun creating the flowers since they are just simply dots with the handle end of a paintbrush.

I took several shots close up so you can see some of the details…


As you can see from this shot in the tree, it’s not very big, maybe 7-inches in height. I created this for DecoArt, so I did have to ship it off to them. I would have loved to have nestled this among my herbs, so I’m tempted to make another one just for me. :)

click picture for larger view
I started by cutting the scales from 3 medium sized pine cones. I painted the birdhouse with Woodland Brown paint. I glued moss to the outside of the house, leaving some space around the window for my flowers. I began constructing the roof tiles using the scales of the pine cone.

click picture for larger view
I started at the bottom and worked my way up, adding an acorn top to the top of the roof. To build the base I used some wood discs my neighbor had cut for me when I made these Rustic Northwoods Christmas Ornaments a few years ago. See? it pays to save stuff! After gluing the discs together I added some pebbles to the ends. I glued the house to the base and painted some green for grass then started adding flowers with different colors. I just kept adding until I was happy with how it looked :)
 There are more detailed instructions in the printable tutorial below.

Do you think the toads in my herb garden would like this fairy house? Do you think the fairies would get mad? I’ve seen signs that say “Don’t piss off the fairies”… Just sayin’.

Come see Emma Kate’s fairy house on my Facebook fan page!
AFTER this project was posted I received some pictures from Alice of her 4 year old granddaughter making their very own fairy house :) To see the entire album go here.

More you might like:
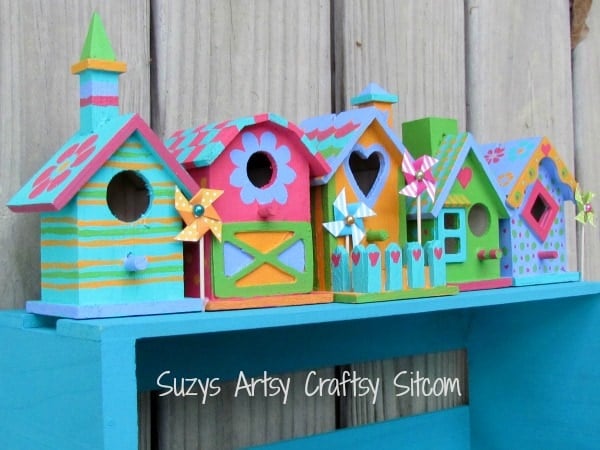
If you’d like to make a more colorful fairy house, try the instructions from Suzy’s colorful birdhouse shelf here!
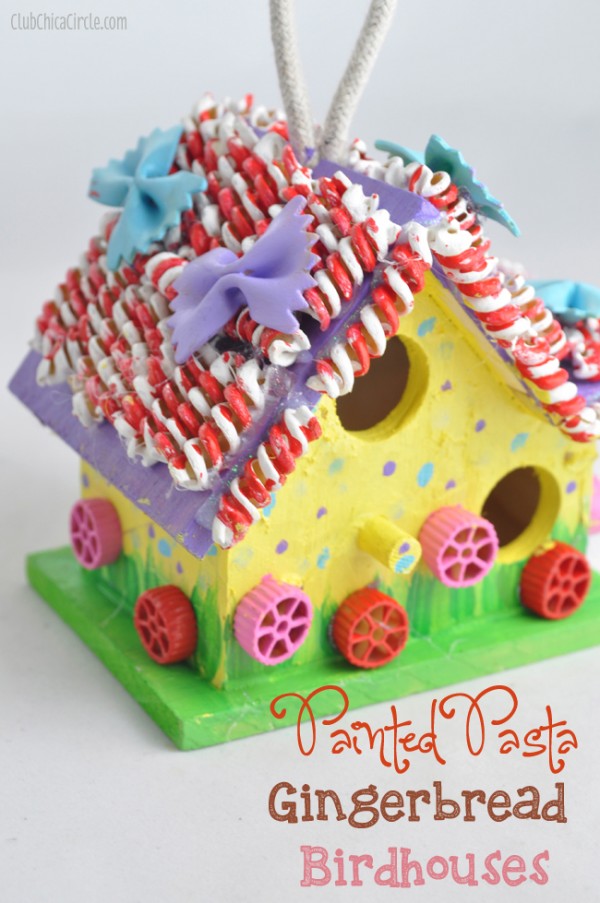
My friend Pauline made adorable gingerbread houses with dried pasta! Full tutorial at the link.
Make a Fairy House
Supplies
- DecoArt Patio Paint
- Cloud White
- Sprout Green
- Sweet Pea
- Petunia Purple
- Very Berry
- Marigold
- Butternut
- Robin’s Egg Blue
- Coral Sunset
- Woodland Brown
- Wrought Iron Black
- Other supplies
- Wooden cylindrical birdhouse
- Sphagmum Moss
- 3 Pinecones
- Acorn top
- White glitter
- Rocks pebbles, stones
- Wood circles
- E6000 glue
Instructions
- Cut the scales from 3 medium pinecones.
- Paint the wooden birdhouse Woodland Brown.
- Cover a section of the painted birdhouse with E6000 glue and press moss into the glue, repeating until the outside of the house is covered, leaving space around the window.
- Glue the scales onto the roof, starting with a row around the bottom and working your way up to the top. Glue the acorn top to the top of the roof.
- Make a base from sliced wood circles by gluing them together and adding some pebbles and stones around the outer edges.
- Glue the house to the base.
- Using a toothpick, dip into paint and dot on to create flowers around the window. Simply dot two or three next to each other then work upwards, lessening the number of dots across as you go up to give them the appearance of growing. We used Cloud White, Coral Sunset, and Robin’s Egg Blue for the front flowers. We used Sweet Pea for the greenery around the edges and Marigold for the flowers around the outer edge of the window. In our “window box”, the flower spilling out the window, we used Petunia Purple dotted lightly with Cloud White.
- Use a scruffy paintbrush to add Sprout Green paint to the front of the wood circles, then dot on flower gardens with toothpick using Very Berry and Petunia Purple dotted with Cloud White in the front, and Marigold, Butternut and Coral Sunset for the flowers in the back and on the pebbles.
- Mix Wrought Iron Black with some Cloud White to create a gray shade. Use the handle end of a paintbrush dipped in gray to create stepping stones in front of the house.
- Dot the roof with some white craft glue using your finger. Sprinkle with white glitter.
- Mini Coastal Clay Houses - July 14, 2026
- DIY Mosquito Repellent Candles - July 10, 2026
- Mason Jar Solar Lights - July 3, 2026


bunni says
That’s it! I’m heading to the craft store…….TODAY
Trish Massey says
Hi Amanda-Love the fairy house. How do you weather proof them? Do you leave them out in the garden?
Amanda Formaro says
Hi Trish! I spray them really well with a clear sealer. Any moss will fade from the sun, so I just replace that the next year. I do bring them in for the winter!
patrick Hanlon says
Where do i find the fairy in the glass window on the tree , is it a DIY or can i buy it ?
Angela Iapichino says
I would like to learn and see more about your beautiful “Fairy Garden Homes”. I have a small flower beds on the side wall of my garage, just at the entrance, and nothing grows except weeds, it has lots of sun.
Debbie Mason says
I can’t wait to show my granddaughters!!! We try to have a “Girls Day” with Grandma on my day off work! They will be so excited! Thank You Amanda!
Amanda Formaro says
Awesome, sounds fun!!
angel says
You are one of the brightest people ever. I am Making one out of plywood because I absolutley love woodworking. I am 13 years old and this proves kids can do anything they put there mind to.
Amanda Formaro says
Awesome, sounds like fun!
Deb Fetter says
I bought a small bird house from the craft store and I painted it brown and then glued small sand stones all over it turn out really nice.
Syl says
Beautiful. So whimsical. I’ve already spent tooooo much time here. I need to get back to work. Lucky I’m the boss.
Pamala says
Great project that I can share with great grandchildren!
Linda says
The pinecones I found were so hard I used tin snips and leather gloves. But so enjoyable, I didn’t paint it as I liked the look. Put it out on my patio table and the birds stole all the moss! So I tucked it away until this week. I still have the paints so I’m back at it! Love this project. Thank you!
Patti Lee says
Thank you, Amanda, for the great tutorial. I can’t wait to collect the materials and my granddaughters and start making a beautiful little neighborhood for those elusive little fairies.
You are so talented! Thank you for sharing this wonderful project!
Amanda Formaro says
Thanks so much Patti! Hope you have a ton of fun! :)
Judy Siebers says
Love this adorable fairy house.
I too, plan on making one.
Have pine cones on order.
Looked, but so far have no circles of wood-have to wait until
son cuts down tree.
I have made several already from bird houses.
Will have to take pictures.
Not too tech savvy.
Have some of this paint.
I also have bought a small wood barn, chicken coop, small resin houses,
fairies, accessories galore.
Love the miniature ceramic animals you can buy online.
So are making dish gardens, dioramas.
Made a larger one out of an aquatic log that will go outside in flower box this summer. It has Peter pan, Tinkerbelle, and baby.
Amanda Formaro says
Thanks Judy! Sounds like you have a fun project for spring!
gigi says
supper cute I love it just love it!!
Amanda Formaro says
Thanks gigi!
violet ferrell says
It’s people like you that give the world something to smile about! Awsome, thank you
Amanda Formaro says
Aww that’s sweet, thanks Violet!
Joy says
Thank you for the instructions on how you made your fairy house I can’t wait to have ago with my Granddaughters it looks so good.
Amanda Formaro says
Hope you have fun Joy!
Willow says
Thank you for the wonderful ideas. I love this! 8 little girls will be making their own versions of this at my daughter’s 5th birthday party this week! (Okay, I’m making one, too, for our fairy garden.) Thanks!
Amanda says
Thank you Willow, sounds like a fun afternoon!!
debib says
adorable!!!
Amanda says
Thanks Debi!
Johnnie says
I love this, Amanda!!
nest of posies says
this is just darling! love how you added pinecones to give it texture!
Amy says
Oh, this is just darling! I bet my daughter would love to make one! I love your idea of using the birdhouse for the “bones” of the house. Very clever. :) Found you on Made by You Mondays! :)
Carol says
That is so adorable! I can’t wait to try making one for my garden.
michelle says
cool!!
Maureen says
That is just fabulous. I have a couple of those houses at school that I picked up at the Dollar store. Thanks for sharing your creation.
norma brooks says
this is just about the prettiest thing I have seen in a long time, and I am going to try to make one for my back yard. I just love it. thank you so much.
Candyse says
You could add a little moss out front as fairies love to dance on it in the moonlight…
Mary Anne says
very sweet, anyone move in yet?
Amanda says
Not yet! :)
Amanda Padgett says
This is so, so cute!! My daughter would totally love this!!
A few years ago my kids would make fairy houses with sticks, bark, grass, rocks etc. But they were very temporary houses. Love this idea of making one that would stick around a long while!
Kristen S- Craft Gossip says
Amanda!!!!!! This is the coolest fairy house I have ever seen!! Posted it!!
http://lessonplans.craftgossip.com/?p=6682
Fransie says
Amanda where can we find moss. Thanks
Amanda Formaro says
Hi Fransie! Moss can be purchased at craft stores, usually in the floral department :)