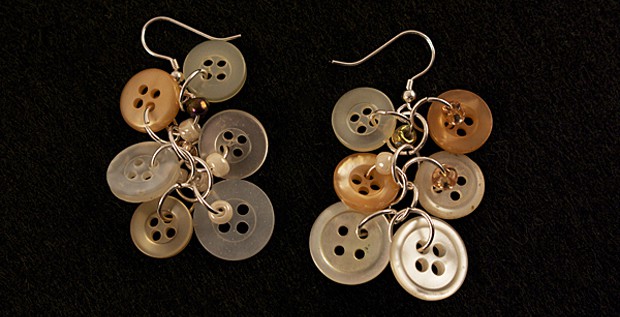
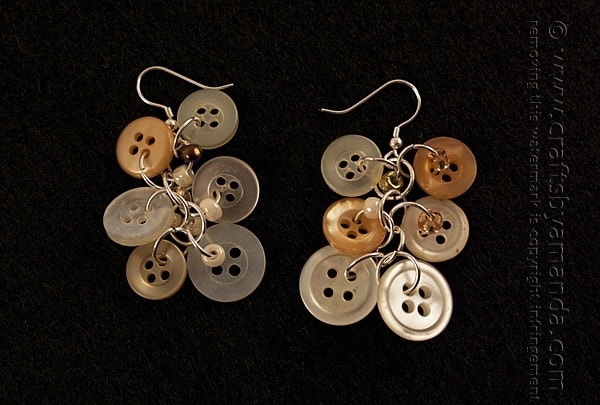
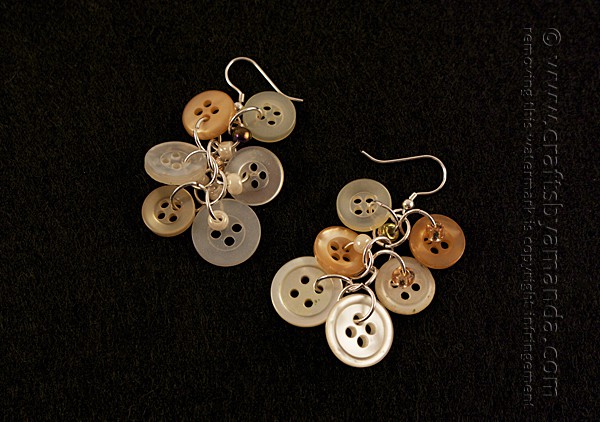
I have lots of antique looking buttons. They are easy to find at garage sales and thrift stores and it doesn’t take long to amass a huge collection. These button earrings would be great for a rustic wedding; perfect for the bride and bridesmaids!
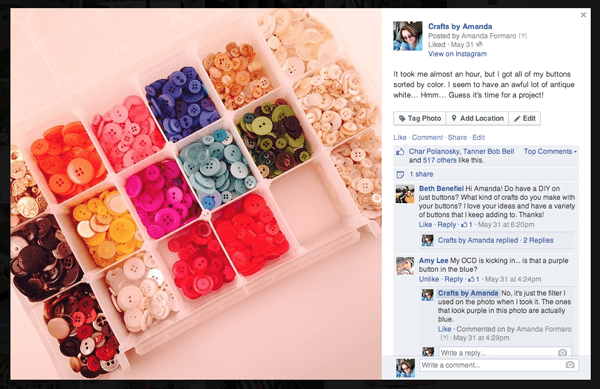
I’m currently working on my fourth book, which involves lots of buttons! If you follow along on Instagram you might have seen this Instagram post when I was sorting my collection of buttons. Or, maybe you saw it on Facebook as I often share Instagram stuff there too!
P.S. you can actually see my first two books, Rubber Band Mania
and Duct Tape Mania
As you can see from my button collection, I have more antique white than any other color, so I’m kind of on a mission to create some projects with them. That’s when I thought that earrings would be a good way to start.
Note: some links below are affiliate links. That means if you happen to buy something, a small percentage of that sale goes back into this site, which enables me to continue to bring you free tutorials such as this one. So, thanks!
As always, a full printable supply list and instructions are at the end of this post. For this project you will need the following supplies:
2 fishhook earring wires![]() (JoAnnns) though I think this deal at Amazon
(JoAnnns) though I think this deal at Amazon![]() might be better!
might be better!
18 jump rings (JoAnns)![]() or these at Amazon
or these at Amazon![]()
12 antique white buttons
Earth tone 6/0 E-beads (I used pearl and some brown, this is a nice assortment of browns![]() and these pearl ones
and these pearl ones![]() are nice too)
are nice too)
Flat nosed pliers![]()
It’s probably really important to note that I do NOT make jewelry. So if the thought of making jewelry intimidates you, this is an excellent beginner jewelry project. You’ll spend a few dollars at the craft store getting jump rings and fish hook earring wires, but other than that you’ll only need your buttons.

It’s a good idea to use some flat nose pliers for opening and closing the jump rings, but it CAN be done with your fingers too. So don’t feel you need to run out and buy a jewelry tool set to make these.
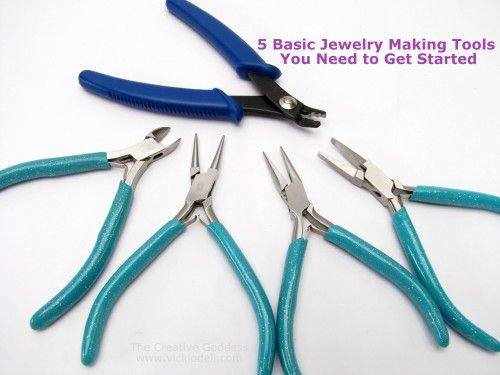
If you are looking to get into jewelry making, my friend Vicki has a great post that shares what tools you will want to have to get started. You can pick up a starter kit at most craft stores and even at WalMart![]() , or buy one online
, or buy one online![]() .
.
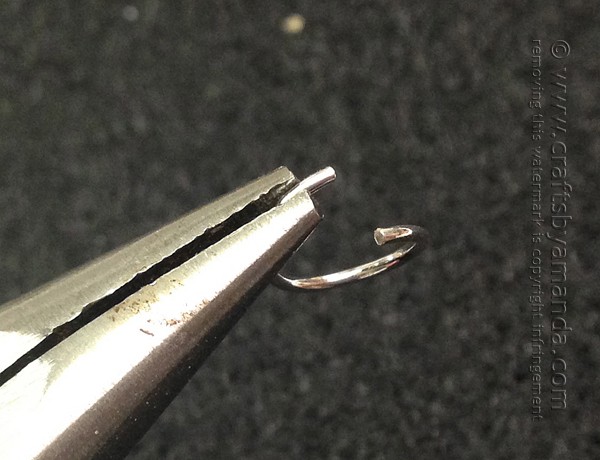
First, it’s important that you open and close your jump rings properly. Opening them the wrong way can cause them to weaken and break. Hold the jump ring on one side with pliers, right next to where the ring separates.
To open the jump ring, separate the opening by moving one side of the ring away from you or toward you, as long as the circle remains in tact. Do not pull the two ends apart as that will weaken the ring and can cause it to break.
NOTE: There are some jump rings that are heavier and stronger than others. Some people suggest using two sets of pliers, one for each side of the ring. This can be helpful when you are working with a heavier/stronger jump ring.
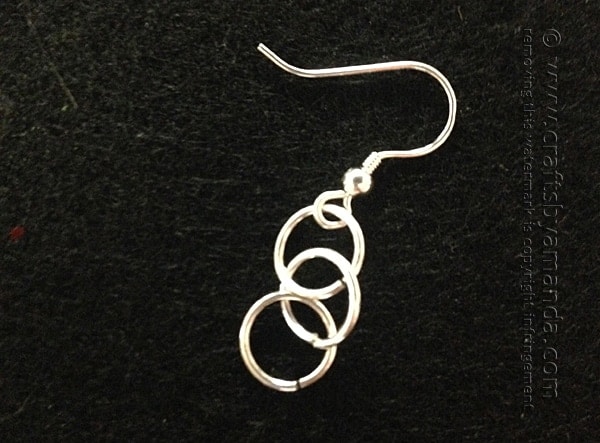
Add a jump ring to the hoop on the earring wire. Close the jump ring in the same manner as how you opened it, lining up the two ends together. Use a back and forth motion to adjust and line up the ends. Add two more so that you have three individual jump rings hanging from the earring wire.
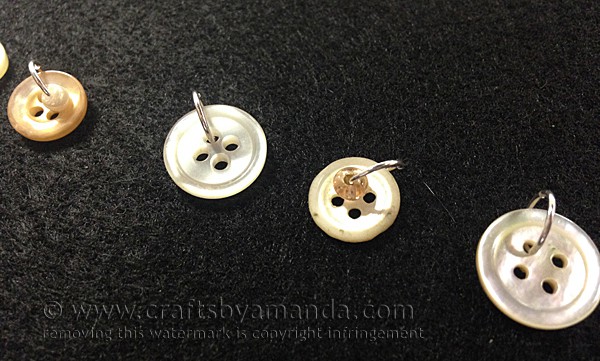
As a beginner, I found it easier to add the buttons to their individual jump rings first and get those all set up. You can certainly combine this step with the next one so you are only opening and closing the jump ring once instead of twice.
I added beads to my earrings along with the buttons. These are seed beads in natural and earth tone colors. Open a jump ring and add a one or two beads and a button. Close the jump ring. Repeat for all the buttons.
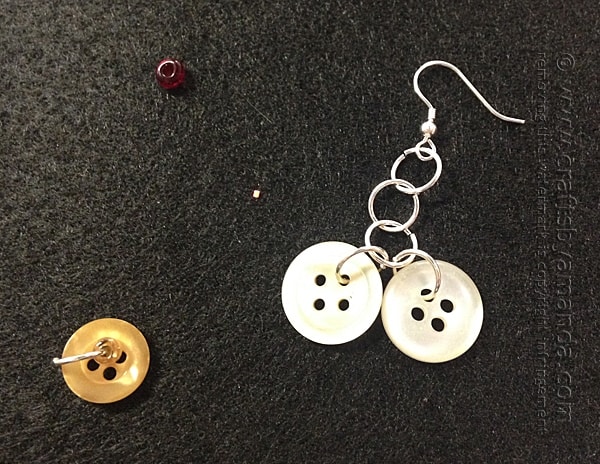
Start adding the jump rings that have the buttons on them to the earring with the jump ring trio. Add two buttons to the bottom jump ring.
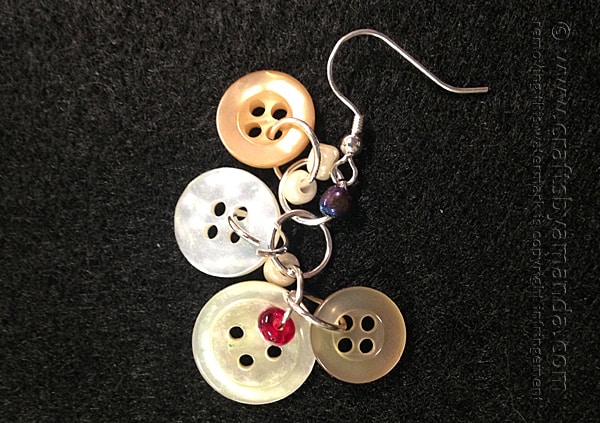
Add the remaining buttons, one on each side of the middle jump ring, and one on each side of the top jump ring.
Wedding luminary ideas
With wedding season here, I hope this tutorial was helpful and/or inspiring! And speaking of wedding season, if you are searching for some pretty ideas for DIY luminaries, I have several you may like! Check them out below.
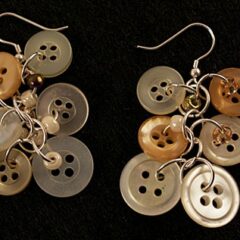
Antique Button Dangle Earrings
Supplies
- 2 fishhook earring wires
- 18 jump rings
- 12 antique white buttons
- Earth tone seed beads
- Flat nosed pliers
Instructions
- Use flat nose pliers to open the jump ring by moving one side of the ring away from you or toward you. Do not pull the sides apart.
- Add a jump ring to the hoop on the earring wire. Close the jump ring in the same manner as how you opened it, lining up the two ends together. Use a back and forth motion to adjust and line up the ends. Add two more so that you have three individual jump rings hanging from the earring wire.
- As a beginner, I found it easier to add the buttons to their individual jump rings first and get those all set up. You can certainly combine this step with the next one so you are only opening and closing the jump ring once instead of twice.
- Open a jump ring and add a one or two beads and a button. Close the jump ring. Repeat for all the buttons.
- Start adding the jump rings that have the buttons on them to the earring with the jump ring trio. Add two buttons to the bottom jump ring.
- Add the remaining buttons, one on each side of the middle jump ring, and one on each side of the top jump ring.
- Tie Dye Beach Towels - July 24, 2026
- Swirling Twirling Ladybugs - July 21, 2026
- Drip Tie Dye Backpack - July 17, 2026


Jodie says
What size and gauge jump rings?
anupriya todi says
Thank you so much for your great tutorial. I am in the exact same place you mentioned when it comes to making jewelry making-not a jewelry maker and intimidated. But I would like to make simple jewelry with buttons. You have very generously clarified many of the questions and hesitations I had about this. Thanks again.
Amanda Formaro says
I’m glad it was helpful!
Vintage Earring Magpie says
Hi Amanda, cool ideas for vintage style earrings :)
Cathey DeRosa says
Great projects. Buttons are my favorite thing to work with. Love lots of other things, but have been fascinated with buttons since I was a little girl.