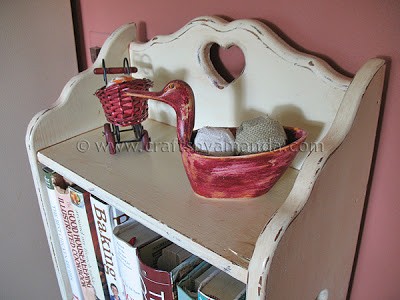
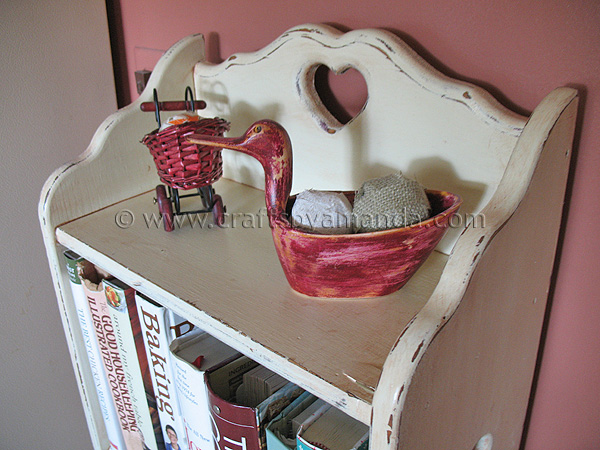
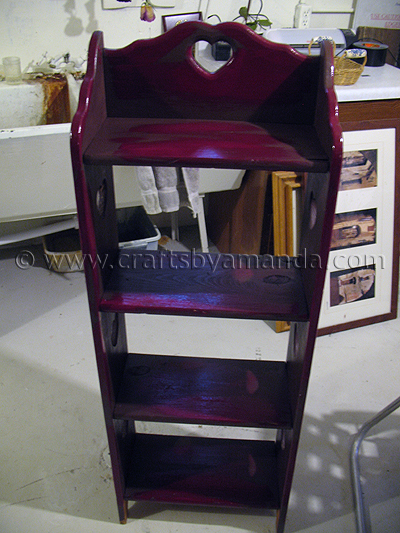
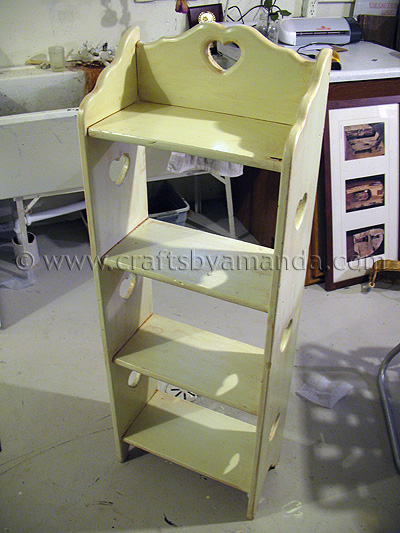
Do you remember those wooden shelves with the heart cut outs on them? Perfect for the country blue decor that was so popular in the 80’s and 90’s? Well last summer I picked up two of those type of bookshelves last summer at a garage sale for $1 each. I’ve been using one of them for cookbooks in my kitchen, but the color has been driving my crazy. I’ve been wanting to revamp it for months and finally pulled out the paintbrush and sander last week.

At first I was trying to decide how to cover up the heart cut outs, but now that I’m done painting it, I actually kind of like the way they look, so they are staying as is for now. I think the new color fits much better against the color of my wall, don’t you? (The tutorial for the French Fruit Wall Art is here)
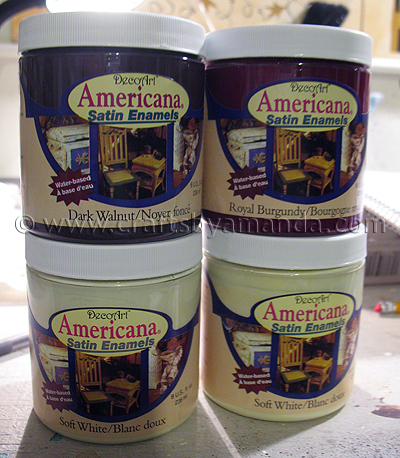
To achieve this I actually used some Americana satin enamels![]() , which are practically hidden on the shelves at Michael’s. They were over by the spray paint display on a shelf at thigh level. I love the size of the paint tubs. Much bigger than the little 2 ounce acrylic paint bottles, but I didn’t need a gallon, or even a quart of expensive Glidden or Bear house paint for this project. These worked perfectly. I only used a small amount of the Royal Burgundy
, which are practically hidden on the shelves at Michael’s. They were over by the spray paint display on a shelf at thigh level. I love the size of the paint tubs. Much bigger than the little 2 ounce acrylic paint bottles, but I didn’t need a gallon, or even a quart of expensive Glidden or Bear house paint for this project. These worked perfectly. I only used a small amount of the Royal Burgundy![]() and the Dark Walnut
and the Dark Walnut![]() , and almost one entire tub of the Soft White
, and almost one entire tub of the Soft White![]() . That’s great, it means I have enough left to do the other shelf as well! :)
. That’s great, it means I have enough left to do the other shelf as well! :)
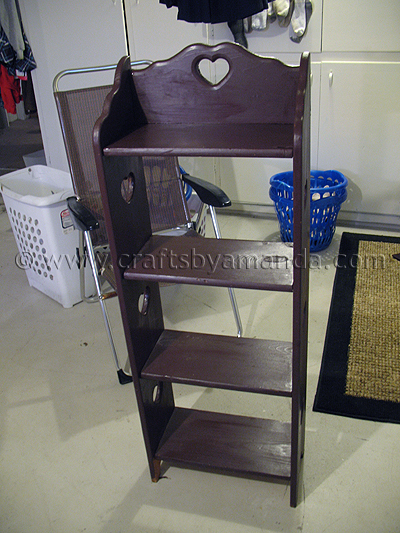
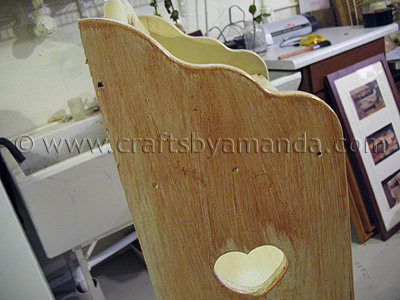
I started by sanding any rough edges, then painted the entire thing with a coat of Dark Walnut.
Then I added some Royal Burgundy in random areas.
The reason I did this is I wanted some red and some brown to show through after painting the white layers and then sanding.
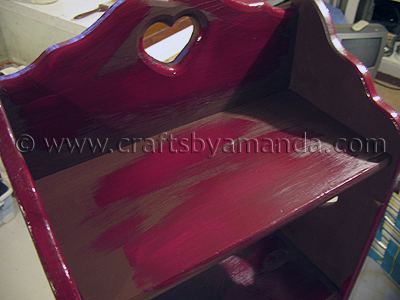
After those coats dried, I painted the entire thing with 3 coats of Soft White. I probably could have gotten away with two, but I really wanted to make sure I had a solid white coat to work with.

Next I mixed some Americana Light Cinnamon![]() with some staining/antiquing medium
with some staining/antiquing medium![]() . I did wait a day before doing this to make sure the white was good and dry. With antiquing medium to apply it with a brush or rag, then wipe off the excess with a dry cloth.
. I did wait a day before doing this to make sure the white was good and dry. With antiquing medium to apply it with a brush or rag, then wipe off the excess with a dry cloth.
This is the stain being applied, work only in sections or it will dry too much to wipe off!
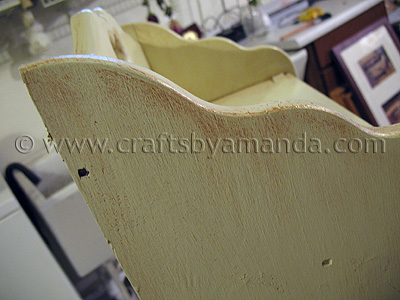
This is what it looked like after all the stain was applied and wiped off.
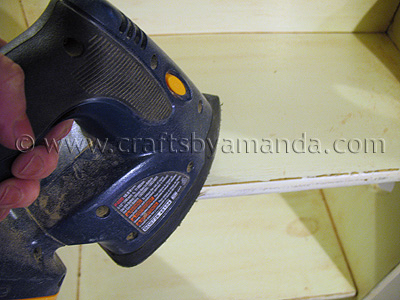
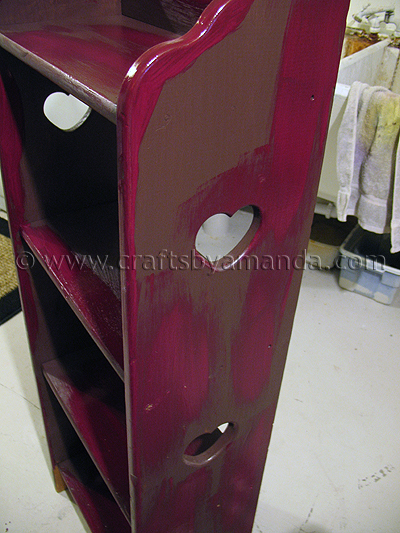
When that was dry, I used my handy dandy Ryobi sander![]() to sand the edges and give it an aged look.
to sand the edges and give it an aged look.
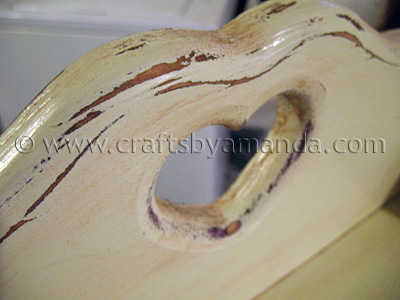
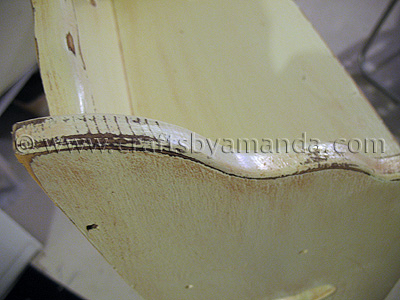
I paid special attention to the corners.

When finished, I used a matte acrylic spray sealer and let it dry overnight before adding any books. :)

Distressed Cookbook Stand - A Redo
Instructions
- I started by sanding any rough edges, then painted the entire thing with a coat of Dark Walnut.
- Then I added some Royal Burgundy in random areas.
- After those coats dried, I painted the entire thing with 3 coats of Soft White.
- Next I mixed some Americana Light Cinnamon with some staining/antiquing medium. I did wait a day before doing this to make sure the white was good and dry. With antiquing medium to apply it with a brush or rag, then wipe off the excess with a dry cloth.
- When that was dry, I used my handy dandy Ryobi sander to sand the edges and give it an aged look.
- I paid special attention to the corners.When finished, I used a matte acrylic spray sealer and let it dry overnight before adding any books.

Did you enjoy this post? Why not subscribe to my feed, or better yet, to my free newsletter – Foodie in the Craftroom, which provides not only crafts but recipes from my other blog, Amanda’s Cookin’ as well!
I’m linking here: Before and After Party and…
- DIY Mosquito Repellent Candles - July 10, 2026
- Mason Jar Solar Lights - July 3, 2026
- Patriotic Pinwheels - June 23, 2026


Amanda says
The shelves look great, the hearts look great with a fresh pop of paint!
A Few Pennies says
Loving that project; perfect size for kitchen and books. Have a great weekend. Patty
Lauren @ My Wonderfully Made says
HAHA! I have a whole HOUSE full of those — floor shelves, book cases, bench, tables! I've hidden most away but I too am thinking of at least painting a few of them. Love the technique you used with all of the different colors. I too want to cover the hearts and I'm thinking some wooden 'medallions' might be the answer but yours DOES look perfect as is! Thanks for the detailed instructions!
Lynda says
It is so much better, it is really cute! Thanks for the ideas!
AmyOfSweden says
Really nice, Amanda! Sometimes it can take a while before you get started. I love them and they are adorable. I would really want one of those shelves but unfortunally I don't have enough room in the house ;)
Maggie says
Luv luv it thank you for the step by step pics. I need to get some paints.
don't forget to add it to our linking party this week
http://www.passionatelyartistic.com/2011/04/happy-easter-2011-and-linking-party.html
Maggie
http://passionatelyartistic.com
Cottage Touch says
Inspiring project and blog.
DebWestbury says
Really neat transformation…got me thinking of the bench that I have with the same heart pattern…
Kudos Kitchen says
Really cute Amanda! I, for one, am glad you left the hearts. With the new paint technique, you've really updated the look!
Dan says
I've got a pile of furniture in Toronto that could use re-finishing. want to make a working holiday? :-)
Connie the crafterbug says
This looks great!
Connie
Gabi says
I love it!
I want too!!