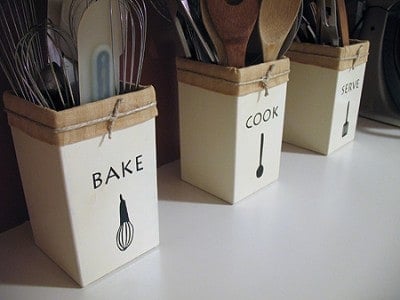

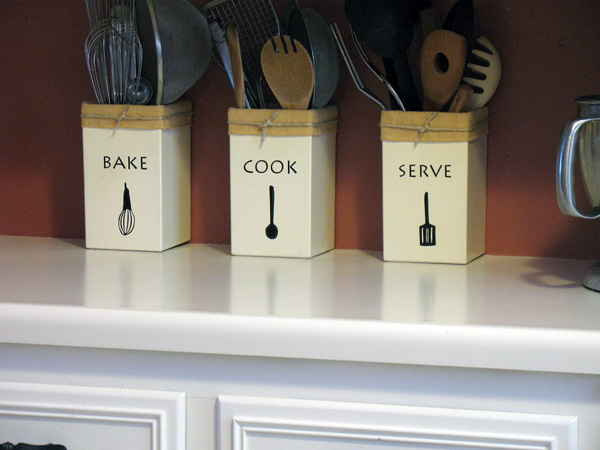
Recently I’ve made several new projects to decorate my kitchen. If you’ve been a reader of this blog for a while, you also know that I have a food blog, Amanda’s Cookin’, and that I love to cook and bake. Because of that, I have loads of different utensils. They were completely consuming my drawer space and getting harder and harder to find, so making these utensil holders just seemed to be a given.
Note: I used my Silhouette machine![]() to create the letters and pictures for these, you could definitely print them out on regular copy paper, spray them with clear matte sealer
to create the letters and pictures for these, you could definitely print them out on regular copy paper, spray them with clear matte sealer![]() , cut them out and Mod Podge
, cut them out and Mod Podge![]() them on.
them on.

I started with these plastic beanie baby boxes![]() (which of course I washed out first, gross). My husband called me from work one day and asked me if I wanted a case of them that someone was getting rid of. Being the craft supply hoarder junkie that I am, I of course said yes!
(which of course I washed out first, gross). My husband called me from work one day and asked me if I wanted a case of them that someone was getting rid of. Being the craft supply hoarder junkie that I am, I of course said yes!
I apologize that I don’t have step by step photos. My camera batteries choked on me in the middle of the project.
I gave them a quick spray with some primer![]() to help the paint adhere to the plastic. Then I simply painted them with Vintage White acrylic paint
to help the paint adhere to the plastic. Then I simply painted them with Vintage White acrylic paint![]() . I ended up giving them a total of three coats, allowing them to dry an hour or so between coats. I did use a paintbrush and acrylic paint, you could also use spray paint for this.
. I ended up giving them a total of three coats, allowing them to dry an hour or so between coats. I did use a paintbrush and acrylic paint, you could also use spray paint for this.
If you have a Silhouette machine![]() , you can use or edit the template – get it here. The font that I used was Lithos Pro, so you could recreate these in Word if you like.
, you can use or edit the template – get it here. The font that I used was Lithos Pro, so you could recreate these in Word if you like.
Here’s a downloadable PDF file as well.
I printed the designs onto vinyl and added them to the containers, being sure they were all lined up with each other. Once I had attached the vinyl I sprayed them with two coats of acrylic sealer (matte finish)![]() , allowing them to dry between coats.
, allowing them to dry between coats.
For the fabric liner, I simply cut strips of fabric from an old tablecloth and doubled them up using hot glue![]() . Then I glued the doubled fabric to the outside, tucking the extra inside the containers. I added a simple piece of twine
. Then I glued the doubled fabric to the outside, tucking the extra inside the containers. I added a simple piece of twine![]() around the outside of the fabric and my utensil holders were complete!
around the outside of the fabric and my utensil holders were complete!
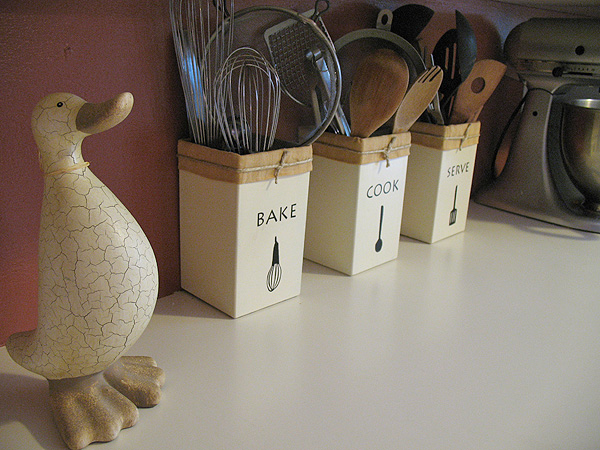
I love the way they turned out. I hope that you like them too! They have been a great way to free up some drawer space and keep all my different utensils separate.

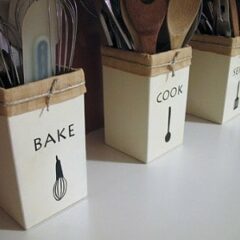
Make Your Own Kitchen Utensil Holders
Supplies
- Boxes
- Silhouette Machine or scissors
- Clear Matte Sealer
- Mod Podge
- Primer
- Vintage White Acrylic Paint
- Vinyl
- Fabric
- Hot Glue Gun
- Twine
Instructions
- I started with these plastic beanie baby boxes.
- I gave them a quick spray with some primer to help the paint adhere to the plastic. Then I simply painted them with Vintage White acrylic paint. I ended up giving them a total of three coats, allowing them to dry an hour or so between coats. I did use a paintbrush and acrylic paint, you could also use spray paint for this.
- If you have a Silhouette machine, you can use or edit the template. The font that I used was Lithos Pro, so you could recreate these in Word if you like.
- I printed the designs onto vinyl and added them to the containers, being sure they were all lined up with each other. Once I had attached the vinyl I sprayed them with two coats of acrylic sealer (matte finish), allowing them to dry between coats.
- For the fabric liner, I simply cut strips of fabric from an old tablecloth and doubled them up using hot glue. Then I glued the doubled fabric to the outside, tucking the extra inside the containers. I added a simple piece of twine around the outside of the fabric and my utensil holders were complete!
- Swirling Twirling Ladybugs - July 21, 2026
- Drip Tie Dye Backpack - July 17, 2026
- Mini Coastal Clay Houses - July 14, 2026


Christa Sunderland says
Very cute containers!
I love the idea of this craft since I love crafts and love saving space!!!
I will have to give this a try soon!!!
Thank you for sharing!!!
Edie says
Very neat idea. I have several pots from amaryllis kits that I use to hold utensils but they are just dumped in there. I like the way you organized them and I am going to decorate them the way you did.
Amanda Formaro says
Awesome, have fun Edie!
Nat says
Hi Amanda,
i so love this idea!
i can’t open the files to get these templates.
would u mind emailing them to me please?
Thank you
Nat
Amanda Formaro says
Hi Nat, I corrected the PDF file so you should be able to download it now :) Sorry for the delay!
Cristina says
I love love love this!!! Can you send me the template? I cannot open it because it says it doesn’t exist. Thank you!
Amanda Formaro says
Oh bummer. I just looked and it says no preview available but it appears to still be there as there is a file size listed. I’ve downloaded the file and will email it to you in a zip. I hope it works. If it doesn’t, it’s lost I’m afraid :-/
Peggie Sue says
I am in love with your little duck!! And your containers are adorable too! lol
admin says
Thank you Peggie!
sangeeta khanna says
I love doing such things too and am loving this idea. I have converted a copper jug as a spatula/ladle holder in my kitchen, but these look so cute :-)
Mart says
I’d love to know how you did the EAT above your cabinets! So Cute!
Amanda Formaro says
Hi mart! The tutorial for the EAT sign is here https://craftsbyamanda.com/2010/11/distressed-eat-sign.html
Courtney says
Who needs Walmart anymore? Thanks for the post :)
Numrah says
this adds up to my list of the craftiest ideas for my new home!
http://numrah-translucentme.blogspot.com/
Lana Bisson says
I like how the utinsels are seperated. I usually keep all mine in one big ceramic jar.
Carolyn says
The containers looks fantastic. They add so much character to your kitchen.
Laurie@The Baking Bookworm says
What a cute idea! So many different uses for this idea too (craft supply holders for my daughter's room come to mind). Thanks so much!
Kimberly Jones says
What a great idea! These look so adorable in your cute kitchen. Thanks for sharing!
kiersten says
Great project! I'm including it in my Craft links this week
B.Large says
Hey there,
I'm a new follower and Cassidy my friend found your blog and loved this idea! So I helped her make her own! Check out my blog and see what we did! Please become a follower too of both of us! I'm introducing her to this whole thing and she would be thrilled to have you follow her too! You can go to her link through mine!
http://brandlarge.blogspot.com
Leanne says
Thanks for linking to We're Organized Wednesday. I'll be featuring this.
Amanda @ Frills and Frolic says
1. I am a new follower!
2. Great name ;)
3. I love the project and not only have I pinned it to Pinterest. I have featured your project today on my blog. I would love for you to stop by!
Amanda
frillsandfrolic.blogspot.com
Kelly@imperfect homemaking says
These are so cute! And it is so clever to keep your baking, cooking, serving utensils seperate! Mine are all jumbled in one big container….your way is sooo much better! Good job.
Mandy @ Creekside Creations says
Those are great! I've been looking for something different to store my utensils in – thanks for sharing!
Leanne says
I love these. They turned out great. I'm hosting We're Organized Wdnesday through Saturday and would love for you to join the party.
April says
Cute I like these!
Amanda @ Ninth Street Notions says
These are absolutely fantastic! I would love to make these for my kitchen because my kitchen drawers are out of control. Come link up at I Made It! Monday at Ninth Street Notions.
The Treasurista says
The Treasurista said…
Hop on over to the Party! Would love for you to link-up @
http://thetreasurista.blogspot.com/p/treasuristas-thursday-treasures-come.html
The Treasurista
Finding and Creating FUN things…
Mrs Ergül says
Amanda, these are way too lovely! I have been inspired!!
Donnie says
They really came out great. Looks like you use your Silhouette machine a lot.
Kelli says
love these!!!
i just gave you an award on my blog check it out!
Lesley Stein says
I found your post from a linky party and just had to comment! These look fabulous :-)
I also love your white cabinets… I've been toying with the idea of painting mine since I have red walls- now I think it'll be on my project list.
The GruCru says
I'm so stealing this-I can't ever shut my utensil drawer. Thanks for posting. Tara
http://trophyw.blogspot.com/
Jill @ Blessings of a Lifetime says
Once again, what a clever girl you are! Love these!
Blessings, — Jill
blessingsofalifetime.blogspot.com
Gillian Mohlman says
SOOO CUTE! I love it! I love the labels on them. Just beautiful.
Gillian
kevinandgillian.blogspot.com
Tati M says
Awesome idea. Never thought about separating them utensils and label it. Even though I do use separate stuff for sweets and savory.
Thank you!
Michelle Cummings says
so glad i sopped by this morning! this solves my dilemma in my kitchen as I have a ever growing collection of whisks and now when I pull something out of the canister holding my kitchen tools, "everything" comes out!
thanks!
Lana @ Never Enough Thyme says
Amanda – I really love these! It's really unbelievable how clever you are.
Sugar Mama says
I love the look of those, simple and very well done. I use a Longagerbger basket to hold my utensils and I totally regret it as it's really taken a beating.
Found you from Tidy Mom
Amanda says
Thanks you guys! These fall into my "favorite projects" category :)
Shelby says
I need you to be my neighbor so I can have cool stuff.. LOL.
Deeba PAB says
Stunning…wish we had so much DIY here.
Gene says
Great idea to keep everything in reach,utensils can get out of hand this looks like a good way to have them handy ,Thanks for the Idea.
* The Design Confidential says
this is so cute! what a fab rehab of those darn beanie babies things!
Fuji Mama says
SO DARN CUTE! I love them!
marla says
Amanda, you are always soooo creative. These utensil boxes are very elegante!
Suzanne says
Most excellent idea and project. Functional and sooooo cute. Looks really great in your really great-looking kitchen! Love them!
Jessica says
Haha, Nutmeg Nanny said EXACTLY what I was going to! Thanks for the project idea! I really think we're going to do this.
Nutmeg Nanny says
I love love love this idea! I'm also loving your kitchen :)