Tie dye is totally cool, and it’s fun, but it’s messy and time consuming and requires quite a few steps. With tie dye you need to have hot water, a separate tub for each color if using Rit dye, and heat setting is required. Making tie dye shirts with multiple colors requires squirt bottles with separate colors and oh boy, what a mess! I assure you, the shirts you see pictured here were created with far less mess and didn’t require anything special. No rubber bands, no hot water, they don’t even require heat setting! All you need is the paint.
Several years ago, back in 2001, I wrote an article on how to make easy tie dye shirts using Rit dyes. They are easy, but messy. And if you are looking for a way to make tie dyed shirts with a group of kids, like for summer camp, then you are going to need a lot of tubs and dye. They will require heat setting and the kids won’t be able to wear their shirts until they are set and dry. However, the method I’m about to show you will produce a totally cool and colorful tie dye looking shirt in about 10 minutes and they only require 30 minutes of hanging dry time! Ready to get started?

Late last summer I received a Spray on Fabric Paint Kit from Simply Spray Fabric Paints. As time has a habit of doing, it got away from me. The kit sat on the shelf for months waiting patiently for me to try it out. I even stashed a couple of white t-shirts with the intentions of using the kit and giving it a go.

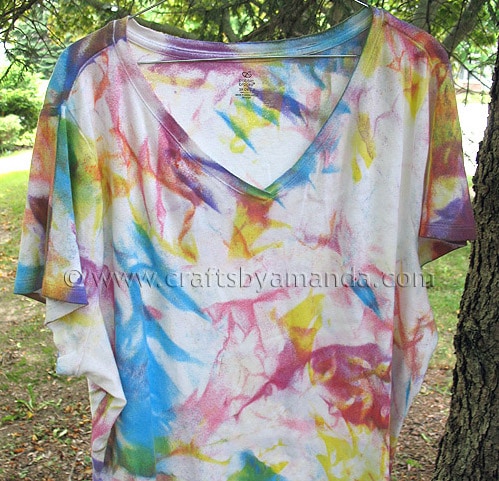
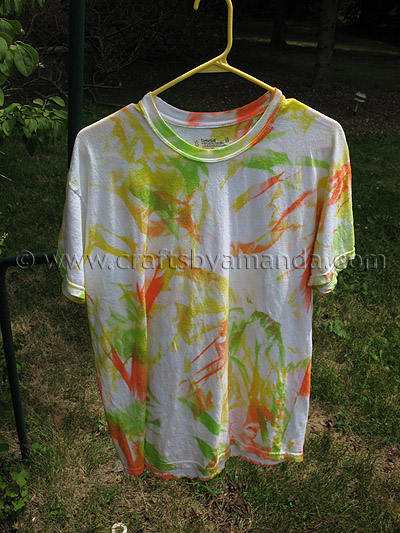
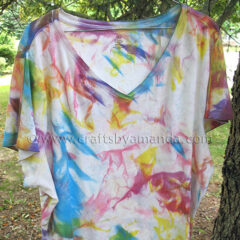
Recently I was wearing a white shirt and got a grease stain on it, right in the front. Gah! Instead of turning it into a dusting rag, I thought I would go ahead and give these paints a whirl. Needless to say I actually had a lot of fun and love my new shirt! Mine is pictured above, I wore it yesterday, 40 minutes after painting it. :)
I’ve seen these paints at Michael’s, so look for them next time you hit the craft store!
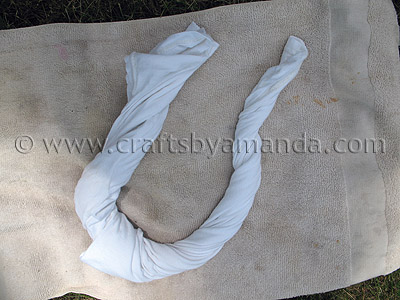
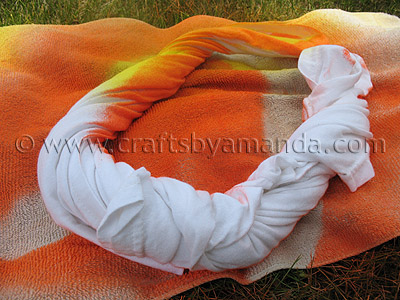
Start by placing an old towel, shower curtain, or dollar store tablecloth on the grass. Twist the shirt and lay it onto the covered surface.
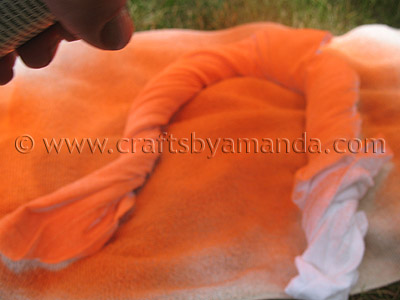
Shake the can and spray. To avoid that “overspray” spotted look, begin spraying on the towel and hold the trigger down moving over the shirt. Keep holding the trigger and don’t release until you are off the shirt again and on the towel. This way any overspray affect will be on the towel instead of your shirt.
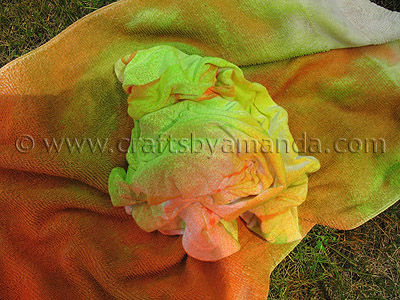
Turn the twisted shirt over and spray with a different color. I did the first side orange, then yellow on the other side.

You can twist sections of the shirt instead of the whole thing. In this step, I opened the shirt and grabbed areas of the shirt and twisted just that area.

Keep opening the shirt up to see your progress. You’ll actually be quite surprised at how much white is still showing! Here I used the “scrunch method”. Simply wad the shirt up as if it were a piece of paper you were throwing away. Scrunch it with your fingers, then spray. Spray with one or several colors. Experiment!
You can see I scrunched here and sprayed with 3 different colors.
Now open up the shirt and put it on a hanger. Let it air dry for 30 minutes.

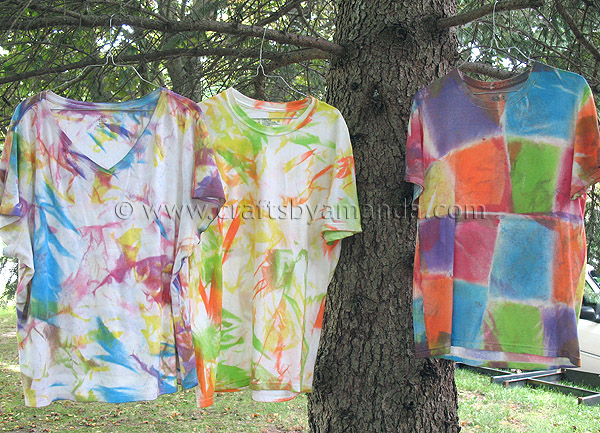
To create the patchwork look, fold the shirt up into a square. Spray.
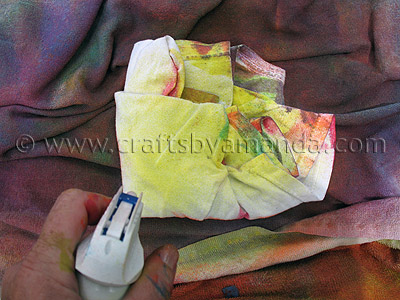
Turn over and spray with a different color. Open, fold, spray, open, fold, spray. Just keep going until you’ve covered the entire shirt!

Hang for 30 minutes. You’ll want to wait 72 hours before washing your painted shirts.

There. Wasn’t that easy?? The paint does get all over your hands, but it washes right off with soap and water. I did notice that it stained my fingernails. I had nail polish on, so I’m not sure if that was the reason, but after my shower the paint was all gone from my fingernails.
This would be a great way to do a lot of shirts at once. The package says the kit can make over 24 shirts, though I would assume that’s with using light coats of paint. I would say the way I used them it would be more like 8-10 shirts. A perfect summer camp project!
More Tie Dye Shirts
Fabric Painted Tie Dye Shirts
Supplies
- old towel shower curtain or tablecloth
- Simply Spray Fabric Paints
- shirt
- hanger
Instructions
- Start by placing an old towel, shower curtain, or dollar store tablecloth on the grass. Twist the shirt and lay it onto the covered surface.
- Shake the can and spray. To avoid that “overspray” spotted look, begin spraying on the towel and hold the trigger down moving over the shirt. Keep holding the trigger and don’t release until you are off the shirt again and on the towel. This way any overspray affect will be on the towel instead of your shirt.
- Turn the twisted shirt over and spray with a different color. I did the first side orange, then yellow on the other side.
- You can twist sections of the shirt instead of the whole thing. In this step, I opened the shirt and grabbed areas of the shirt and twisted just that area.
- Keep opening the shirt up to see your progress. You’ll actually be quite surprised at how much white is still showing! Here I used the “scrunch method”. Simply wad the shirt up as if it were a piece of paper you were throwing away. Scrunch it with your fingers, then spray. Spray with one or several colors. Experiment!
- You can see I scrunched here and sprayed with 3 different colors.
- Now open up the shirt and put it on a hanger. Let it air dry for 30 minutes.
- To create the patchwork look, fold the shirt up into a square. Spray.
- Turn over and spray with a different color. Open, fold, spray, open, fold, spray. Just keep going until you’ve covered the entire shirt!
- Hang for 30 minutes. You’ll want to wait 72 hours before washing your painted shirts.

Did you enjoy this post? Why not subscribe to my feed, or better yet, to my free newsletter – Foodie in the Craftroom, which provides not only crafts but recipes from my other blog, Amanda’s Cookin’ as well!
- Swirling Twirling Ladybugs - July 21, 2026
- Drip Tie Dye Backpack - July 17, 2026
- Mini Coastal Clay Houses - July 14, 2026


david reizian says
amanda thank you very much for your wonderful blog
david
owner and inventor of simply spray
Sonny says
Does the shirt have to be wet
Jeanella says
p.s. I have saved my mom’s box clutch purse with wrist chain tucked inside. Light aqua color, a type of smooth taffeta (or similar) fabric. It has a slight water stain on it. I just might first practice spraying this dye on a similar plain fabric. Then I’ll use it on the clutch. It’s worth a try, as I cannot use the clutch the way it looks now, anyway.
Jeanella says
For a long, long time (many, many years), I’ve been wishing that fabric dying wouldn’t have to require hot water! That’s why I haven’t tried it yet. Thank you for alerting us to this wonderful spray dye. Off to Michael’s I go……….
Amanda Formaro says
I hope you have fun Jeanella, would love to hear how your project turns out!
Amanda says
it's totally soft, just like part of the shirt, can't even tell! :)
Sonia says
This is a great idea for a fun faux tie-dye! Does the paint dry hard? Or does it feel as soft as the tshirt once it's all done?
Carolyn says
Tie dying has been a long time favourite with kids. Your tutorial is excellent and your finished products look fantastic. Thanks for posting.
Ginger@gingersnapcrafts says
Following you from Someday Crafts. Would love to have you link this up at my {wow me} wednesday link up party going on right now. :)
Ginger
gingersnapcrafts.blogspot.com
Maggie says
this is really kewl…
Don't forget to add it to our weekly party for our readers to discover.
http://www.passionatelyartistic.com/2011/07/weekly-talent-search-with-linking-party.html
Thanks
Maggie
andie jaye says
ha! just had a project fail over this… the post is here http://crayonfreckles.blogspot.com/2011/07/project-food-coloring-tie-dye-fail.html
i'm going to add this link onto it to show people how to do it the right way. i'm a new follower of yours too!
also, i would love it if you would link this up to my tiptoe thru tuesday party (open until friday)
Confessions of a Stay at Home Mommy says
This looks so fun! I would love it if you would link up to my Tuesday Confessional link party going on now: http://www.craftyconfessions.com/2011/07/tuesday-confessional-link-up-2.html. I hope to see you soon!
~Macy from Confessions of a SAHM
RedTedArt says
Ooooh what a fabulous project for the summer holidays!
Thank you again sharing on Red Ted Art!
Maggy
ShannonSews says
What a great way to bring some color in! Cute idea!!
Tami says
I had no idea that there was such a product. We (2nd grade class moms) were going to do tie dye shirts with our second graders last year so that they could wear them for their field days but we scrapped the idea because of the mess of tie dying. Now I can bring up this idea again.
Thanks, Amanda! I love your shirts!!
vivisue says
Love, love, love all of these! What a great job! Now it's time to play a few tunes from "Chicago" and "The Eagles" and I need to get my '68 Mustang out makin' "the drag". . . LOL! I'm just an old hippy. :D
Kim B says
I love the tie dye shirts!! Looks like fun.
Melissa @ The Chocolate Muffin Tree says
Love these! Thanks for sharing!
gail says
cool beans amanda! I love the look of tye dye! :)
glad you stained your shirt! hahaha
I sure do hope you have had a great holiday weekend!
gail