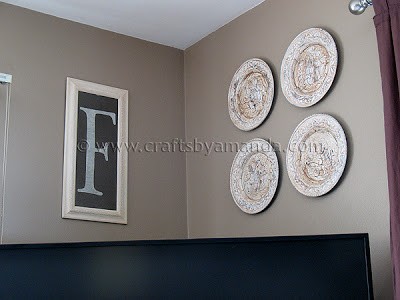

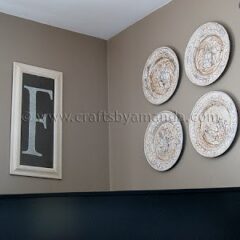
I needed one more thing to hang on my living room wall. There was one empty spot above our television that needed a little something. Our walls are a darker mocha color, so whatever I decided to put there would need to be a contrasting light color. I took an old framed flower picture, some hammered spray paint, and a little Mod Podged fabric to make this framed monogram.

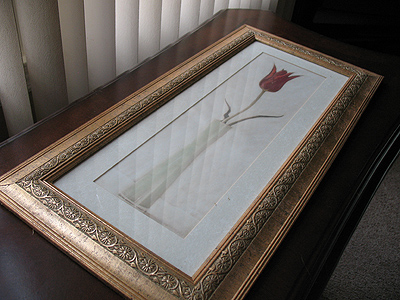
The framed flower actually has a mate. So I have one more of these to use on another project, probably for the bathroom. :) Here’s a before shot of the framed picture.
I removed the glass from the frame and used a piece of fine grit sandpaper across the surface to rough it up a bit. Then I gave the glass a coat of Rustoleum’s hammered brown spray paint![]() and left it to dry.
and left it to dry.

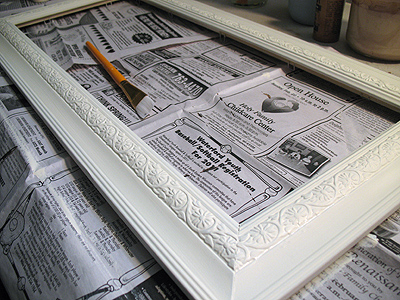
While the glass was drying, I gave the frame a coat of Krylon’s white primer![]() and then painted the primed frame with a coat of Vintage White
and then painted the primed frame with a coat of Vintage White![]() .
.
I chose some light colored fabric, originally from a tablecloth that I used to make some curtains for my backdoor, and cut enough for my monogram letter. I placed the fabric onto waxed paper and painted the fabric with Mod Podge to prep it. Doing this keeps the fabric from fraying when you cut out your letter.

While everything was drying I made the pattern for my letter F. I chose the font I wanted, enlarged it on the copier, then printed off an extra copy. In order to make the F long and tall to match the frame, I cut sections of one F printout and pieced them together with tape. Then I cut the letter out.

Now it was time for another coat of hammered spray paint on the glass.
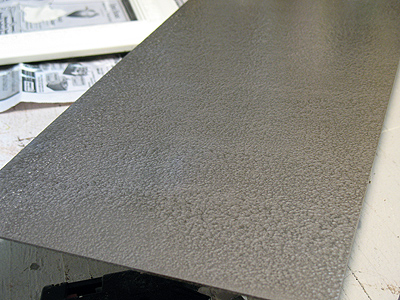
See the cool effect that the hammered paint gives? I’m not sure the photo is really doing it justice.
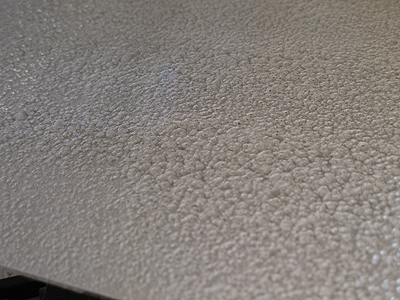
When you look at the finished frame, the glass looks like tin!
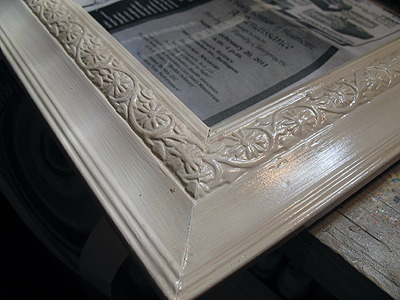
I added a small amount of dark brown paint to some glazing medium![]() and glazed the frame. When that was dry, I finished it with an acrylic sealer spray
and glazed the frame. When that was dry, I finished it with an acrylic sealer spray![]() .
.
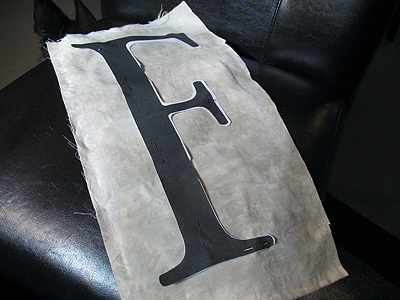
I pinned my “F” pattern to the dry Mod Podged fabric and cut out the letter.

In order to position the F properly in the frame I placed the painted glass back into the frame first and then placed the letter onto it. I used Mod Podge to attach the letter to the glass, only applying Mod Podge to the back of the fabric letter.
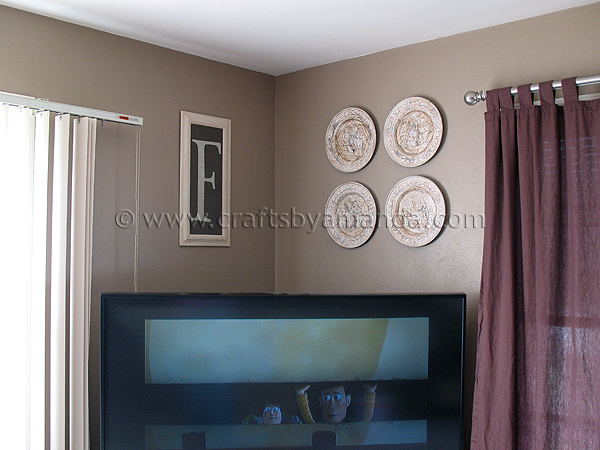
I placed the original backing back into the frame behind the glass and it was all done!


Framed Monogram
Supplies
- Old Framed Picture
- Hammered Spray Paint
- Mod Podge
- Fine Grit Sandpaper
- Kylon’s White Primer
- Vintage White Paint
- colored fabric
- waxed paper
- Letter in appropriate Font
- Dark Brown Paint
- Glazing Medium
- Acrylic Sealer Spray
Instructions
- I removed the glass from the frame and used a piece of fine grit sandpaper across the surface to rough it up a bit. Then I gave the glass a coat of Rustoleum’s hammered brown spray paint and left it to dry.
- While the glass was drying, I gave the frame a coat of Krylon’s white primer and then painted the primed frame with a coat of Vintage White.
- I chose some light colored fabric, originally from a tablecloth that I used to make some curtains for my backdoor, and cut enough for my monogram letter. I placed the fabric onto waxed paper and painted the fabric with Mod Podge to prep it.
- While everything was drying I made the pattern for my letter F. I chose the font I wanted, enlarged it on the copier, then printed off an extra copy. In order to make the F long and tall to match the frame, I cut sections of one F printout and pieced them together with tape. Then I cut the letter out.
- Now it was time for another coat of hammered spray paint on the glass.
- I added a small amount of dark brown paint to some glazing medium and glazed the frame. When that was dry, I finished it with an acrylic sealer spray.
- I pinned my “F” pattern to the dry Mod Podged fabric and cut out the letter.
- In order to position the F properly in the frame I placed the painted glass back into the frame first and then placed the letter onto it. I used Mod Podge to attach the letter to the glass, only applying Mod Podge to the back of the fabric letter.
- I placed the original backing back into the frame behind the glass and it was all done!

Did you enjoy this post? Why not subscribe to my feed, or better yet, to my free newsletter – Foodie in the Craftroom, which provides not only crafts but recipes from my other blog, Amanda’s Cookin’ as well!
- Swirling Twirling Ladybugs - July 21, 2026
- Drip Tie Dye Backpack - July 17, 2026
- Mini Coastal Clay Houses - July 14, 2026


Jenni says
Hi there, I just launched a Rust-Oleum Linky and would love it if you would add this. No hoops or rules just a little linky for Rust-Oleum Lovers.
You can find it here:
http://kissedbyafrog.blogspot.com/p/rust-oleum-craft-project-parade-linky.html
Hope to see you there!
Hugs~
Jenni
Amanda Formaro says
Thanks for the invitation Jenni, I’ll come check it out ;)
Deeba PAB says
You are the best!! This is too cool! Wow!
Amanda K @ Every Crafty Endeavor says
I love Monogramed stuff – you can't ever go wrong and yours turned out so cute!
I am having an "every crafty blog" linky party and would love for you to come and join!
Amanda says
@moneysaving – I'll be posting the plate project this week as well! :)
Leidi Bird says
Very Nice!
moneysavingenthusiast says
I want to know about the dishes too on the right side!
Is there a way to subscribe to the comments? I'm at [email protected]
moneysavingenthusiast says
This is gorgeous! I can't wait to try this!
Natalia Lynn says
I love this, what a great idea! I am loving redone frames and monograms, super cute!
tales from an oc cottage says
What a great look!
m ^..^
Gwen @ Gwenny Penny says
That hammered paint is awesome! Really neat idea to use fabric for the monogram, Amanda. This looks really classy.
Patti Royster says
I love your idea! that is so very cool! I wonder if you could hammer paint over corkboard? I need a buletin board for my desk but want something different….
great idea! thanks so much! :)
Lillian Pearl Designs says
Wow great idea! Thanks for the wonderful tutorial!
[email protected] says
What a smart way to do the letter, I love your creativity! Thanks for the great project, I'll be linking.
Rust-Oleum says
Amanda,
What a great project! It looks so fun and trendy. Thank you so much for using Rust-Oleum and keep up the great work with your projects.
Also, we love your project so much, that we're going to post it as our project of the day tomorrow on our Paint Ideas Facebook page.
facebook.com/paintideas
– Rust-Oleum Scott
Katrina says
You're good. Lettering is so IN right now, I've noticed.
[email protected] says
whoa! I like the way the glass looks like tin!
super job amanda!
gail
Tami says
I love it! I've used the hammered paint before and love it, too. I can't wait to move so that I can try so many of your craft projects.
Karen says
That is so cool! I have a frame about that size and I wasn't quite sure what to do with it. Thanks for the idea!!
http://www.karismaheartsavannah.blogspot.com
Denise * KKL Primitives says
WOW – love it Amanda!! Isn't that hammered paint the best! My hubby used it to paint an old jukebox side years ago and it turned out really nice.
abuenin says
Amanda, Thanks for the tut! It is amazing what you come up with YOU ROCK!!! Who would of ever thought of spray painting the glass????? You have opened a world of possibilities for me!!! Again THANKS!!!!!!!!!!
Blessings,
Ninfa