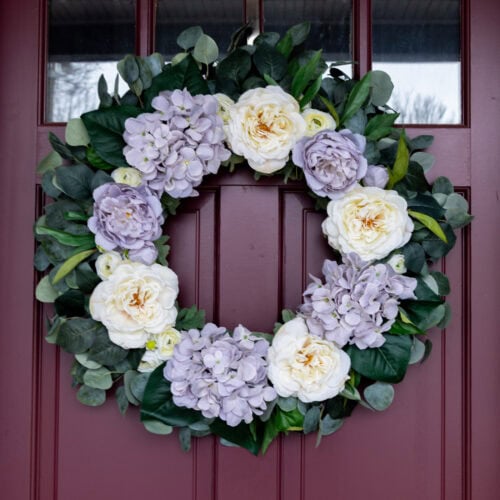

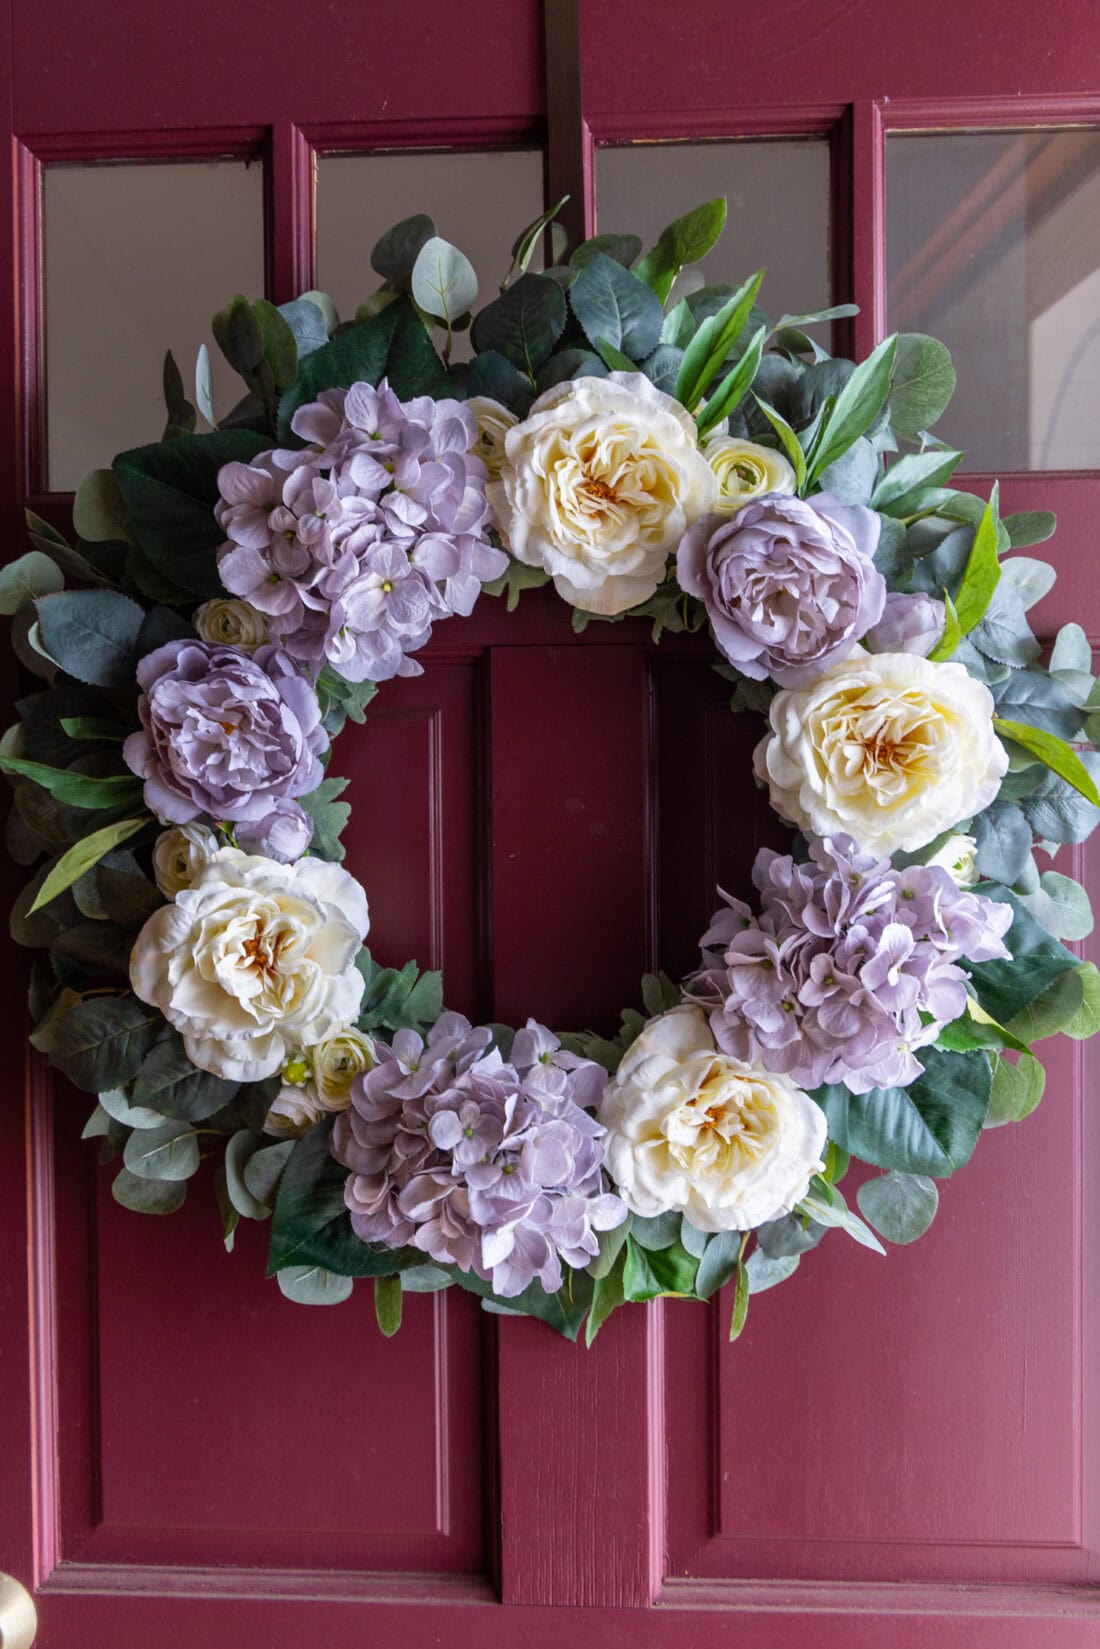
Add a touch of summer charm to your front door with an easy homemade hydrangea wreath using faux flowers.
Why we love this project
Real flower hydrangea wreaths are gorgeous, but they run a hefty price tag. Making your own DIY hydrangea wreath is not only easy but you can display it on your door year after year without worrying about the precious dried petals blowing away in the wind.
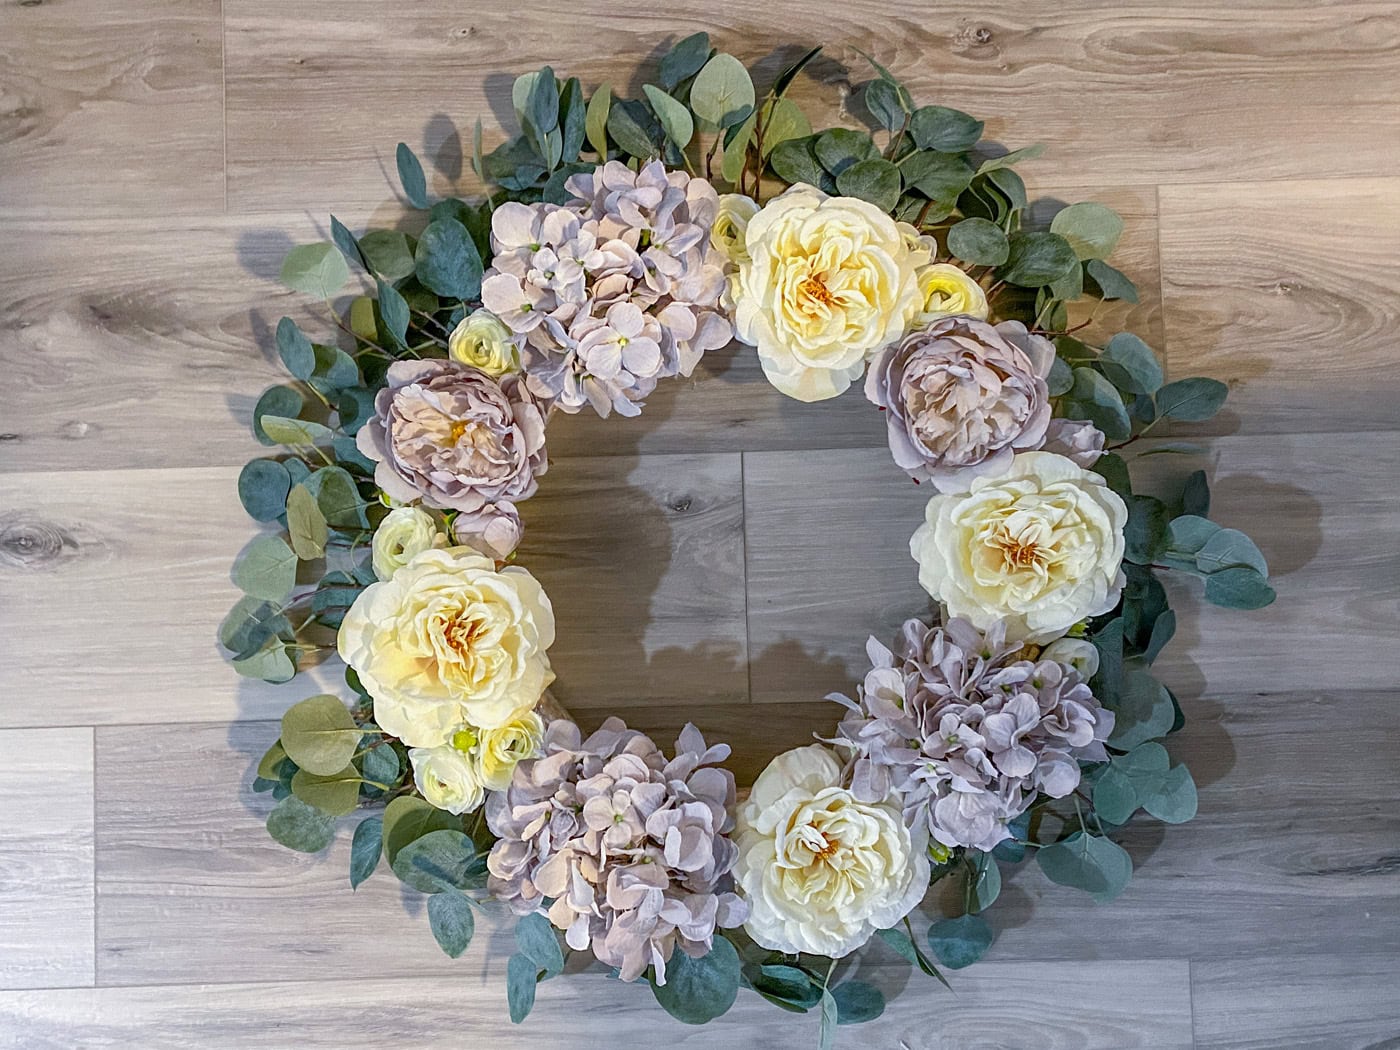
Hydrangeas and peonies are two of my favorite flowers with their large, vibrant heads dotted with different hues. Once summer rolls around it’s time to switch out my spring forsythia wreath for a new showstopper to help welcome in the warmer season. I saw this beautiful wreath and it gave me the inspiration to make it on my own and share it with you!
Helpful Project Information:
- Age Level: Adult
- Mess Factor: Medium
- Level of Difficulty: Fairly easy
- Time to Complete: 1-2 hours
- Cost Estimate: Around $30 or so depending on the supplies you have on hand.
Craft supplies you will need
Get the full list of supplies and directions in the printable version at the end of this post.
- 18-inch straw wreath
- Floral wire
- Silk hydrangeas
- Silk peonies
- Silk leaves
How to Make a Hydrangea Wreath
These step by step photos and instructions are here to help you visualize how to make this project. Please scroll down to simply print out the instructions!
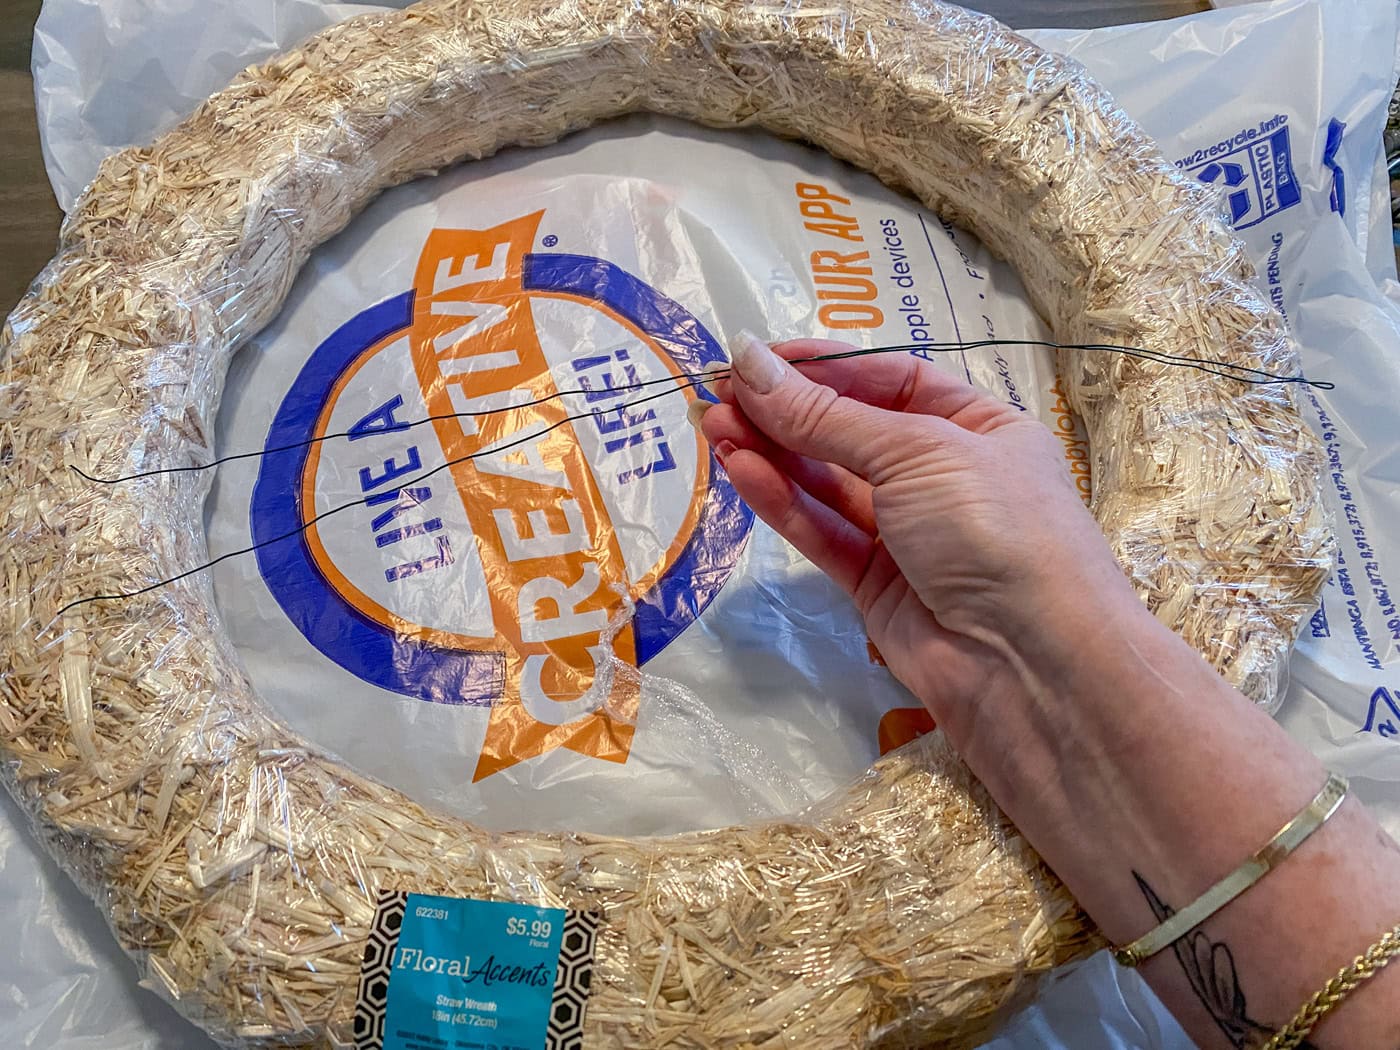
- Leave the plastic wrapping on the wreath form if it has one. This will keep any stray pieces of straw from shedding off.
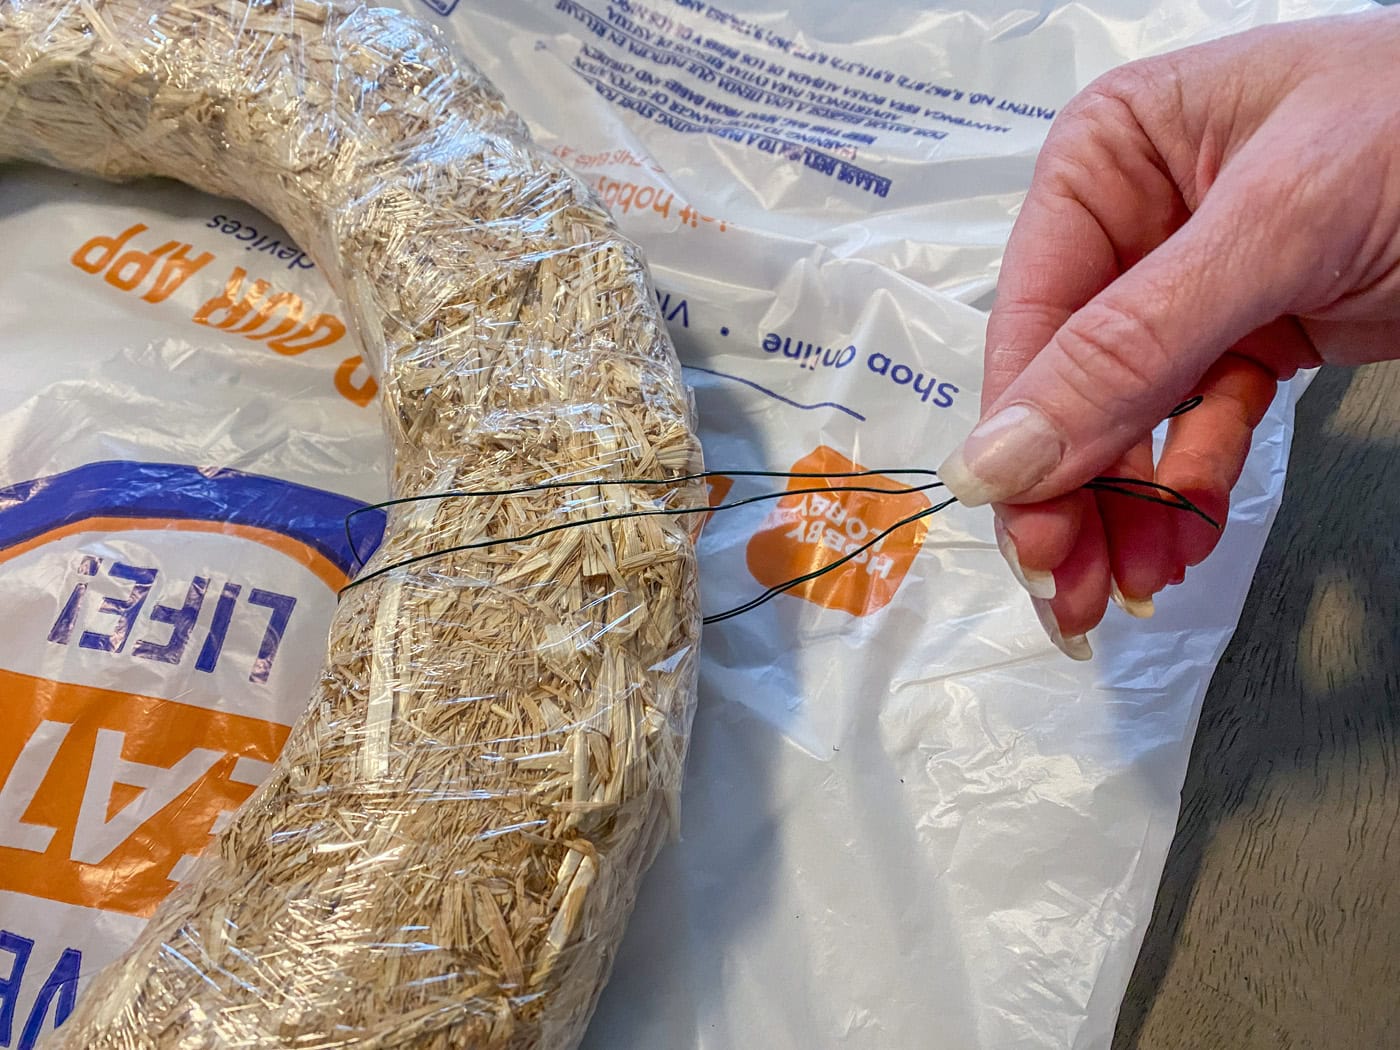
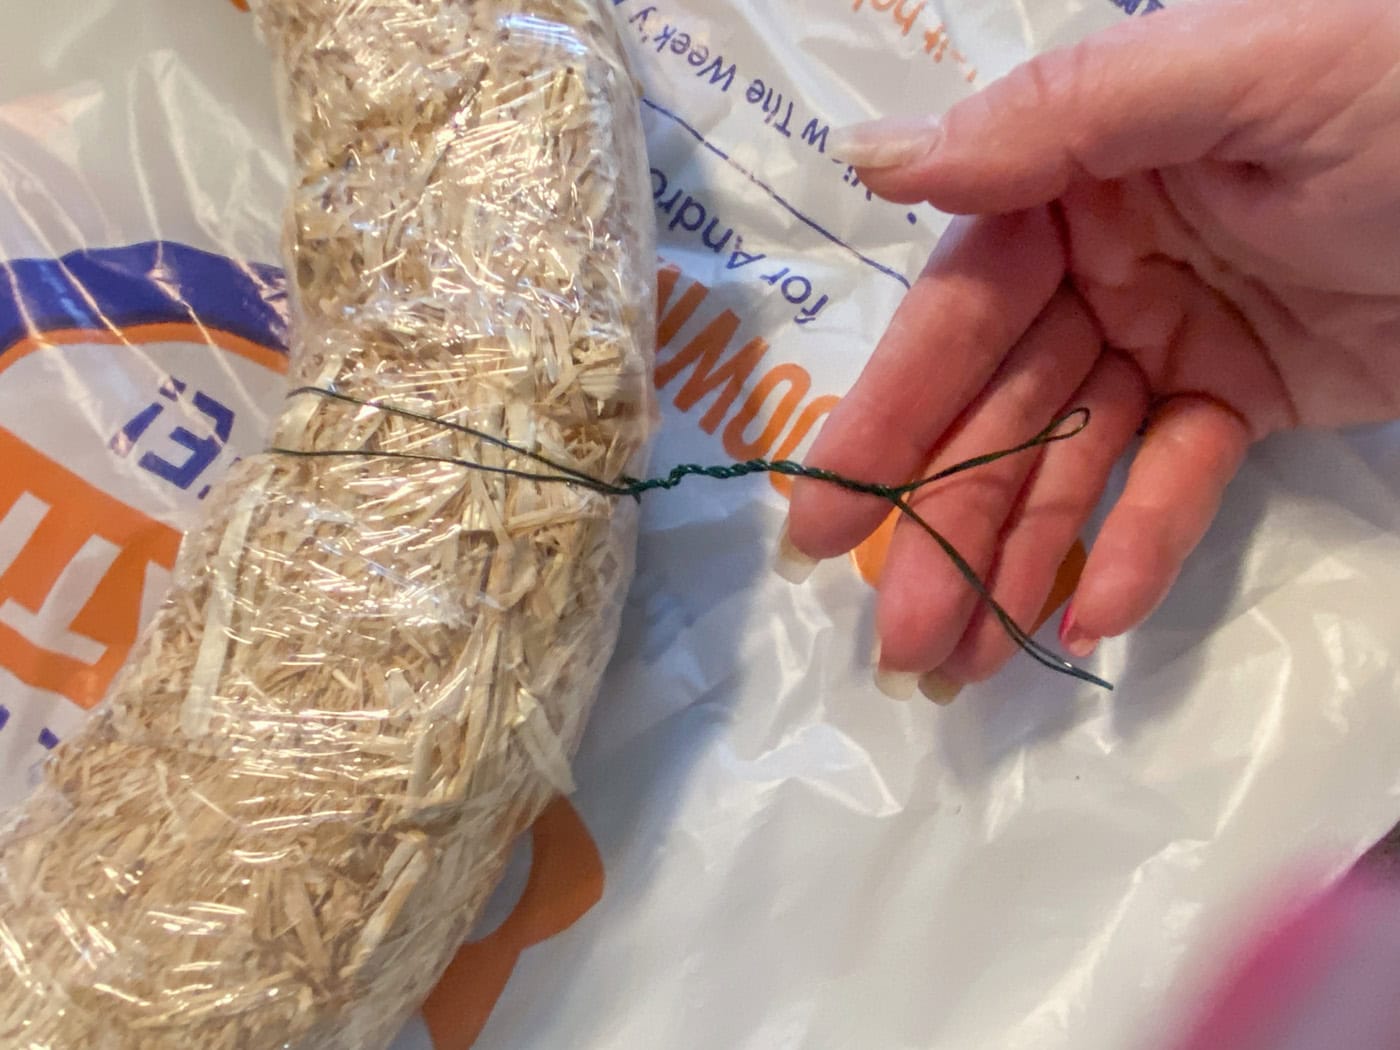
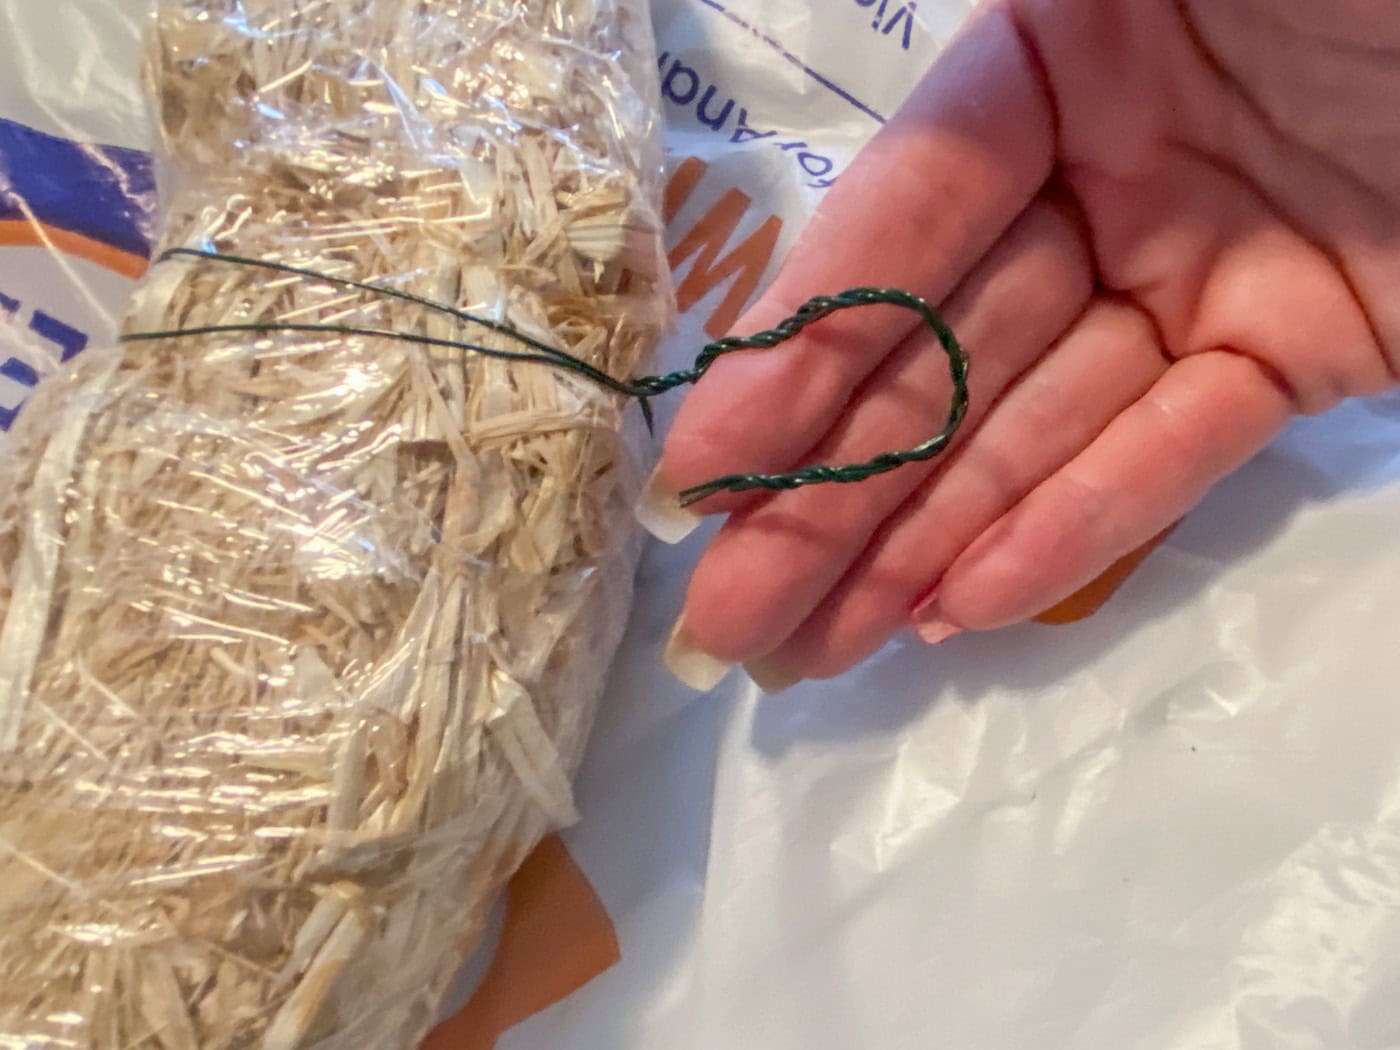
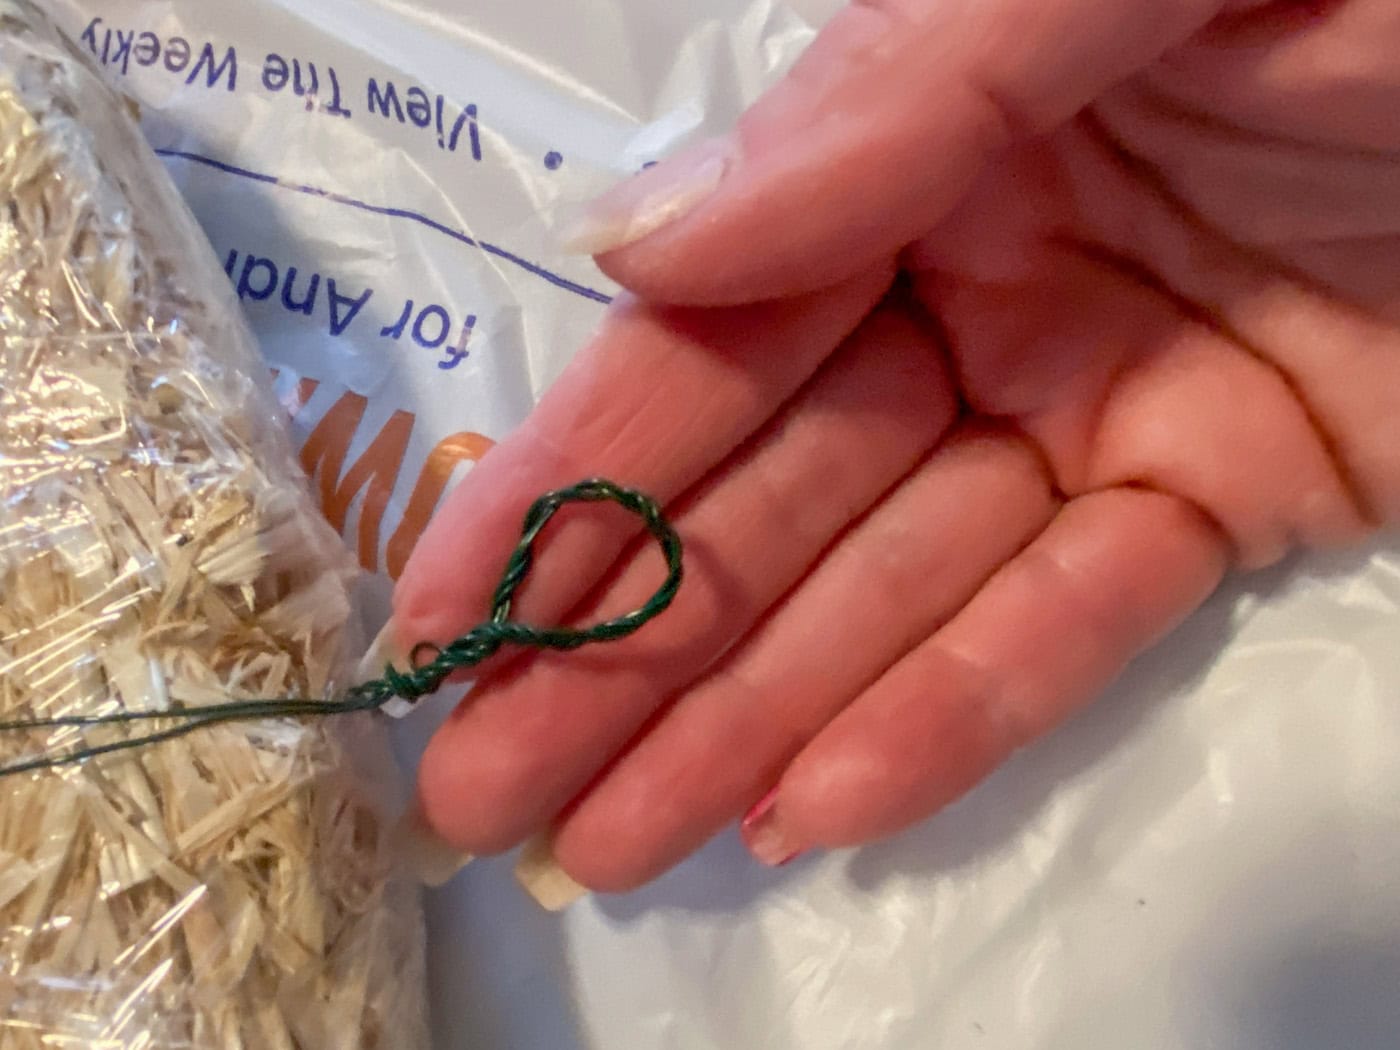
- Cut a piece of floral wire 36 inches long. Fold the wire in half. Fold the wire around the wreath, joining the two ends together and twisting all the way to the end.

- Bend the end of the twisted wire into a loop and twist together at the bottom to close the loop and secure. This will be your hanger.
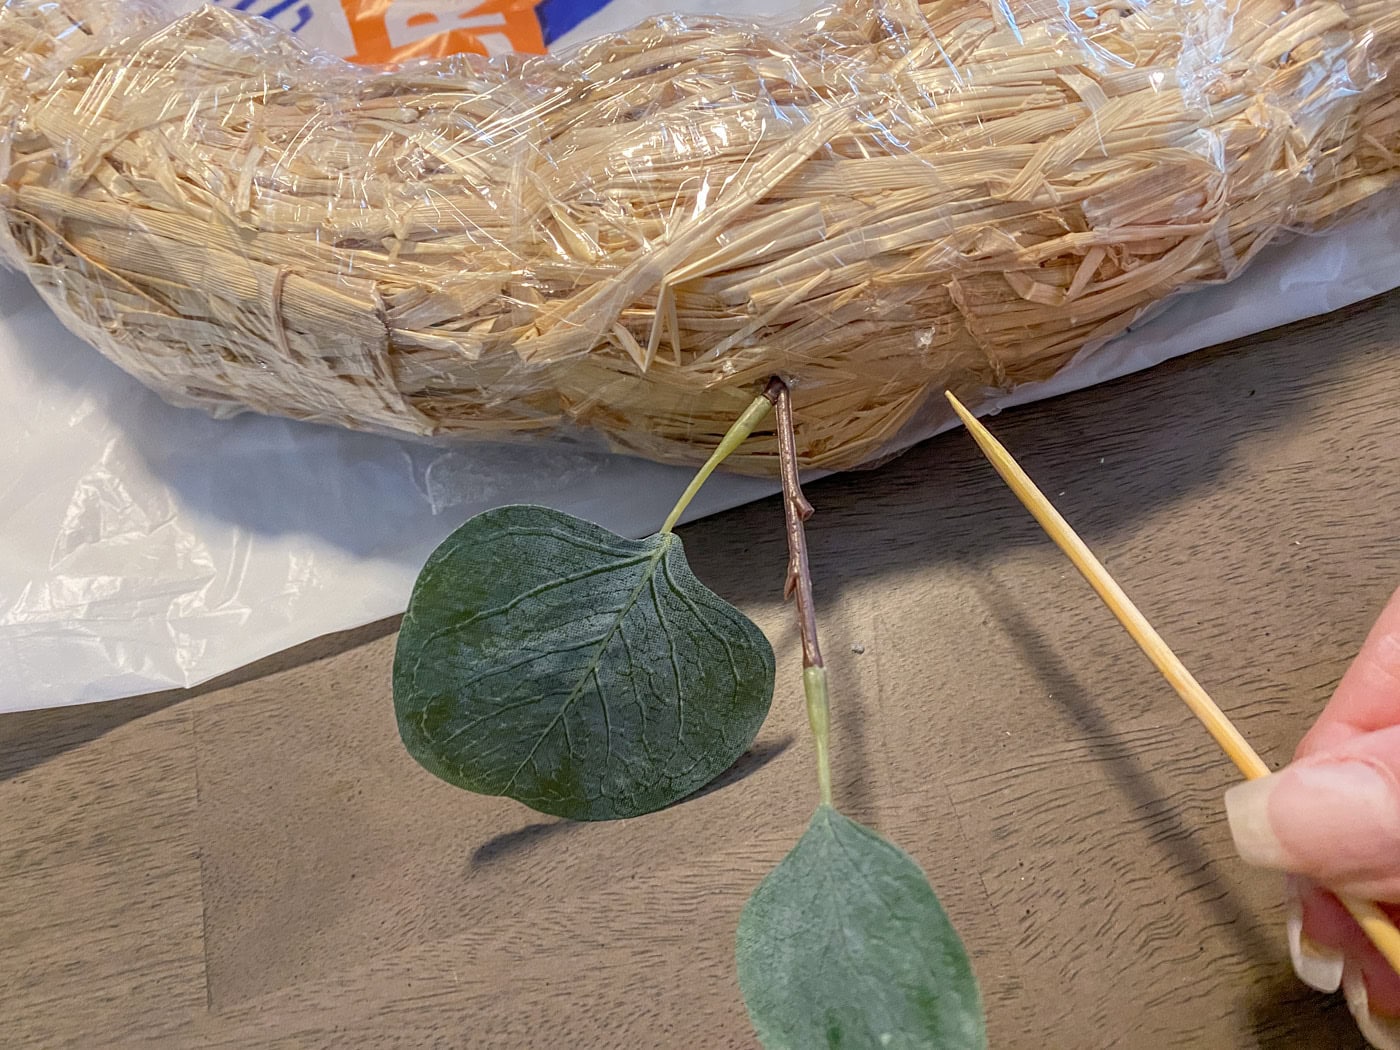
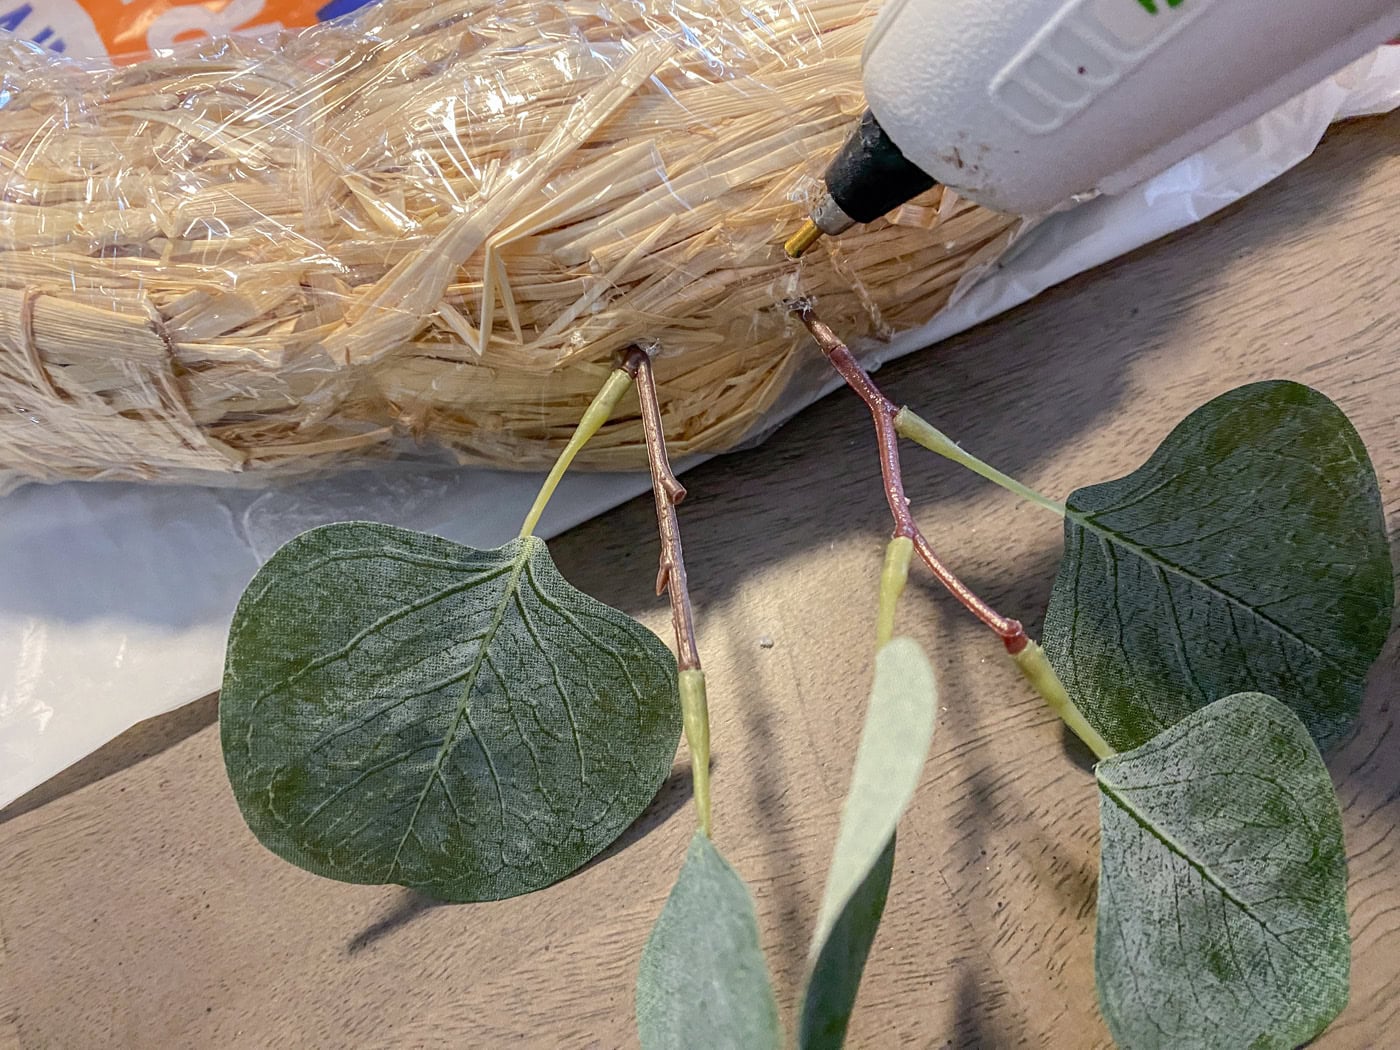
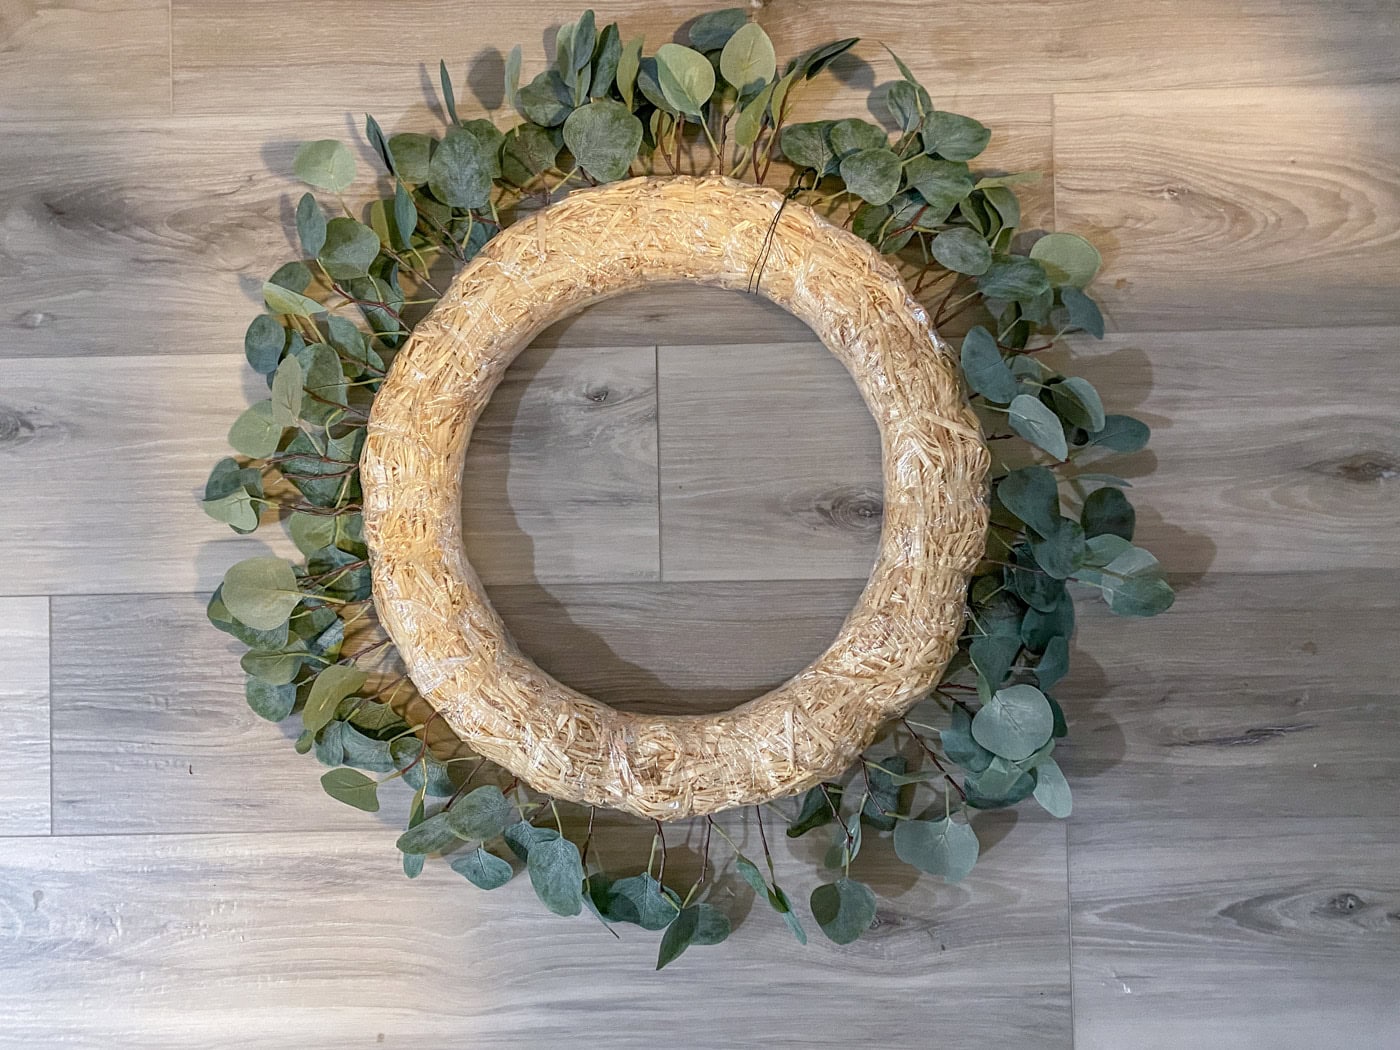
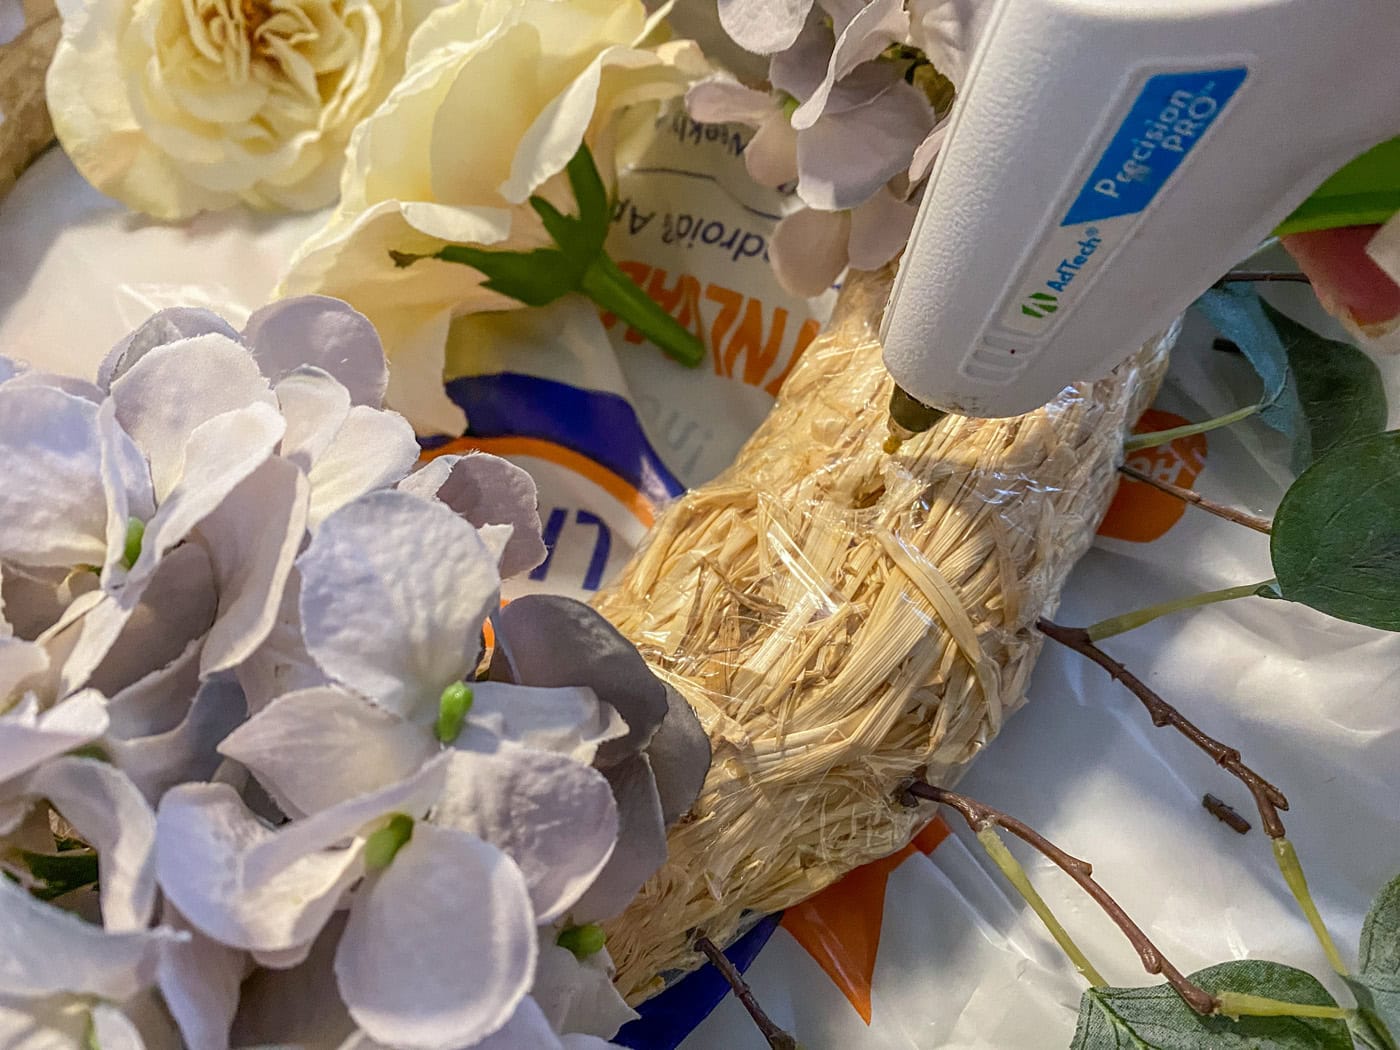
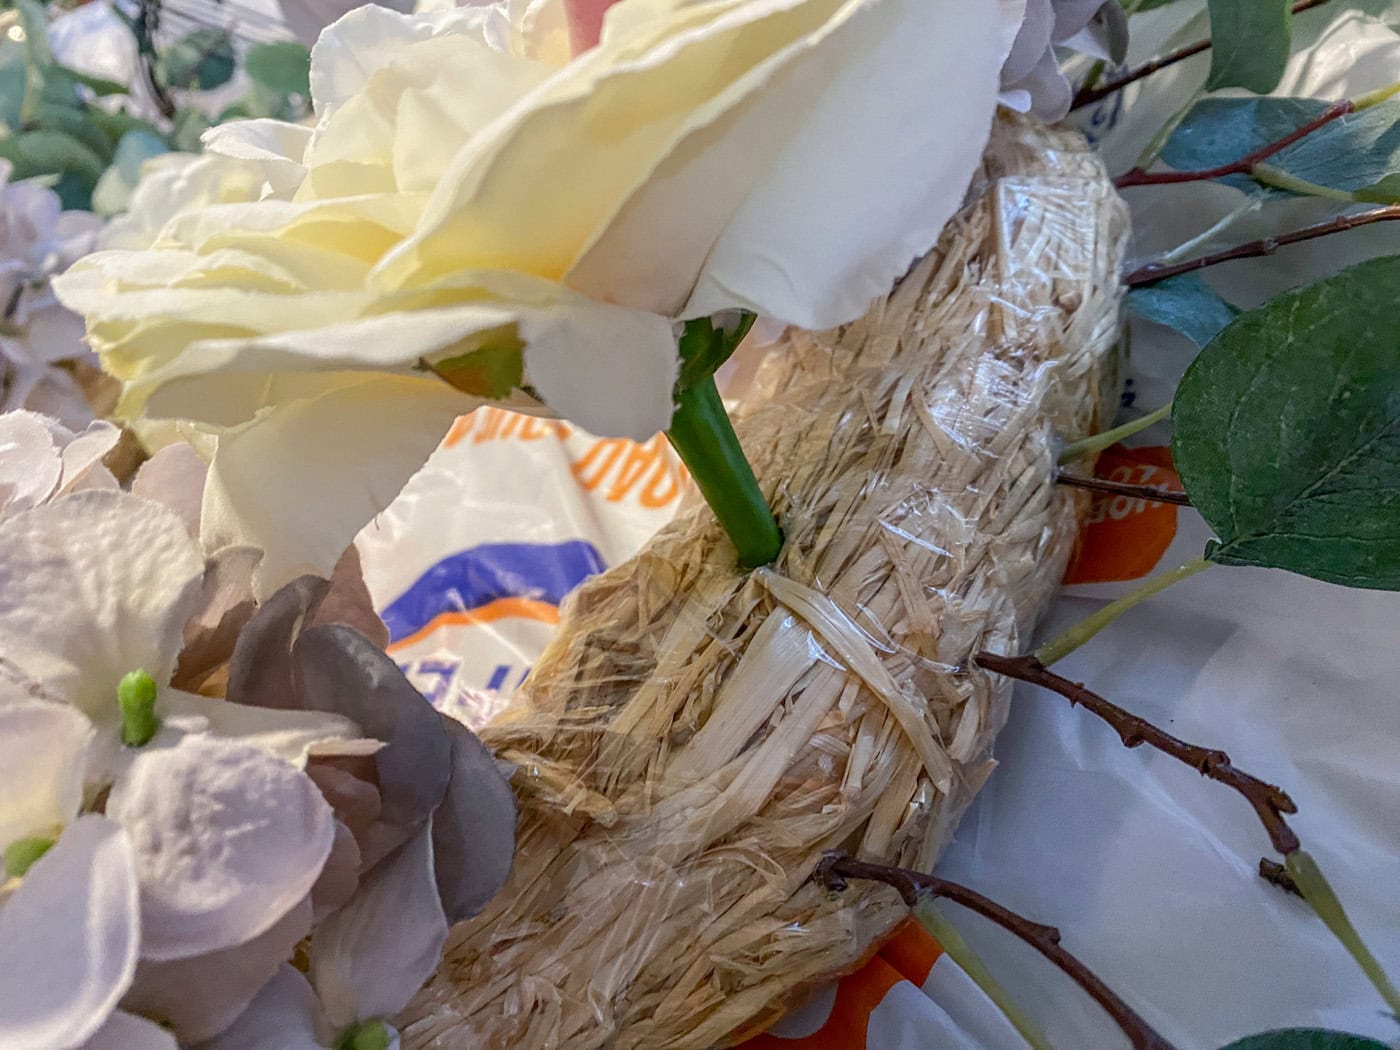
- Use a skewer to poke holes into the outside of the wreath. After creating a hole, insert stems with leaves into the holes. Secure with a little hot glue. Continue until you have a full line of leaves going around the wreath form.
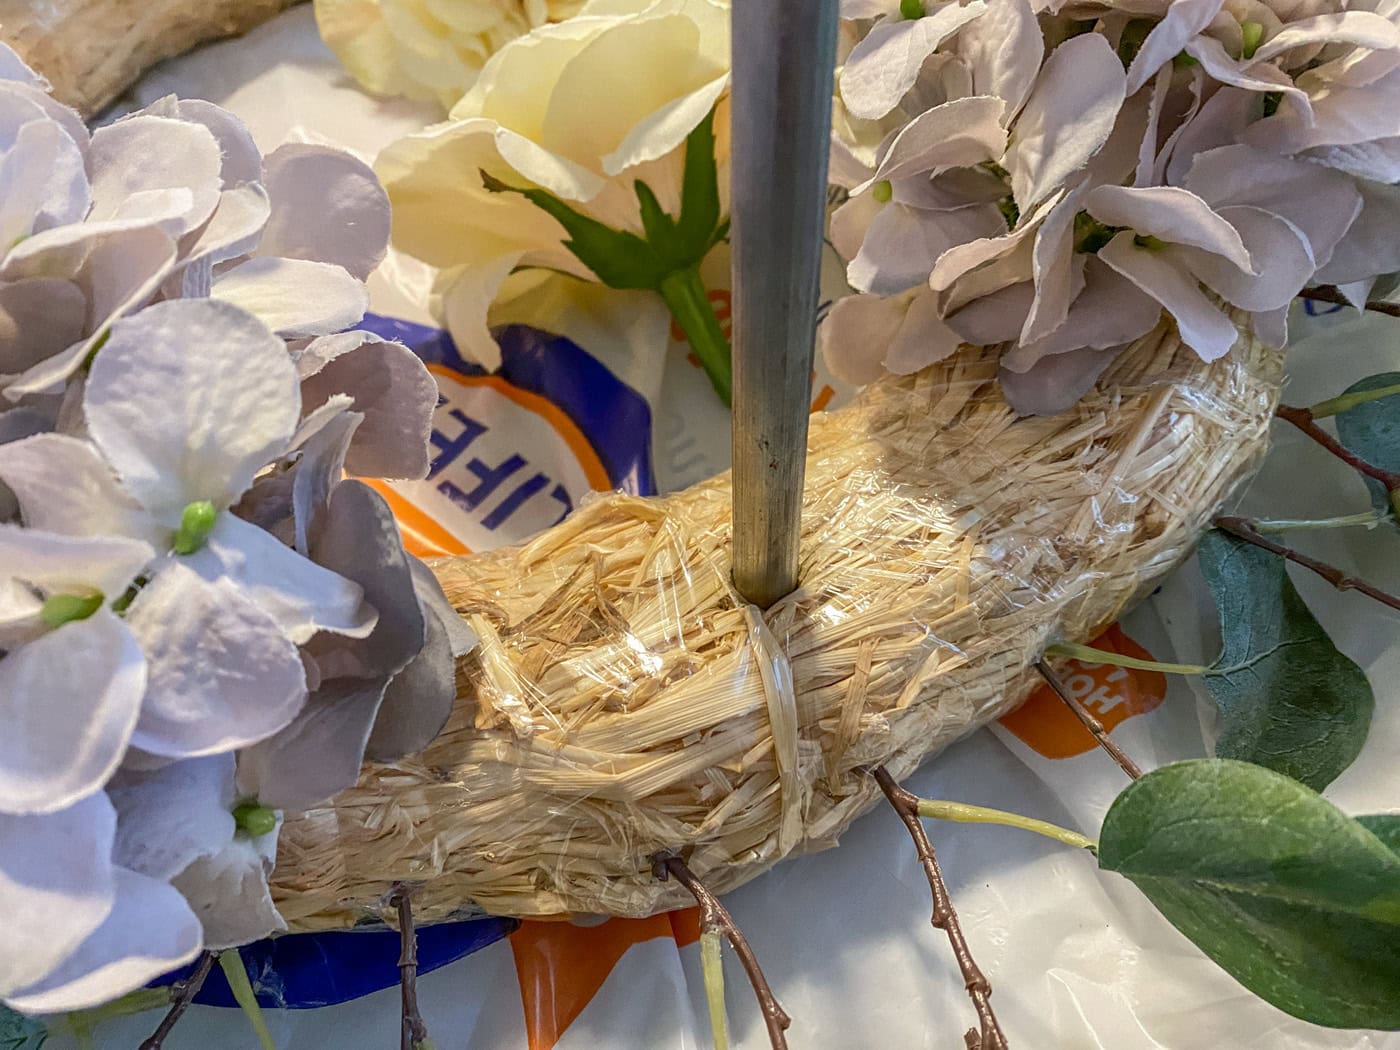
- Place wreath form face up on the work surface. Use a honing rod if you have one (they are steel and will go through the wreath easier) to poke a hole in the front side of the wreath.
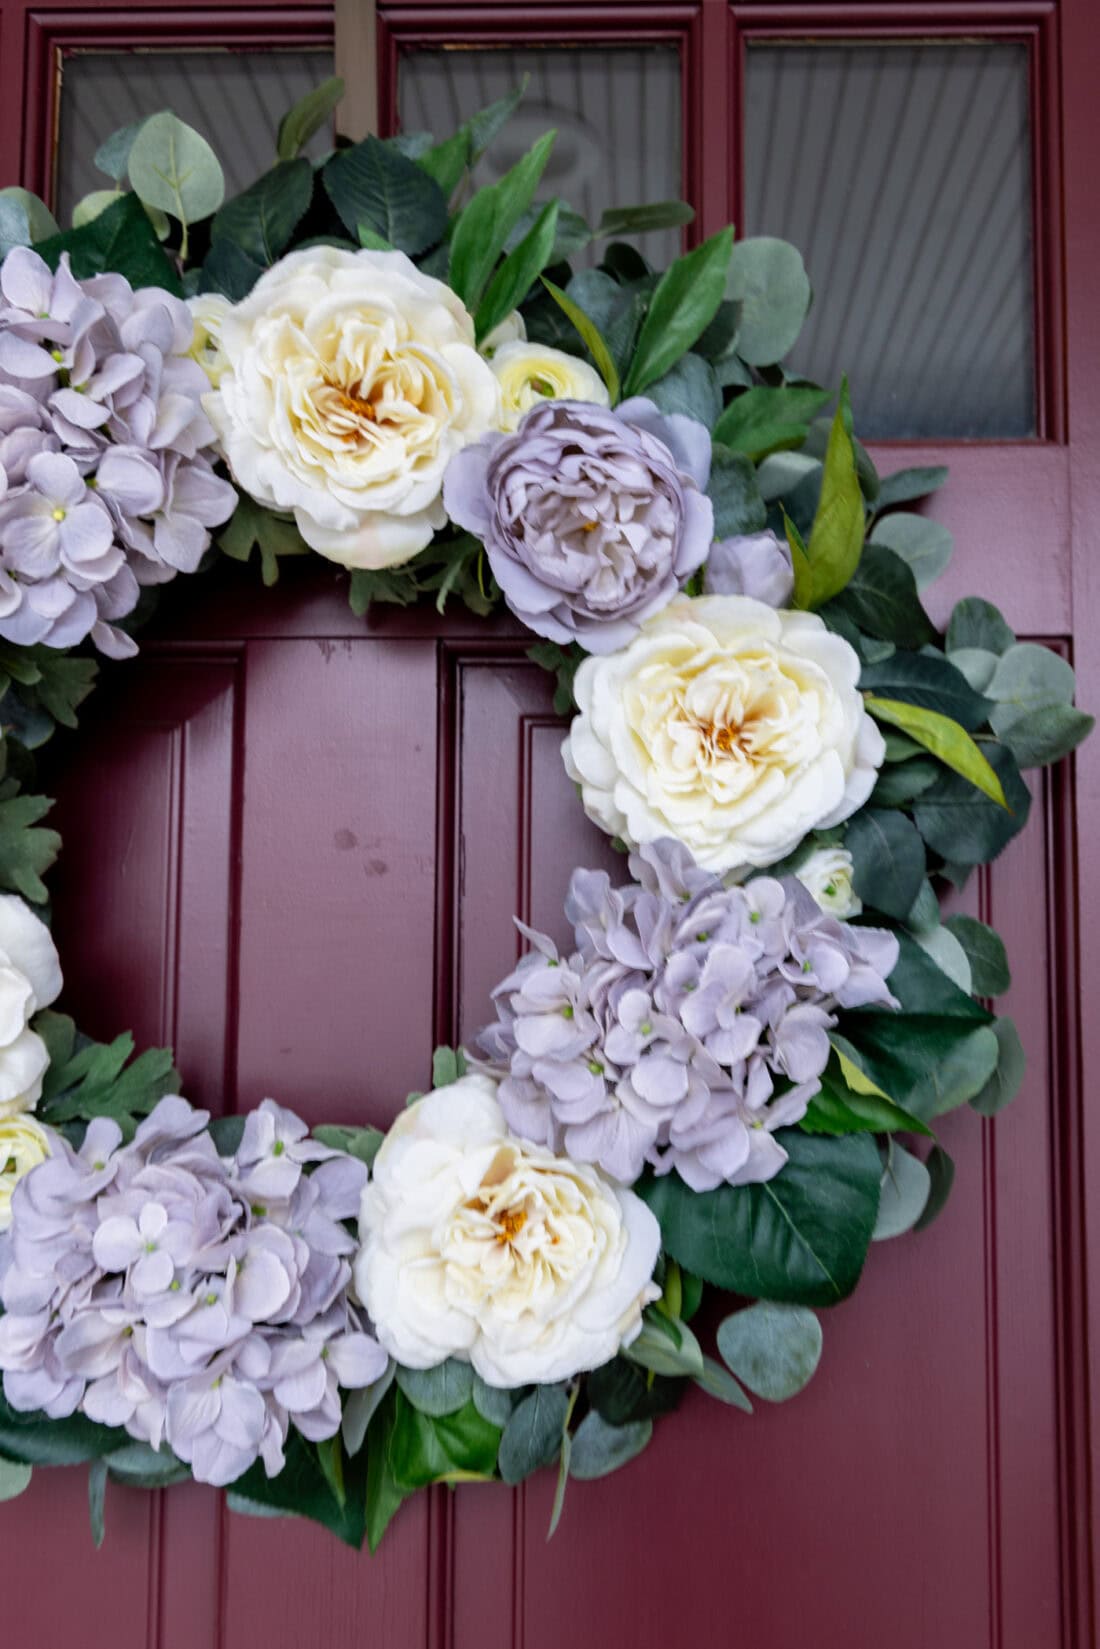
- Squeeze some hot glue into the hole and immediately push the stem of the hydrangea into the hole. Repeat this process for the peonies, alternating the two types of flowers until complete.
- Finish off by filling in any gaps with smaller peonies and leaves.

Expert Crafting Tips
- Mix and match the faux flowers in the colors of your choice for a personal touch.
- You can use a foam, grapevine, or wire wreath form instead of the straw if you wish. However, these instructions are for a straw wreath so you will have to adjust your method for different forms.
- Optionally add a tied ribbon for a little extra flair.
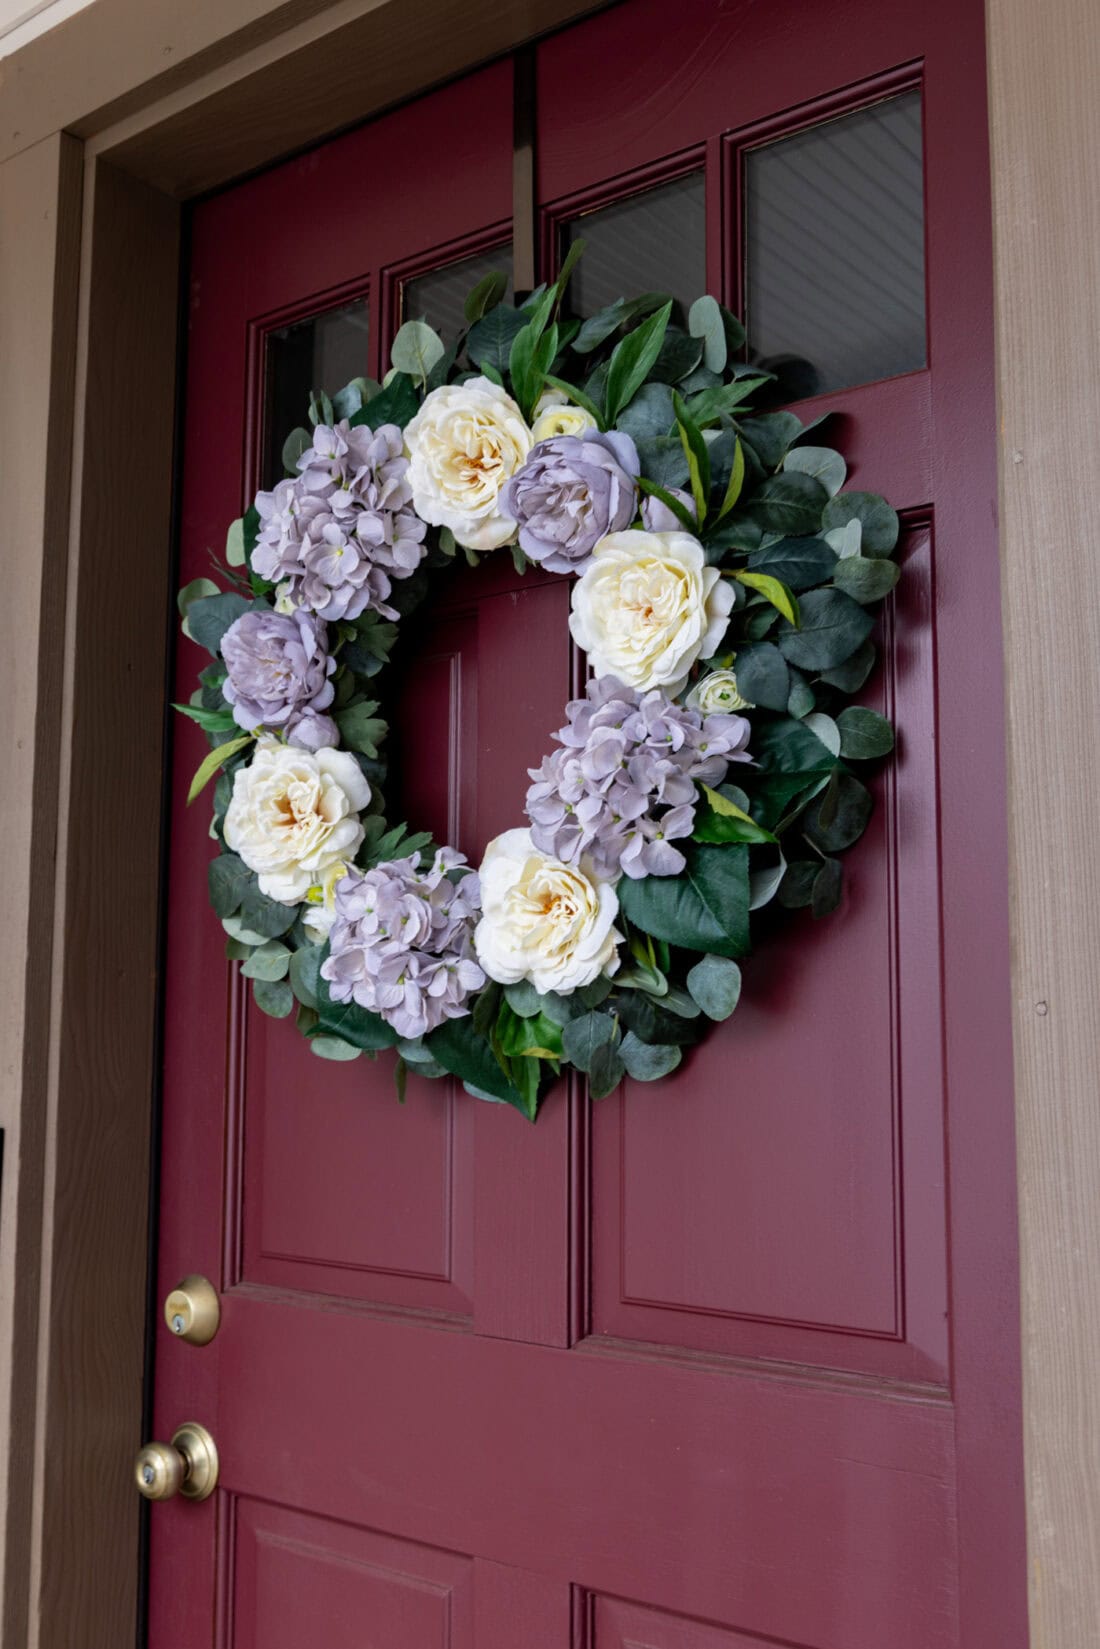
Display your hydrangea wreath on a front door, porch door, or interior door. As mentioned above, this wreath would be beautiful with a bow tied on the bottom as well. Happy crafting!
More Wreath Projects
I love to create and share my projects with you! I know it’s hard to remember to come back and search, so I’ve made it easy for you with my weekly newsletter! You can subscribe for free and I’ll send you fun crafts and delicious recipes every week right to your email.

Hydrangea Wreath
Supplies
- 18 inch straw wreath
- floral wire
- 3-4 silk hydrangeas
- silk peonies about 6 large and 6-10 small
- silk leaves
Craft tools
- Wooden skewer
- Wooden spoon with round end handle or a sharpening/honing rod
Instructions
- Leave the plastic wrapping on the wreath if it has one. This will keep any stray pieces of straw from shedding off.
- Cut a piece of floral wire 36 inches long. Fold the wire in half. Fold the wire around the wreath, joining the two ends together and twisting all the way to the end.
- Bend the end of the twisted wire into a loop and twist together at the bottom to close the loop and secure. This will be your hanger.
- Use a skewer to poke holes into the outside of the wreath. After creating a hole, insert stems with leaves into the holes. Secure with a little hot glue. Continue until you have a full line of leaves going around the wreath form.
- Place wreath form face up on the work surface. Use a honing rod if you have one (they are steel and will go through the wreath easier) to poke a hole in the front side of the wreath.
- Squeeze some hot glue into the hole and immediately push the stem of the hydrangea into the hole. Repeat this process for the peonies, alternating the two types of flowers until complete.
- Finish off by filling in any gaps with smaller peonies and leaves.
- Hang!
Expert Tips & FAQs
- You can use a foam, grapevine, or wire wreath form instead of the straw if you wish. However, these instructions are for a straw wreath so you will have to adjust your method for different forms.
- Grab two sizes of faux peonies for filling in any gaps in the wreath. I used both large and small to do so in various colors.
- Feel free to use whatever color peonies and hydrangeas you prefer!
- Swirling Twirling Ladybugs - July 21, 2026
- Drip Tie Dye Backpack - July 17, 2026
- Mini Coastal Clay Houses - July 14, 2026


Leave a Reply