• Home
  • About
    • About Crafts by Amanda
    • Visit Our Recipe Site
  • Work With Us
  • Join
    • Free Newsletters
    • Join our Facebook craft group
↑
  • Tutorials
    • Tutorial Index
    • Adult Crafts
    • Crafts for Kids
    • Crafts for Seniors
    • Recycled Crafts
    • Seasonal Crafts
    • Holiday Crafts
    • Free Printables
    • Craft Collections
  • Adult Crafts
    • Bath & Body
    • Beach Crafts
    • Clay Pot Crafts
    • Crafts for Seniors
    • Decoupage Crafts for Adults
    • DIY Gift ideas
    • Garden Crafts
    • Home Decor Projects
    • Kitchen Crafts
    • Light Bulb Crafts
    • Luminary Crafts
    • Mason Jar Crafts
    • Needlework
    • Photo Display Ideas
    • Recycled Crafts for Adults
    • Wearable Crafts for Adults
  • Crafts for Kids
    • Animal Crafts for Kids
    • Back to School Crafts
    • Beach Crafts for Kids
    • Camp Crafts
    • Cardboard Tube Crafts for Kids
    • Decoupage Crafts for Kids
    • Easy Crafts for Kids
    • Nature Crafts for Kids
    • Other Kid’s Crafts
    • Paper Plate Crafts for Kids
    • Recycled Crafts for Kids
    • Slimes, Doughs, & Clay
    • Wearable Crafts for Kids
  • Holiday Crafts
    • 4th of July Crafts
    • Christmas Crafts
    • DIY Gift ideas
    • Earth Day Crafts
    • Easter Crafts
    • Father’s Day Crafts
    • Halloween Crafts
    • Memorial Day Crafts
    • Mother’s Day Crafts
    • New Year’s
    • Other Holidays
    • Patriot Day Crafts
    • St. Patrick’s Day Crafts
    • Thanksgiving Crafts
    • Valentine’s Day Crafts
  • Seasonal Crafts
    • Winter Crafts
    • Spring Crafts
    • Summer Crafts
    • Fall Crafts
  • Skip to primary navigation
  • Skip to main content
  • Skip to primary sidebar
  • Skip to footer

Crafts by Amanda

crafts for adults and kid's crafts

  • Tutorials
    • Tutorial Index
    • Adult Crafts
    • Crafts for Kids
    • Crafts for Seniors
    • Recycled Crafts
    • Seasonal Crafts
    • Holiday Crafts
    • Free Printables
    • Craft Collections
  • Adult Crafts
    • Bath & Body
    • Beach Crafts
    • Clay Pot Crafts
    • Crafts for Seniors
    • Decoupage Crafts for Adults
    • DIY Gift ideas
    • Garden Crafts
    • Home Decor Projects
    • Kitchen Crafts
    • Light Bulb Crafts
    • Luminary Crafts
    • Mason Jar Crafts
    • Needlework
    • Photo Display Ideas
    • Recycled Crafts for Adults
    • Wearable Crafts for Adults
  • Crafts for Kids
    • Animal Crafts for Kids
    • Back to School Crafts
    • Beach Crafts for Kids
    • Camp Crafts
    • Cardboard Tube Crafts for Kids
    • Decoupage Crafts for Kids
    • Easy Crafts for Kids
    • Nature Crafts for Kids
    • Other Kid’s Crafts
    • Paper Plate Crafts for Kids
    • Recycled Crafts for Kids
    • Slimes, Doughs, & Clay
    • Wearable Crafts for Kids
  • Holiday Crafts
    • 4th of July Crafts
    • Christmas Crafts
    • DIY Gift ideas
    • Earth Day Crafts
    • Easter Crafts
    • Father’s Day Crafts
    • Halloween Crafts
    • Memorial Day Crafts
    • Mother’s Day Crafts
    • New Year’s
    • Other Holidays
    • Patriot Day Crafts
    • St. Patrick’s Day Crafts
    • Thanksgiving Crafts
    • Valentine’s Day Crafts
  • Seasonal Crafts
    • Winter Crafts
    • Spring Crafts
    • Summer Crafts
    • Fall Crafts
Craft Tutorials | Adult Crafts | Home Decor Projects | How to Make a Forsythia Wreath
Home Decor Projects

How to Make a Forsythia Wreath

Author by Amanda Davis on April 15, 2020 Updated on September 20, 2022

5 from 8 votes
Brighten up your door this spring by making a gorgeous forsythia wreath!
Jump to Project
How to Make a Forsythia Wreath
915 shares
  • Share
  • Tweet
  • Flipboard
  • Email

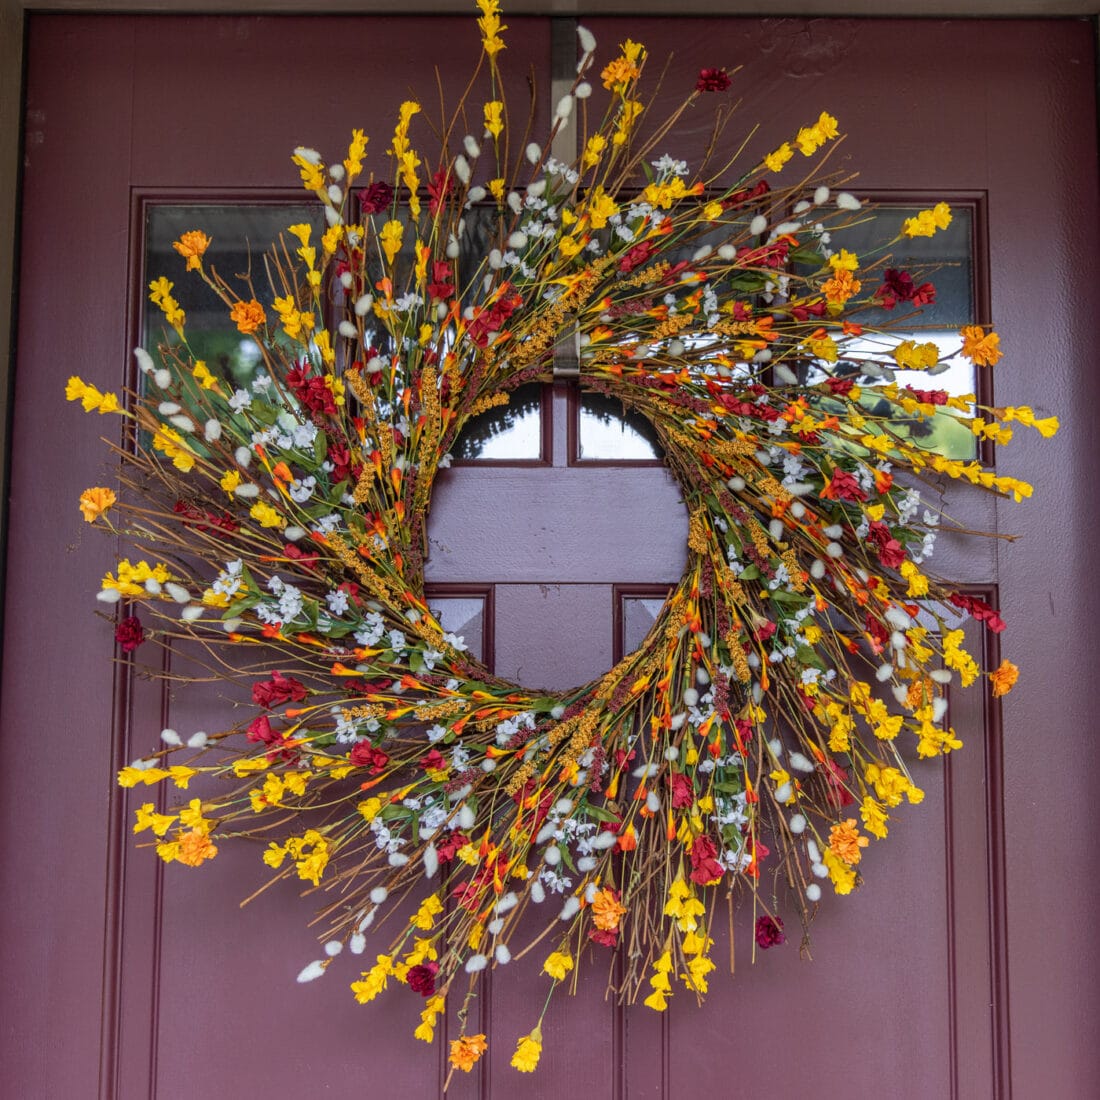
Spring is being really stubborn in southern Wisconsin this year and frankly, my patience is wearing thin. So instead of waiting for the real thing, I decided to make a forsythia wreath with silk flowers to brighten up my door.

Learn how to make a beautiful Forsythia Wreath for your door.


Forsythia Wreath

I just bought a house, it was a huge milestone for me and I couldn’t wait to make it my own! I spent 5 weeks redoing everything, I even painted the front door. There’s another house in my neighborhood with a similar blue door and she had a really pretty forsythia wreath hanging on it.

I loved the blue and yellow combination and knew I had to make one for myself. So I switched out my bandana wreath for this bright colored beauty.

RELATED: Got a hula hoop handy? Another beautiful wreath idea is knocking at your door. Check out how you can make a pretty spring Hula Hoop Wreath or a Spring Hoop Wreath with just a handful of supplies.

Fall Spray Wreath
Here’s a fall version, just use different flowers!
Up close of Forsythia Wreath

I just moved in a couple weeks ago and spent the first week unpacking and getting everything sorted out. The second week I spent catching up on work! It’s amazing how quickly you can fall behind. This past week though, I hit the craft store and they had silk flowers on sale. When I came across the faux forsythia flowers, I knew it was time to make my spring wreath.

Forsythia wreath on blue door

How to Make a Forsythia Wreath

This was actually a very easy project. It did take me about an hour and a half to put together, but I don’t mind. I find crafting to be a de-stressor. And frankly, I needed that today. I did beat my fingers up a bit bending the floral wire over and over again, but I’ve paid worse dues for sure.

Supplies you need to make a forsythia wreath

Supplies you need to make a forsythia wreath

  • Sunburst grapevine wreath
  • 10-15 stems of silk forsythia stems (I used 11)
  • 22-gauge floral wire
  • Wire snips
  • Hot glue gun (optional)

NOTE: I did NOT use the zip ties in the photo. It was easier using just the floral wire.

I chose a sunburst grapevine wreath because it looks fuller and frankly, more natural than a plain wire wreath form.

Cut the sprigs of forsythia flowers from the branch

Begin by using your wire snips to cut the sprigs of forsythia flowers from the branch.  Cut from the bottom of each sprig, you will have some long and some short.

loose flowers

Set aside any loose flowers that have fallen off your branches. We will use these later.

Separate the forsythia springs into two piles

To make assemble easier, separate the forsythia springs into two piles according to size. You’ll be adding the larger sprigs first.

wrap floral wire around the forsythia sprig

Cut a piece of floral wire about 4-inches long. Wrap the floral wire around the forsythia sprig a couple of time to secure it in place.

attach the forsythia sprig with flora wire to the wreath

Begin with the longer sprigs and attach them with floral wire to the outer ends of the wreath, wrapping the open end around one of the grapevine twigs.

Continue working around the wreath

Continue working around the grapevine wreath, attaching forsythia sprigs along the outer wreath twigs.

Attach small forsythia sprigs

Next begin filling in empty areas with the smaller forsythia sprigs. Work your way completely around the wreath.

attach loose flowers

Take the loose flowers you set aside earlier and fill in spots in the wreath by sliding them into the empty tubes on the sprigs. If you like, you can secure sprigs with a hot glue gun. I didn’t but we’ll see how it holds up after the door opens and closes a hundred times.

forsythia wreath on door

That’s it! It turned out beautiful didn’t it? I absolutely love my new forsythia wreath, especially against my blue door! Now if spring would just arrive…

Forsythia Wreath on the front door

If you liked this wreath, you might also like my Twig Coastal Wreath and my Easter Egg Wreath. Still want more? Here are over 20 summer wreath ideas too!

More Wreath Projects

  • Tulip Wreath
  • Burlap Wreath
  • Burlap Pumpkin Wreath
  • Halloween Ribbon Wreath
  • Deco Mesh Pumpkin Wreath
How to Make a Forsythia Wreath
Print Project
5 from 8 votes

How to Make a Forsythia Wreath

Brighten up your door this spring by making a gorgeous forsythia wreath!
Author: Amanda Formaro

Supplies

  • Sunburst grapevine wreath
  • 10-15 stems of silk forsythia stems I used 11
  • 22- gauge floral wire
  • Wire snips
  • Hot glue gun optional

Instructions

  • Begin by using your wire snips to cut the sprigs of forsythia flowers from the branch. Cut from the bottom of each sprig, you will have some long and some short.
  • Set aside any loose flowers that have fallen off your branches. We will use these later.
  • To make assemble easier, separate the forsythia springs into two piles according to size. You’ll be adding the larger sprigs first.
  • Cut a piece of floral wire about 4-inches long. Wrap the floral wire around the forsythia sprig a couple of time to secure it in place.
  • Begin with the longer sprigs and attach them with floral wire to the outer ends of the wreath, wrapping the open end around one of the grapevine twigs.
  • Continue working around the grapevine wreath, attaching forsythia sprigs along the outer wreath twigs.
  • Next begin filling in empty areas with the smaller forsythia sprigs. Work your way completely around the wreath.
  • Take the loose flowers you set aside earlier and fill in spots in the wreath by sliding them into the empty tubes on the sprigs. If you like, you can secure sprigs with a hot glue gun. I didn’t but we’ll see how it holds up after the door opens and closes a hundred times.

This post originally appeared on this blog on Apr 16, 2018.

  • Author
  • Recent Posts
Amanda Davis
Amanda Davis is the crafty, entrepreneurial mother of four children. She loves to bake, cook, make kid's crafts and create decorative items for her home. She is a crafting expert and guru in the kitchen and has appeared online and in print publications many times over the years.
Latest posts by Amanda Davis (see all)
  • Paper Plate Aquarium Craft - June 17, 2025
  • Patriotic Bandana Wreath - June 13, 2025
  • Ladybug Painted Rocks - June 10, 2025
915 shares
  • Share
  • Tweet
  • Flipboard
  • Email

Filed Under: Crafts for Seniors, Easter Crafts, Home Decor Projects, Spring Crafts Tagged With: flowers, forsythia, summer, wreath

Reader Interactions

Free CraftsBy email every week

Latest crafts straight to your inbox!

Comments

  1. Diane says

    October 21, 2022 at 12:29 pm

    Hi! I can’t wait to make this wreath. Gorgeous!! Please share the paint color information for your door color. It’s lovely and I want to put it on my side entry door.

    Reply
    • Amanda Formaro says

      November 19, 2022 at 1:05 pm

      I’m afraid I don’t have the paint can anymore, I’m sorry!

      Reply
  2. Diane says

    October 8, 2022 at 1:46 pm

    Love this wreath. Nice project for my winter. I have to know…. What is your door paint color name and brand and number if you have it. I love the color!

    Reply
  3. Emily says

    October 4, 2022 at 3:19 am

    The link you provided for the sunburst grapevine wreath, does not bring you to where u should be.
    I’m not finding where to buy the sunburst style grapevine? Please help

    Reply
    • Amanda Formaro says

      December 18, 2022 at 12:45 pm

      You can get them at craft stores, like Hobby Lobby https://www.hobbylobby.com/Floral-Wedding/Floral-Supplies/Wreaths-Forms/Sunburst-Grapevine-Wreath/p/4286

      Reply
  4. Pam says

    February 23, 2021 at 10:36 am

    Love this wreath. Thank you for the great tutorial that we can print out. I print them out and put them in a small binder and when people comment about a project they want to do or something that I have done, I show them the small binder.

    As far as your new home: May you only know good health, wealth , and happiness and make good memories!

    Reply
5 from 8 votes (6 ratings without comment)

Leave a Reply Cancel reply

Your email address will not be published. Required fields are marked *

Rate This Project


The maximum upload file size: 640 MB. You can upload: image, video. Links to YouTube, Facebook, Twitter and other services inserted in the comment text will be automatically embedded. Drop files here

Primary Sidebar

Hi! I’m Amanda and I’m the founder and head designer of Crafts by Amanda. I have spent over 25 years creating projects to share, but it’s not just me anymore! It’s turned into a complete family affair. Come and meet the Creative Team!

Free CraftsBy email every week

Latest crafts straight to your inbox!

All Time Favorites

Learn to make these adorable ladybug painted rocks. use special outdoor paint for this adorable garden craft so you can keep garden ladybugs all summer!

Ladybug Painted Rocks…

These colorful little ladybug painted rocks are the ... Go To project

snowy pinecone candle jar luminaries

Winter Luminaries: Snowy Pinecone…

Make pretty winter luminaries that appear to be covered ... Go To project

Make this wonderful deco mesh pumpkin wreath to hang on your door this fall!

Deco Mesh Pumpkin Wreath…

Adorn your door this fall with a pretty deco mesh ... Go To project

Reuse those empty prescription pill bottles in all sorts of ways. From organizing to making cookies. Yes, cookies! See how to use your empty pill bottles!

20 Uses for Prescription Pill…

You've been collecting prescription pill bottles for ... Go To project

Meet the Family

Amanda

Founder and Designer

Kristen

Editorial Manager

Lindsay

Social Media Manager

As seen on:

Footer

Favorites

  • Jar Photo Frames
  • No-Sew Roman Shade
  • Paper Flowers
  • How to Make a Scrunchie
  • Mermaid Slime

About

  • Home
  • Meet the Creative Team
  • Work with Us
  • Privacy Policy
  • Accessibility
  • Contact Us

Images/text copyright Amanda Formaro 2020. To feature a post from Crafts by Amanda, you may use one photo credited and linked back directly to the project post.

Free CraftsBy email every week

Latest crafts straight to your inbox!

Copyright ©2025, Crafts by Amanda. All Rights Reserved.
Design by Pixel Me Designs

Rate This Tutorial

Your vote:


To share a photo with your comment click here!

A rating is required
A name is required
An email is required

Recipe Ratings without Comment

Something went wrong. Please try again.