
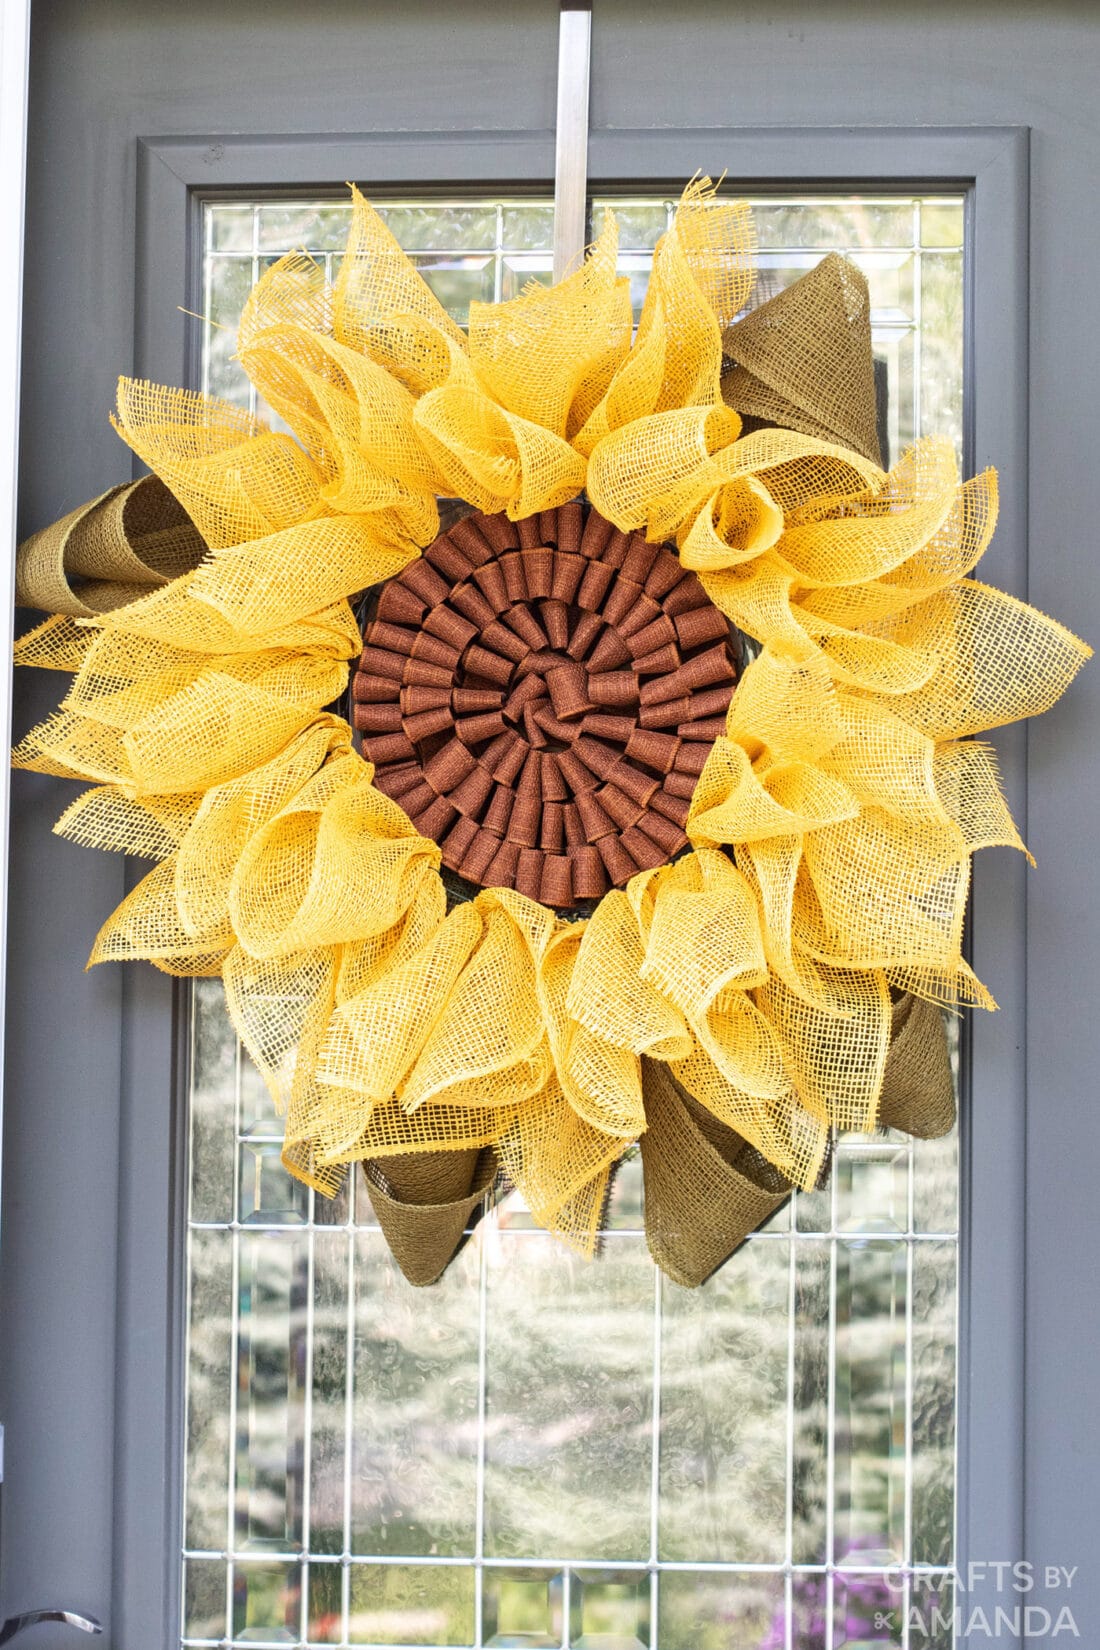
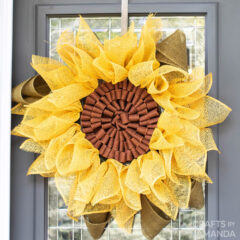
This beautiful sunflower wreath is made with brown, yellow, and green burlap. A statement piece like this on your front door can easily transition from summer to fall!
Why we love this project
Bright and cheery with a touch of rustic charm, this sunflower wreath is a beautiful piece to hang both indoors or outdoors. You’ve likely seen beautiful sunflower wreaths floating around the internet, but you can easily make it at home for much less. It’s really quite a simple project that anyone can tackle, so grab some friends and make a day out of it!
The beauty of sunflower crafts is that they’re multi-seasonal decor. They are great all summer and throughout fall, so you’ll get some good use out of your wreath.
Helpful Project Information:
- Age Level: 13 and up
- Mess Factor: Medium
- Level of Difficulty: Easy
- Time to Complete: Less than 30 minutes
- Cost Estimate: Less than $30.00
Craft supplies you will need
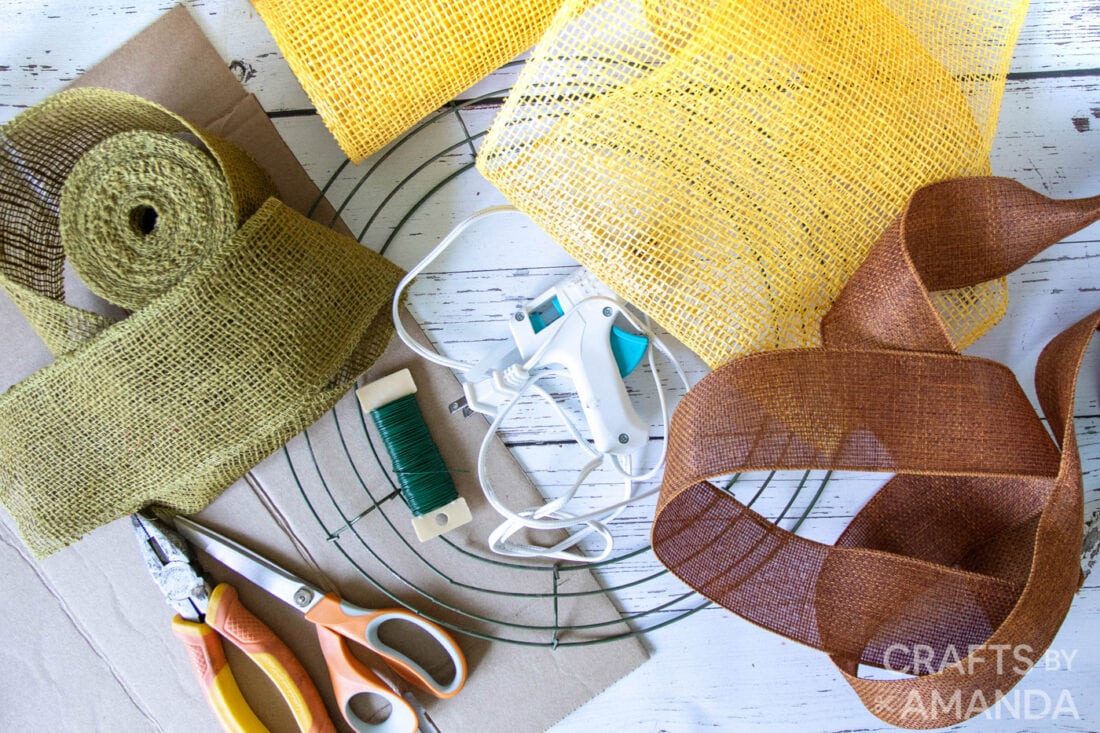
Get full list of supplies and directions in the printable version at the end of this post.
How to Make a Sunflower Wreath
These step by step photos and instructions are here to help you visualize how to make this project. Please scroll down to simply print out the instructions!
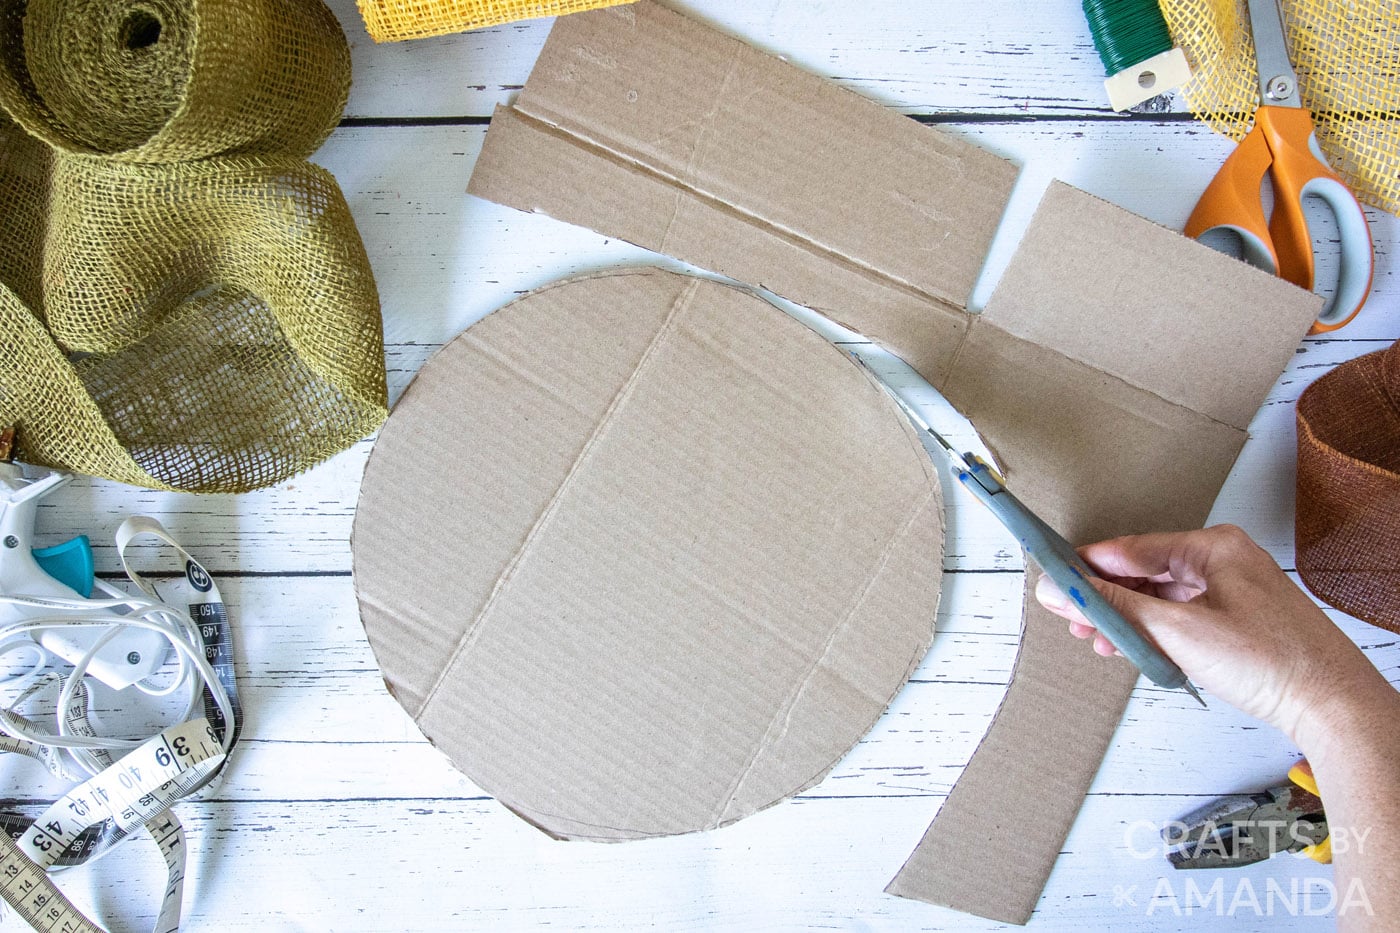
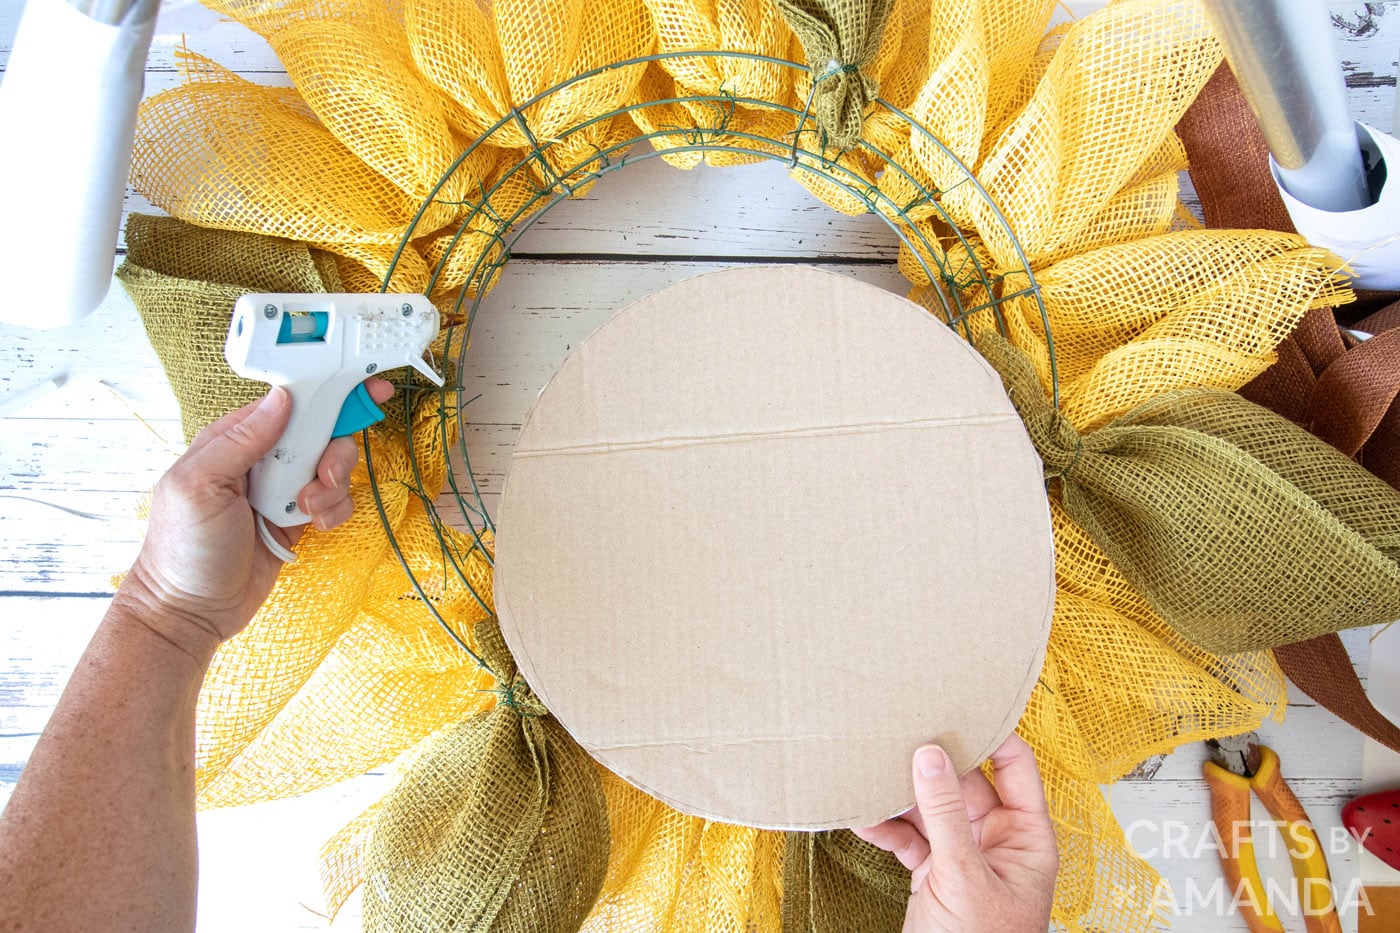
- Place a 12″ wire frame on top of a piece of cardboard and trace the outer edge of the smallest inner wire ring. Cut out the circle and put aside for the time being.

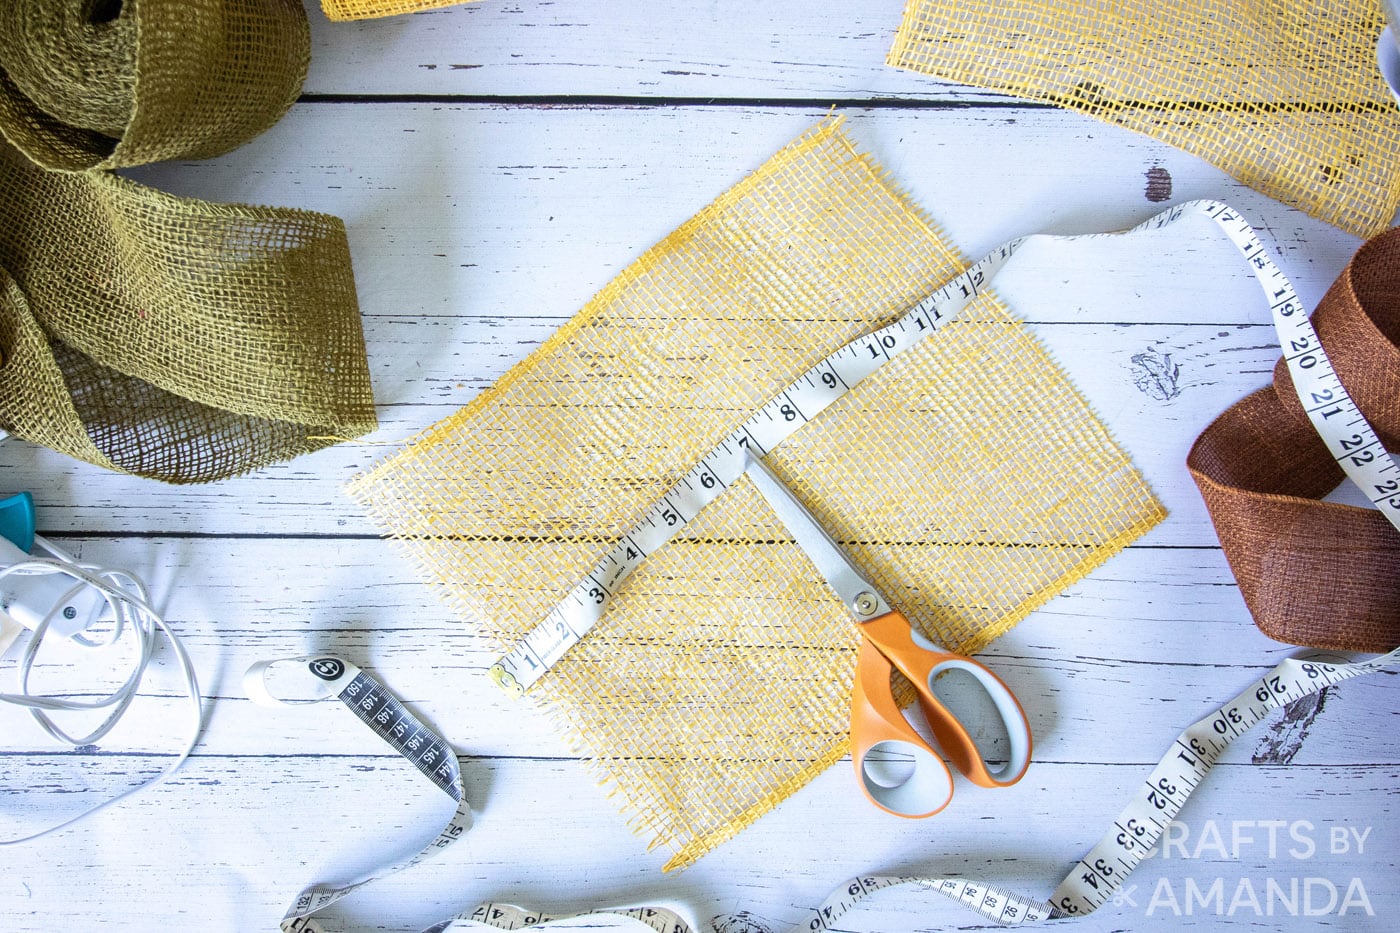
- Cut floral wire into 6” long pieces. Cut yellow burlap ribbon into 12” long rectangular pieces.
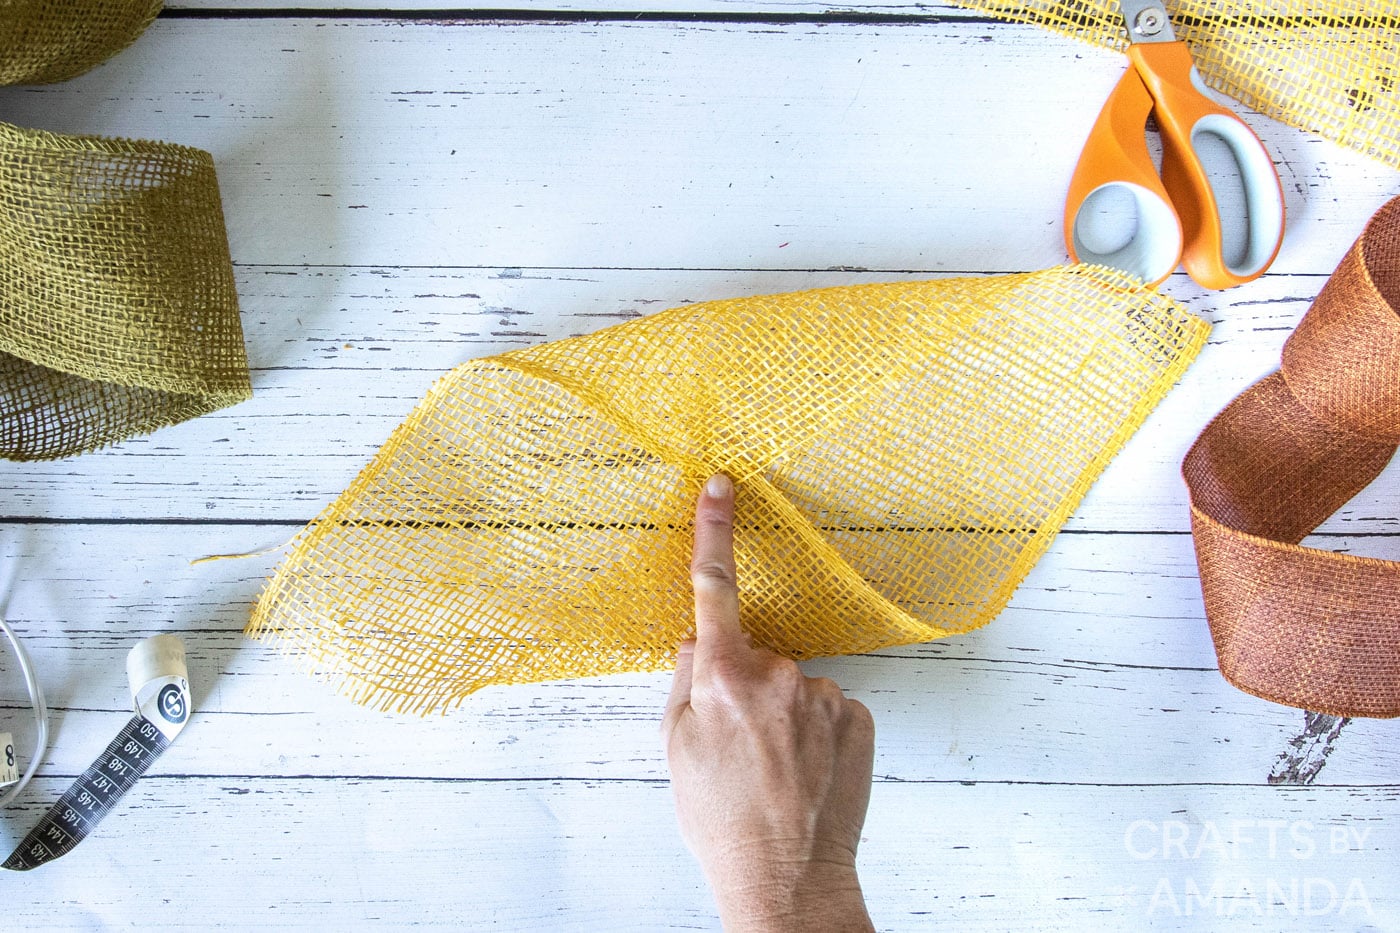
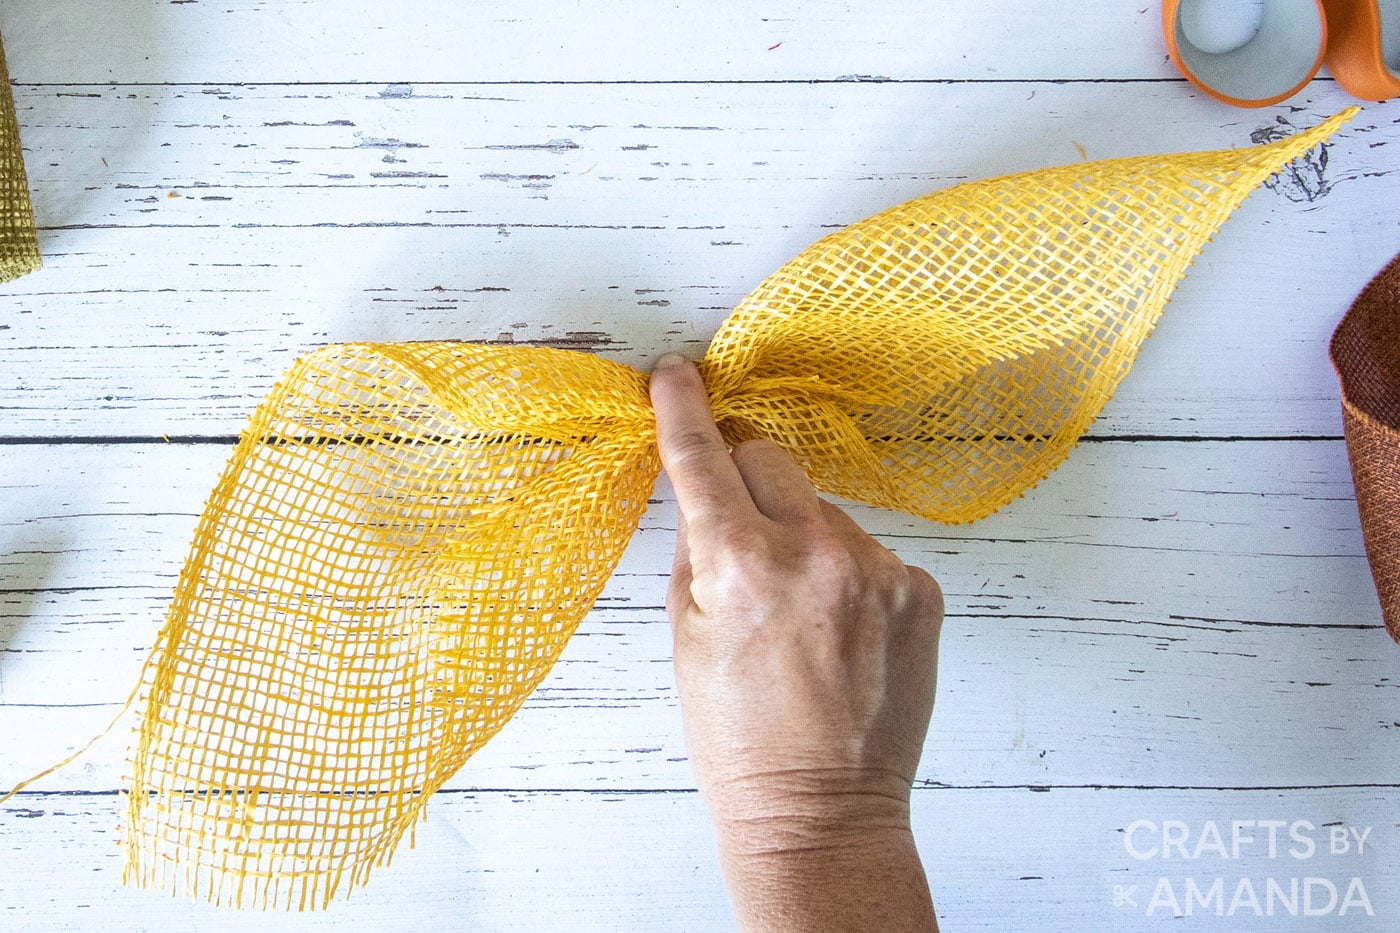
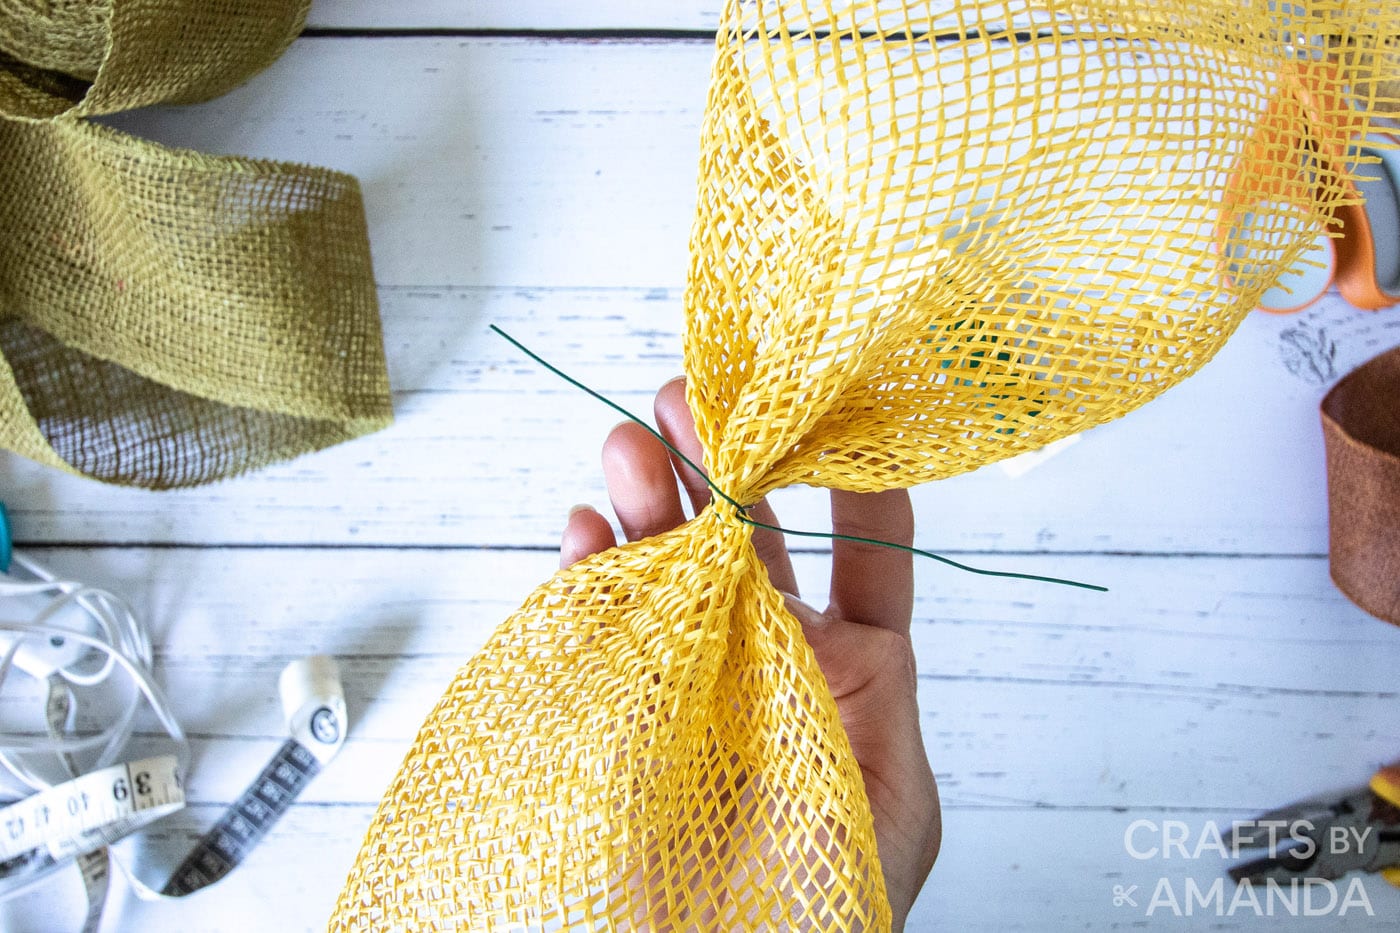
- Fold two opposite corners of one rectangle towards the center and then cinch the folded edges in the middle.
- Secure with a piece of floral wire to form sunflower petals.
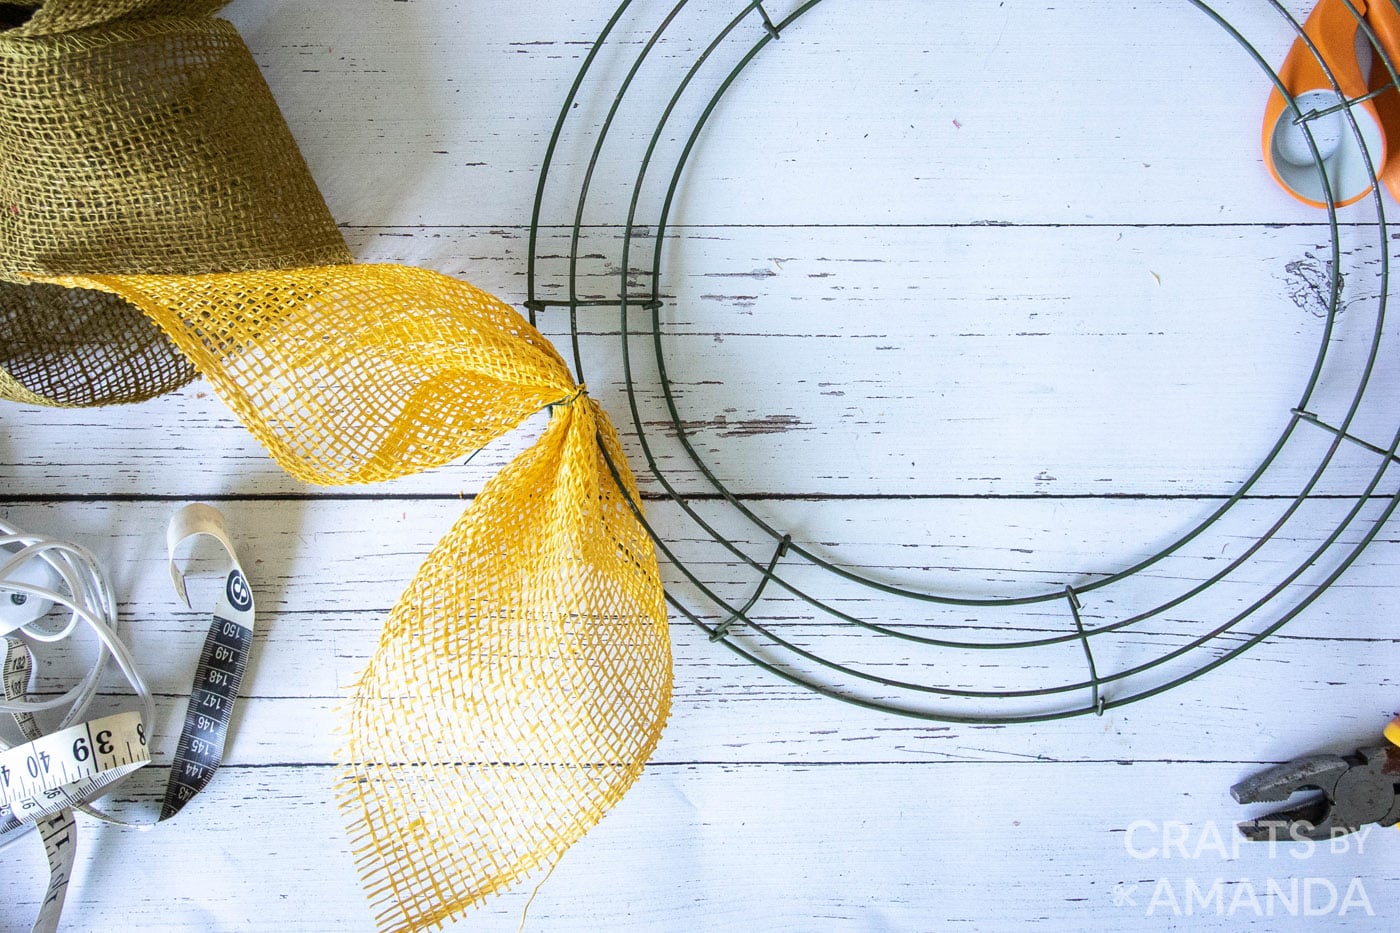
- Place the cinched burlap against the wire frame with the folded edges facing downward.
- Wrap the floral wire around the second ring of wires on the wreath form.
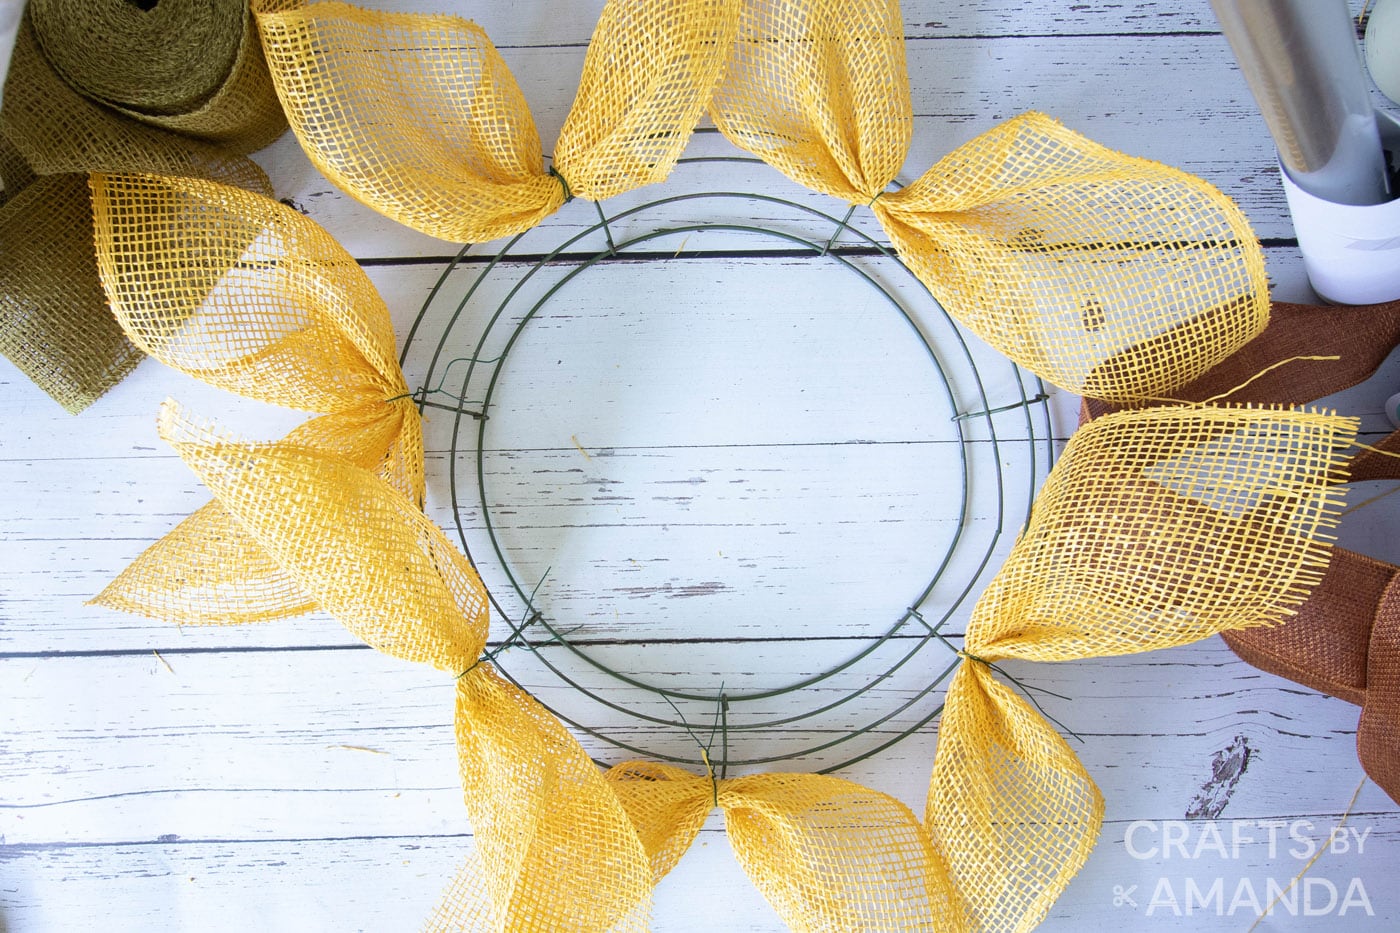
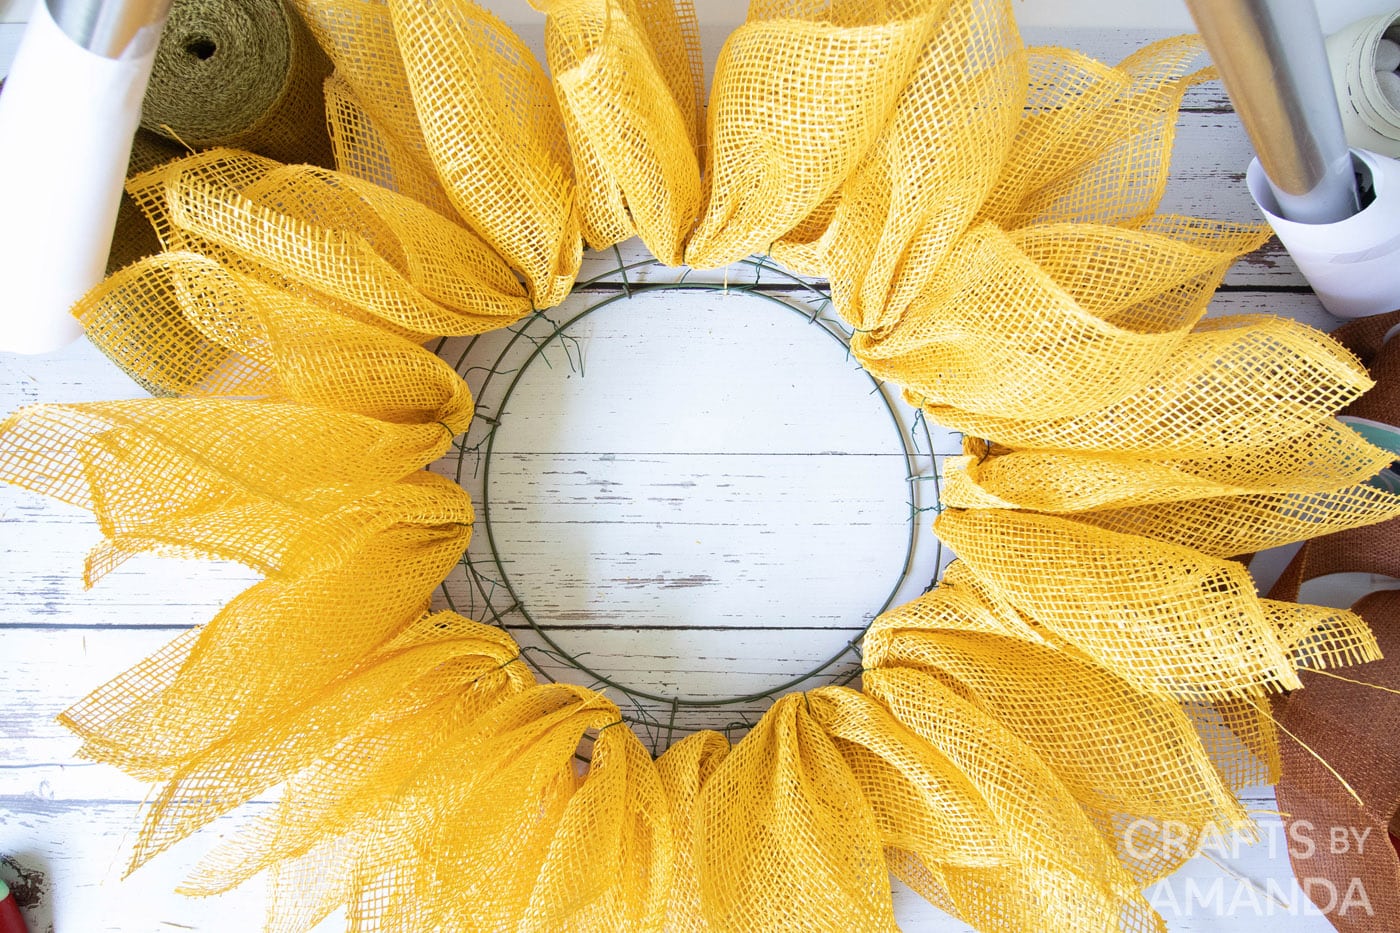
- Continue making sunflower petals and space them evenly around the same ring. Fill in with more petals until you are happy with the fullness. We attached 14 petals to each ring.
- Repeat this process for the 3rd ring on the wire wreath form.
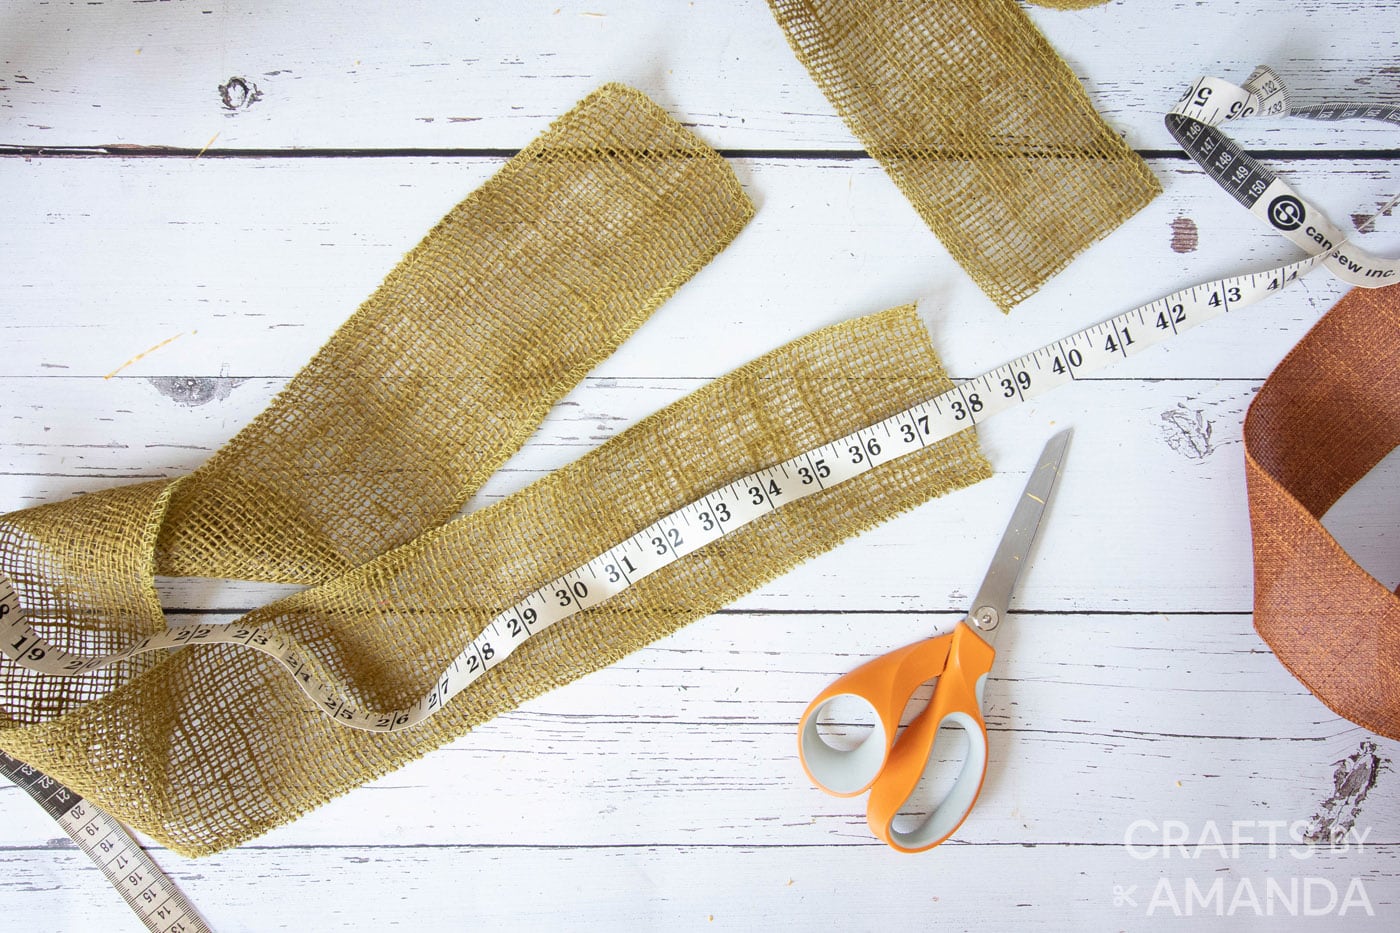
- Cut the green burlap ribbon into 38” long pieces.
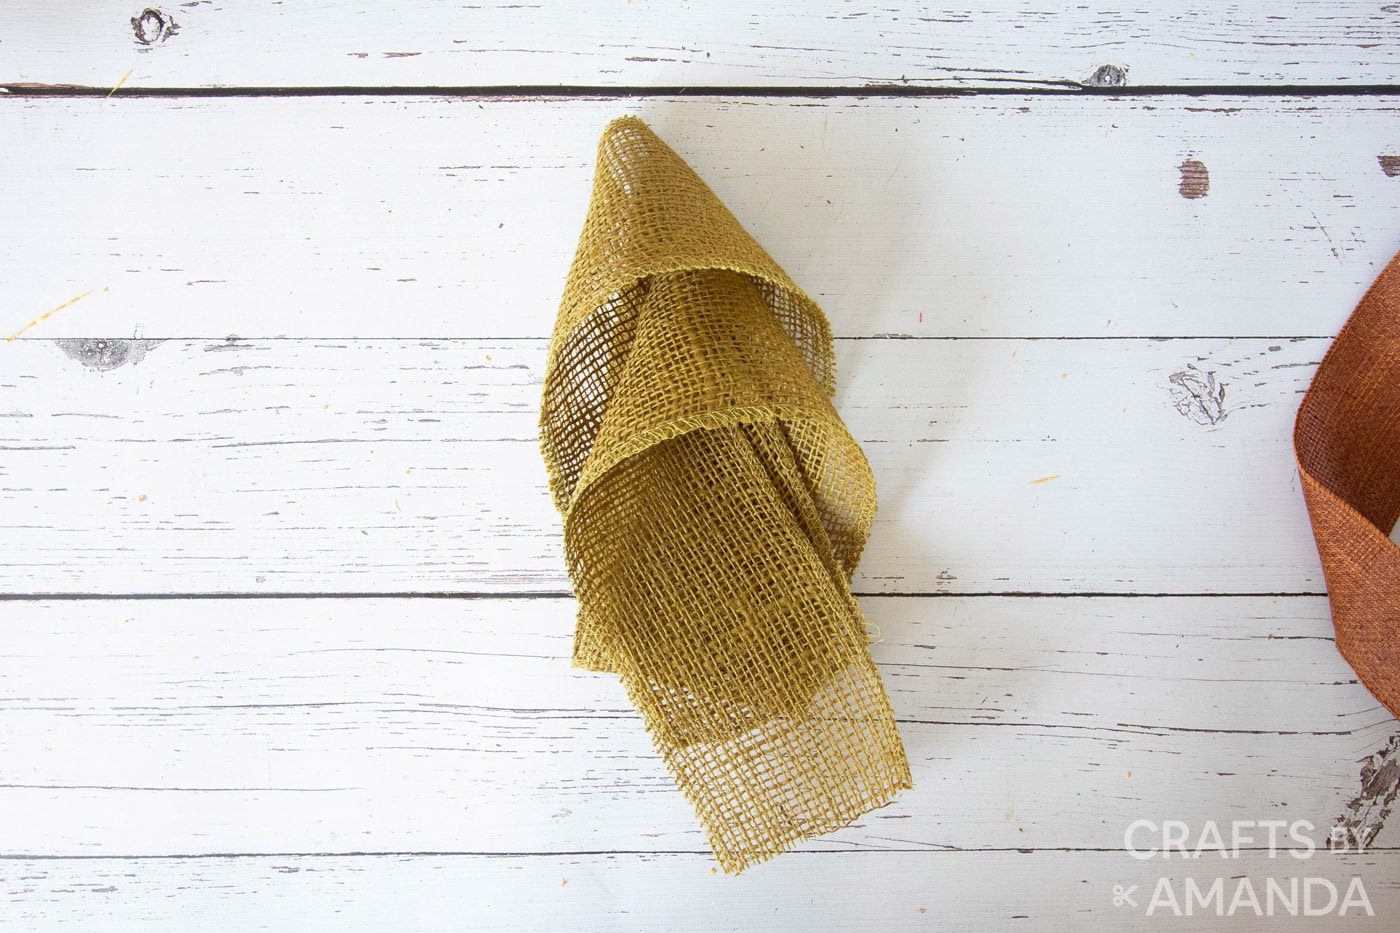
- Fold the green burlap ribbon in half lengthwise and then fold again a second time.

- Pull the one cut end of the ribbon staggering the folded layers.
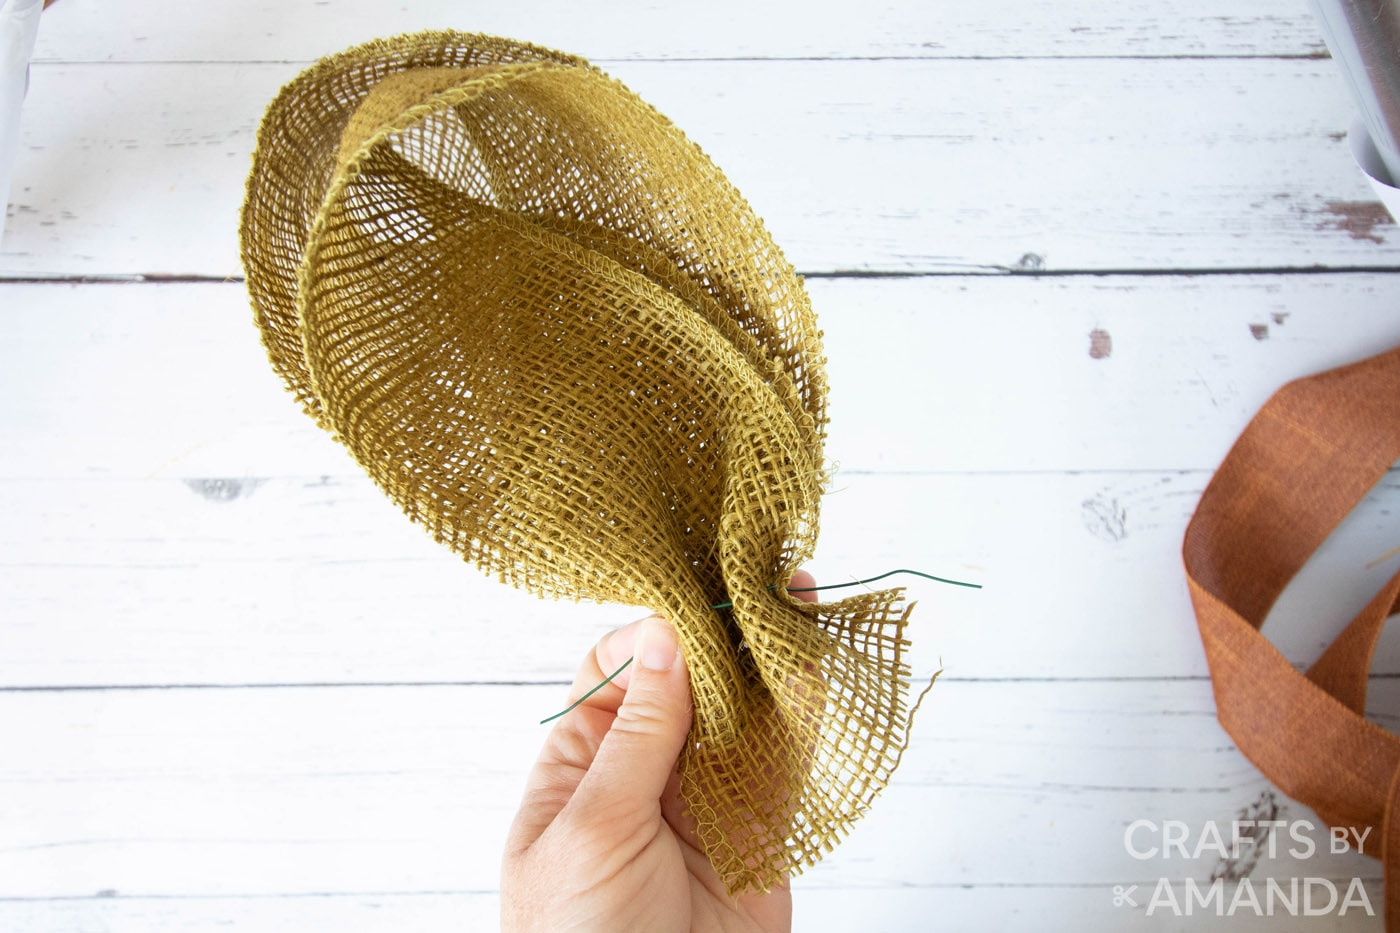
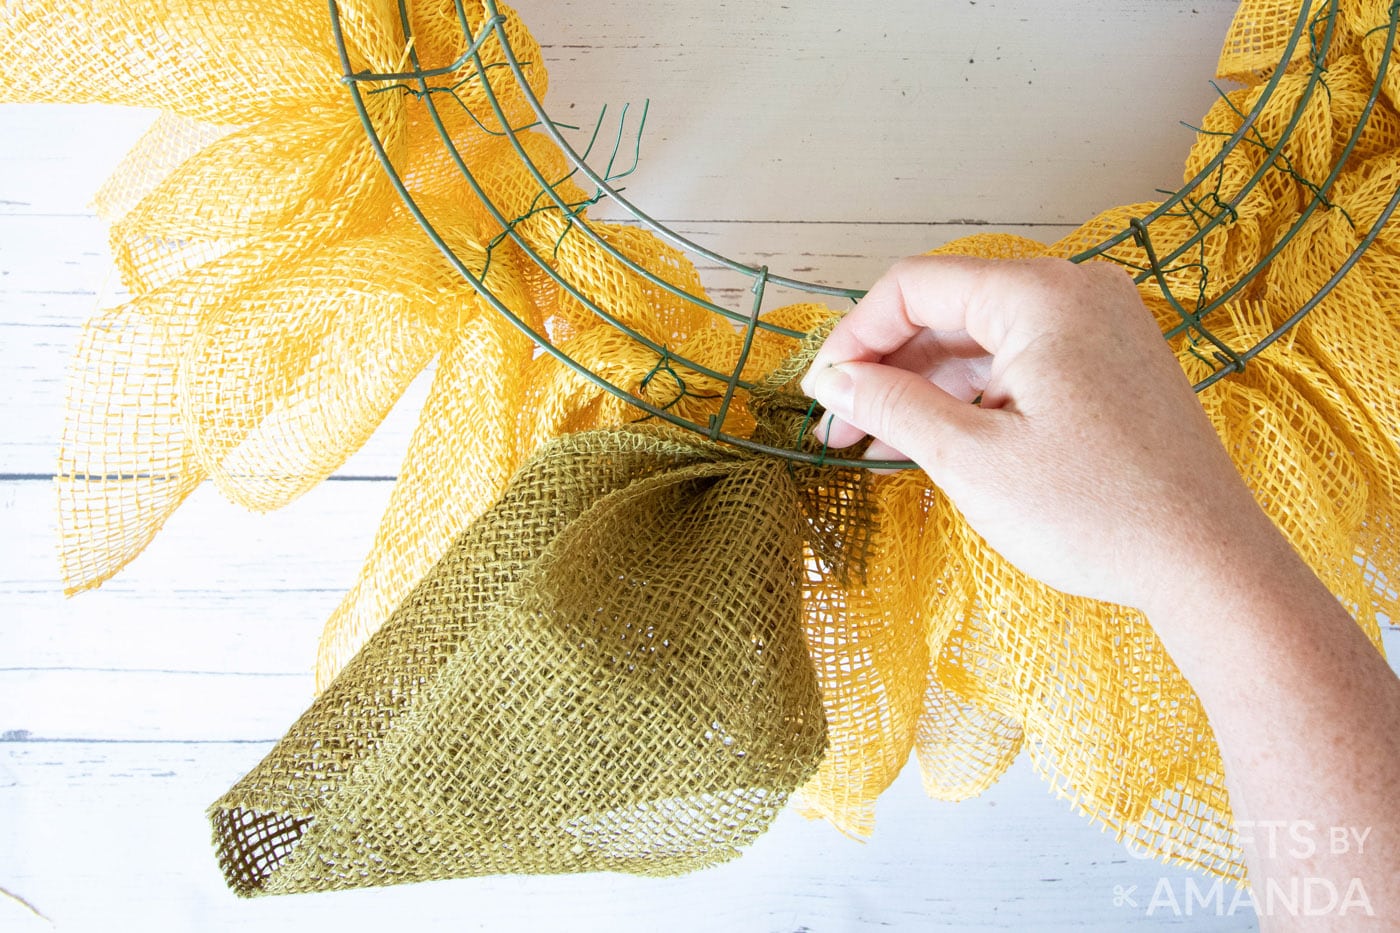
- Wrap a piece of floral wire around the end to hold the shape and then secure it to the outer ring of the wreath form.
- Make 5 sunflower leaves total using the same method and evenly space them apart around the wreath form.
- Preheat your hot glue gun. Turn the wreath right side facing down and glue the circle cardboard cutout to the inner ring. Then turn the wreath right side facing up.
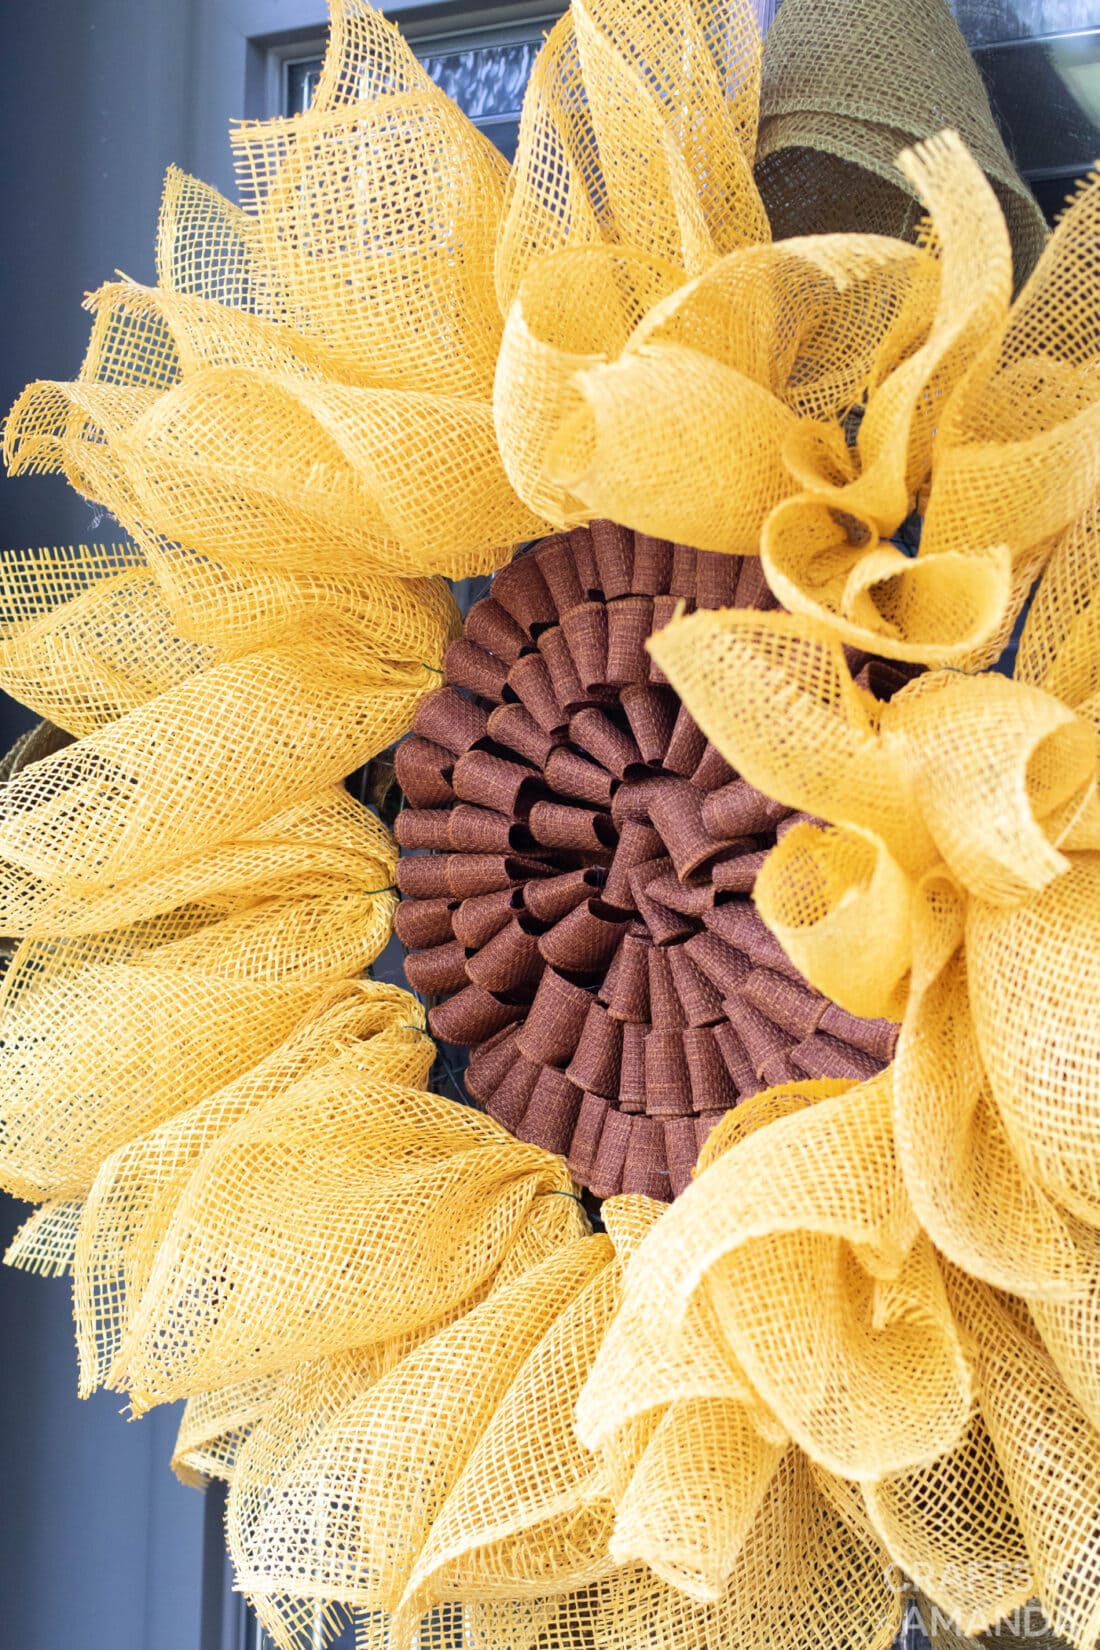
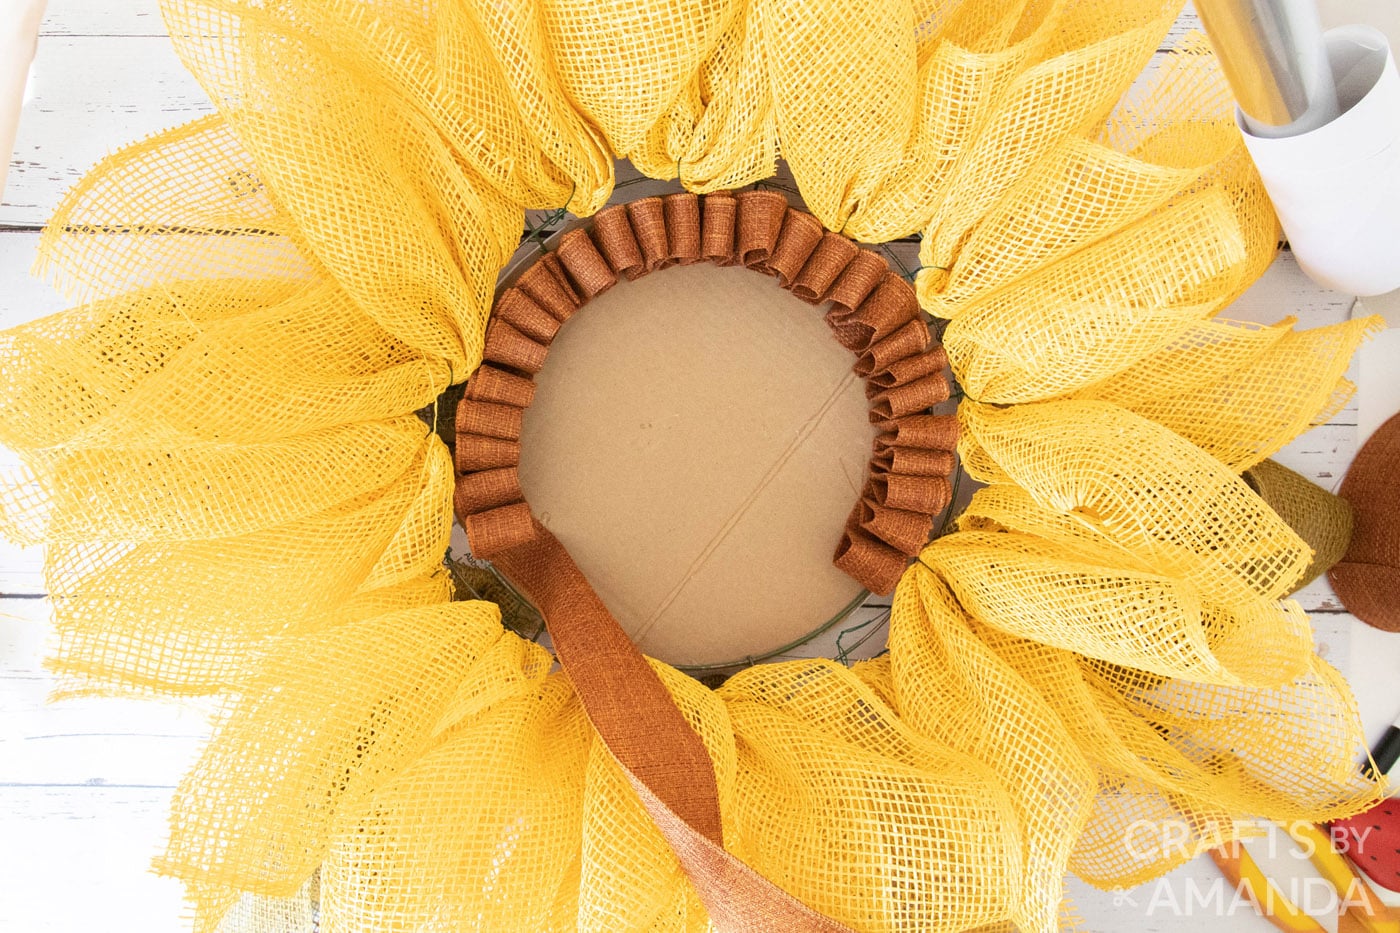
- Fold the brown burlap ribbon in half widthwise and then glue the cut end to the cardboard close to the outer edge.
- Begin folding the ribbon lengthwise in short, loose waves, approx. 2” high. Glue all concave curves of the ribbon to the cardboard as you work around the circle.
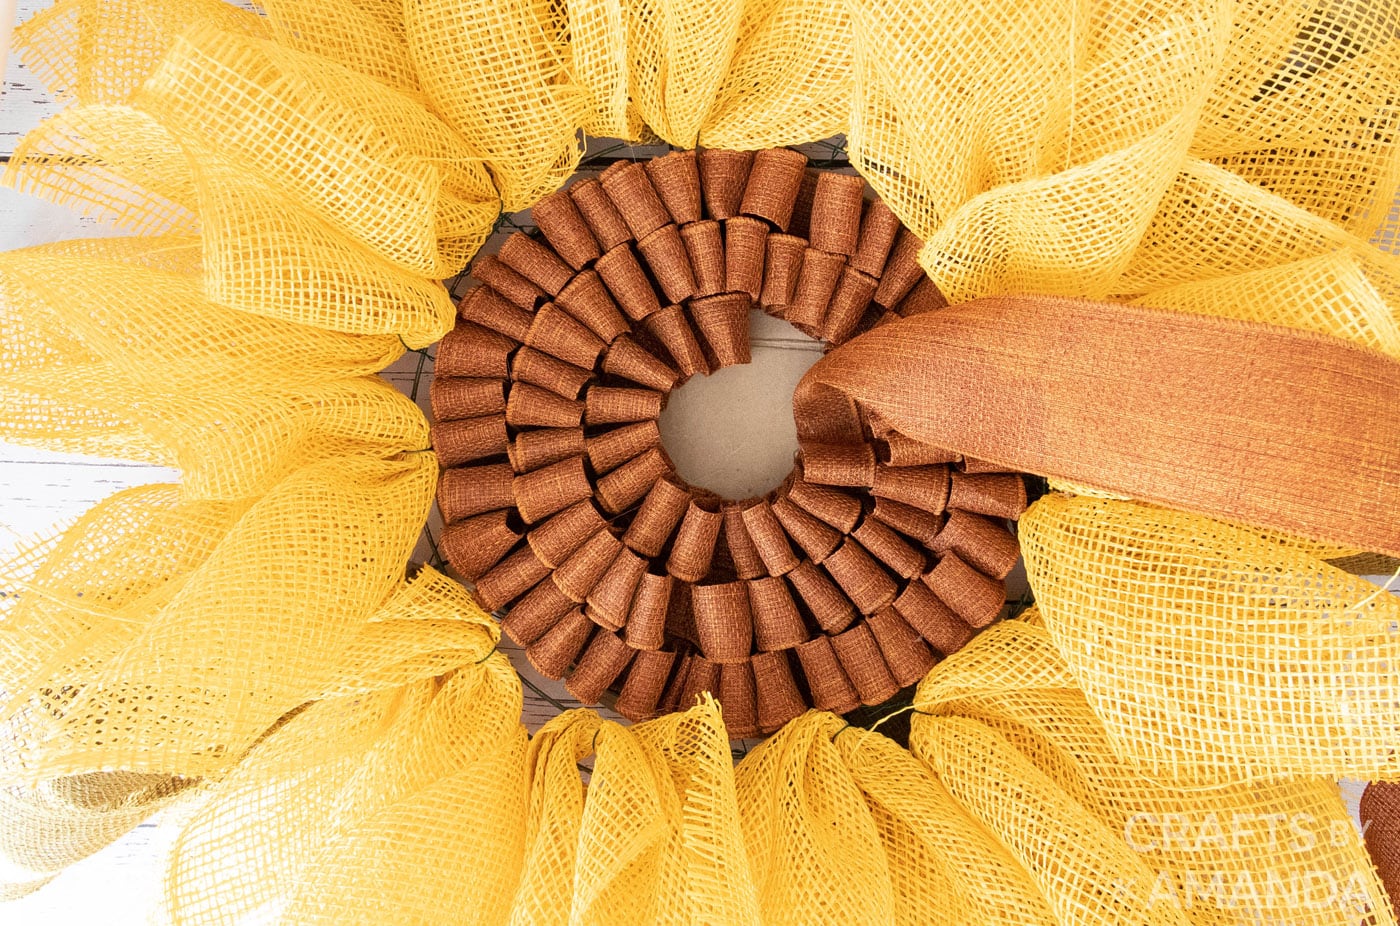
- Repeat with the second row and continue towards the center until the cardboard is completely covered.
- Hang to enjoy!

Expert Crafting Tips
- If you don’t have floral wire, you can use pipe cleaners to attach your burlap petals to the wire wreath form.
- You can easily swap out the colors to your liking for this wreath. It would look so pretty in pink, red, or purple!

A gorgeous sunflower wreath will complement anyone’s door, be prepared for it to be a conversation starter!
More Wreath Projects
- Tulip Wreath
- Burlap Wreath
- Burlap Pumpkin Wreath
- Halloween Ribbon Wreath
- Deco Mesh Pumpkin Wreath
- How to Make A Forsythia Wreath
I love to create and share my projects with you! I know it’s hard to remember to come back and search, so I’ve made it easy for you with my weekly newsletter! You can subscribe for free and I’ll send you fun crafts and delicious recipes every week right to your email.
Sunflower Wreath
Supplies
- yellow burlap ribbon we used 10” wide x 10 yards long
- brown burlap ribbon we used 2.5” wide x 10 yards
- green burlap ribbon we used 4” wide x 10 yards long
- floral wire or pipe cleaners
- wire wreath form 12" diameter
- cardboard approx. 11” wide
Craft tools
- Wire cutters
Instructions
- Place the wire frame on top of a piece of cardboard and trace the outer edge of the smallest inner wire ring. Cut out the circle and put aside for the time being.
- Cut floral wire into 6” long pieces. Cut yellow burlap ribbon into 12” long rectangular pieces.
- Fold two opposite corners of one rectangle towards the center and then cinch the folded edges in the middle. Secure with a piece of floral wire to form sunflower petals.
- Place the cinched burlap against the wire frame with the folded edges facing downward.
- Wrap the floral wire around the second ring of wires on the wreath form.
- Continue making sunflower petals and space them evenly around the same ring. Fill in with more petals until happy with the fullness. We attached 14 petals to each ring.
- Repeat this process for the 3rd ring on the wire wreath form.
- Cut the green burlap ribbon into 38” long pieces.
- Fold the green burlap ribbon in half lengthwise and then fold again a second time.
- Pull the one cut end of the ribbon staggering the folded layers.
- Wrap a piece of floral wire around the end to hold the shape and then secure it to the outer ring of the wreath form.
- Make 5 sunflower leaves in total in the same way and evenly space them apart around the wreath form.
- Preheat glue gun. Turn the wreath right side facing down and glue the circle cardboard cutout to the inner ring. Then turn the wreath right side facing up.
- Fold the brown burlap ribbon in half widthwise and then glue the cut end to the cardboard close to the outer edge.
- Begin folding the ribbon lengthwise in short, loose waves, approx. 2” high. Glue all concave curves of the ribbon to the cardboard as you work around the circle.
- Repeat with the second row and continue towards the center until the cardboard is completely covered. Hang to enjoy!
Video
Expert Tips & FAQs
- You will likely want to hang this wreath under a covered area or inside a screen door to protect it from the elements.
This post originally appeared here on Aug 13, 2021.
- Tie Dye Beach Towels - July 24, 2026
- Swirling Twirling Ladybugs - July 21, 2026
- Drip Tie Dye Backpack - July 17, 2026


Violeta says
This is gorgeous! I love how full and fluffy it looks. Today I’ve featured your tutorial on Crafts on Display, I hope you enjoy it, and keep up the amazing work! https://craftsondisplay.com/home-decor/burlap-sunflower-wreath-186244/
Vero says
I can’t find 10 in wide. Can I use 5.5 in?
Kathie Coade says
Thank you for adding me to your list, I look forward to seeing some arts and crafts
Amanda Terry says
Do you know how many yards you actually used for 1 wreath? Love the craft! :)