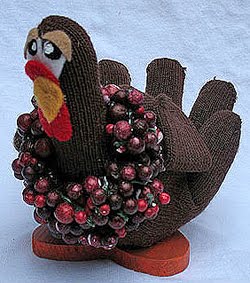
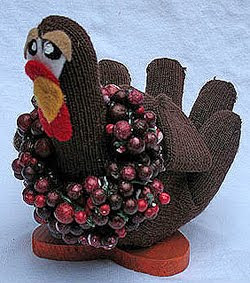
Now that Halloween has passed, I was going through some of the Thanksgiving crafts I have made over the years for FamilyCorner.com. One of my all time favorites has to be the stuffed glove turkey I made three years ago. I always keep stock of those cheap knit gloves, and usually buy gobs of them each winter. My kids go through them like water, so I always have several pairs on hand. Quite often I end up with several mismatched pairs, which I in turn I save to make something.
This brown glove, however, didn’t lose its mate. Instead, the second glove in the pair had a huge hole in it. So I salvaged some scraps from the second glove and came up with this stuffed turkey glove. I still bring him out every year at Thanksgiving and he sits proudly on our table. This is one turkey that will never hit the oven. ;)
Project originally posted here on FamilyCorner.com
I’ve submitted this to Reinvented’s Trash to Treasure
More Thanksgiving Crafts
Glove Turkey
Supplies
- 2 brown knit gloves
- berries from silk plant
- 3 " wooden heart
- acrylic paint: white black, and orange
- felt: goldenrod red, tan, and white
- Poly batting stuffing
- scissors
- paintbrush
- hot glue gun
- rubber band
- patterns
Instructions
- Stuff one of the gloves with poly batting, fill the fingers and half of the palm.
- Cut the four fingers off the second glove, leave the thumb intact. Set the finger pieces aside for a later step. Hot glue the finger openings closed. Stuff the thumb and half of the palm with poly batting.
- Paint the wooden heart orange and set aside to dry.
- Insert the glove with only the thumb inside the fully intact glove. The thumb should be sticking out for the head of the turkey. You will need to maneuver the poly batting around until you have a plump body, add more poly batting if needed. The fingers (tail) will be sticking straight out.
- Once you have the body stuffed and plumped, and the thumb is sticking out, you will need to raise the fingers (tail) up so that the are stuck to the body and stand up. To do this, cup the turkey in your hand and press the stuffed fingers towards the body, like you are cupping a ball in your hand. Apply some hot glue at the bends in the fingers so that they will stick to the body of the glove. Wrap a rubber band around the turkey so that the fingers will have time to dry. Set aside.
- While that is setting up, build the wreath around the neck, which should be the wrist cuff of the outer glove. Hot glue silk or plastic berries around the neck to form a festive wreath.
- Glue the body to the orange heart (feet), rounded ends of the heart should be at the front of the turkey.
- Take two of the cut fingers that you set aside earlier, these will be the wings. Fold in half, tack with hot glue to keep folded. Glue cut edge to the side of the turkey so that the rounded end of the cut finger is showing on the outside. Repeat on the other side. Save the other two fingers for scrap material on another project.
- To add facial features, begin by gluing on the whites of the eyes. Use the handle end of a paintbrush to add blacks of eyes. Next add the eyebrows, then the waddle and lastly the beak. Finally, dot white on to blacks of the eyes.
- Remove the rubber band.
- Watercolor Luminaries - February 11, 2025
- Free Valentine Printables: Cards, toppers, and tags - February 4, 2025
- Valentine Hugs - January 31, 2025


Lavonne says
So cute and was easy to make
Carol Woolworth says
I love all of your crafts! I have made a few and my grandkids love them!
Amanda Formaro says
Thanks so much Carol!
Chic Cookies says
OMG, I just saw this. I. LOVE. Him.
pinkstripes says
I love this! It's so creative.
Claire says
I love this! I'm going to make one :)
alexandra s.m. says
Thank you Amanda it's beautiful!!
Painter Mommy says
I love this! I am really enjoying your site and getting emails each time you post. :)
DAWN
Kimm at Reinvented says
That is so cute! And what a great way to upcycle an orphaned glove. Thanks for linking up!