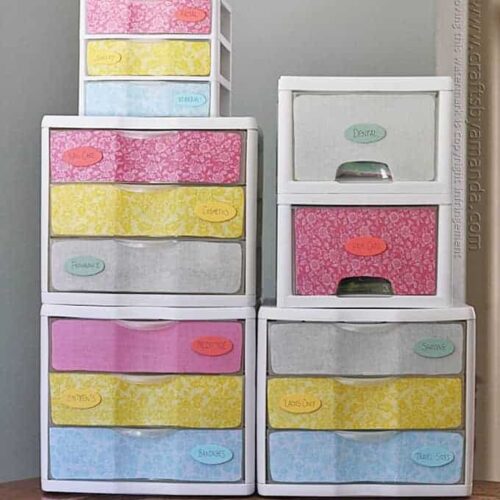
From drab to fab, these plastic storage drawers get a makeover with a little but of paint, decoupage, and pretty fabric!

Plastic Storage Drawer Makeover
You can buy plastic storage drawers from any WalMart or Target and use them for a variety of things. They’re great for make-up, toys, socks, craft supplies, and papers. I have some rather large cabinets in my bathroom, but that’s exactly what they are… large. No shelves, no dividers, just a big space. So to make use of them I buy plastic storage drawers![]() to keep everything in since we also don’t have a medicine cabinet.
to keep everything in since we also don’t have a medicine cabinet.
This project was just another thing for me to add to my home organizing checklist for the new year. My bathroom is far from pretty. This house was built in the early 1950’s and the décor in here was awful. In fact, there are still traces. See the Victorian wallpaper and contact paper still inside the cabinets? We’ve made some changes such as painting the green cabinets white and adding some DIY décor to the walls.

While my storage containers have been doing a great job, they were looking pretty dingy. The labels were handwritten and peeling off and the plastic was getting dirty.

Not only were they looking bad on the outside, they really needed to be reorganized too. So I took this opportunity to empty everything out, wash them up and give them a facelift.
How to Makeover Your Plastic Storage Drawers
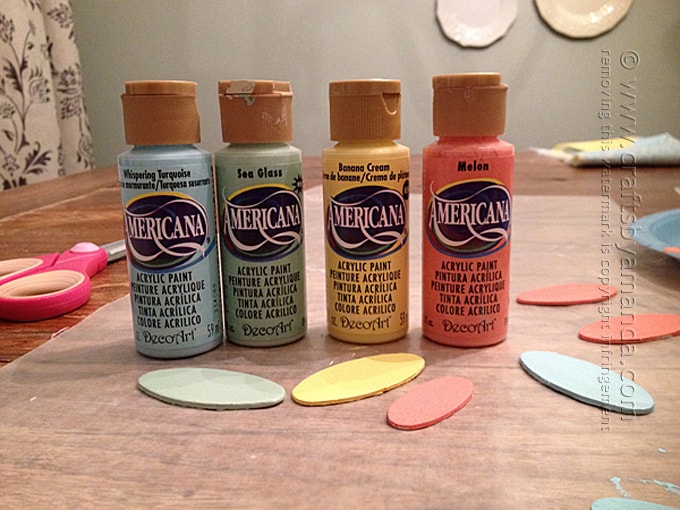
- I used Americana acrylics in these exact colors: Whispering Turquoise
 , Sea Glass, Banana Cream and Melon. You can also find Americana paints at Michaels and at Joann’s or you can use your favorite paint colors. You’ll also need a decoupage medium such as Mod Podge.
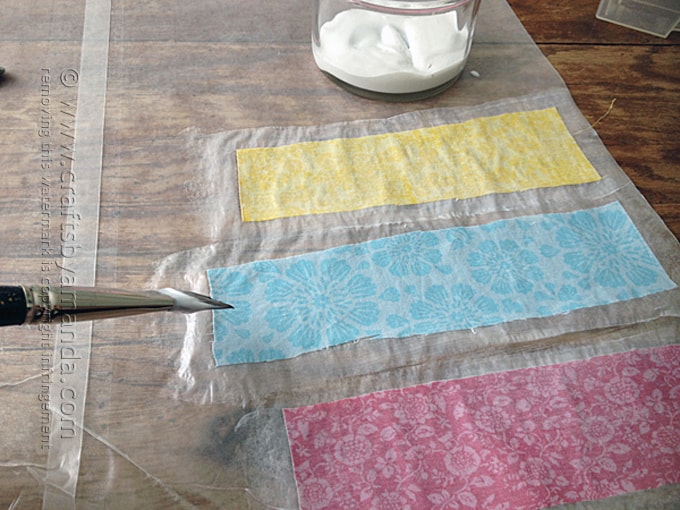
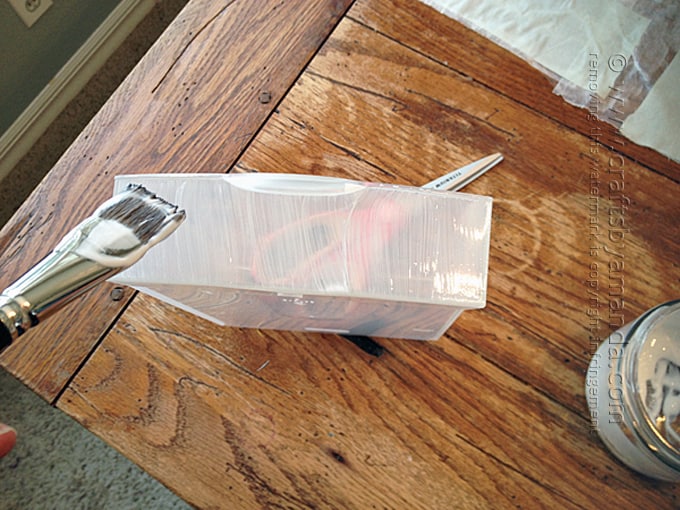
- After washing all of my containers, I prepped the fabric with decoupage on some waxed paper. Don’t leave it there too long or the waxed paper will stick! Remove it after about 20 minutes and simply move it to another piece of waxed paper to dry more. Prepping the fabric this way will keep the fabric from fraying when you cut it.
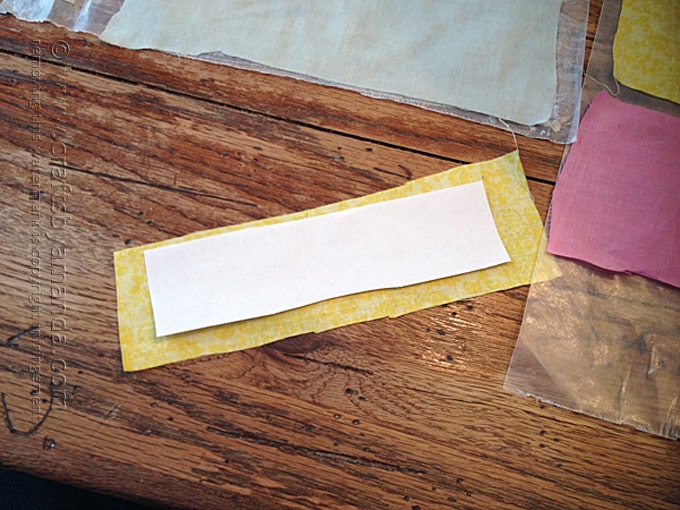
- While that was drying, I created templates for the front of the plastic storage drawers using a piece of paper and creasing it along the edges of the drawers. When the fabric was ready, I traced the pattern onto the fabric with a pen and cut the shapes out, cutting right inside the pen lines.
- Once I lined up the fabric on the drawer front and trimmed anything that needed it, I applied a thin coat of decoupage to the drawer front and to the back of the fabric. Then I placed the fabric onto the drawer front, smoothed it out and applied decoupage over the top.
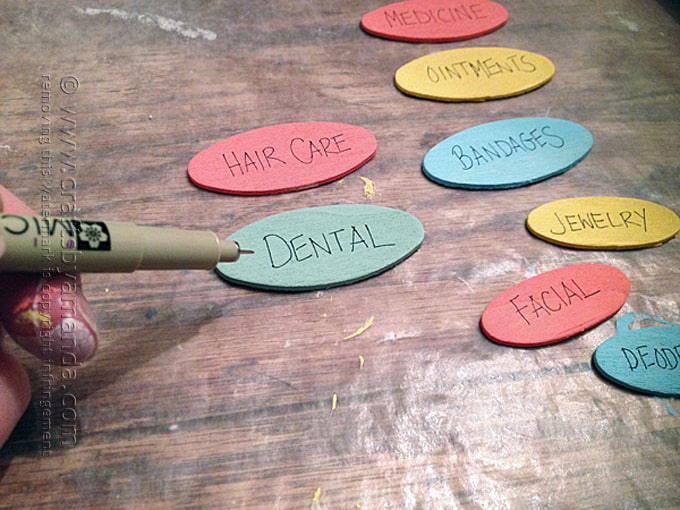
- While the drawers were drying, I painted wooden oval shapes with the acrylic paints, each one matching the corresponding drawers. Contrasting the colors would have been cool too! I used a micron pen to write on each oval. With the drawers standing on end, I attached the ovals with white craft glue and allowed them to dry.
This was a fun project and now my bathroom cabinets are organized once again! A great way to start off the new year.

For even more projects check out these 30+ organization ideas for your home!
More Home Decor Projects
In case you’re curious, here’s a list of the decor pieces that are hanging in my bathroom (tutorials for each):
- Beaded Seashell Jellyfish on Canvas
- Beach Flag Sun Catcher
- PB Inspired Weathered Painted Oar
- Weathered Paint Stick Beach Flag
- Weathered Newport Beach Sign
- Beach Starfish Plaque

Makeover: Plastic Storage Drawers
Supplies
- Fabric: I used fat quarters
- Decoupage medium or Mod Podge
- Plastic storage containers
- Labels of your choice
Americana acrylic paints:
- Whispering Turquoise
- Sea Glass
- Banana Cream
- Melon
Instructions
- After washing all of my containers, I prepped the fabric with decoupage on some waxed paper. Don’t leave it there too long or the waxed paper will stick! Remove it after about 20 minutes and simply move it to another piece of waxed paper to dry more.
- While that was drying, I created templates for my drawer fronts using a piece of paper and creasing it along the edges of the drawers. When the fabric was ready, I traced the pattern onto the fabric with a pen and cut the shapes out, cutting right inside the pen lines.
- Once I lined up the fabric on the drawer front and trimmed anything that needed it, I applied a thin coat of decoupage to the drawer front and to the back of the fabric. Then I placed the fabric onto the drawer front, smoothed it out and applied decoupage over the top.
- While the drawers were drying, I painted wooden oval shapes with the acrylic paints, each one matching the corresponding drawers. Contrasting the colors would have been cool too! I used a micron pen to write on each oval. With the drawers standing on end, I attached the ovals with white craft glue and allowed them to dry.
This post originally appeared here on Jan 25, 2015.
- Patriotic Pinwheels - June 23, 2026
- Fingerprint Daddy & Me Coffee Mug - June 12, 2026
- Patriotic Bandana Wreath - June 9, 2026


Lisa Gordon says
I want to use acrylic paint to make my mop, broomstick’s and matching dust pan, which are plastic. What do you suggest? I want to make a few sets for XMAS gifts. What all do I need?
Deborah says
I used Duct tape on my plastic bins. I also used it to keep two sets together. It works very well. I did use white. I have the larger ones with three drawers. They have craft supplies Stored in them right now. I will be going through them later when I redo my craft room.
Amanda Formaro says
Great idea!
Marisa says
I have plastic garden containers from Dollar tree that are plain plastic. The ceramic ones are so expensive but are so much more beautiful than plain terra cotta or green plastic ones I have. Any idea if I could apply this technique to my outdoor garden containers. ?
Amanda Formaro says
Hi Marisa. It’s possible yes. I would definitely suggest using Outdoor Mod Podge, specially formulated for outdoor use. Please read the instructions on the bottle as I am unable to give you advice on it as I haven’t used it yet myself.
Candy says
I used double sided tape and scrapbook paper. You cannot see the double-sided tape if you place it just right. Plus, it is easy to change if tastes change.
Alaina says
Would fabric stiffener spray work in place of the decoupage?
I love the idea of using fat quarters for this project. I’ve seen it done with scrapbook paper, but fabric seems like it’d be easier to work with. Thanks for sharing!
Amanda Formaro says
Hi Alaina. I am not sure if stiffener spray would be enough to hold like an adhesive. Unless your question was geared only toward making the fabric so it doesn’t fray?
Katie says
Just found your site today through Pinterest and I LOVE IT! You have such great ideas and I especially LOVE this one!! Organizing is my passion and I dabble in DIY Decor and I never thought to decorate storage containers like this! Thank you for the inspiration and thanks for sharing!!
Amie says
So smart! I have one in my bathroom that fits the tiny space perfectly, but I hate how it looks. Guess what I’ll be doing this weekend?
Amanda Formaro says
Fun! I hope you were able to get the project done! :)
Lauren @ Mom Home Guide says
Very cute! I bought plastic storage drawers for my kids’ closets a few weeks ago, and have been meaning to do something like what you did — but I plan to use scrapbook paper. But the fabric would probably last longer!
Amanda Formaro says
Either way will probably last as long, I just find fabric is easier to work with on the curves than paper :) I’m sure you’re project will be awesome no matter which you choose!
Sharon Hahn says
I also used scrapbook paper for the plastic shelves in my bathroom. I have the carts with several drawers with a tan and blue color scheme due to the tile already there. I can change out the paper when I get tired of it or use plain scrapbook paper and add any stickers that fit the mood.