
I have always had a soft spot for Americana decor. When I came across the great big American flag in the Pottery Barn catalog I was immediately drawn to it. So were several other crafty bloggers, it’s probably one of the most popular PB knock offs I’ve seen yet! I have known for a while I wanted to make it, but procrastination always seems to get the better of me.

Believe it or not, it was my husband’s nagging encouragement that finally got me to to the craft table to get this project started. The walls in our bedroom have been bare far too long and he’s been hounding asking me to hang something up. I think my next project will be this gorgeous tufted headboard from The Idea Room! But for now I needed to get this flag done.

Shortly after Memorial Day we purchased a new screen door and needed some thin wood to use as spacer/shim type material. We grabbed a bundle of 36″ lath boards from Menards for a little over $5.00 and used maybe 2 or 3 to install the door.

The next day I was looking through the kitchen window and noticed my husband had put the rest of the bundle into our fire pit! What?? I of course saved them from certain destruction and knew I would use them for this very project. :)
Over the next few weeks I began to see more and more flag knock off projects popping up everywhere. They are all different, which I love, each person adding their own twist and personality. My tutorial follows, but first I wanted to show you some of the projects I’ve stumbled across lately.

Here’s the original Pottery Barn flag which sells for $129
And here are several knock offs I’ve seen:

Moody Girl Projects (originally I found it on u-Create)

Crafty Butt (I posted about this on Craft Gossip in June)

Between naps on the Porch – I got my inspiration for the frame I built my flag on when I saw Susan’s version

At Home with K

I’m not sure that this flag from The Lettered Cottage was inspired by Pottery Barn, but I loved how this beachy flag looked. Look closely, flag’s stars are starfish! Brilliant! (I originally found this on CSI)
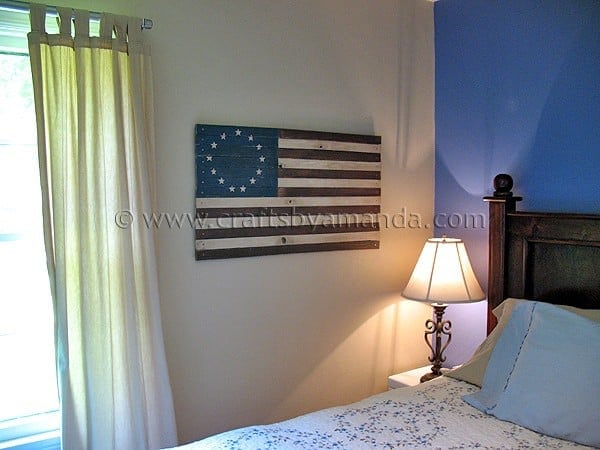
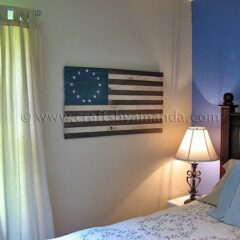
Now for my flag
My finished flag measures 36″ wide by 20″ high. Each of the lath boards are 1.5″ high and there are of course, 13 of them.
The cost for this project was pretty minimal, out of pocket cost was less than $10.00:
- $5 for a bundle of lath boards (and I will make plenty of other projects from the rest)
- acrylic paint and staining medium I had on hand
- Primer I had on hand, I used Kilz, but spray primer would work too
- picture hanger 2.79
- copper tacks 1.69
- Gorilla Glue – I used wood glue and super glue, again on hand
- Americana matte spray sealer, on hand

I did not sand the boards first, I wanted everything rustic. I primed the lath boards on hubby’s suggestion. He said that it would prevent any green or sap seepage. Plus it also adds a first coat so that your paint isn’t completely sucked into the wood.

The gray boards that you see are the ones that I used to create my frame. First I laid out the 13 lath boards that would be my flag. Then I placed the gray boards over the top to figure out the size of my frame. I didn’t want the frame to poke out from the sides or bottom, so doing this ahead of time was important.

Pardon the confusion here. I realize in this picture the boards are now white and there’s one middle one that is gray. The white ones are actually gray on the other side. See I ran out of white and finished with my spray can of gray Krylon primer. Anyway, I needed the center lath board because the center of my flag did not feel like it would get the support it needed due to its size. I used wood glue to attach it all together.

First I taped off the area where I wanted my stars.

Then I picked my paint colors. I didn’t want my flag to be red, white and blue, but rather I wanted the colors to match my room, which are brown and grayish blue tones.

Then I painted the canton with light mocha. I did this so that when I add the star stickers later, they will leave this color in their place. You’ll see…

Ok sorry for the back track here. I realize I just painted the canton and here it is, not painted! Ha! Just trying to type up the tutorial in order, even if I didn’t actually DO everything in order. So anyway, I found some star shaped foam stickers in my supply stash and created the 13 colony star circle for the colonial flag. When I had them set, I removed the backings one by one and stuck them in place.

Next I painted the stripes with the Light Mocha and Dark Chocolate, starting and ending with the Dark Chocolate.

Then I painted Uniform Blue over the canton area, carefully covering the stars. I waited about 6 or 7 minutes and got nervous. I was afraid of the stickers getting stuck to the paint, so I carefully removed them. I did have to do a little touch up with a thin paintbrush.

I let the boards dry and then took my sander to them to distress them a bit.
Now it was time to put the flag together and attach it to the frame. I used Gorilla Glue’s wood glue, and touched up a couple stubborn areas with the super glue.

I put wood glue down all three vertical boards and placed the flag boards on top, gently pressing them into the glue.

A note about the hammer. I made that as a Father’s Day craft for Kaboose a couple years ago. if you like it, you can see the tutorial for it here
I actually WANTED my nails to be noticeable and visible, so I found some copper cut tacks at the hardware store in town. These would have been much cheaper at Home Depot.. just saying’. Regardless, they were inexpensive considering the project. I only used one of the packages and had some left over as well.

These tacks don’t have the sharpest points, so I did use a small nail to poke the holes first. Then I hammered in a copper tack on each board. I love the rustic look these give it!

After I had all the tacks in, I reinforced the corners of the frame with some nails.

There were two boards where the tacks weren’t quite long enough, so I added a little super glue and stuck them in place.


I wanted to get the picture hanger in place before I completed the flag. Seems like I always forget to do that part until I’m done, then I run the risk of harming the finished product. So instead, I went ahead and attached the hanger.

To give it that rustic, antiqued look, I mixed together some staining / antiquing medium with an equal amount of dark brown paint, I used Americana Bittersweet Chocolate.

Work in small sections. Brush on..

..wipe off with a dry cloth.
You can add more stain in some spots, or wipe off in different degrees of pressure to achieve the affect that you want.

I let the stain dry for about an hour then added 2 coats of matte sealer.

Pretty cool!

I think it’s kind of weird that these pictures make it look like the stripes are red. But they’re not, they are brown!

PB Inspired Rustic Colonial American Flag
Supplies
- bundle of lath boards
- staining medium
- primer
- picture hanger
- copper tacks
- Gorilla Glue
- Americana Matte Spray Sealer
- painter’s tape
- star stickers
- sander
- hammer
- nails
- rag
Paint
- Americana Dark Chocolate
- Americana Light Mocha
- Americana Uniform Blue
- Americana Bittersweet Chocolate
Instructions
- I did not sand the boards first, I wanted everything rustic. I primed the lath boards.
- First I laid out the 13 lath boards that would be my flag. Then I placed the gray boards over the top to figure out the size of my frame. I didn’t want the frame to poke out from the sides or bottom, so doing this ahead of time was important.
- I needed the center lath board because the center of my flag did not feel like it would get the support it needed due to its size. I used wood glue to attach it all together.
- First I taped off the area where I wanted my stars.
- Then I picked my paint colors.
- Then I painted the canton with light mocha. I did this so that when I add the star stickers later, they will leave this color in their place.
- I found some star shaped foam stickers in my supply stash and created the 13 colony star circle for the colonial flag. When I had them set, I removed the backings one by one and stuck them in place.
- Next I painted the stripes with the Light Mocha and Dark Chocolate, starting and ending with the Dark Chocolate.
- Then I painted Uniform Blue over the canton area, carefully covering the stars. I waited about 6 or 7 minutes and got nervous. I was afraid of the stickers getting stuck to the paint, so I carefully removed them. I did have to do a little touch up with a thin paintbrush.
- I let the boards dry and then took my sander to them to distress them a bit.
- Now it was time to put the flag together and attach it to the frame. I used Gorilla Glue’s wood glue, and touched up a couple stubborn areas with the super glue.
- I put wood glue down all three vertical boards and placed the flag boards on top, gently pressing them into the glue.
- I did use a small nail to poke the holes first. Then I hammered in a copper tack on each board.
- After I had all the tacks in, I reinforced the corners of the frame with some nails.
- There were two boards where the tacks weren’t quite long enough, so I added a little super glue and stuck them in place.
- I went ahead and attached the hanger.
- To give it that rustic, antiqued look, I mixed together some staining / antiquing medium with an equal amount of dark brown paint, I used Americana Bittersweet Chocolate.
- Work in small sections. Brush on..
- wipe off with a dry cloth.
- You can add more stain in some spots, or wipe off in different degrees of pressure to achieve the affect that you want.
- I let the stain dry for about an hour then added 2 coats of matte sealer.
- Swirling Twirling Ladybugs - July 21, 2026
- Drip Tie Dye Backpack - July 17, 2026
- Mini Coastal Clay Houses - July 14, 2026


Marla Reinert says
Love this flag! It’s what I’ve been looking for. Thank you
I wish you would offer a print button to print the instructions.
Amanda Formaro says
Hi Marla, so glad you like it! I actually do offer a printer friendly version on my newer posts, but this one is rather old and doesn’t have it. Sorry about that!
Sarah says
Love the flag! Pinned it to my DIY board and plan to make it for my family room!
Amanda Formaro says
Thanks Sarah, I hope you enjoy the project! This is still hanging in my bedroom :)
Sarah says
Are the 13 lath boards held together only by the frame? Thx, Sarah
Amy@theidearoom says
Sharing on fb today! Such a cute sign! Pinned!
Daphne says
Wonderful tutorial. I like your version better than PB version.
Amanda Formaro says
Thank you Daphne, that’s very nice of you to say!
Kim Dushinski says
Thank you for this awesome tutorial. So, so great. I am going to make this for our entry way.
Amanda says
Thanks Kim! Looking forward to hearing and/or seeing how it comes out!
Cyndi says
Oh my gosh! I love this.. much more than the PB flag!!
Abbie (Five days...5 ways) says
This turned out really well! Love the weathered look and all the detail you put into it!
I would be thrilled if you would link this up at my first ever Feature Friday Free-for-All (200+ links already and growing…yes, I’m a little excited! ; )).
http://www.fivedaysfiveways.com/2012/01/feature-friday-free-for-all-1.html
P.S. I’m your newest follower. : )
~Abbie (www.fivedaysfiveways.com)
Amanda says
Thanks Jacee, I appreciate that!
Jacee says
Thanks for sharing your instructions. You did a great job on that flag.
KATHY says
Great job on your flag!! It looks fabulous.
Kathy
Tami says
Very nice. Feel free to stop by my blog at http://www.thisandthatfromtami.blogspot.com
Fondly, Tami
Bethany @ A Fish Who Likes Flowers says
Your flag is beautiful! Thanks for showing me how to make one myself. Thanks for the inspiration
Jen says
I love it!
Honey at 2805 says
Nice job! I'm a US flag lover!
Hope you will please drop by and enter my $50 Overstock.com Gift Card Giveaway!! If there are 500 entries, the amount will increase the Gift Card to $100.
Sommer says
Ah I was looking for something like this for the 4th! I'm keeping this in my file for next year for sure! Would love to have you link to my party this weekend too! http://designergarden.blogspot.com/2011/07/vip-party-21.html
Meggan from Lila Grace Accessories says
Love this idea! You did a fabulous job!
BluBabesCreate says
Oh cute! It would go perfect in my son's room. Come see!
Kim -today's creative blog says
I love it! It turned out so good.
Angie says
Great job on this project. I'm pinning it so I can remember it for next year! Thanks for sharing.
Kari says
I absolutely love this Amanda…you did an amazing job!
Kari-Ucreate
Susan (Between Naps on the Porch) says
Amanda, your flag turned out wonderful! I love it! So fun seeing everyone's version…they are all unique and beautiful!
Kindra-At Home With K says
Great job on your flag! Thanks for sharing my pic of my flag. They are easy and fun to make!!
By Shawna Rae says
Love this… added this to my pinterest board. Thank you for sharing!
byshawnarae.blogspot.com