• Home
  • About
    • About Crafts by Amanda
    • Visit Our Recipe Site
  • Work With Us
  • Join
    • Free Newsletters
    • Join our Facebook craft group
↑
  • Tutorials
    • Tutorial Index
    • Adult Crafts
    • Crafts for Kids
    • Crafts for Seniors
    • Recycled Crafts
    • Seasonal Crafts
    • Holiday Crafts
    • Free Printables
    • Craft Collections
  • Adult Crafts
    • Bath & Body
    • Beach Crafts
    • Clay Pot Crafts
    • Crafts for Seniors
    • Decoupage Crafts for Adults
    • DIY Gift ideas
    • Garden Crafts
    • Home Decor Projects
    • Kitchen Crafts
    • Light Bulb Crafts
    • Luminary Crafts
    • Mason Jar Crafts
    • Needlework
    • Photo Display Ideas
    • Recycled Crafts for Adults
    • Wearable Crafts for Adults
  • Crafts for Kids
    • Animal Crafts for Kids
    • Back to School Crafts
    • Beach Crafts for Kids
    • Camp Crafts
    • Cardboard Tube Crafts for Kids
    • Decoupage Crafts for Kids
    • Easy Crafts for Kids
    • Nature Crafts for Kids
    • Other Kid’s Crafts
    • Paper Plate Crafts for Kids
    • Recycled Crafts for Kids
    • Slimes, Doughs, & Clay
    • Wearable Crafts for Kids
  • Holiday Crafts
    • 4th of July Crafts
    • Christmas Crafts
    • DIY Gift ideas
    • Earth Day Crafts
    • Easter Crafts
    • Father’s Day Crafts
    • Halloween Crafts
    • Memorial Day Crafts
    • Mother’s Day Crafts
    • New Year’s
    • Other Holidays
    • Patriot Day Crafts
    • St. Patrick’s Day Crafts
    • Thanksgiving Crafts
    • Valentine’s Day Crafts
  • Seasonal Crafts
    • Winter Crafts
    • Spring Crafts
    • Summer Crafts
    • Fall Crafts
  • Skip to primary navigation
  • Skip to main content
  • Skip to primary sidebar
  • Skip to footer

Crafts by Amanda

crafts for adults and kid's crafts

  • Tutorials
    • Tutorial Index
    • Adult Crafts
    • Crafts for Kids
    • Crafts for Seniors
    • Recycled Crafts
    • Seasonal Crafts
    • Holiday Crafts
    • Free Printables
    • Craft Collections
  • Adult Crafts
    • Bath & Body
    • Beach Crafts
    • Clay Pot Crafts
    • Crafts for Seniors
    • Decoupage Crafts for Adults
    • DIY Gift ideas
    • Garden Crafts
    • Home Decor Projects
    • Kitchen Crafts
    • Light Bulb Crafts
    • Luminary Crafts
    • Mason Jar Crafts
    • Needlework
    • Photo Display Ideas
    • Recycled Crafts for Adults
    • Wearable Crafts for Adults
  • Crafts for Kids
    • Animal Crafts for Kids
    • Back to School Crafts
    • Beach Crafts for Kids
    • Camp Crafts
    • Cardboard Tube Crafts for Kids
    • Decoupage Crafts for Kids
    • Easy Crafts for Kids
    • Nature Crafts for Kids
    • Other Kid’s Crafts
    • Paper Plate Crafts for Kids
    • Recycled Crafts for Kids
    • Slimes, Doughs, & Clay
    • Wearable Crafts for Kids
  • Holiday Crafts
    • 4th of July Crafts
    • Christmas Crafts
    • DIY Gift ideas
    • Earth Day Crafts
    • Easter Crafts
    • Father’s Day Crafts
    • Halloween Crafts
    • Memorial Day Crafts
    • Mother’s Day Crafts
    • New Year’s
    • Other Holidays
    • Patriot Day Crafts
    • St. Patrick’s Day Crafts
    • Thanksgiving Crafts
    • Valentine’s Day Crafts
  • Seasonal Crafts
    • Winter Crafts
    • Spring Crafts
    • Summer Crafts
    • Fall Crafts
Craft Tutorials | Adult Crafts | Beach Crafts | Stenciled Chalky Finish Table Makeover

Stenciled Chalky Finish Table Makeover

Author by Amanda Davis on February 23, 2014 Updated on January 15, 2019

No ratings yet
Jump to Project
52 shares
  • Share
  • Tweet
  • Flipboard
  • Email

Stenciled Chalky Finish Table Makeover by @amandaformaro Crafts by Amanda


I’ve been dying to try the new chalky finish paint that arrived a few weeks ago. We just had our floors done so we had to move several pieces of furniture to make that happen, so I took advantage of that time to redo this rickety old corner table I have.

Stenciled Chalky Finish Table Makeover by @amandaformaro Crafts by Amanda

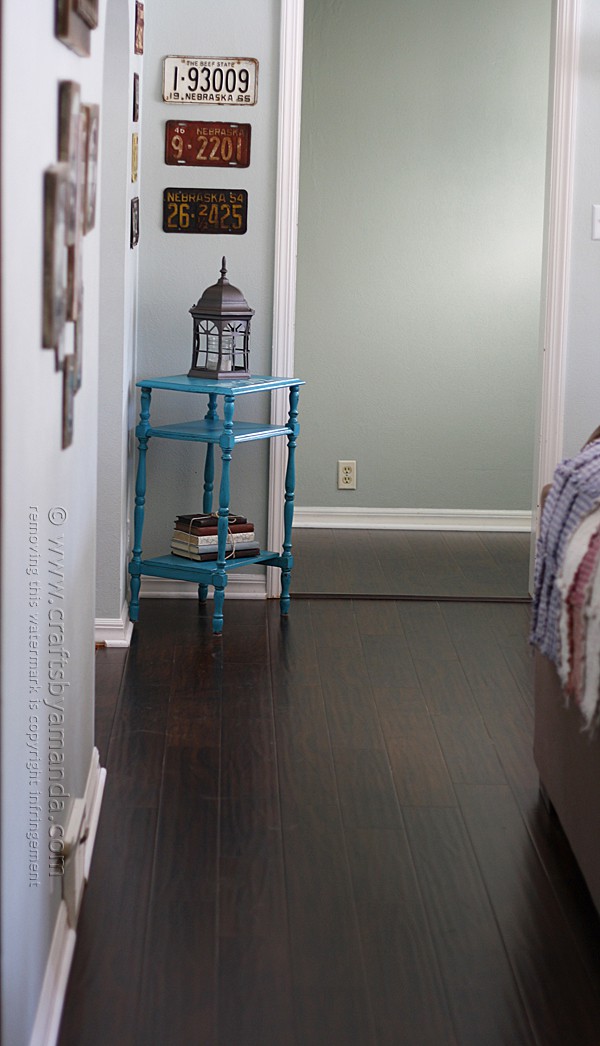
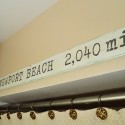
The changes I’ve been making to my living room and dining room include changing the wall color to a more calming seaside feel, adding dark brown elements, including the furniture, and making new coastal themed decor pieces.

Stenciled Chalky Finish Table Makeover by @amandaformaro Crafts by Amanda

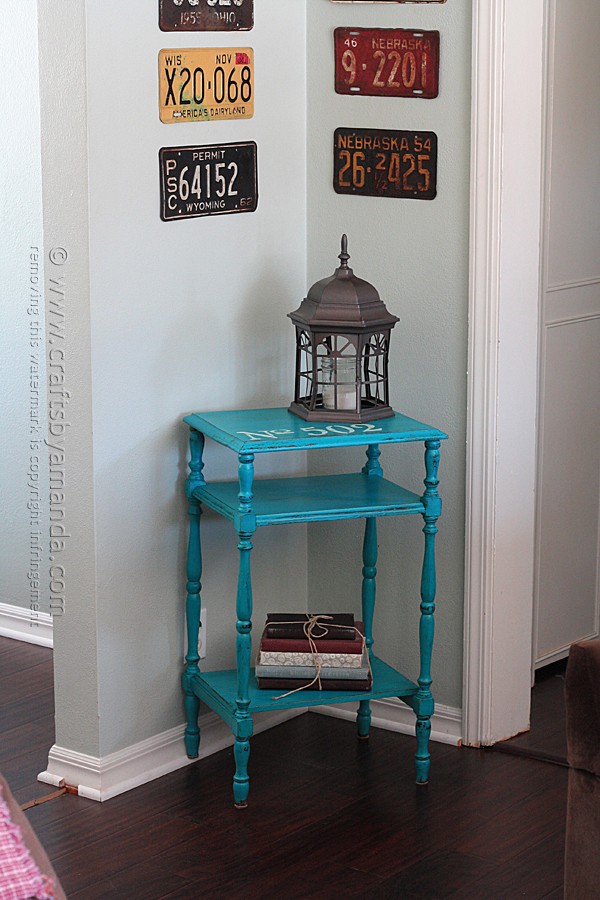
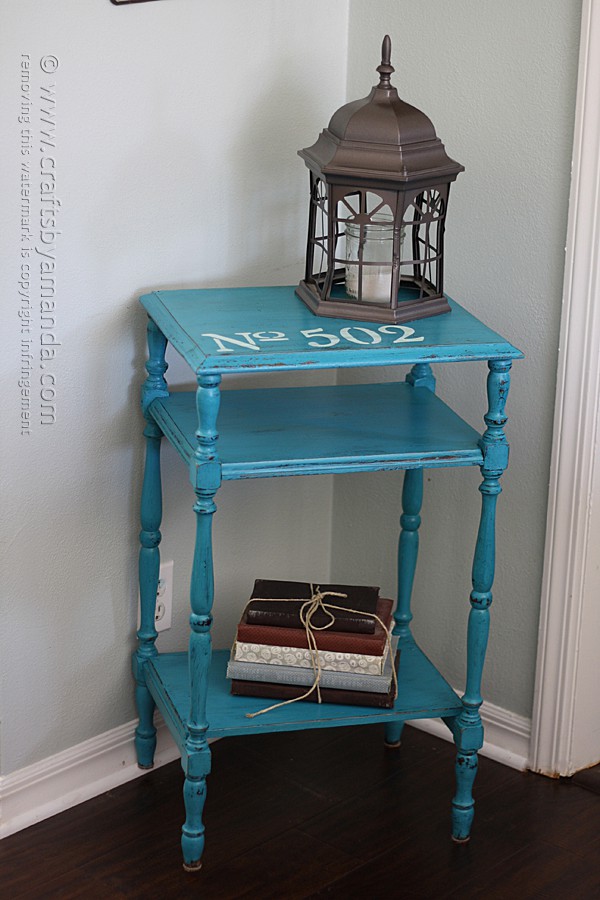
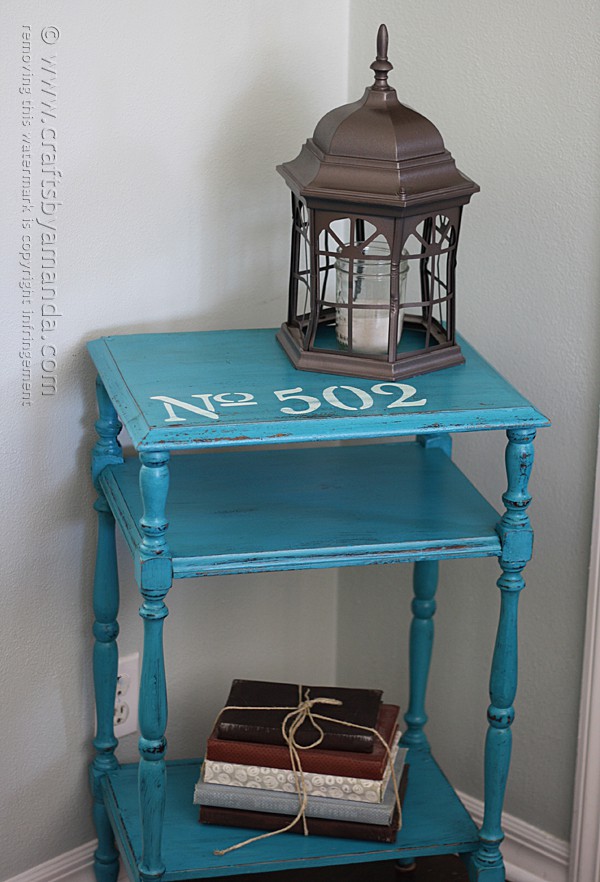
However, I didn’t really have a pop of color anywhere, so I decided to take this old table, that really should have been thrown out a long time ago, and breathe some new life into it. I originally picked it up several years ago from a thrift store or a garage sale, I honestly can’t remember which. It’s wobbly and can’t be tightened up, and when placed on a level surface, leans to the left.

Stenciled Chalky Finish Table Makeover by @amandaformaro Crafts by Amanda

But I still really liked the curves of the legs and the old feel of it, so I’ve kept it as an accent piece for years. To make it stand up straight and not lean, I had to rest one of the back legs on the baseboard. Nobody will notice that though, so I’m okay with it. :)

Stenciled Chalky Finish Table Makeover by @amandaformaro Crafts by Amanda

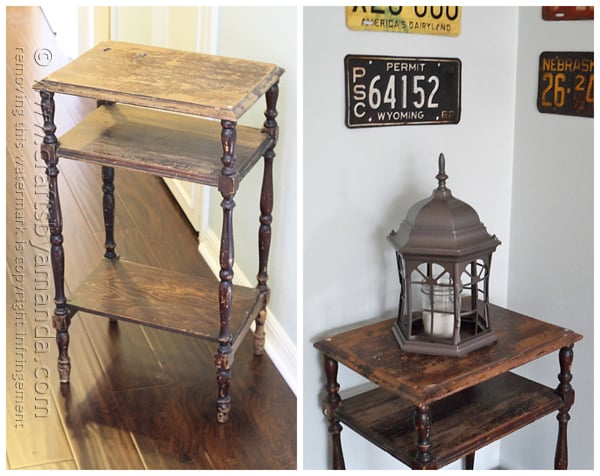
And see that old lantern sitting on the table? Here’s the story on that. One day, about 5 years ago, I went out to my mailbox to get the mail. Laying on the road, right near my mailbox was a light fixture from someone’s driveway light post (I’m guessing).

Stenciled Chalky Finish Table Makeover by @amandaformaro Crafts by Amanda

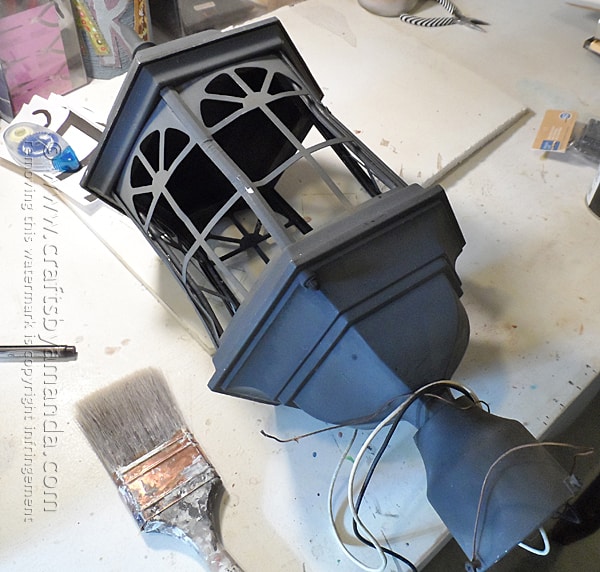
Not sure if it fell off of a junk truck, the kind that drive around before the garbage man comes and picks through furniture and scrap, of if some bored teenagers played a prank. It was pretty dented up, but I knew it had potential. I took out the wiring and lighting innards, discarded the bottom piece and painted it with hammered brown spray paint. A simple mason jar with sand inside is a great place for a tea light.

Stenciled Chalky Finish Table Makeover by @amandaformaro Crafts by Amanda

Back to the table project. If you follow along on Instagram or Facebook, you may have seen me working on this. Note that right now these paints are available only through Home Depot’s website but will become available in their stores soon too. They will also be available in Michael’s stores in April.

Stenciled Chalky Finish Table Makeover by @amandaformaro Crafts by Amanda

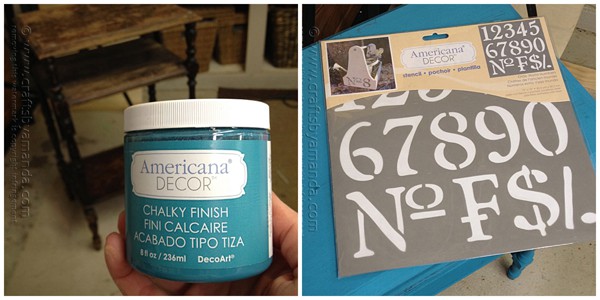
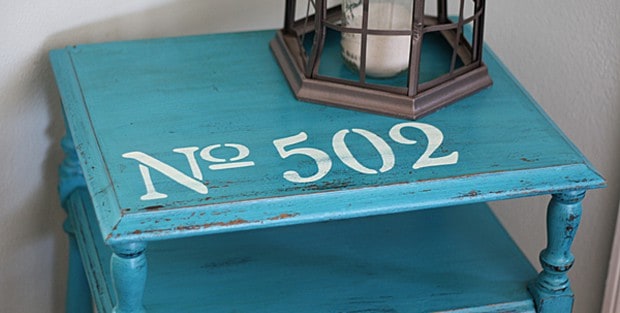
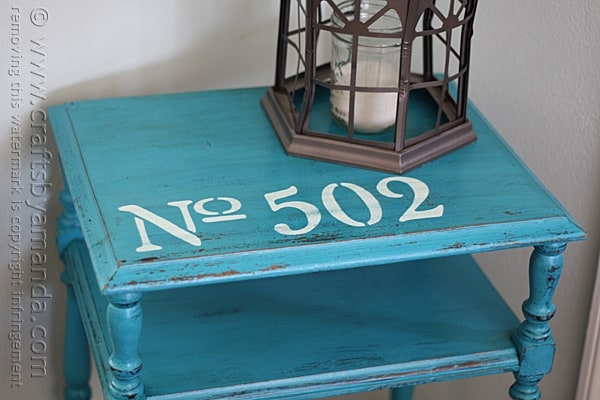
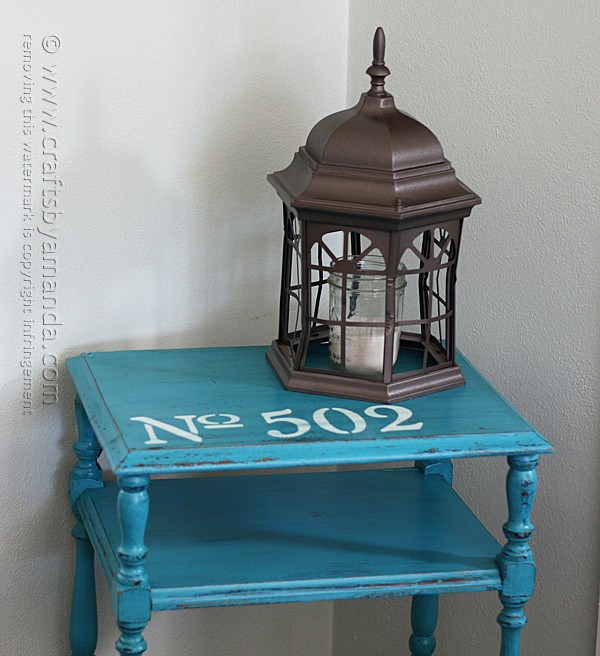
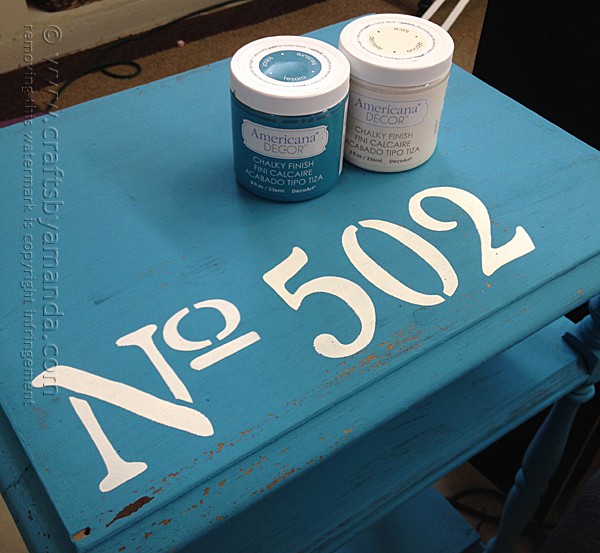
I used Americana Decor Chalky Finish paint, the color is called Treasure. Right now it’s only available on Home Depot’s website, but soon it will be in their stores as well. Same goes for the stencils. The one I used is called Olde World Numbers.

Stenciled Chalky Finish Table Makeover by @amandaformaro Crafts by Amanda

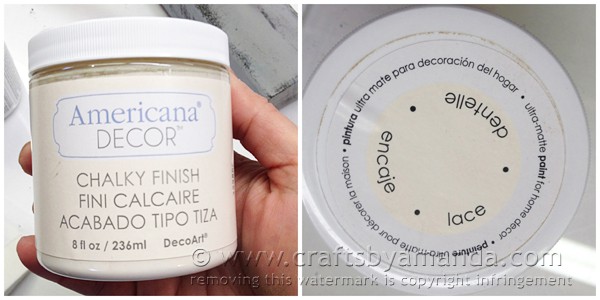
For the stenciling color, I used Americana Decor Chalky Finish, the color is called Lace.

Stenciled Chalky Finish Table Makeover by @amandaformaro Crafts by Amanda

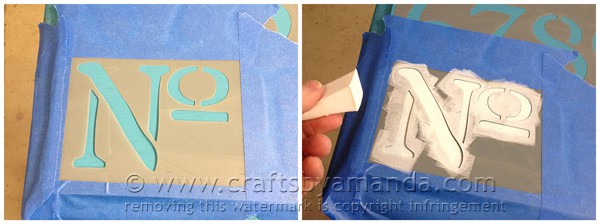
When you place a stencil on a surface, especially one like this that has other elements you won’t be using, you’ll want to cover those outer elements with painter’s tape. Just FYI here too, when I removed the painter’s tape it did pull up small amounts of the paint, which was fine with me. That was less distressing that I had to do! I use a foam cosmetic sponge to stencil with. Best thing since sliced bread and you can get them at the dollar store.

Stenciled Chalky Finish Table Makeover by @amandaformaro Crafts by Amanda

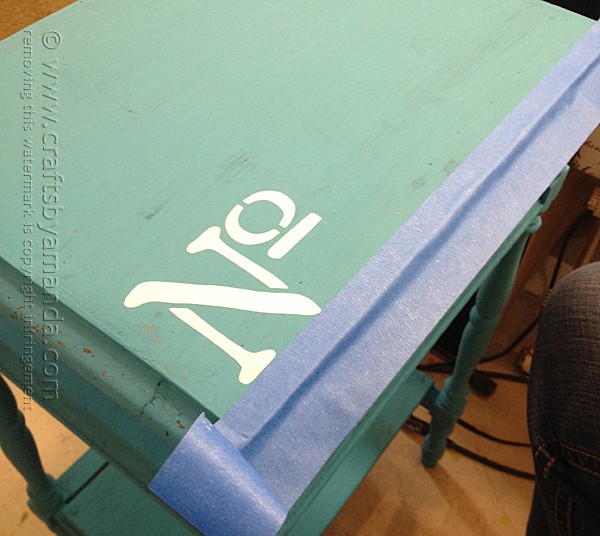
After stenciling the “No.” section, I wanted to make sure the numbers lined up. So ran a piece of painter’s tape across the length of the table to use as a guide.

Stenciled Chalky Finish Table Makeover by @amandaformaro Crafts by Amanda

Next was the first number. Incidentally, in case you are wondering what the “502” stands for, it’s my house number of my address. Anyway, do each number individually and don’t press the painter’s tape down too hard.

Stenciled Chalky Finish Table Makeover by @amandaformaro Crafts by Amanda

I did do about three very thin coats when stenciling. Thin works much better than thick coats and helps avoid any seepage under the stencils. Thin coats dry super quickly so that all three coats can be done one right after the other.

Stenciled Chalky Finish Table Makeover by @amandaformaro Crafts by Amanda

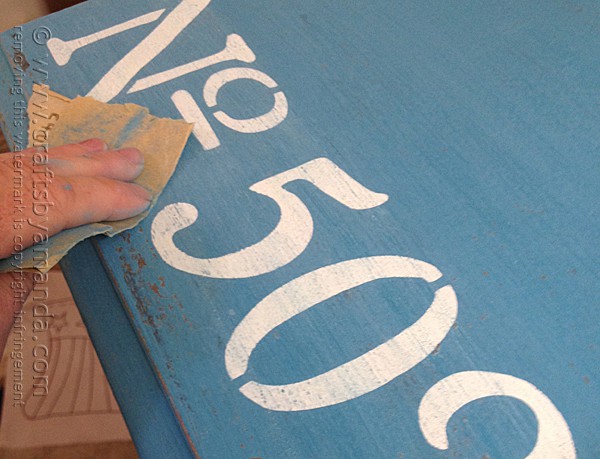
I used a fine grit sandpaper to distress the table. It took me about 2 sheets total for the whole thing. When distressing the numbers, rather than sanding back and forth, only sand over the numbers in one direction. It gives it a more wind worn look.

Stenciled Chalky Finish Table Makeover by @amandaformaro Crafts by Amanda

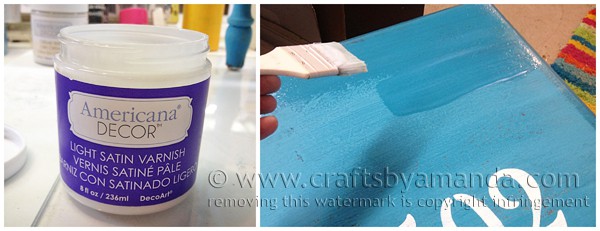
After all the sanding I dusted it off really good and wiped it down with a slightly damp rag. When that dried, I used Americana Decor Light Satin varnish. One coat was all it took and it left me with a nice sheen that isn’t glossy. Incidentally, you can use Americana Decor creme waxes instead, but that requires adding the wax again every 6-8 months. Not something I wanted to do. However, creme waxes allow you to control the sheen and finish a lot more than a varnish does. You can even buff it to a high gloss polish. So it really depends on your personal preference.

Stenciled Chalky Finish Table Makeover by @amandaformaro Crafts by Amanda

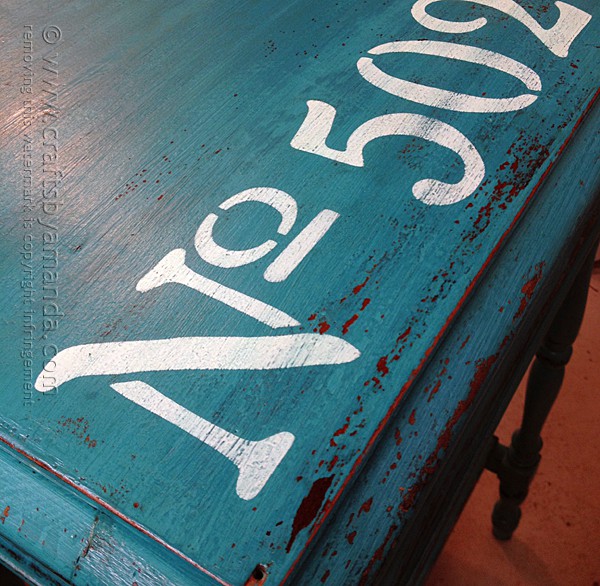
So there you have it. I love that this paint required no surface prep other that wiping it down and that I only needed one coat of paint and one coat of varnish. This paint dries really quickly, so I was able to finish this project in one day without a problem.

Stenciled Chalky Finish Table Makeover by @amandaformaro Crafts by Amanda

It’s a great addition to my living room and adds a really nice color pop against my new floors! Hope you like it.

Oh and I have plenty of paint and varnish left, I would wager to guess enough to do 3-4 more tables just like this. :)

More Coastal Projects

If you enjoyed this and like the coastal or beach theme, here are several more of my projects that you might like. See all the beach projects here:

Beach Starfish Plaque
Weathered Paint Stick Beach Flag
Beach Flag Suncatcher
Striped Beach Luminaries
Weathered Beach Signs
Weathered Newport Beach Sign
Thrift Store Ceramic Bird Makeover
Pottery Barn Inspired Weathered Painted Oar
InLinkz.com


Print Project
No ratings yet

Stenciled Chalky Finish Table Makeover

Supplies

Americana Decor

  • Chalky Finish paint - Treasure
  • Chalky Finish paint - Lace
  • Light Satin varnish
  • Stencil - Olde World Numbers
  • 2 sheets 240-grit sandpaper
  • Painter's tape
  • Cosmetic sponge

Instructions

  • Wipe table down with a damp cloth.
  • Paint table with one coat of Treasure and allow to dry 2 hours.
  • Position stencil on table using painter's tape. Stencil on Lace paint with cosmetic sponge. Allow to dry 2 hours.
  • Distress edges with sandpaper. Sand in one direction only over the numbers rather than back and forth, to achieve a wind worn look.
  • Dust off table and wipe down with a damp cloth and let dry.
  • Paint on one coat of varnish and let dry for 2 hours.

I am a DecoArt Core Blogger. I was compensated for this post, but have always loved DecoArt products! Therefore, all opinions expressed here are 100% my own.

  • Author
  • Recent Posts
Amanda Davis
Amanda Davis is the crafty, entrepreneurial mother of four children. She loves to bake, cook, make kid's crafts and create decorative items for her home. She is a crafting expert and guru in the kitchen and has appeared online and in print publications many times over the years.
Latest posts by Amanda Davis (see all)
  • Recycled Plastic Lid Windchime - July 11, 2025
  • Rainbow Tie Dye Shirts - July 4, 2025
  • Mason Jar Solar Lights - June 27, 2025
52 shares
  • Share
  • Tweet
  • Flipboard
  • Email

Filed Under: Beach Crafts, Home Decor Projects Tagged With: adult, adult craft ideas, adult crafts, adults, beach, chalk paint, coastal, crafts for adults, distressed, furniture, ocean, stencil

Reader Interactions

Free CraftsBy email every week

Latest crafts straight to your inbox!

Comments

  1. Donna. Huisinga says

    April 8, 2014 at 2:15 pm

    Nice tutorial. Thanks.

    Reply
    • Amanda Formaro says

      April 9, 2014 at 6:58 am

      Thank you Donna, glad you like it :)

      Reply
  2. Ginger says

    March 1, 2014 at 1:46 am

    Love the color you chose! :)

    Reply
    • Amanda Formaro says

      March 3, 2014 at 6:26 am

      Thank you Ginger~!

      Reply
  3. mark says

    February 28, 2014 at 9:26 am

    Love the bold colours .and the numbers are eight up my street x

    Reply
    • Amanda Formaro says

      March 3, 2014 at 6:25 am

      Thanks Mark!

      Reply

Leave a Reply Cancel reply

Your email address will not be published. Required fields are marked *

Rate This Project


The maximum upload file size: 640 MB. You can upload: image, video. Links to YouTube, Facebook, Twitter and other services inserted in the comment text will be automatically embedded. Drop files here

Primary Sidebar

Hi! I’m Amanda and I’m the founder and head designer of Crafts by Amanda. I have spent over 25 years creating projects to share, but it’s not just me anymore! It’s turned into a complete family affair. Come and meet the Creative Team!

Free CraftsBy email every week

Latest crafts straight to your inbox!

All Time Favorites

Learn to make these adorable ladybug painted rocks. use special outdoor paint for this adorable garden craft so you can keep garden ladybugs all summer!

Ladybug Painted Rocks…

These colorful little ladybug painted rocks are the ... Go To project

snowy pinecone candle jar luminaries

Winter Luminaries: Snowy Pinecone…

Make pretty winter luminaries that appear to be covered ... Go To project

Make this wonderful deco mesh pumpkin wreath to hang on your door this fall!

Deco Mesh Pumpkin Wreath…

Adorn your door this fall with a pretty deco mesh ... Go To project

Reuse those empty prescription pill bottles in all sorts of ways. From organizing to making cookies. Yes, cookies! See how to use your empty pill bottles!

20 Uses for Prescription Pill…

You've been collecting prescription pill bottles for ... Go To project

Meet the Family

Amanda

Founder and Designer

Kristen

Editorial Manager

Lindsay

Social Media Manager

As seen on:

Footer

Favorites

  • Jar Photo Frames
  • No-Sew Roman Shade
  • Paper Flowers
  • How to Make a Scrunchie
  • Mermaid Slime

About

  • Home
  • Meet the Creative Team
  • Work with Us
  • Privacy Policy
  • Accessibility
  • Contact Us

Images/text copyright Amanda Formaro 2020. To feature a post from Crafts by Amanda, you may use one photo credited and linked back directly to the project post.

Free CraftsBy email every week

Latest crafts straight to your inbox!

Copyright ©2025, Crafts by Amanda. All Rights Reserved.
Design by Pixel Me Designs

Rate This Tutorial

Your vote:


To share a photo with your comment click here!

A rating is required
A name is required
An email is required